It was 10:47 PM on a rainy Tuesday, and a very specific, almost urgent craving for something warm and spiced hit me. I didn’t have the energy for a layer cake, and honestly, I didn’t have the patience for a complicated recipe. I had a can of pumpkin puree left over from a forgotten project and a stick of butter that was begging to be browned. I mean, that nutty, toasty aroma of brown butter just seemed like the perfect partner for pumpkin, didn’t it? I grabbed my favorite mixing bowl, the one with the tiny chip on the rim, and just started throwing things together.
The first batch was a bit flat—maybe you’ve been there—but the flavor was already there. That deep, almost caramel-like taste from the brown butter mixed with the earthy pumpkin and sweet chocolate chips was a revelation. I made a few adjustments the next morning (with a proper cup of coffee this time), and these Soft Pumpkin Chocolate Chip Cookies were born. They have that perfect, pillowy texture with slightly crispy edges, and the brown butter just sends them into another dimension.
Honestly, this recipe stayed with me because it solved a real problem. It turned a random pantry raid into a cookie that tastes like you spent hours on it. You get all the cozy, fall vibes without any of the fuss. Let me tell you, these cookies are the reason I now keep an extra can of pumpkin in the cupboard at all times. They are the perfect little bite of autumn that you can have any day of the week.
Why You’ll Love This Recipe
I have tested this recipe more times than I care to admit, and I can confidently say it hits every single mark for a perfect cookie. It is not just another pumpkin cookie that turns out cakey or dry. This one is different, and here is why you are going to absolutely love it.
- Quick & Easy: From start to finish, these cookies come together in about 30 minutes. The brown butter takes just 5 minutes, and the dough comes together in one bowl. It is perfect for a last-minute dessert or a weekend baking project with the kids.
- Simple Ingredients: You probably have 90% of these ingredients in your pantry right now. No need for a special trip to the store for weird flours or hard-to-find extracts. Just good, honest baking staples.
- Perfect for Fall Gatherings: These cookies are the star of any Thanksgiving dessert table, Halloween party, or cozy night in. They bring that warm, spiced aroma that makes a house feel like a home.
- Crowd-Pleaser: I have yet to meet a person who doesn’t love these. Kids go wild for the chocolate chips, and adults appreciate the sophisticated depth of the brown butter. They disappear fast.
- Unbelievably Delicious: The texture is the real winner here. They are incredibly soft and tender, almost like a pumpkin muffin top, but with those irresistible slightly crispy edges. The combination of nutty brown butter, sweet pumpkin, and rich chocolate is pure comfort.
What makes this recipe stand out from the rest is the technique of browning the butter. It is a simple step that adds a layer of complexity you just cannot get from regular melted butter. It transforms the cookie from a simple pumpkin treat into something that tastes professional and deeply satisfying. This isn’t just another version of a pumpkin cookie—it is, honestly, the best version.
These cookies are the kind that make you close your eyes after the first bite. They are comfort food reimagined—a little bit healthier than a traditional butter-laden cookie, but with the same soul-soothing satisfaction. They are perfect for impressing guests without any stress, or just turning a regular Tuesday into something a little bit special.
What Ingredients You Will Need
This recipe uses simple, wholesome ingredients to deliver that bold, autumnal flavor and soft, tender texture. Most of these are pantry staples, which makes this recipe incredibly easy to whip up on a whim.
- Unsalted Butter (1 cup / 2 sticks): This is the star of the show. We are going to brown it, which deepens its flavor and adds a nutty, toasty aroma. I recommend using a good quality butter like Kerrygold for the best results, but any unsalted butter will work. The browning process removes some water content, which helps create a chewier cookie.
- Pumpkin Purée (1 cup / 245g): Make sure you are using 100% pure pumpkin purée, not pumpkin pie filling. The pie filling has added sugar and spices that will throw off the balance. I usually go with Libby’s, but store brands work just as well. Be sure to blot your pumpkin purée with a paper towel to remove excess moisture—this is a secret to preventing flat cookies!
- Light Brown Sugar (3/4 cup / 150g): Packed firmly. Brown sugar adds moisture and a subtle molasses flavor that pairs beautifully with the pumpkin and brown butter. It helps keep the cookies soft and chewy.
- Granulated Sugar (1/2 cup / 100g): This adds sweetness and helps the cookies spread just the right amount in the oven.
- Large Egg (1): At room temperature. The egg binds the ingredients together and adds structure. A room-temperature egg emulsifies better into the butter-sugar mixture, creating a smoother dough.
- Vanilla Extract (2 teaspoons): Pure vanilla extract is best. It enhances all the other flavors and adds a warm, sweet note. Avoid imitation vanilla if you can, as it can taste artificial.
- All-Purpose Flour (2 cups / 250g): Spooned and leveled. This gives the cookies their structure. Do not pack the flour into your measuring cup, or you will end up with dry, dense cookies.
- Baking Soda (1 teaspoon): This helps the cookies spread and become tender. It also reacts with the brown sugar to create a slightly chewy texture.
- Baking Powder (1/2 teaspoon): This adds a little extra lift, helping the cookies become soft and puffy.
- Salt (1/2 teaspoon): A crucial ingredient! It balances the sweetness and enhances the flavors of the pumpkin, butter, and spices. I use fine sea salt.
- Pumpkin Pie Spice (1 ½ teaspoons): You can use a store-bought blend or make your own with a mix of cinnamon, nutmeg, ginger, and cloves. This is what gives the cookies that classic fall flavor.
- Cinnamon (1 teaspoon): For an extra layer of warm, sweet spice.
- Semi-Sweet Chocolate Chips (1 ½ cups / 270g): I prefer semi-sweet because it balances the sweetness of the cookie without being overpowering. You can use dark chocolate chips for a more intense flavor, or milk chocolate if you like things sweeter. I like to use a mix of regular chips and a few chopped chocolate chunks for different textures in every bite.
Equipment Needed
You do not need a ton of fancy equipment for this recipe, which is part of its charm. Here is what you will need to get started.
- Large Mixing Bowls: One for the wet ingredients and one for the dry. I prefer glass or stainless steel bowls because they are easy to clean and don’t retain odors.
- Whisk: For combining the dry ingredients and for mixing the wet ingredients. A good whisk helps incorporate air into the dough.
- Rubber Spatula: Essential for scraping down the sides of the bowl and folding in the chocolate chips without overmixing.
- Baking Sheets: Two standard half-sheet pans work perfectly. If you only have one, you can bake the cookies in batches, just let the pan cool down between batches.
- Parchment Paper or Silicone Baking Mat: This is non-negotiable for preventing the cookies from sticking and ensuring even browning. Parchment paper is my go-to because it is disposable and easy to clean up.
- Cookie Scoop (1.5 tablespoon size): This ensures all your cookies are the same size, which means they will bake evenly. A small ice cream scoop works perfectly too.
- Cooling Rack: Letting the cookies cool on a wire rack prevents them from getting soggy on the bottom. I have used a cheap one from the grocery store for years, and it works great.
- Light-Colored Saucepan: For browning the butter. A light-colored pan makes it much easier to see the butter change color as it browns. A heavy-bottomed pan is best to prevent the butter from burning.
Preparation Method
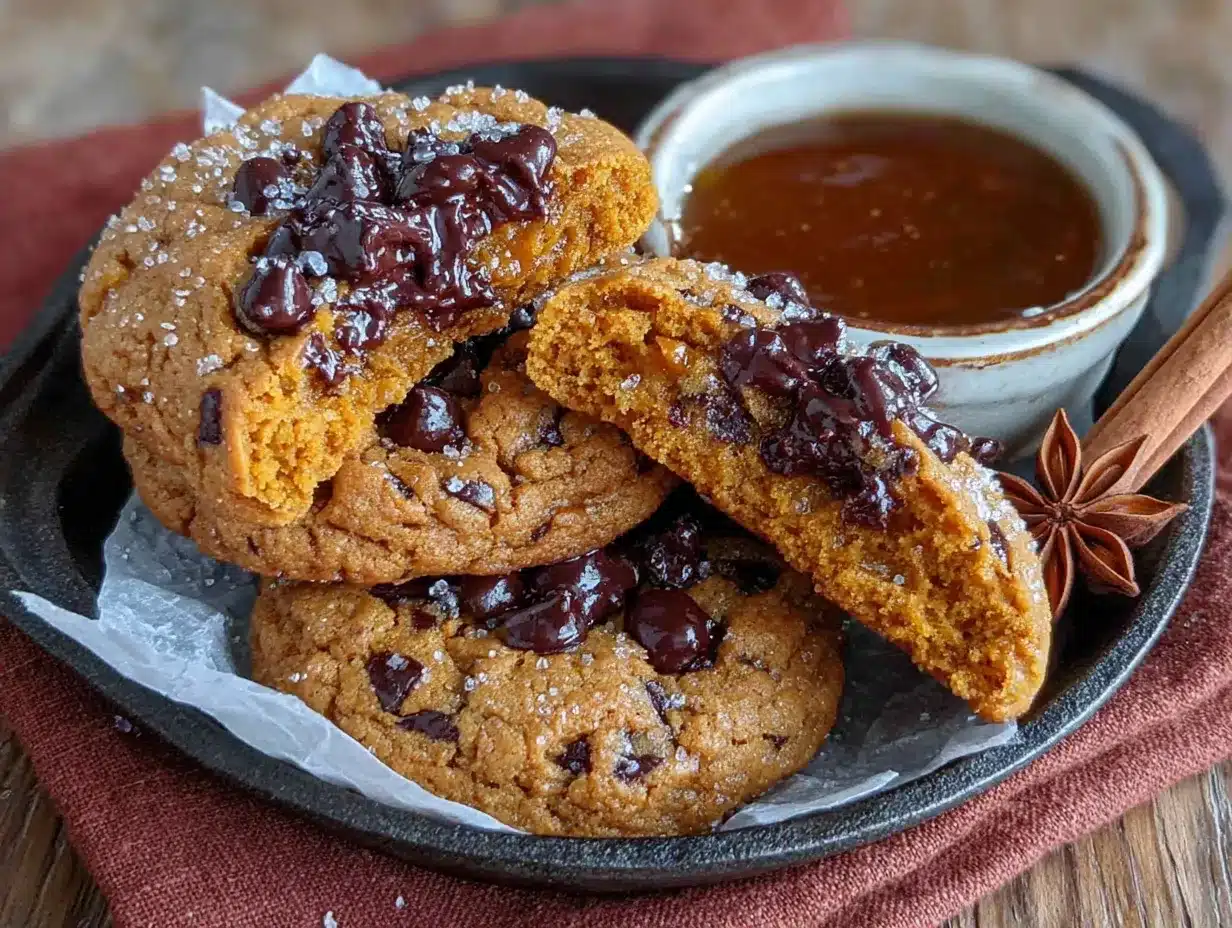
Let’s get baking! This process is straightforward, but following these steps carefully will guarantee you perfect, soft, and delicious cookies every single time.
- Brown the Butter (5 minutes): Place the 1 cup of unsalted butter in a light-colored saucepan over medium heat. Stir it constantly with a rubber spatula or a wooden spoon. The butter will melt, then foam, and then you will start to see brown specks forming at the bottom. It will smell nutty and toasty. This whole process takes about 5-7 minutes. Once it is golden brown and smells amazing, immediately remove it from the heat and pour it into a large heatproof mixing bowl. Let it cool for 10-15 minutes. Do not skip this cooling step, or you will cook the egg later!
- Blot the Pumpkin (2 minutes): While the butter is cooling, spread your 1 cup of pumpkin purée onto a plate lined with a few paper towels. Place another paper towel on top and press gently to absorb any excess liquid. This is a game-changer. Removing that extra moisture helps the cookies stay thick and soft instead of spreading into flat pancakes. Let it sit while you prepare the other ingredients.
- Mix Wet Ingredients (3 minutes): To the cooled brown butter, add 3/4 cup packed light brown sugar and 1/2 cup granulated sugar. Whisk vigorously for about 1 minute until the mixture is smooth and looks like a thick paste. It will be a bit grainy, and that is okay. Add the 1 large room-temperature egg and 2 teaspoons of vanilla extract. Whisk again until everything is fully combined and the mixture looks glossy.
- Add the Pumpkin (2 minutes): Add the blotted pumpkin purée to the wet mixture. Whisk gently until it is fully incorporated. The mixture might look a little curdled or separated at this point, but do not panic! That is just the water in the pumpkin interacting with the butter. It will all come together once you add the flour.
- Combine Dry Ingredients (2 minutes): In a separate medium bowl, whisk together 2 cups of all-purpose flour, 1 teaspoon of baking soda, 1/2 teaspoon of baking powder, 1/2 teaspoon of salt, 1 ½ teaspoons of pumpkin pie spice, and 1 teaspoon of cinnamon. Make sure there are no lumps of baking soda or powder.
- Combine Wet and Dry (3 minutes): Pour the dry ingredients into the bowl with the wet ingredients. Using a rubber spatula, fold the mixture together gently. Stir just until you no longer see streaks of flour. Overmixing at this stage will develop the gluten too much and make your cookies tough. A few small lumps are perfectly fine.
- Fold in the Chocolate Chips (1 minute): Add 1 ½ cups of semi-sweet chocolate chips to the dough. Fold them in with the spatula until they are evenly distributed. The dough will be thick, soft, and slightly sticky. This is a good sign.
- Chill the Dough (30 minutes, optional but recommended): Cover the bowl with plastic wrap and place it in the refrigerator for at least 30 minutes. Chilling the dough solidifies the butter, which prevents the cookies from spreading too much in the oven. It also allows the flavors to meld together. If you are in a hurry, you can skip this step, but your cookies will be a little flatter.
- Preheat and Prep (10 minutes): About 15 minutes before you are ready to bake, preheat your oven to 350°F (175°C). Line your baking sheets with parchment paper or silicone baking mats.
- Scoop and Bake (10-12 minutes): Use your cookie scoop to portion out rounded tablespoons of dough (about 1.5 tablespoons each). Place them about 2 inches apart on the prepared baking sheets. Bake for 10-12 minutes. The edges should be set and lightly golden, but the centers will still look soft and slightly puffy. They will continue to set as they cool on the pan. For softer cookies, bake for 10 minutes. For slightly crispier edges, go for 12 minutes.
- Cool and Enjoy (10 minutes): Let the cookies cool on the baking sheet for 5 minutes. This is an important step because they are very fragile when hot. After 5 minutes, transfer them to a wire cooling rack to cool completely. Or, you know, eat one warm because you absolutely deserve it.
Cooking Tips & Techniques
After making these cookies about a dozen times, I have learned a few things the hard way. Here are my best tips to ensure your cookies turn out perfectly every time.
Don’t Skip the Brown Butter Cooling Step. I learned this lesson the messy way. I once poured the hot brown butter directly into the sugar and egg mixture, and it partially scrambled the egg. You end up with little bits of cooked egg in your dough, which is not pleasant. Let the brown butter cool for at least 10-15 minutes until it is warm but not hot to the touch.
Blotting the Pumpkin is Not Optional. I know it feels like an extra, annoying step, but it makes a huge difference. Pumpkin has a lot of water, and if you don’t remove some of it, your cookies will spread into thin, flat discs. I have made that mistake, and while they still tasted good, they were not the thick, soft cookies I was aiming for. A quick blot with a paper towel is all it takes.
Use a Cookie Scoop for Uniformity. Using a cookie scoop ensures that every cookie is the same size, which means they will all bake at the same rate. No more having some cookies burnt and others underdone. It is a small investment that pays off in consistency.
Chill the Dough for Best Results. I know you want cookies right now. I get it. But chilling the dough for 30 minutes is the secret to a thick, bakery-style cookie. It solidifies the butter, which means the cookies spread less in the oven. If you bake the dough right away, the butter is too soft, and the cookies will spread into thin, crispy wafers. The flavor is also better after a short chill.
Watch the Oven, Not the Clock. Every oven runs a little differently. My oven might bake these in 11 minutes, while yours might need 13. The best indicator is visual. The edges should be set and lightly golden, and the centers should look puffy and slightly soft. They will continue to bake on the hot pan after you pull them out.
Variations & Adaptations
One of the best things about this recipe is how adaptable it is. You can easily tweak it to fit your dietary needs or flavor preferences. Here are a few variations I have personally tried and loved.
- Gluten-Free Option: I have successfully made these cookies with a 1:1 gluten-free baking flour blend (like Bob’s Red Mill or King Arthur). The texture is slightly more delicate, but they are still incredibly soft and delicious. Do not use a single type of gluten-free flour like almond flour or coconut flour, as they will change the texture significantly.
- Dairy-Free Option: To make these dairy-free, substitute the unsalted butter with a high-quality vegan butter stick (like Earth Balance or Miyoko’s). The browning process works differently with vegan butter, so you might not get the same deep nutty flavor, but it will still be delicious. Use dairy-free chocolate chips as well.
- Spice It Up: If you are a spice lover, feel free to amp up the warm flavors. Add an extra 1/2 teaspoon of ginger or a pinch of ground cloves. You can also add a 1/4 teaspoon of cardamom for a more complex, aromatic flavor. I once added a pinch of cayenne pepper for a sweet-heat combo, and it was surprisingly good!
- Nutty Twist: For some added crunch, fold in 1/2 cup of toasted, chopped pecans or walnuts along with the chocolate chips. The nuts add a wonderful texture and pair beautifully with the brown butter and pumpkin. Toast the nuts in a dry pan for 2-3 minutes to bring out their flavor before adding them to the dough.
- White Chocolate & Cranberry: For a festive fall twist, swap the semi-sweet chocolate chips for 1 cup of white chocolate chips and 1/2 cup of dried cranberries. The tartness of the cranberries cuts through the sweetness of the white chocolate and the richness of the brown butter. This is a favorite for Thanksgiving!
Serving & Storage Suggestions
These cookies are wonderful in so many ways. Here is how to serve them and keep them fresh for days.
These cookies are best served slightly warm, when the chocolate chips are still a little melty and the texture is at its peak of softness. I like to pop them in the microwave for 10-15 seconds if they have been sitting out for a while. They are perfect on their own, but they are also amazing with a cold glass of milk, a warm cup of coffee, or a mug of spiced chai tea. For a real treat, sandwich a scoop of vanilla ice cream between two cookies for the ultimate cookie ice cream sandwich.
Storage: Store the baked cookies in an airtight container at room temperature for up to 5 days. To keep them extra soft, add a slice of plain bread to the container. The bread will absorb any excess moisture and release it back to the cookies, keeping them soft and chewy. Replace the bread slice every day or two.
Freezing: These cookies freeze beautifully. You have two options. First, you can freeze the baked cookies. Let them cool completely, then place them in a single layer in a freezer-safe bag or container. They will keep for up to 3 months. Thaw them at room temperature or reheat them in a 300°F oven for 5 minutes. Second, you can freeze the raw cookie dough. Scoop the dough into balls, place them on a baking sheet, and freeze until solid. Transfer the frozen dough balls to a freezer bag. You can bake them directly from frozen, adding 2-3 minutes to the baking time.
Flavor Development: Honestly, these cookies taste even better the next day. The flavors of the brown butter, pumpkin, and spices have time to meld together and deepen. So if you can resist eating them all on day one, you are in for a real treat on day two.
Nutritional Information & Benefits
While these are definitely a treat, they do have some redeeming qualities. Here is a quick look at the estimated nutritional information per cookie (based on 24 cookies).
| Nutrient | Amount per Cookie |
|---|---|
| Calories | 185 |
| Fat | 10g |
| Carbohydrates | 24g |
| Protein | 2g |
| Fiber | 1g |
| Sugar | 15g |
These cookies offer a small dose of vitamin A from the pumpkin, which is great for eye health and immune function. Pumpkin is also a good source of fiber, which helps with digestion. The brown butter provides a small amount of healthy fats, and the dark chocolate chips offer antioxidants. Remember, these are a dessert, so enjoy them in moderation as part of a balanced diet. They are a wonderful way to satisfy a sweet craving while getting a tiny bit of nutritional benefit.
For those with dietary concerns, this recipe can be easily adapted to be gluten-free or dairy-free, as mentioned in the variations section. The main allergens to be aware of are gluten (from the flour), dairy (from the butter and chocolate), and eggs.
Conclusion
These Soft Pumpkin Chocolate Chip Cookies with Brown Butter are more than just a recipe—they are a little piece of autumn joy you can create any time the craving hits. They combine the cozy, familiar flavors of pumpkin and spice with the sophisticated depth of brown butter, all wrapped up in a perfectly soft, chewy cookie. They are easy enough for a weeknight bake but impressive enough to share with friends and family.
I encourage you to make this recipe your own. Play around with the spices, try a different type of chocolate chip, or add some nuts. The best recipes are the ones you make with your own hands and your own heart. I honestly love these cookies because they remind me that the best things in life are often the simplest. A few humble ingredients, a little bit of time, and a whole lot of love can create something truly magical.
Now, I want to hear from you! Have you tried making these cookies? Did you make any fun substitutions? Drop a comment below and let me know how they turned out. And if you loved them, please share this post with a friend who needs a little fall baking inspiration. Happy baking, friends!
Frequently Asked Questions
Can I use pumpkin pie filling instead of pumpkin purée?
No, I would not recommend it. Pumpkin pie filling has added sugar, spices, and stabilizers that will change the texture and sweetness of the cookies. Stick with 100% pure pumpkin purée for the best results.
Why did my cookies turn out flat?
This is usually due to one of two things. First, you might have skipped the step of blotting the pumpkin. Too much moisture in the pumpkin will cause the cookies to spread. Second, you might have baked the dough without chilling it. Chilling the dough solidifies the butter and prevents excessive spreading.
Can I make these cookies without brown butter?
You can, but you will lose a lot of flavor. If you are short on time, simply melt 1 cup of unsalted butter and let it cool slightly. The cookies will still be good, but they will lack that deep, nutty, caramel-like flavor that makes them so special.
How do I know when the cookies are done baking?
The edges should be set and lightly golden, but the centers will still look soft and slightly puffy. They will continue to bake on the hot baking sheet as they cool. For a softer cookie, pull them out at the 10-minute mark. For a slightly crispier edge, go for 12 minutes.
Can I double this recipe?
Absolutely! This recipe doubles beautifully. Just make sure you have a large enough bowl for the dough. You will also need to bake the cookies in batches, making sure your baking sheet has cooled down between batches so the dough does not start to melt before it goes into the oven.
Pin This Recipe!
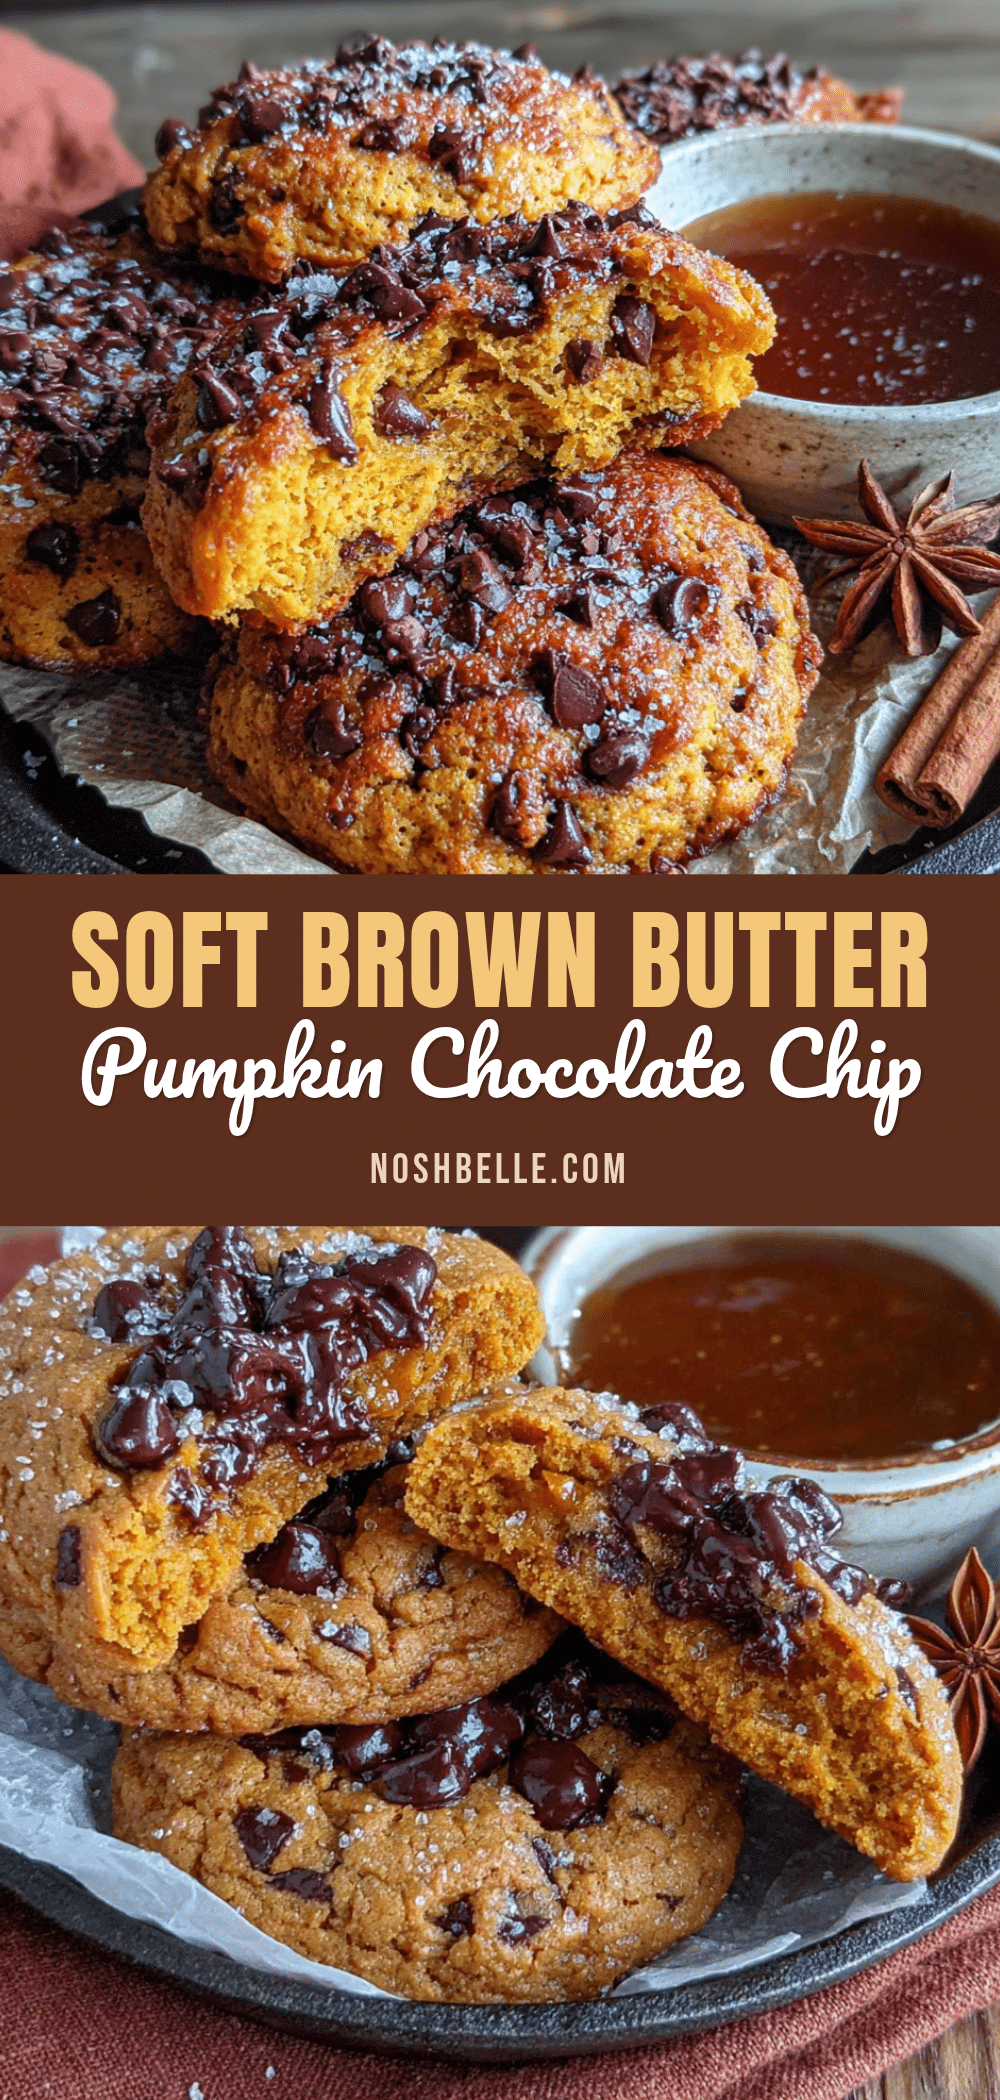
Soft Pumpkin Chocolate Chip Cookies with Brown Butter
These soft and chewy pumpkin chocolate chip cookies feature nutty brown butter and warm fall spices for the ultimate cozy treat. Quick and easy to make, they are perfect for any autumn gathering.
- Prep Time: 15 minutes
- Cook Time: 12 minutes
- Total Time: 30 minutes (plus optional 30 minutes chilling)
- Yield: 24 cookies 1x
- Category: Dessert
- Cuisine: American
Ingredients
- 1 cup (2 sticks) unsalted butter
- 1 cup (245g) pumpkin purée (blotted)
- 3/4 cup (150g) light brown sugar, packed
- 1/2 cup (100g) granulated sugar
- 1 large egg, room temperature
- 2 teaspoons vanilla extract
- 2 cups (250g) all-purpose flour, spooned and leveled
- 1 teaspoon baking soda
- 1/2 teaspoon baking powder
- 1/2 teaspoon fine sea salt
- 1 1/2 teaspoons pumpkin pie spice
- 1 teaspoon ground cinnamon
- 1 1/2 cups (270g) semi-sweet chocolate chips
Instructions
- Brown the butter: Place 1 cup unsalted butter in a light-colored saucepan over medium heat. Stir constantly until melted, foamy, and brown specks appear (about 5-7 minutes). Immediately remove from heat and pour into a large heatproof bowl. Let cool for 10-15 minutes.
- Blot the pumpkin: Spread 1 cup pumpkin purée onto a plate lined with paper towels. Place another paper towel on top and press gently to absorb excess moisture. Set aside.
- Mix wet ingredients: To the cooled brown butter, add 3/4 cup packed light brown sugar and 1/2 cup granulated sugar. Whisk vigorously for 1 minute until smooth and paste-like. Add 1 large room-temperature egg and 2 teaspoons vanilla extract. Whisk until glossy and fully combined.
- Add pumpkin: Add the blotted pumpkin purée to the wet mixture. Whisk gently until fully incorporated (mixture may look slightly curdled).
- Combine dry ingredients: In a separate medium bowl, whisk together 2 cups all-purpose flour, 1 teaspoon baking soda, 1/2 teaspoon baking powder, 1/2 teaspoon salt, 1 1/2 teaspoons pumpkin pie spice, and 1 teaspoon cinnamon.
- Combine wet and dry: Pour dry ingredients into wet mixture. Fold gently with a rubber spatula just until no streaks of flour remain. Do not overmix.
- Fold in chocolate chips: Add 1 1/2 cups semi-sweet chocolate chips. Fold until evenly distributed. Dough will be thick, soft, and slightly sticky.
- Chill dough (optional but recommended): Cover bowl with plastic wrap and refrigerate for at least 30 minutes.
- Preheat and prep: About 15 minutes before baking, preheat oven to 350°F (175°C). Line baking sheets with parchment paper or silicone baking mats.
- Scoop and bake: Using a 1.5-tablespoon cookie scoop, portion dough and place 2 inches apart on prepared sheets. Bake for 10-12 minutes until edges are set and lightly golden, centers still soft and puffy.
- Cool: Let cookies cool on baking sheet for 5 minutes, then transfer to a wire rack to cool completely.
Notes
Blotting the pumpkin removes excess moisture, preventing flat cookies. Chilling the dough solidifies the butter for thicker cookies. Brown butter must cool before adding egg to avoid scrambling. Cookies taste even better the next day.
Nutrition
- Serving Size: 1 cookie
- Calories: 185
- Sugar: 15
- Sodium: 120
- Fat: 10
- Saturated Fat: 6
- Carbohydrates: 24
- Fiber: 1
- Protein: 2
Keywords: pumpkin cookies, chocolate chip cookies, brown butter, fall baking, soft cookies, easy cookie recipe


