My brother-in-law Mark asked why I couldn’t just skip the flipping. We were standing in my kitchen on a Tuesday night, and I was explaining my elaborate method for getting crispy chicken skin — sear, rest, flip, baste, rest again. He looked at me like I was describing a rocket launch. “Why not just cook it all on one side until it’s done?” he said. I started to explain why that wouldn’t work — then stopped. Honestly? I had no good reason. I’d just always done it that way because some blog told me to fifteen years ago.
So I tried it his way. I threw four bone-in chicken thighs into a cold cast iron skillet, skin-side down, cranked the heat, and didn’t touch them for a full twelve minutes. The kitchen filled with this aggressive, happy sizzle and a smell that made my neighbor text me asking what I was cooking. When I finally peeked under that first thigh, the skin was this deep mahogany color with actual, honest-to-goodness crunch. I’d been overcomplicating chicken thighs for a decade, and Mark figured it out in ten seconds. Let me tell you — eating that humble pie tasted pretty good, especially with all that garlic butter pooled around it.
These crispy garlic butter chicken thighs are now my go-to Tuesday night dinner. They come together in about thirty minutes, use ingredients I almost always have, and deliver that kind of crispy skin you normally only get at a fancy restaurant. I mean, the butter starts browning while the garlic gets all sweet and nutty in the pan — it’s the kind of smell that makes everyone wander into the kitchen asking when dinner’s ready. If you’ve been wrestling with chicken skin that comes out flabby or pale, I promise this method changes everything. It’s the recipe that taught me sometimes the simplest approach is the one that actually works.
Why You’ll Love This Recipe
I’ve tested this method more times than I care to admit — probably eight or nine batches before I felt confident enough to share it. Each time, I tweaked something small: the heat level, the butter temperature, the garlic timing. What I landed on is a technique that consistently delivers restaurant-quality crispy skin without the fuss. Here’s why this recipe stands out from every other chicken thigh recipe you’ve tried:
- Ready in Under 30 Minutes : From fridge to table in about 28 minutes. No marinating, no complicated steps, no waiting around. Perfect for those evenings when you walk in the door hungry and need dinner on the table before everyone gets hangry.
- Pantry-Friendly Ingredients : Chicken thighs, butter, garlic, salt, pepper, and maybe some thyme if you’re feeling fancy. That’s it. No trips to specialty stores, no hunting down obscure spices.
- Perfect for Busy Weeknights : This is the recipe I make on Wednesdays when I’ve already used up all my cooking energy by Tuesday. It’s simple enough for a tired cook but impressive enough to serve to company.
- Crowd-Pleasing Results : I’ve served these to picky kids, skeptical in-laws, and actual chef friends. Every single person goes quiet after the first bite. The garlic butter sauce alone is worth making extra bread for.
- One-Pan Wonder : Less cleanup means more time actually enjoying your evening. The whole thing happens in one skillet, and the sauce comes together right in the same pan.
What really sets this recipe apart is the technique. Most chicken thigh recipes have you flipping the meat multiple times, which prevents that deep, even crust from forming. By cooking the thighs entirely on one side first, you get skin so crispy it shatters when you bite into it. Then you flip, add the garlic butter, and let the second side finish cooking while the flavors meld. It’s not just another chicken recipe — it’s the one that made me stop looking for better methods.
This is the kind of meal that makes you close your eyes after that first bite. The garlic gets sweet and mellow in the butter, the chicken stays juicy on the inside, and that crispy skin? Absolute perfection. It’s comfort food that comes together fast enough for a Tuesday but tastes like you spent all afternoon cooking.
What Ingredients You Will Need
This recipe uses simple, honest ingredients to create something genuinely special. Most of these are probably already in your kitchen, which is exactly how I like to cook. Here’s what you’ll need and why each ingredient matters:
For the Chicken:
- 4 bone-in, skin-on chicken thighs (about 1.5 pounds total) — Bone-in thighs stay juicier during cooking, and the skin is essential for that crispy texture. I prefer thighs from a local farm when I can find them, but standard grocery store thighs work beautifully too. Look for thighs with the skin still attached and intact — torn skin won’t crisp as evenly.
- 1 teaspoon kosher salt — I use Diamond Crystal brand because it’s less salty by volume and easier to control. If you’re using fine table salt, cut back to about ¾ teaspoon.
- ½ teaspoon black pepper — Freshly ground makes a noticeable difference here. The pepper adds a subtle warmth that complements the garlic butter beautifully.
- 1 tablespoon neutral oil (like avocado or canola) — This helps the skin start crisping before the butter goes in. Butter alone burns too quickly at the high heat we need for crispy skin.
For the Garlic Butter Sauce:
- 4 tablespoons unsalted butter — Kerrygold is my go-to for its rich flavor and higher fat content, but any good unsalted butter works. The butter does double duty here: it helps finish cooking the chicken and becomes the base for our sauce.
- 6 cloves garlic, thinly sliced — Don’t mince the garlic here. Thin slices cook more evenly and are less likely to burn than minced garlic. They also look beautiful scattered over the finished chicken. Use fresh garlic, not the pre-minced stuff from a jar — the flavor difference is huge.
- 2 sprigs fresh thyme (optional but recommended) — Thyme adds an earthy, slightly floral note that cuts through the richness of the butter. If you only have dried thyme, use about ½ teaspoon and add it with the garlic.
- 1 tablespoon fresh lemon juice — Added at the very end, lemon juice brightens the whole dish and balances the richness. Don’t skip this — it’s the secret to making the flavors pop.
- Flaky sea salt for finishing (like Maldon) — This is optional but absolutely worth it. That final sprinkle of crunchy salt adds texture and a burst of salty flavor that makes every bite better.
For Serving (optional but recommended):
- Fresh parsley, chopped — Adds color and freshness.
- Crusty bread or rice — You’ll want something to soak up every drop of that garlic butter sauce.
Equipment Needed
You don’t need a fancy kitchen to make these chicken thighs. Here’s what I use and what you can substitute if needed:
- 12-inch cast iron skillet — This is my first choice because it holds heat evenly and gives you that beautiful, deep sear. If you don’t have cast iron, a heavy stainless steel skillet works almost as well. Avoid non-stick pans here — they don’t get hot enough for truly crispy skin.
- Tongs — A good pair of metal tongs makes flipping the chicken easy without tearing the skin. I’ve used the same pair for years, and they’re worth every penny.
- Instant-read thermometer — This is non-negotiable for perfectly cooked chicken. The difference between 165°F and 175°F is the difference between juicy and dry. I use a Thermapen, but any reliable thermometer works.
- Cutting board and sharp knife — For slicing the garlic and any herbs. A dull knife will crush the garlic instead of slicing it cleanly.
- Small bowl — For mixing the salt and pepper before seasoning the chicken.
If you don’t have a cast iron skillet, don’t run out and buy one just for this recipe. A heavy-bottomed stainless steel pan works great — just make sure it’s preheated properly before adding the chicken. I’ve also made this in an enameled Dutch oven with good results, though the skin doesn’t get quite as crispy because the sides are higher.
Preparation Method
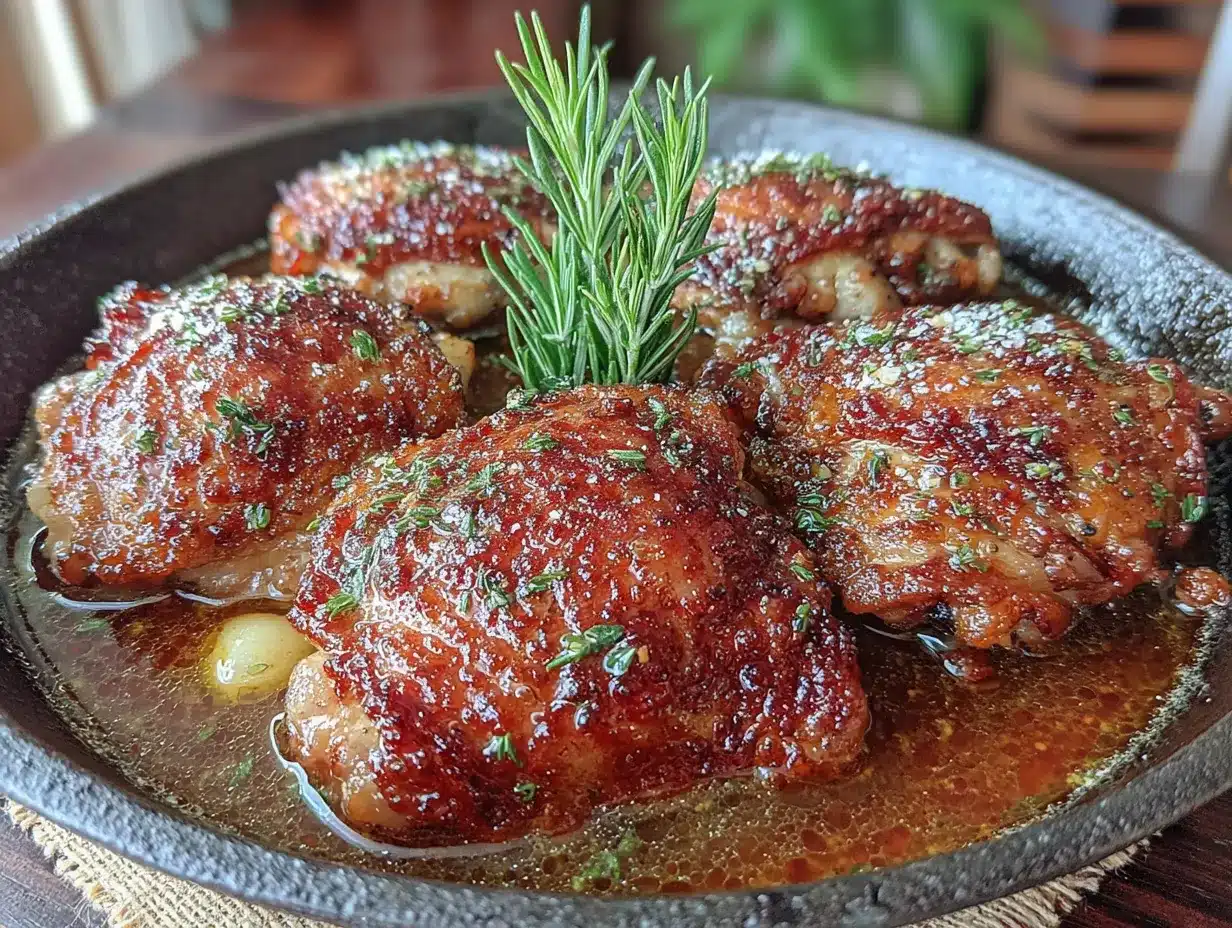
Let me walk you through this step by step. I’ve included all the little details that make the difference between good chicken and absolutely unforgettable chicken.
- Pat the chicken thighs completely dry (2 minutes) — This is the most important step, and I cannot emphasize it enough. Use paper towels and really press into every nook and cranny of the skin. Any moisture on the surface will steam instead of sear, and you’ll end up with pale, rubbery skin instead of crispy, golden perfection. Let the chicken sit uncovered on a plate for five minutes after drying to ensure the surface is completely dry.
- Season generously (1 minute) — Sprinkle the kosher salt and black pepper evenly over both sides of the chicken thighs. Don’t be shy with the salt — chicken thighs can handle it, and proper seasoning is what makes the skin taste amazing. I season from about 12 inches above the chicken to ensure even distribution.
- Preheat your skillet (3 minutes) — Place your cast iron skillet over medium-high heat and add the neutral oil. Let it heat until the oil shimmers and you see the first wisp of smoke. This takes about 3 minutes in my kitchen, but your stove might be different. The pan needs to be hot enough that the chicken sizzles aggressively the moment it hits the surface.
- Place the chicken skin-side down (12 minutes) — Lay the chicken thighs in the hot skillet, skin-side down, arranging them so they’re not touching. If they’re crowded, the steam can’t escape and the skin won’t crisp. Listen for that immediate, vigorous sizzle — if you don’t hear it, your pan isn’t hot enough. Now here’s the hard part: do not touch them for 12 minutes. I know it’s tempting to peek, but every time you lift that chicken, you lose heat and interrupt the crisping process. Trust the process. The skin will release naturally from the pan when it’s ready.
- Check for doneness and flip (2 minutes) — After 12 minutes, use your tongs to gently lift one corner of a thigh. The skin should be deep golden brown and release easily from the pan. If it sticks, give it another minute. Once the skin is perfectly crispy, flip each thigh over so the skin side is up. The second side needs much less time — about 2 to 3 minutes depending on thickness.
- Add the garlic butter (3 minutes) — Reduce the heat to medium-low. Add the butter to the pan, letting it melt around the chicken. Toss in the sliced garlic and thyme sprigs. As the butter melts, tilt the pan slightly and use a spoon to baste the chicken with the garlic butter. Do this continuously for about 2 minutes — the garlic will soften and become fragrant, and the butter will start to brown slightly. This basting step is what gives the chicken that incredible flavor.
- Check internal temperature (1 minute) — Insert your instant-read thermometer into the thickest part of a thigh, avoiding the bone. You’re looking for 165°F for safe eating, but I actually prefer 170°F to 175°F for thighs — the extra few degrees break down more connective tissue and make the meat even more tender and juicy. If you’re not at temperature yet, continue cooking over low heat for another few minutes.
- Finish with lemon and rest (5 minutes) — Remove the skillet from the heat. Squeeze the fresh lemon juice over the chicken and sprinkle with flaky sea salt if you’re using it. Let the chicken rest in the pan for 5 minutes before serving. This resting period lets the juices redistribute throughout the meat, so every bite is moist and flavorful. Don’t skip this step — I learned the hard way that cutting into hot chicken means all those beautiful juices end up on the cutting board instead of in your mouth.
Cooking Tips & Techniques
After making this recipe more times than I can count, I’ve collected a few tricks that make the process smoother and the results more consistent. Here’s what I wish someone had told me the first time:
The biggest mistake I see people make is moving the chicken too early. I did it myself the first three times I tried this method. The skin would look golden on the edges but still pale in the middle, and I’d flip it anyway, thinking it was done. Nope. The skin needs that full 12 minutes of uninterrupted contact with the hot pan. If you flip too soon, the skin tears, and you lose all that beautiful crispiness. Trust the timer. Walk away if you have to.
About the garlic — slice it thinly and add it after you flip the chicken, not before. If you add garlic to the pan at the beginning, it will burn to bitter little crisps by the time the chicken is done. Burnt garlic ruins a dish faster than almost anything else. Adding it with the butter, after the hard searing is done, gives you sweet, mellow garlic that’s perfectly cooked.
Here’s a trick for even crispier skin : after patting the chicken dry, let it sit uncovered in the fridge for 30 minutes. This dries out the surface even more, which means even crispier results. I do this when I’m planning ahead, but honestly, the recipe works great even without this step.
Multitasking tip : While the chicken is cooking skin-side down, use that time to prep your sides. I usually start some rice or roast some vegetables while the chicken does its thing. The chicken needs almost no hands-on attention during those 12 minutes, so it’s the perfect time to get the rest of dinner ready.
One thing I learned the hard way : don’t crowd the pan. I tried making six thighs in a 10-inch skillet once, and the skin came out pale and sad. The thighs need space between them for the steam to escape. If you’re cooking for a crowd, use two pans or cook in batches. The extra few minutes are worth it for that perfect crispy skin.
Variations & Adaptations
This recipe is wonderfully adaptable. Here are some variations I’ve tried and loved:
Spicy Garlic Butter Chicken — Add ½ teaspoon red pepper flakes along with the garlic. The heat cuts through the richness of the butter beautifully. My brother-in-law Mark actually prefers this version now, which is funny considering he started this whole thing by suggesting I simplify my method.
Herb-Infused Version — Along with the thyme, add a sprig of rosemary and a couple of sage leaves to the butter while it melts. The herbs infuse the butter with their oils, creating a complex, aromatic sauce that’s incredible spooned over rice or mashed potatoes.
Lemon-Herb Variation — Add the zest of one lemon along with the garlic, and increase the lemon juice to 2 tablespoons. The extra citrus brightens everything up and makes the dish feel lighter, perfect for spring or summer dinners.
Dairy-Free Adaptation — Substitute the butter with a high-quality vegan butter or ghee (which is lactose-free). I’ve used Miyoko’s European Style Cultured Vegan Butter with excellent results — it browns similarly to dairy butter and creates a rich, nutty sauce.
Oven-Finished Method — If you’re nervous about stovetop cooking, you can start the chicken on the stove for the crispy skin, then transfer the skillet to a 400°F oven for 10 to 15 minutes to finish cooking. This is actually my preferred method when I’m cooking for a crowd because it frees up stovetop space for other dishes.
Chicken Breast Adaptation — You can use boneless, skinless chicken breasts here, but the timing changes significantly. Cook skin-side down for only 4 to 5 minutes, then flip and cook another 3 to 4 minutes until the internal temperature reaches 155°F (carryover cooking will bring it to 165°F). The butter basting step stays the same.
Serving & Storage Suggestions
These chicken thighs are incredibly versatile when it comes to serving. Here’s how I like to enjoy them:
Serving Temperature — Serve the chicken hot, straight from the skillet. The garlic butter sauce should be warm and liquid, ready to soak into whatever you serve alongside. I like to spoon extra sauce over the chicken right before bringing it to the table.
What to Serve With It — The garlic butter sauce is the star here, so you want something that will soak it up. Mashed potatoes are my personal favorite — the creamy texture against the crispy chicken skin is heaven. Rice, crusty bread, or even egg noodles work beautifully too. For vegetables, I usually go with roasted asparagus, green beans, or a simple arugula salad with lemon vinaigrette. The peppery arugula cuts through the richness of the butter perfectly.
Storage Instructions — Leftover chicken keeps beautifully in the refrigerator for up to 4 days. Store it in an airtight container with the garlic butter sauce poured over the top. The flavors actually deepen overnight, making leftovers almost better than the original dish.
Reheating Methods — The key to reheating is preserving that crispy skin. I’ve found the best method is to reheat the chicken in a 375°F oven for about 10 minutes. Place the chicken on a wire rack set over a baking sheet so air can circulate around it. If you’re in a hurry, a toaster oven works great. Avoid the microwave at all costs — it will turn that beautiful crispy skin into sad, rubbery leather.
Freezing Instructions — These chicken thighs freeze well for up to 3 months. Cool completely, then wrap each thigh individually in plastic wrap and place in a freezer bag. To reheat, thaw overnight in the refrigerator, then reheat in a 375°F oven for 12 to 15 minutes.
A Note on Flavor Development — The garlic butter sauce will solidify in the refrigerator, but don’t worry — it will melt back into a beautiful sauce when reheated. The garlic flavor mellows and sweetens over time, so leftovers actually have a more rounded, complex flavor than the freshly made dish.
Nutritional Information & Benefits
Here’s the nutritional breakdown for one serving (one chicken thigh with garlic butter sauce):
| Nutrient | Amount Per Serving |
|---|---|
| Calories | 410 |
| Protein | 32g |
| Fat | 30g |
| Saturated Fat | 12g |
| Carbohydrates | 2g |
| Fiber | 0g |
| Sugar | 0g |
| Sodium | 680mg |
Chicken thighs are actually a nutritional powerhouse. They’re higher in iron and zinc than chicken breasts, and the extra fat content keeps you feeling full and satisfied longer. The garlic in this recipe isn’t just for flavor — it contains allicin, a compound with anti-inflammatory and immune-boosting properties. And the butter, while rich, provides fat-soluble vitamins A, D, E, and K that help your body absorb nutrients from other foods you eat with this meal.
This recipe is naturally gluten-free and can be made dairy-free with the substitution mentioned above. If you’re watching your sodium, reduce the salt to ¾ teaspoon and skip the flaky sea salt finish. The lemon juice at the end helps brighten the flavors even with less salt.
I personally love that this meal feels indulgent but is actually quite balanced — protein-rich, low in carbohydrates, and full of satisfying flavor. It’s the kind of dinner that keeps you full until morning without that heavy, weighed-down feeling.
Conclusion
These crispy garlic butter chicken thighs have become a staple in my kitchen for good reason. They’re fast enough for a busy Tuesday, impressive enough for company, and simple enough that even a beginner cook can nail them on the first try. The technique of cooking the chicken entirely on one side before flipping revolutionized the way I cook chicken, and I hope it does the same for you.
What I love most about this recipe is how forgiving it is. You can adjust the garlic, swap the herbs, or change up the sides, and it still comes out delicious. It’s the kind of recipe that builds confidence in the kitchen — once you see that perfect crispy skin and taste that garlic butter sauce, you’ll start looking at other recipes differently. You’ll start trusting the process instead of fussing with things.
I’d love to hear how these turn out for you. Did you try any variations? Did your family go quiet after the first bite like mine does every single time? Drop a comment below and let me know. And if you’re looking for more quick weeknight dinners, you might enjoy these garlic parmesan roasted potatoes that pair perfectly with this chicken. Happy cooking, friends — I’m rooting for you and that beautiful crispy skin!
Frequently Asked Questions
Can I use boneless, skinless chicken thighs for this recipe?
You can, but the results won’t be the same. Boneless, skinless thighs cook much faster and won’t develop that crispy skin we’re after. If you use them, reduce the cooking time significantly — about 4 to 5 minutes per side — and add the garlic butter during the last minute of cooking. The dish will still be tasty, just different.
Why is my chicken skin not getting crispy?
There are three common culprits. First, the chicken wasn’t dried thoroughly before cooking — any moisture on the surface creates steam instead of searing. Second, the pan wasn’t hot enough when you added the chicken. Third, you moved the chicken too early. Give it the full 12 minutes without touching it, and make sure your pan is properly preheated.
Can I make this recipe ahead of time?
Absolutely. Cook the chicken as directed, let it cool, and store it in the refrigerator with the garlic butter sauce. To reheat, place the chicken on a wire rack over a baking sheet and warm it in a 375°F oven for 10 to 12 minutes. The skin won’t be quite as crispy as fresh, but it will still be delicious.
What’s the best way to slice garlic for this recipe?
Use a sharp knife and slice the garlic cloves crosswise into thin rounds, about 1/8 inch thick. This is better than mincing because thin slices cook evenly and are less likely to burn. If your knife is dull, it will crush the garlic instead of slicing it cleanly, which releases more moisture and can lead to uneven cooking.
Can I double this recipe?
Yes, but you’ll need to cook the chicken in batches unless you have a very large skillet. Crowding the pan prevents the skin from crisping properly. Cook the first batch, remove it to a plate, and keep it warm in a 200°F oven while you cook the second batch. Add fresh butter and garlic for the second batch since the first batch’s butter will have browned and the garlic will have cooked through.
Pin This Recipe!

Crispy Garlic Butter Chicken Thighs: Easy 30-Minute Dinner

These crispy garlic butter chicken thighs are a quick and easy weeknight dinner, ready in about 30 minutes. With perfectly crispy skin and a rich garlic butter sauce, this one-pan recipe is simple enough for a busy Tuesday but impressive enough for company.
- Prep Time: 10 minutes
- Cook Time: 20 minutes
- Total Time: 30 minutes
- Yield: 4 servings 1x
- Category: Main Course
- Cuisine: American
Ingredients
- 4 bone-in, skin-on chicken thighs (about 1.5 pounds total)
- 1 teaspoon kosher salt (use ¾ teaspoon if using fine table salt)
- ½ teaspoon black pepper, freshly ground
- 1 tablespoon neutral oil (such as avocado or canola)
- 4 tablespoons unsalted butter
- 6 cloves garlic, thinly sliced
- 2 sprigs fresh thyme (optional, or ½ teaspoon dried thyme)
- 1 tablespoon fresh lemon juice
- Flaky sea salt for finishing (optional, such as Maldon)
- Fresh parsley, chopped (for serving, optional)
- Crusty bread or rice (for serving, optional)
Instructions
- Pat the chicken thighs completely dry with paper towels. Let them sit uncovered on a plate for 5 minutes to ensure the surface is completely dry.
- Season both sides of the chicken thighs evenly with kosher salt and black pepper.
- Place a 12-inch cast iron skillet over medium-high heat and add the neutral oil. Heat until the oil shimmers and you see the first wisp of smoke, about 3 minutes.
- Place the chicken thighs skin-side down in the hot skillet, arranging them so they are not touching. Cook without moving them for 12 minutes. The skin should be deep golden brown and release easily from the pan.
- Flip each thigh over so the skin side is up. Cook for 2 to 3 minutes.
- Reduce the heat to medium-low. Add the butter to the pan, letting it melt around the chicken. Add the sliced garlic and thyme sprigs. Tilt the pan slightly and use a spoon to baste the chicken with the garlic butter continuously for about 2 minutes.
- Check the internal temperature of the thickest part of a thigh (avoiding the bone) with an instant-read thermometer. Aim for 165°F for safe eating, or 170°F to 175°F for more tender meat.
- Remove the skillet from the heat. Squeeze the fresh lemon juice over the chicken and sprinkle with flaky sea salt if using. Let the chicken rest in the pan for 5 minutes before serving. Garnish with fresh parsley and serve with crusty bread or rice if desired.
Notes
For even crispier skin, after patting the chicken dry, let it sit uncovered in the fridge for 30 minutes. Do not crowd the pan; cook in batches if needed. Avoid flipping the chicken too early to ensure a deep, even crust. The garlic butter sauce can be made dairy-free by using vegan butter or ghee.
Nutrition
- Serving Size: 1 chicken thigh with
- Calories: 410
- Sodium: 680
- Fat: 30
- Saturated Fat: 12
- Carbohydrates: 2
- Protein: 32
Keywords: crispy chicken thighs, garlic butter chicken, easy chicken dinner, 30-minute meal, one-pan chicken, weeknight dinner, gluten-free chicken