There used to be a tiny health food café tucked between a dry cleaner and a vintage shop on Main Street that made the most incredible peanut butter protein balls. When they closed suddenly two summers ago—literally overnight, with a handwritten “Sorry, we moved!” sign taped to the door—I felt genuinely lost. I mean, those little bites got me through afternoon slumps, pre-workout hunger, and random 3 PM cravings for months. After twelve tries—some crumbly disasters, one that tasted like straight sawdust, and a batch so sticky it glued my blender lid shut—I finally cracked the code. Let me tell you, this version is better than the original. And I don’t say that lightly.
The secret? It’s not about fancy superfood powders or obscure ingredients you have to order online. It’s about getting the texture just right—firm enough to hold together, soft enough to melt slightly in your mouth, and packed with enough protein to actually keep you full. Honestly, if you’ve ever tried making protein balls at home and ended up with a sad, crumbly mess, I’ve been there. Maybe you’ve been there too. That’s exactly why I kept testing until I got it perfect.
These no-bake peanut butter protein balls are the kind of snack you make once and immediately wish you’d doubled the batch. They take about fifteen minutes from start to finish, require zero oven time, and use ingredients you probably already have in your pantry. The best part? They actually taste like a treat—not a compromise. Every time I roll a fresh batch, I think about that little café and how something so simple can become so meaningful. That’s the power of a really good recipe, you know?
Why You’ll Love This Recipe
Let’s be real for a second—there are about a million protein ball recipes floating around the internet. What makes these different? I’ve tested this recipe at least twenty times over the past year, tweaking ratios, swapping ingredients, and annoying my family with endless samples. What I landed on is the perfect balance of flavor, texture, and nutrition that actually works for real life.
- Quick & Easy: You can make these in under 15 minutes. No baking, no waiting, no complicated techniques. Just mix, roll, and eat.
- Simple Ingredients: No weird powders or expensive specialty items. You likely have everything you need right now—peanut butter, oats, honey, protein powder, and a few mix-ins.
- Perfect for Meal Prep: These keep beautifully in the fridge for up to two weeks and freeze like a dream. Make a double batch on Sunday and grab them all week.
- Crowd-Pleaser: I’ve brought these to work, to playdates, and to family gatherings. Kids love them, adults devour them, and nobody guesses they’re packed with protein.
- Unbelievably Delicious: The texture is soft, chewy, and satisfying without being sticky or dry. The peanut butter flavor shines through, and the chocolate chips add little pockets of sweetness.
What makes this recipe different from the rest? It’s the ratio. After countless trials, I found the sweet spot where the oats and protein powder absorb just enough moisture from the peanut butter and honey to create a dough that rolls easily without falling apart. Plus, I use a trick of letting the mixture rest for five minutes before rolling—it makes all the difference in texture. This isn’t just another version of protein balls. It’s the version that finally works.
What Ingredients You Will Need
This recipe uses simple, wholesome ingredients that come together to create something truly satisfying. Most of these are pantry staples, which means you can whip up a batch whenever the craving strikes without a special trip to the store.
- Creamy Peanut Butter – 1 cup (240g). Natural peanut butter works best here—the kind that’s just peanuts and salt. I prefer the brand that grinds it fresh at my local grocery store, but any creamy natural peanut butter will do. Avoid the sugary commercial stuff; it throws off the texture and makes the balls too sweet. If your peanut butter is super oily, stir it well before measuring.
- Rolled Oats – 1 ½ cups (135g). Old-fashioned rolled oats give the best texture. Quick oats work in a pinch but make the balls a bit softer. Steel-cut oats are too hard and won’t blend well. For a gluten-free option, use certified gluten-free oats—I’ve tested this with several brands and they all work fine.
- Vanilla Protein Powder – ½ cup (about 50g). I recommend a high-quality vanilla whey or plant-based protein powder. My personal favorite is the vanilla collagen peptide powder from Vital Proteins—it dissolves seamlessly and adds extra protein without any chalky taste. If you’re using a plant-based powder, look for one that’s finely milled; some grainier options can make the balls crumbly.
- Honey – ⅓ cup (112g). Raw honey adds natural sweetness and helps bind everything together. Maple syrup works as a substitute for a vegan option, though the flavor will be slightly different. Agave nectar is too thin and makes the dough sticky.
- Mini Chocolate Chips – ¼ cup (45g). Dark chocolate chips are my go-to for a hint of richness without overwhelming sweetness. You can use milk chocolate or white chocolate if you prefer. For a sugar-free option, Lily’s brand makes excellent stevia-sweetened chocolate chips.
- Ground Flaxseed – 2 tablespoons (14g). This is my secret ingredient for extra fiber and omega-3s. It also helps absorb moisture and keeps the balls from getting too sticky. You can skip it if you don’t have it, but the texture won’t be quite as perfect.
- Pinch of Sea Salt – Just a pinch (about ⅛ teaspoon). This enhances the peanut butter flavor and balances the sweetness. If your peanut butter is already salted, you can skip this.
Equipment Needed
You don’t need much for this recipe—that’s the beauty of no-bake snacks. Here’s what you’ll need:
- Large Mixing Bowl – Any medium-to-large bowl works. I use a ceramic one because it doesn’t slide around on the counter.
- Measuring Cups and Spoons – For accuracy. I learned the hard way that eyeballing protein powder leads to dry, crumbly balls.
- Spatula or Wooden Spoon – For mixing. A sturdy spatula works best because the dough gets thick.
- Baking Sheet or Plate – To hold the rolled balls while they set. Line it with parchment paper for easy cleanup.
- Cookie Scoop (Optional) – A 1-tablespoon scoop makes perfectly uniform balls. If you don’t have one, just use your hands—I do half the time anyway.
- Refrigerator – For chilling. The balls need at least 30 minutes to firm up before eating.
I’ve made these in a tiny apartment kitchen with a cracked mixing bowl and a bent spatula. You really don’t need fancy equipment. If you have hands and a bowl, you’re good to go.
Preparation Method
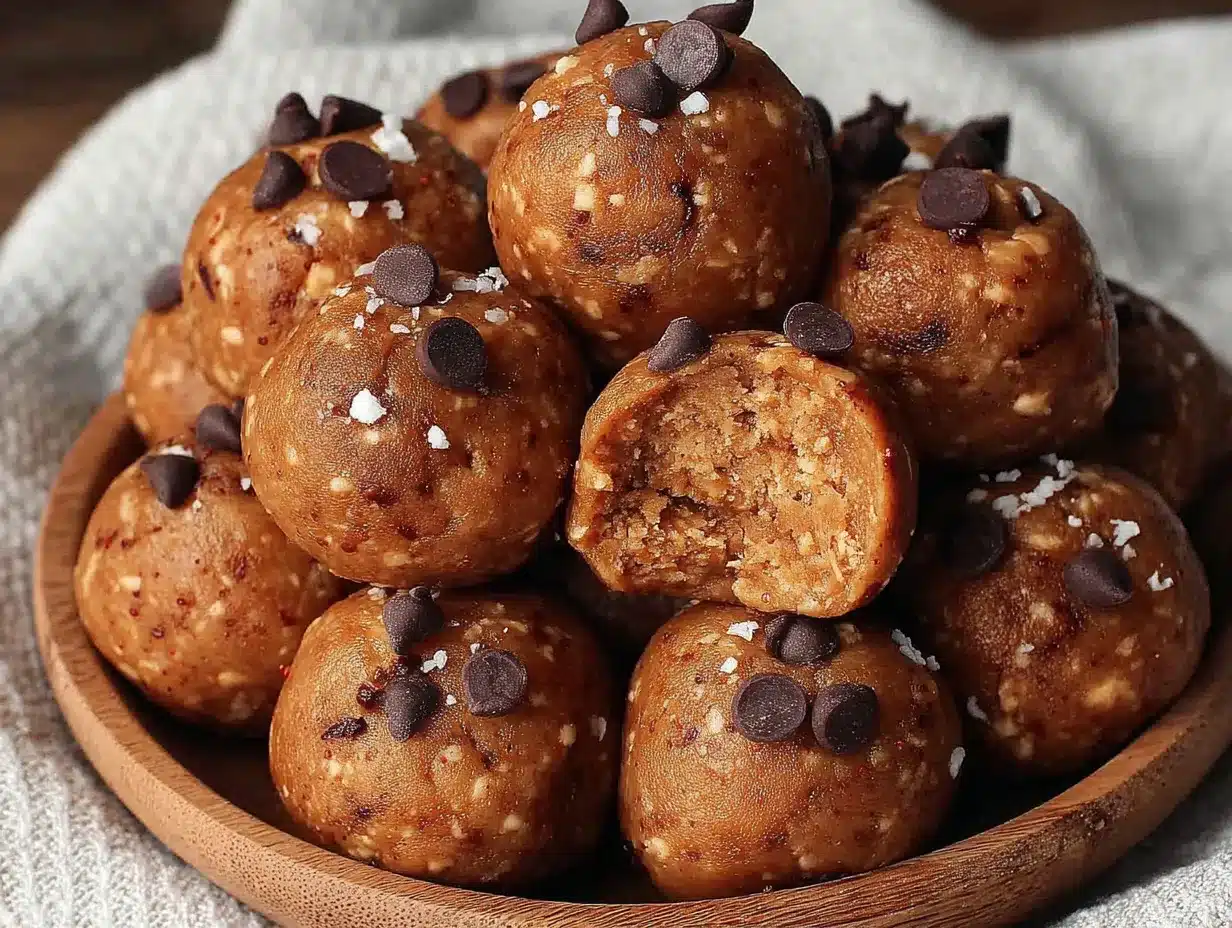
This recipe comes together in about 15 minutes of active time. Follow these steps carefully, and you’ll have perfect protein balls every time.
- Combine the dry ingredients. In your large mixing bowl, add the rolled oats, vanilla protein powder, ground flaxseed, and a pinch of sea salt. Whisk them together with a fork until evenly distributed. This step ensures the protein powder doesn’t clump later.
- Add the wet ingredients. Spoon in the creamy peanut butter and drizzle the honey over the top. Don’t mix yet—just let them sit on top of the dry ingredients.
- Mix until combined. Using your spatula or wooden spoon, stir everything together. Start slowly to avoid flinging oats everywhere—trust me, I’ve learned this the messy way. The mixture will look dry at first, then suddenly come together into a thick, cohesive dough. Keep stirring until no dry spots remain. This takes about 2 minutes of vigorous mixing.
- Fold in the chocolate chips. Add the mini chocolate chips and fold them in gently. Make sure they’re evenly distributed throughout the dough, not all clustered in one spot.
- Let the mixture rest. This is the most important step. Cover the bowl with a clean kitchen towel and let it sit at room temperature for 5 minutes. During this time, the oats absorb moisture from the peanut butter and honey, making the dough easier to roll and giving the balls a better texture. I know it’s tempting to skip this, but don’t—it makes a real difference.
- Roll into balls. After the rest, scoop out about 1 tablespoon of dough (or use your cookie scoop). Roll it between your palms firmly but gently—you want a smooth ball, not a squished one. If the dough feels too sticky, wet your hands slightly with cold water. If it feels too dry, add a teaspoon of honey or a splash of milk. Place each ball on your parchment-lined baking sheet.
- Repeat until all dough is used. You should get about 18-20 balls, depending on how big you roll them. I usually get exactly 18 because I like them slightly generous.
- Chill for at least 30 minutes. Pop the baking sheet into the refrigerator. The balls need this time to firm up. If you try to eat one immediately, it’ll be soft and a bit messy—still delicious, but not ideal. After 30 minutes, they’re perfectly firm and ready to enjoy.
- Store properly. Transfer the chilled balls to an airtight container. Layer them between sheets of parchment paper if stacking to prevent sticking.
Pro tip: The dough should feel slightly sticky but not wet. If it sticks to your hands excessively, add another tablespoon of oats. If it crumbles and won’t hold together, add another tablespoon of honey. The rest period helps you gauge the true texture, so don’t adjust too much before that step.
Cooking Tips & Techniques
After making these protein balls more times than I can count, I’ve picked up a few tricks that make the process smoother and the results more consistent.
Temperature matters. If your peanut butter is cold from the fridge, it won’t mix well. Let it come to room temperature for about 20 minutes before starting. Same with honey—if it’s crystallized or thick, warm it gently by placing the jar in a bowl of hot water for a few minutes. Room-temperature ingredients blend into a smooth, uniform dough much more easily.
The texture test. Before rolling all the balls, make one test ball. If it holds together nicely and feels firm but pliable, proceed. If it crumbles, add a touch more honey. If it’s too sticky, add a sprinkle of oats. This saves you from rolling an entire batch that doesn’t work.
My biggest failure: The first time I made these, I used old protein powder that had clumped up. The balls turned out with weird hard bits that crunched when you bit into them—not in a good way. Always sift your protein powder if it looks lumpy. Or just buy fresh powder regularly, which is what I do now.
Multitasking tip: While the mixture rests for those 5 minutes, use the time to clean your mixing bowl and spatula. You’ll thank yourself when you’re done and the kitchen is already tidy. I also line my storage container during this time so everything’s ready to go.
Consistency trick: If you want perfectly uniform balls, weigh them. I use a small kitchen scale and aim for 25 grams each. It takes an extra 2 minutes but makes the batch look professional and ensures even portion sizes for tracking nutrition.
Variations & Adaptations
One of the best things about this recipe is how flexible it is. Here are some variations I’ve tried and loved:
Chocolate Peanut Butter Dream: Swap the vanilla protein powder for chocolate protein powder and add an extra tablespoon of cocoa powder. The chocolate-peanut butter combo is absolutely irresistible. My kids beg for this version every single week.
Vegan Version: Use maple syrup instead of honey and a plant-based protein powder. I’ve tested this with pea protein and brown rice protein—both work, though the texture is slightly less tender. Add an extra tablespoon of maple syrup if the dough seems dry.
Nut-Free Option: Substitute sunflower seed butter for the peanut butter. Sunflower butter has a similar consistency and works beautifully. Note that it can react with baking soda if you ever bake these (though we’re not baking here, so no worries). The flavor is slightly different but still delicious.
Add-In Adventures: Beyond chocolate chips, try shredded coconut, chopped dried cranberries, cacao nibs, or finely chopped nuts. My personal favorite variation includes 2 tablespoons of chia seeds and ¼ cup of dried cherries—it’s like a PB&J in ball form.
Lower Sugar: Reduce the honey to ¼ cup and use unsweetened protein powder. The balls will be less sweet but still satisfying. You can also use a monk fruit sweetener blend instead of honey, though you may need to add a tablespoon of water to get the right consistency.
Protein Boost: Add an extra scoop of protein powder (about ¼ cup more) and increase the honey by 1-2 tablespoons to compensate for the dryness. This bumps each ball up to about 8-9 grams of protein.
Serving & Storage Suggestions
These protein balls are incredibly versatile when it comes to serving. Here’s how I enjoy them and how to keep them fresh.
Serving temperature: I prefer them straight from the fridge—cold, firm, and satisfying. They’re also great at room temperature if you’re packing them for a snack on the go. Just don’t leave them out in warm weather for more than a couple of hours, as the chocolate chips can soften and the balls may lose their shape.
Perfect pairings: These are fantastic on their own, but they also pair beautifully with a cup of coffee in the morning or as a post-workout snack with a glass of milk. For a dessert twist, crumble one over a bowl of vanilla ice cream or yogurt.
Storage instructions: Place the balls in an airtight container in the refrigerator. They’ll stay fresh for up to 2 weeks—though in my house, they rarely last that long. If you want to keep them longer, freeze them. Arrange the balls in a single layer on a baking sheet and freeze for 1 hour, then transfer to a freezer-safe bag or container. They’ll keep for up to 3 months.
Reheating (if you can call it that): No reheating needed! Just take them out of the fridge or freezer and eat. If frozen, let them sit at room temperature for 5-10 minutes before enjoying. The texture softens slightly as they thaw, which some people prefer.
Flavor development: Interestingly, these balls taste even better after a day in the fridge. The flavors meld together, and the oats soften just a bit more. I often make a batch the night before I plan to serve them for optimal taste and texture.
Nutritional Information & Benefits
Here’s the approximate nutritional breakdown for one protein ball (based on 18 balls per batch):
| Nutrient | Amount Per Ball |
|---|---|
| Calories | 145 |
| Protein | 7g |
| Carbohydrates | 16g |
| Fiber | 3g |
| Sugar | 9g |
| Fat | 7g |
| Saturated Fat | 2g |
| Sodium | 85mg |
Health benefits: These aren’t just tasty—they’re genuinely good for you. The peanut butter provides healthy monounsaturated fats and plant-based protein. Oats offer soluble fiber that supports heart health and keeps you full. Flaxseed adds omega-3 fatty acids and extra fiber. And the protein powder helps with muscle recovery and satiety. Plus, no refined sugar—just natural sweetness from honey.
Dietary considerations: This recipe is naturally vegetarian. For gluten-free, use certified gluten-free oats. For vegan, swap honey for maple syrup. For nut-free, use sunflower seed butter. The recipe contains peanuts and may contain traces of other allergens depending on your protein powder and chocolate chips.
I personally love that I can grab one of these on my way out the door and feel energized for hours. It’s real food that actually fuels your body—not a processed snack bar full of ingredients I can’t pronounce.
Conclusion
These easy high-protein peanut butter protein balls have become a staple in my kitchen for good reason. They’re quick to make, packed with nutrition, and absolutely delicious. Whether you need a pre-workout boost, an afternoon pick-me-up, or a healthy treat that actually satisfies a sweet craving, this recipe delivers every single time.
I encourage you to make these your own. Add your favorite mix-ins, adjust the sweetness to your liking, or experiment with different nut butters. The beauty of this recipe is how forgiving it is—you really can’t mess it up. And if you do? Well, that’s how new variations are born.
I’d love to hear how yours turn out! Drop a comment below and let me know what variations you tried, or share a photo of your batch. And if you loved these as much as I do, don’t forget to share this recipe with a friend who needs a quick, healthy snack in their life. Happy rolling!
Frequently Asked Questions
Can I use crunchy peanut butter instead of creamy?
Absolutely! Crunchy peanut butter adds a nice texture with little peanut pieces throughout. Just note that the balls might be slightly less cohesive since the chunks create small air pockets. If using crunchy, make sure it’s still a natural variety without added sugars or oils.
My dough is too dry and crumbly. What did I do wrong?
This usually happens when the peanut butter is too thick or the protein powder is very absorbent. Try adding 1-2 tablespoons of honey or a splash of milk (dairy or non-dairy) and mix again. Let it rest for another 5 minutes before rolling. If it’s still dry, your protein powder might be the culprit—some brands are much more absorbent than others.
Can I make these without protein powder?
Yes, you can! Omit the protein powder and increase the oats by ¼ cup. You’ll lose some protein content, but the balls will still be tasty and satisfying. Alternatively, you can substitute the protein powder with an equal amount of oat flour or almond flour for a similar texture.
How long do these last at room temperature?
These are best kept refrigerated, but they can sit at room temperature for up to 4-6 hours without issue. If you’re packing them for a lunchbox or a hike, they’ll be fine for the day. Just avoid leaving them in a hot car or direct sunlight, as the chocolate chips can melt and the balls may soften too much.
Can I double this recipe?
Definitely! This recipe doubles beautifully. Just make sure your mixing bowl is large enough to handle the extra volume—I use my biggest bowl when making a double batch. The only thing that changes is the rolling time. I often make a triple batch and freeze most of them for easy snacking all month long.
Pin This Recipe!
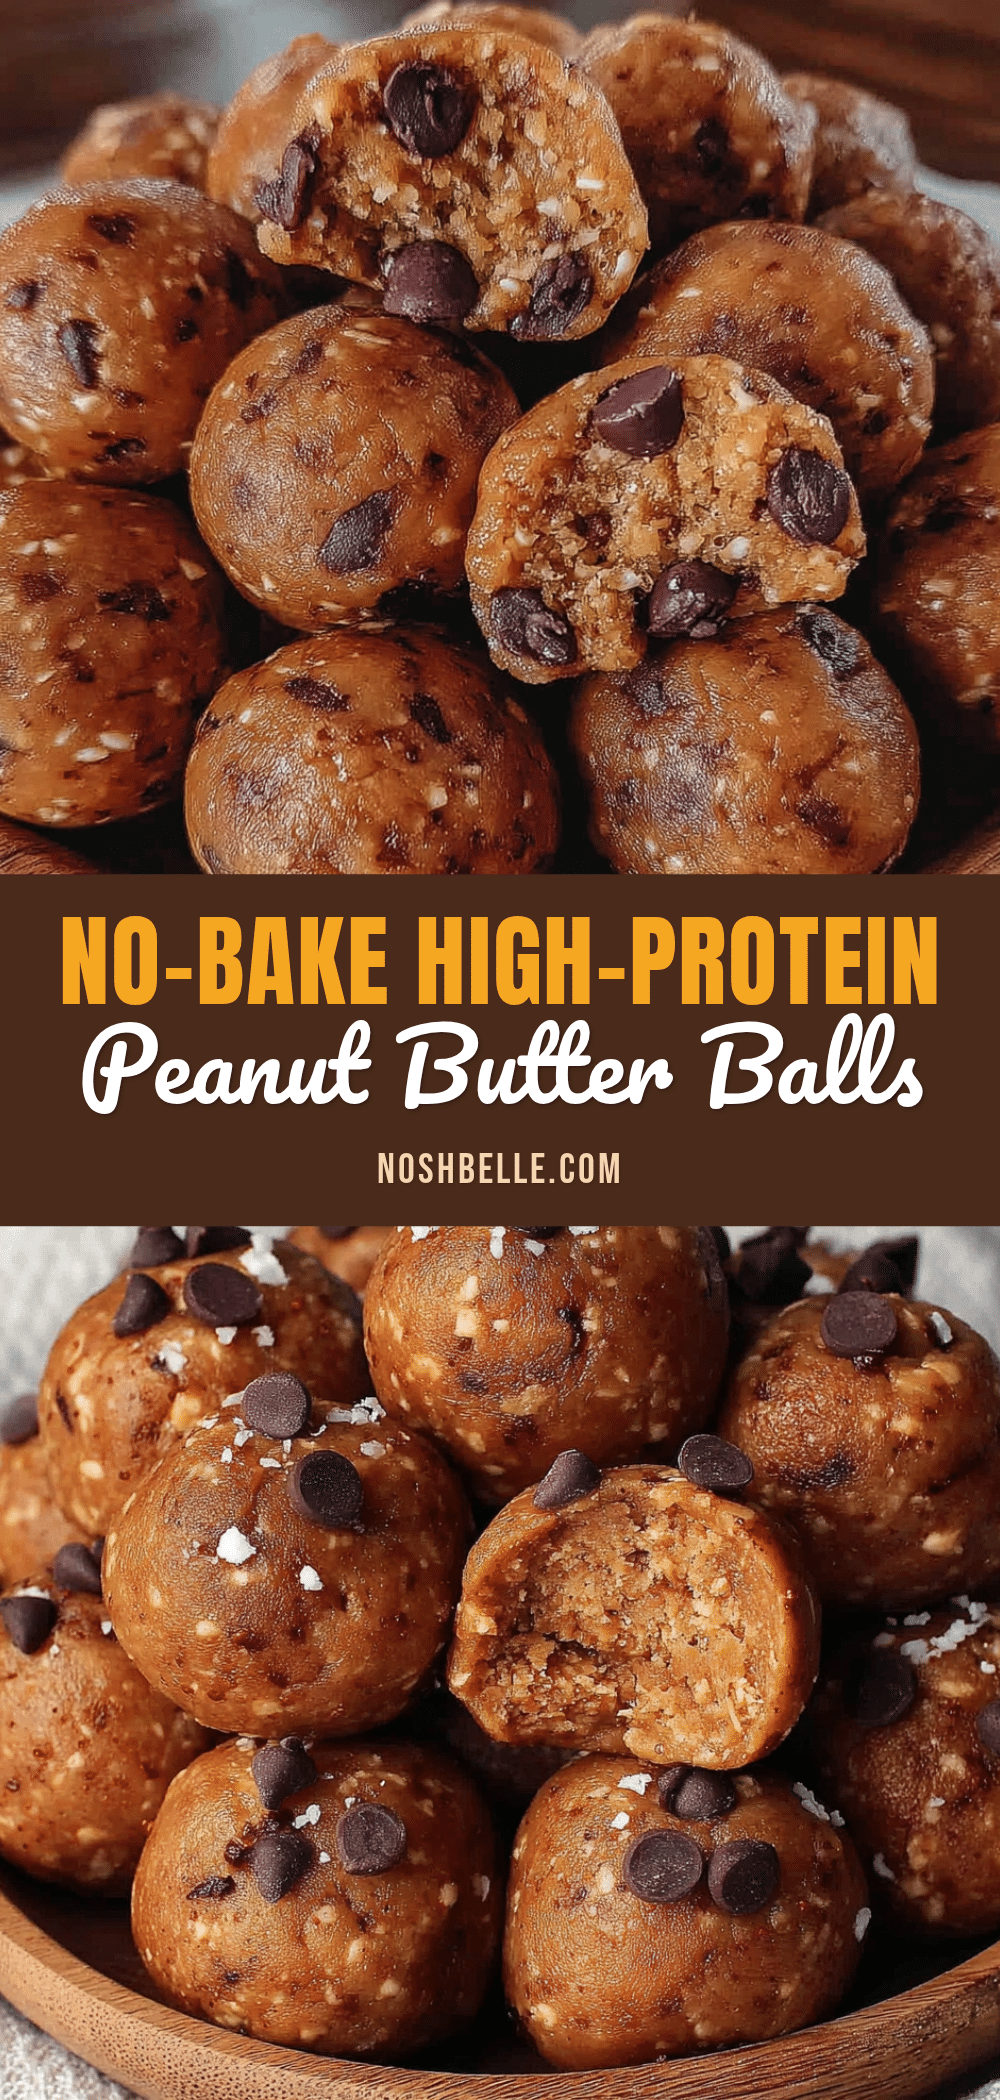
Easy High-Protein Peanut Butter Protein Balls Recipe

These no-bake peanut butter protein balls are quick, easy, and packed with protein. Made with simple pantry ingredients, they’re perfect for meal prep and taste like a treat, not a compromise.
- Prep Time: 15 minutes
- Cook Time: 0 minutes
- Total Time: 45 minutes (includes 30 minutes chilling)
- Yield: 18-20 balls 1x
- Category: Snack
- Cuisine: American
Ingredients
- 1 cup (240g) creamy natural peanut butter
- 1 ½ cups (135g) rolled oats
- ½ cup (about 50g) vanilla protein powder
- ⅓ cup (112g) honey
- ¼ cup (45g) mini chocolate chips
- 2 tablespoons (14g) ground flaxseed
- Pinch of sea salt (about ⅛ teaspoon)
Instructions
- In a large mixing bowl, combine the rolled oats, vanilla protein powder, ground flaxseed, and a pinch of sea salt. Whisk together with a fork until evenly distributed.
- Add the creamy peanut butter and honey on top of the dry ingredients. Do not mix yet.
- Stir everything together with a spatula or wooden spoon until a thick, cohesive dough forms and no dry spots remain (about 2 minutes of vigorous mixing).
- Fold in the mini chocolate chips until evenly distributed.
- Cover the bowl with a clean kitchen towel and let the mixture rest at room temperature for 5 minutes.
- Scoop out about 1 tablespoon of dough and roll it between your palms into a smooth ball. Place on a parchment-lined baking sheet.
- Repeat until all dough is used (about 18-20 balls).
- Chill the baking sheet in the refrigerator for at least 30 minutes to firm up.
- Transfer the chilled balls to an airtight container, layering with parchment paper if stacking. Store in the refrigerator.
Notes
Let the mixture rest for 5 minutes before rolling for best texture. If dough is too sticky, add more oats; if too dry, add more honey or a splash of milk. For uniform balls, weigh them at 25g each. These taste even better after a day in the fridge.
Nutrition
- Serving Size: 1 ball
- Calories: 145
- Sugar: 9
- Sodium: 85
- Fat: 7
- Saturated Fat: 2
- Carbohydrates: 16
- Fiber: 3
- Protein: 7
Keywords: peanut butter protein balls, high protein snack, no bake protein balls, healthy snack, meal prep snack, gluten free protein balls, vegan protein balls