My neighbor, Mrs. Gable, wasn’t trying to impress anyone. I’d stopped by to borrow a cup of sugar—how cliché, right?—and this rainbow of colors on her kitchen counter stopped me mid-sentence. She had these little plastic cups lined up like soldiers, each one a perfect stripe of yellow, orange, and white. It looked like someone had bottled a sunset. Or, you know, a bag of candy corn.
She shrugged when I asked about them. “Oh, it’s just Jell-O. My grandkids love ’em.” Just Jell-O. She said it like it was nothing, like she hadn’t just created the most visually stunning thing I’d seen all week. I stood there, honestly a little starstruck, while she told me the trick. “You just gotta be patient with the layers,” she said, wiping her hands on her apron. “Let ’em set.” That was it. No fancy equipment, no complicated techniques. Just patience and a few boxes of Jell-O.
I went home that afternoon with a sugar substitute and a head full of ideas. I mean, I had to try it myself. Maybe you’ve been there—you see a recipe that looks way too complicated to be worth it, but it’s so pretty you can’t stop thinking about it? That was me with these Easy Candy Corn Layered Jello Cups. I messed up the first batch, of course. I got impatient and poured the next layer too soon, and it all bled together into a muddy mess. But that failure taught me exactly what to do right.
These little cups have become my secret weapon for fall gatherings. They’re the dessert that gets the biggest reaction with the least amount of effort. Every time I bring them out, people lean in, smile, and say, “Wait, you made these?” And I get to shrug, just like Mrs. Gable, and say, “Oh, it’s just Jell-O.”
Why You’ll Love This Recipe
Let me tell you why these Easy Candy Corn Layered Jello Cups have earned a permanent spot in my dessert rotation. First off, they look like you spent hours in the kitchen. The truth? They come together with just five simple ingredients and a little bit of waiting time. It’s the kind of trick that makes you look like a kitchen wizard without breaking a sweat.
- Quick & Easy: The active prep time is maybe 15 minutes. The rest is just waiting for the Jell-O to set. You can do other stuff while the fridge does the work.
- Simple Ingredients: You probably already have most of these in your pantry. No weird specialty items or trips to three different stores.
- Perfect for Fall Gatherings: These are a hit at Halloween parties, Thanksgiving dinners, or just a fun after-school snack for the kids.
- Crowd-Pleaser: Kids go absolutely nuts for them, and adults can’t resist the nostalgic candy corn look. I’ve seen grown men get genuinely excited about these.
- Unbelievably Delicious: The combination of sweet orange and lemon Jell-O with that creamy white topping is just perfection. It tastes like childhood.
What makes this recipe different from the rest? It’s the patience trick. Most people rush the layers and end up with a muddy mess. I’ve tested the timing, figured out exactly how long each layer needs to set, and I’m sharing all those hard-learned lessons with you. This isn’t just another Jell-O recipe—it’s the one that actually works, every single time.
There’s something special about making a dessert that brings pure joy to people’s faces. These cups do that. They’re fun, they’re festive, and they remind us that sometimes the simplest things are the most memorable.
What Ingredients You Will Need
This recipe uses simple, pantry-friendly ingredients to create a dessert that looks way more impressive than it actually is. Here’s what you’ll need to grab:
- 1 box (6 oz) Orange Jell-O (I prefer Jell-O brand for consistent setting, but store brands work fine too)
- 1 box (6 oz) Lemon Jell-O (this gives you that bright yellow layer; you can also use pineapple flavor in a pinch)
- 1 can (14 oz) Sweetened Condensed Milk (this is the secret to that creamy white layer—don’t skip it!)
- 2 envelopes (0.25 oz each) Unflavored Gelatin (Knox brand is my go-to; this helps the white layer set firmly)
- Boiling Water (for dissolving the Jell-O; you’ll need about 2 cups total, divided)
- Cold Water (about 1 cup, divided, for the unflavored gelatin and for the white layer)
Ingredient Selection Tips: Look for Jell-O boxes that aren’t expired—old gelatin won’t set properly. For the unflavored gelatin, I always keep Knox brand on hand because it’s reliable and dissolves smoothly without clumps. If you’re using a store brand, just make sure it’s unflavored and unsweetened.
Substitution Guidance: You can swap the lemon Jell-O for pineapple or even white grape flavor if you want a slightly different taste. For a sugar-free version, use sugar-free Jell-O and sugar-free sweetened condensed milk—just note that the texture might be slightly softer. If you’re dairy-free, coconut sweetened condensed milk works beautifully in the white layer, though it will have a slight coconut flavor that actually pairs nicely with the citrus.
Pro Tip from My Kitchen: I always buy an extra box of each Jell-O flavor just in case. There’s nothing worse than getting halfway through and realizing you’re short. Plus, you can use the extras for a second batch because trust me, people will ask for more.
Equipment Needed
You don’t need a fancy kitchen to pull off these Easy Candy Corn Layered Jello Cups. Here’s what you’ll need:
- Small clear plastic cups (7 oz size) – These are perfect for showing off the layers. I get mine at the party supply store. You’ll need about 10-12 cups.
- 2 medium mixing bowls – One for each Jell-O flavor. Glass or heat-safe plastic works best.
- 1 small bowl – For the unflavored gelatin mixture.
- Measuring cups – For the boiling water and cold water.
- Whisk – To make sure the gelatin dissolves completely.
- Liquid measuring cup – For easy pouring into the cups.
- Refrigerator space – You’ll need a flat spot in your fridge where the cups can sit undisturbed.
- Patience – Okay, this isn’t equipment, but it’s the most important tool you’ll need!
Budget-Friendly Alternatives: If you don’t have clear plastic cups, small glass jars or even ramekins work. You just won’t see the layers as clearly. I’ve also used silicone muffin cups in a pinch—they peel away easily and the Jell-O pops out like a little candy corn-shaped treat.
My Experience: I learned the hard way that using metal bowls can sometimes affect how gelatin sets. Stick with glass or heat-safe plastic. And please, for the love of all things jiggly, use clear cups. The whole point is showing off those beautiful layers!
Preparation Method
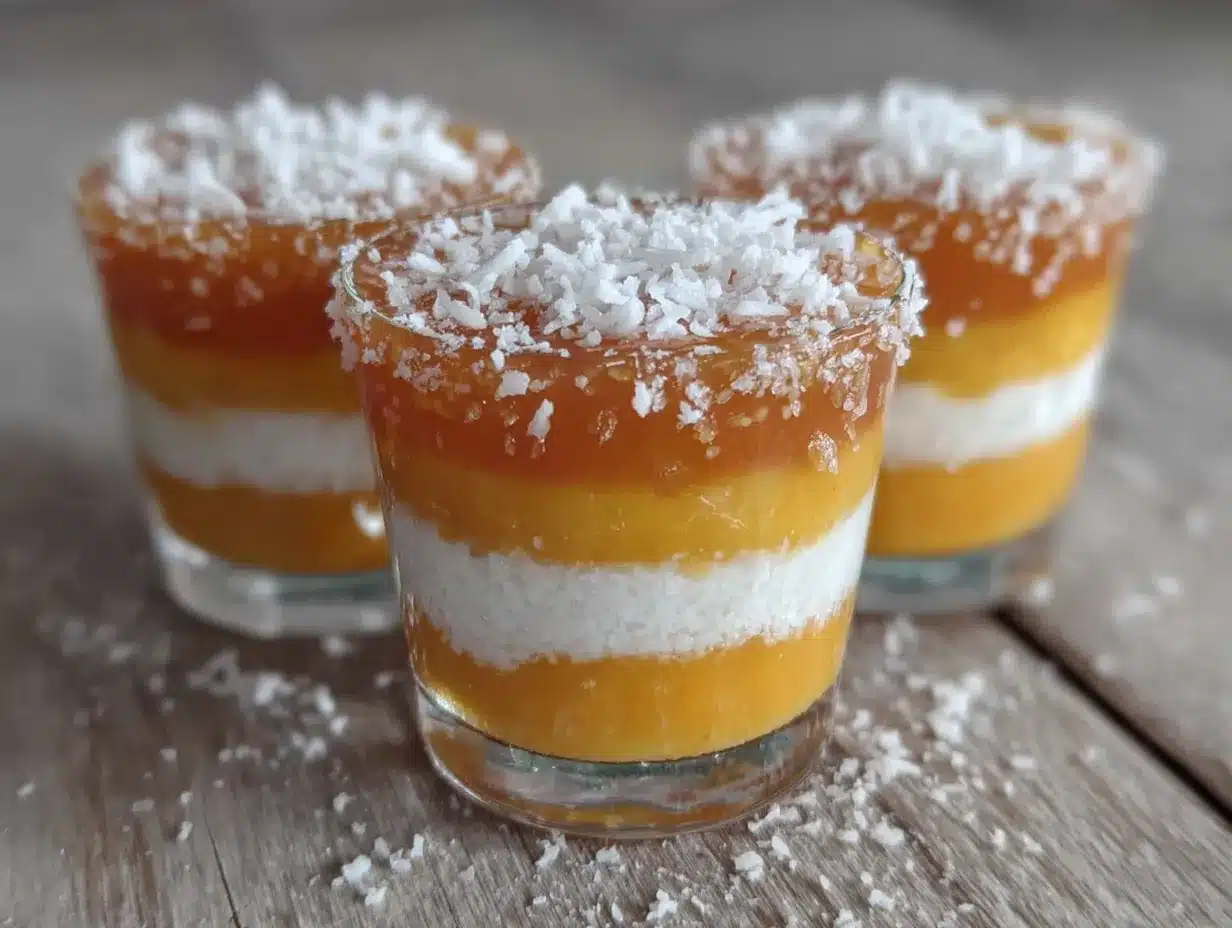
Okay, let’s get to the fun part. Follow these steps carefully, and you’ll have gorgeous, Instagram-worthy Jello Cups in no time.
- Prepare the Orange Layer (Bottom Layer): In a medium bowl, empty the entire box of orange Jell-O. Add 1 cup of boiling water and whisk until the powder is completely dissolved—about 2 minutes. No granules should be left. Set aside to cool slightly while you prepare the next step.
- Pour the Orange Layer: Using your liquid measuring cup, carefully pour the orange Jell-O mixture into each of your clear plastic cups, filling them about one-third of the way. You want the layer to be about 1 inch deep. Place the cups on a tray and carefully transfer them to the refrigerator. Let them set for about 45 minutes to 1 hour. The layer should be firm to the touch but not completely solid—it should jiggle slightly when you tap the cup.
- Prepare the White Layer: While the orange layer is setting, make the white layer. In a small bowl, sprinkle both envelopes of unflavored gelatin over 1/2 cup of cold water. Let it sit for about 5 minutes—this is called “blooming” and it helps the gelatin dissolve evenly. In a separate small saucepan, heat 1/2 cup of water until it’s just simmering. Pour the hot water over the bloomed gelatin and whisk until completely dissolved. Then, whisk in the entire can of sweetened condensed milk until the mixture is smooth and creamy. Set aside at room temperature—do not refrigerate it yet.
- Pour the White Layer: Once the orange layer is set, take the cups out of the fridge. Gently pour the white mixture over the orange layer, filling each cup another one-third of the way. Be careful not to pour too fast or you’ll disturb the orange layer. Return the cups to the fridge for another 45 minutes to 1 hour.
- Prepare the Yellow Layer (Top Layer): While the white layer sets, prepare the lemon Jell-O. In a medium bowl, empty the lemon Jell-O powder and add 1 cup of boiling water. Whisk until completely dissolved. Let it cool to room temperature—about 15 to 20 minutes. You don’t want it hot when you pour it over the white layer.
- Pour the Yellow Layer: Once the white layer is set, take the cups out. Gently pour the cooled lemon Jell-O over the white layer, filling the cups to the top. Return to the fridge and let them set for at least 4 hours, but overnight is best.
- Serve and Enjoy: Once fully set, these cups are ready to go. Serve them chilled straight from the fridge. They’ll hold their shape beautifully, and those layers will be perfectly distinct.
Troubleshooting Tips: If your layers are bleeding into each other, you didn’t let the previous layer set long enough. Patience is key here. If the white layer is too soft, you might have used too much water or not enough gelatin. And if the Jell-O has bubbles on top, you whisked too vigorously—try stirring more gently next time.
Sensory Cues: The orange layer should feel firm but springy when you tap the cup. The white layer should be creamy and opaque, like a thick pudding. The yellow layer should be clear and bright, with no cloudiness. When you hold the cup up to the light, you should see three distinct, crisp layers.
My Personal Efficiency Tip: I set a timer on my phone for each layer. That way, I can go do other things and not worry about forgetting. I usually start these in the morning so they’re ready by dinner time.
Cooking Tips & Techniques
Let me share some hard-won wisdom from my Jell-O journey. I’ve made every mistake in the book so you don’t have to.
The Patience Principle: The number one mistake people make is rushing the layers. I get it—you’re excited. But if you pour the next layer before the previous one is set, you’ll end up with a muddy mess. I once tried to speed things up by putting the cups in the freezer. Don’t do it. The Jell-O sets unevenly and gets icy. The fridge is your friend.
The Temperature Trick: Make sure each layer is at room temperature before you pour it over the set layer. Hot liquid will melt the layer underneath. I learned this the hard way when my beautiful orange layer turned into a wavy, bleeding disaster. Let your Jell-O mixtures cool on the counter for 15-20 minutes before pouring.
The Pouring Technique: Use a liquid measuring cup with a spout for pouring. Pour slowly and gently against the side of the cup, not directly into the center. This minimizes splashing and keeps the layers clean. I use a small funnel for the white layer because it’s thicker—it helps control the flow.
Consistency Check: The white layer should be the consistency of heavy cream when you pour it. If it’s too thick, it won’t level out evenly. If it’s too thin, it might not set properly. The sweetened condensed milk mixture should be smooth and pourable.
Multitasking Strategy: While the orange layer sets, prepare the white layer mixture. While the white layer sets, prepare the yellow Jell-O and let it cool. This way, you’re always ready for the next step without any downtime.
My Biggest Failure: I once tried to make these for a party and ran out of time. I only let each layer set for 20 minutes. The result? A sad, swirly mess that looked like tie-dye gone wrong. Everyone still ate them, but they weren’t the stunning showstoppers I wanted. Learn from my mistake—give each layer its full setting time.
Variations & Adaptations
Once you’ve mastered the basic technique, the possibilities are endless. Here are some of my favorite variations:
- Halloween Ghost Cups: Use lime Jell-O for the bottom layer (green), then white, then orange for the top. It looks like a little ghost in a cup. I did these for a Halloween party and they were a huge hit with the kids.
- Fourth of July Cups: Use berry blue Jell-O for the bottom, white for the middle, and strawberry for the top. Red, white, and blue! I brought these to a barbecue and they disappeared before the burgers were done.
- Dairy-Free Version: Swap the sweetened condensed milk for a can of coconut sweetened condensed milk. The coconut flavor is subtle and pairs beautifully with the citrus Jell-O. Just make sure to use unflavored gelatin that’s certified vegan if needed.
- Adult Version: Add a splash of vodka or rum to each Jell-O layer before pouring. Use about 1 tablespoon per cup of liquid. Just remember that alcohol can affect how gelatin sets, so you might need to let them set a bit longer. I made these for a grown-up game night and they were a fun twist.
- Mini Cups: Use shot glasses or small 2-ounce cups for party appetizers. They’re perfect for sampling multiple flavors. Just reduce the setting time slightly since the layers are thinner.
My Personal Variation: I once tried adding a layer of crushed graham crackers between the white and yellow layers for a little crunch. It was delicious, but the crackers got soggy after a day. If you try this, add them right before serving.
Serving & Storage Suggestions
These Easy Candy Corn Layered Jello Cups are best served chilled, straight from the fridge. The cold temperature keeps the layers firm and distinct. I like to serve them on a tray with a little spoon tucked into each cup.
Presentation Tips: Arrange the cups on a white platter to make the colors pop. You can add a small piece of candy corn on top of each cup for garnish. For a Halloween party, place them on a tray with fake spider webs or little plastic spiders. The kids will lose their minds.
Complementary Dishes: These cups pair beautifully with other light desserts. I often serve them alongside a plate of sugar cookies or a bowl of fresh fruit. For a fall-themed spread, add some pumpkin pie or apple crisp. The citrusy sweetness of the Jell-O balances the richness of heavier desserts.
Storage Instructions: Keep the cups covered in the refrigerator. You can use plastic wrap or put the cups in a covered container. They’ll stay fresh for up to 5 days. The layers might start to soften after 3 days, but they’ll still taste great.
Freezer Instructions: I don’t recommend freezing these. The texture gets icy and the layers separate. If you need to make them ahead, prepare them up to 2 days in advance and keep them refrigerated.
How Flavors Develop: The Jell-O flavors actually meld together slightly over time. The first day, each layer tastes distinct. By day three, there’s a subtle blending that creates a more complex flavor profile. Honestly, I think they taste even better on day two.
Nutritional Information & Benefits
Here’s a rough estimate of the nutritional content per serving (one 7-ounce cup):
| Nutrient | Amount |
|---|---|
| Calories | 180 |
| Total Fat | 2g |
| Saturated Fat | 1.5g |
| Cholesterol | 10mg |
| Sodium | 80mg |
| Total Carbohydrates | 38g |
| Sugars | 36g |
| Protein | 4g |
Health Benefits: Gelatin is a good source of collagen, which supports joint health and skin elasticity. The sweetened condensed milk provides calcium and protein. Of course, this is a treat, not a health food, but it’s nice to know there are some redeeming qualities!
Dietary Considerations: This recipe is naturally gluten-free and nut-free. For a sugar-free version, use sugar-free Jell-O and sugar-free sweetened condensed milk. For a dairy-free version, use coconut sweetened condensed milk.
Potential Allergens: This recipe contains dairy from the sweetened condensed milk. It does not contain eggs, soy, or common tree nuts.
My Personal Wellness Perspective: I believe in balance. These cups are a fun, festive treat that brings joy to people. I don’t stress about the sugar content because they’re an occasional indulgence. Life is too short to skip dessert, you know?
Conclusion
These Easy Candy Corn Layered Jello Cups are more than just a dessert—they’re a conversation starter. They bring smiles to faces, spark memories of Halloween past, and make you look like a kitchen genius with minimal effort. Honestly, what’s not to love?
I hope you give these a try. Don’t be afraid to customize them to your taste. Swap the colors for your favorite holiday, experiment with different flavors, or add your own special touch. The basic technique is so versatile that you can adapt it to any occasion.
Why do I keep making these? Because every time I set them on the table, I watch people’s faces light up. I remember Mrs. Gable’s casual shrug, and I feel connected to that simple, joyful moment. Cooking is about sharing happiness, and these cups deliver it in every bite.
So go ahead—grab some Jell-O, clear some fridge space, and make a batch. And when your friends ask how you did it, just shrug and say, “Oh, it’s just Jell-O.” They’ll never believe you, and that’s the best part.
Have you tried this recipe? I’d love to hear about your variations and successes. Drop a comment below and share your Jell-O creations. Happy cooking, friends!
Frequently Asked Questions
Can I use sugar-free Jell-O for this recipe?
Yes, absolutely! Sugar-free Jell-O works perfectly. Just keep in mind that sugar-free versions can sometimes set a bit softer than regular Jell-O. You might need to let them set for an extra 15-20 minutes per layer. The taste is still great, and it’s a good option if you’re watching your sugar intake.
How long do the layers actually need to set?
Each layer needs about 45 minutes to 1 hour in the refrigerator. The white layer might need a full hour because it’s thicker. I always err on the side of caution and give them the full hour. If you’re in a rush, you can try 30 minutes, but the layers might not be as clean. Patience really is the secret ingredient here.
Can I make these in a large dish instead of individual cups?
You can, but it’s trickier. The layers need to be poured very carefully to avoid mixing. I recommend using a clear glass dish so you can see the layers. You’ll need to let each layer set completely before adding the next. The setting time might be longer for a larger dish since there’s more volume. If you do this, plan for at least 1.5 hours per layer.
Why did my white layer turn out grainy?
Grainy white layer usually means the unflavored gelatin wasn’t fully dissolved. Make sure you let it bloom properly in cold water for 5 minutes before adding the hot water. Also, whisk thoroughly until the mixture is completely smooth. If you see any lumps, strain the mixture through a fine-mesh sieve before pouring.
Can I add fruit to the layers?
You can, but be careful. Fresh fruit contains enzymes that can break down gelatin and prevent it from setting. If you want to add fruit, use canned fruit that’s been drained well, or cook the fresh fruit first to deactivate the enzymes. I’ve added mandarin oranges to the orange layer and it turned out great—just make sure they’re well-drained.
Pin This Recipe!
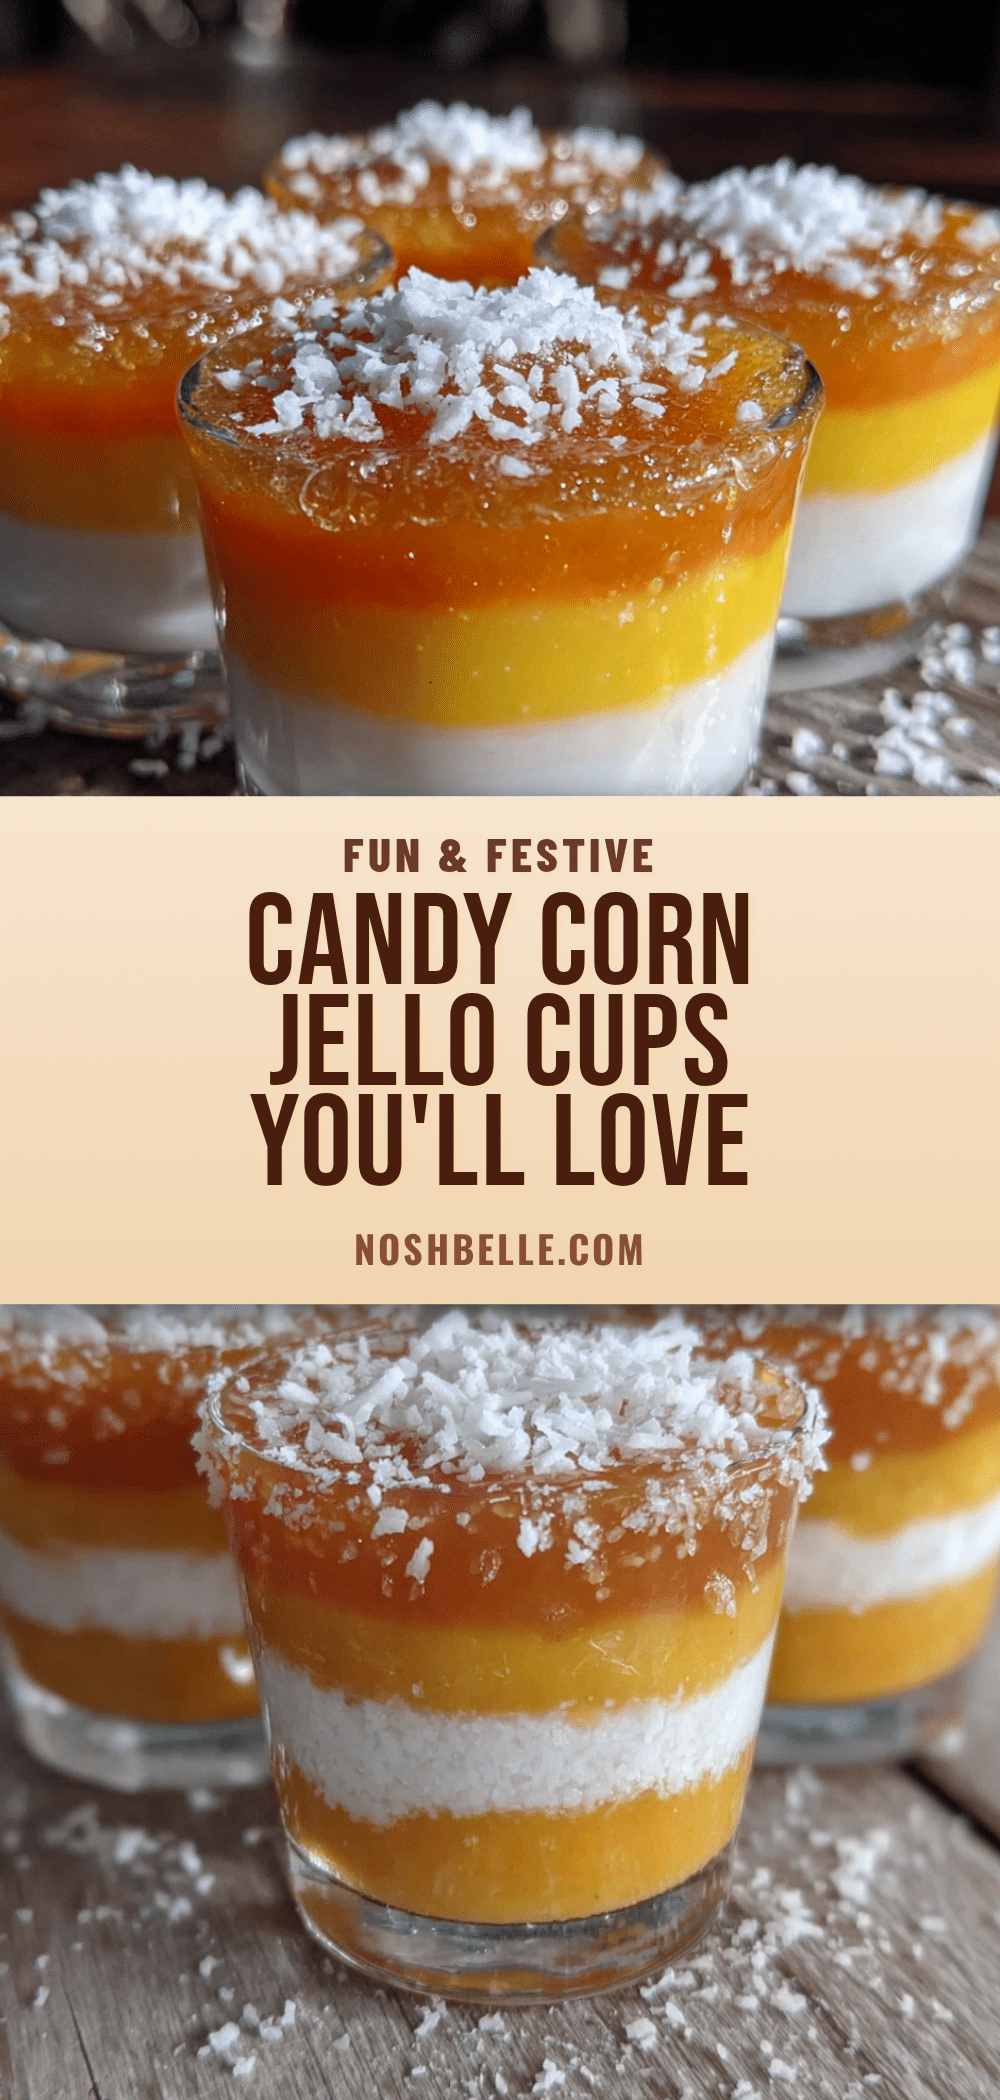
Easy Candy Corn Layered Jello Cups: 5-Ingredient Dessert
These Easy Candy Corn Layered Jello Cups are a stunning, no-bake dessert with just five simple ingredients. Perfect for fall gatherings, they feature vibrant layers of orange, white, and yellow that look like candy corn and taste like childhood.
- Prep Time: 15 minutes
- Cook Time: 0 minutes
- Total Time: 6 hours 15 minutes (including setting time)
- Yield: 10-12 servings 1x
- Category: Dessert
- Cuisine: American
Ingredients
- 1 box (6 oz) Orange Jell-O
- 1 box (6 oz) Lemon Jell-O
- 1 can (14 oz) Sweetened Condensed Milk
- 2 envelopes (0.25 oz each) Unflavored Gelatin
- Boiling Water (about 2 cups, divided)
- Cold Water (about 1 cup, divided)
Instructions
- Prepare the Orange Layer (Bottom Layer): In a medium bowl, empty the entire box of orange Jell-O. Add 1 cup of boiling water and whisk until the powder is completely dissolved—about 2 minutes. No granules should be left. Set aside to cool slightly while you prepare the next step.
- Pour the Orange Layer: Using your liquid measuring cup, carefully pour the orange Jell-O mixture into each of your clear plastic cups, filling them about one-third of the way. You want the layer to be about 1 inch deep. Place the cups on a tray and carefully transfer them to the refrigerator. Let them set for about 45 minutes to 1 hour. The layer should be firm to the touch but not completely solid—it should jiggle slightly when you tap the cup.
- Prepare the White Layer: While the orange layer is setting, make the white layer. In a small bowl, sprinkle both envelopes of unflavored gelatin over 1/2 cup of cold water. Let it sit for about 5 minutes—this is called ‘blooming’ and it helps the gelatin dissolve evenly. In a separate small saucepan, heat 1/2 cup of water until it’s just simmering. Pour the hot water over the bloomed gelatin and whisk until completely dissolved. Then, whisk in the entire can of sweetened condensed milk until the…
- Pour the White Layer: Once the orange layer is set, take the cups out of the fridge. Gently pour the white mixture over the orange layer, filling each cup another one-third of the way. Be careful not to pour too fast or you’ll disturb the orange layer. Return the cups to the fridge for another 45 minutes to 1 hour.
- Prepare the Yellow Layer (Top Layer): While the white layer sets, prepare the lemon Jell-O. In a medium bowl, empty the lemon Jell-O powder and add 1 cup of boiling water. Whisk until completely dissolved. Let it cool to room temperature—about 15 to 20 minutes. You don’t want it hot when you pour it over the white layer.
- Pour the Yellow Layer: Once the white layer is set, take the cups out. Gently pour the cooled lemon Jell-O over the white layer, filling the cups to the top. Return to the fridge and let them set for at least 4 hours, but overnight is best.
- Serve and Enjoy: Once fully set, these cups are ready to go. Serve them chilled straight from the fridge. They’ll hold their shape beautifully, and those layers will be perfectly distinct.
Notes
Patience is key—let each layer set fully before adding the next. Use clear cups to show off the layers. For best results, let the final set go overnight.
Nutrition
- Serving Size: 1 cup (7 oz)
- Calories: 180
- Sugar: 36
- Sodium: 80
- Fat: 2
- Saturated Fat: 1.5
- Carbohydrates: 38
- Protein: 4
Keywords: candy corn, Jell-O, layered dessert, Halloween, fall, no-bake, easy dessert, kid-friendly


