I had declared Halloween candy a lost cause for years. Not the candy itself—I mean the whole predictable parade of it. The same mini chocolate bars, the same sad little wrappers, the same sugar coma by 8 PM. Every October 31st, I’d buy the bags, dump them in a bowl, and feel a little disappointed before the first trick-or-treater even rang the bell. Then last October, my sister showed up at my door with a tray of apple slices, a jar of caramel, and six little bowls of toppings. She caught me mid-eye-roll, honestly. But by the time the second batch of neighbors arrived, I was standing in my kitchen doorway, holding a plate of caramel-drizzled apples like I’d invented the whole thing. The power went out halfway through my third slice—the one loaded with crushed pretzels and dark chocolate chips—and I didn’t even care. I just stood there in the dark, eating it, grinning like an idiot.
That’s the thing about this Easy Caramel Apple Slices Halloween Topping Bar. It feels like a party trick, but it’s really just a smart way to let people build their own perfect bite. You don’t have to commit to one topping. You don’t have to wrestle with a whole apple on a stick. And you definitely don’t have to spend more than fifteen minutes getting it all ready. I mean, maybe you’ve been there—standing in the candy aisle, staring at bags of stuff you don’t even want, wondering why Halloween snacks can’t feel a little more intentional. Well, this is that. It’s the Halloween dessert that actually makes you happy you’re the one hosting.
I keep making it because it solves the problem nobody asked me to solve but everyone secretly wanted fixed. It’s fast. It’s flexible. And honestly, it’s the only Halloween treat I’ve ever made that left me with zero regrets and zero leftovers. The kids went wild for the sprinkles. The adults hovered near the sea salt and toffee bits. And me? I just stood there, holding my caramel apple slice, proving myself wrong one crunchy, sweet bite at a time.
Why You’ll Love This Recipe
Let me tell you why this Easy Caramel Apple Slices Halloween Topping Bar became my non-negotiable fall staple. I tested this setup at three different gatherings last season—a school party, a family dinner, and my own Halloween open house—and every single time, people lit up. Not because the apples were fancy. Because they got to choose.
- Quick & Easy: You can prep everything in under 15 minutes. Slice the apples, warm the caramel, arrange the toppings. That’s it. No baking, no boiling sugar, no complicated steps.
- Simple Ingredients: You probably have most of these in your pantry right now. Apples, caramel sauce, a few crunchy and salty toppings. No special grocery runs required.
- Perfect for Halloween Parties: This is the kind of dessert that keeps people lingering around the table. It’s interactive, it’s visually fun, and it works for kids and adults alike.
- Crowd-Pleaser: I’ve watched picky eaters load up slices with nothing but sprinkles, and I’ve watched grown adults carefully layer crushed cookies and sea salt. Everyone finds their combination.
- Unbelievably Delicious: The contrast between crisp apple, sticky caramel, and crunchy toppings is next-level comfort food. It’s sweet, salty, cold, and warm all at once.
What makes this version different from the usual caramel apple situation is the flexibility. No sticky fingers wrestling with a whole apple on a stick. No commitment to one flavor. You get to sample, mix, and remake as many times as you want. It’s comfort food reimagined—faster, smarter, and with the same soul-soothing satisfaction. Perfect for impressing guests without stress, or turning a simple Tuesday night into something memorable.
What Ingredients You Will Need
This recipe uses simple, wholesome ingredients to deliver that perfect balance of sweet, tart, salty, and crunchy. Most of these are pantry staples or easy to find at any grocery store.
- Apples: 4 large apples (I prefer Honeycrisp or Granny Smith for their tartness and firm texture). Look for apples that are crisp and free of bruises. If you want a sweeter bite, Fuji or Gala work beautifully too.
- Caramel Sauce: 1 cup store-bought or homemade caramel sauce. I personally recommend the jarred kind from the baking aisle—it’s thick, rich, and doesn’t slide off the apples. If you’re feeling ambitious, you can make your own with butter, brown sugar, and cream.
- Chocolate Chips: 1/2 cup semi-sweet or dark chocolate chips. These add richness and a slight bitterness that balances the caramel. Milk chocolate works too if you prefer a sweeter profile.
- Crushed Pretzels: 1/2 cup crushed pretzel twists. The saltiness is crucial here—it cuts through the sweetness and adds an incredible crunch. I like to crush them by hand so there are some bigger pieces and some fine bits.
- Toffee Bits: 1/4 cup toffee bits or crushed Heath bars. These add a buttery, crunchy texture that pairs perfectly with caramel. You can find them in the baking aisle near the chocolate chips.
- Halloween Sprinkles: 2 tablespoons festive sprinkles (orange, black, purple). These are purely for fun, but honestly, they make the whole thing feel like a celebration. Kids go wild for them.
- Sea Salt: 1/2 teaspoon flaky sea salt (like Maldon). A tiny sprinkle on top transforms the entire flavor profile. Don’t skip it—it’s the secret to making these taste professional.
- Chopped Nuts: 1/4 cup chopped peanuts or pecans (optional). Adds another layer of crunch and a toasty flavor. Toast them lightly in a dry pan for extra depth.
- White Chocolate: 1/4 cup white chocolate chips (optional). Drizzle melted white chocolate over the finished slices for a beautiful contrast against the caramel. It’s purely aesthetic, but it looks stunning.
- Lemon Juice: 1 tablespoon lemon juice mixed with 1 cup water. This is for dipping the apple slices to prevent browning. It’s a small step that makes a huge difference if you’re prepping ahead.
Equipment Needed
You don’t need anything fancy for this recipe. Here’s what you’ll need to pull it off:
- Sharp Knife and Cutting Board: A good chef’s knife makes slicing apples even and safe. I’ve used a dull knife before, and it’s a mess—trust me, sharp is better.
- Small Saucepan or Microwave-Safe Bowl: For warming the caramel sauce. A saucepan on low heat works perfectly, but a microwave works in 20-second bursts if you’re short on time.
- Serving Platter or Tray: A large wooden board or a white platter shows off the colors beautifully. I use a rectangular wooden board I found at a thrift store—it’s got character.
- Small Bowls: At least 5 to 6 small bowls for the toppings. Ramekins work great. You want each topping to have its own space so people can dip and sprinkle easily.
- Skewers or Toothpicks: For picking up the apple slices. Short skewers are ideal—they’re sturdy enough to hold a loaded slice. Toothpicks work for smaller pieces.
- Paper Towels: For drying the apple slices after their lemon water bath. Pat them dry thoroughly so the caramel sticks properly.
Preparation Method
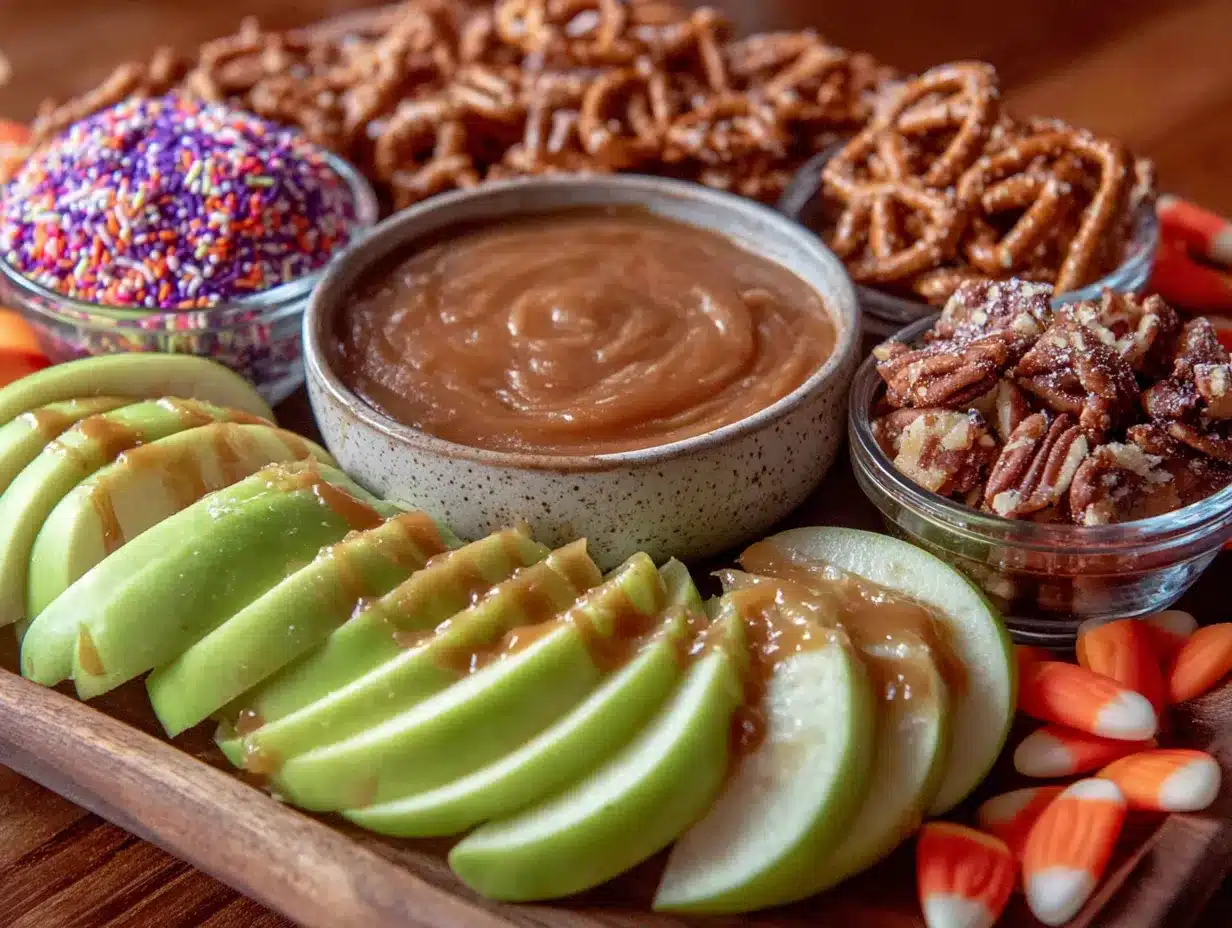
Follow these steps, and you’ll have a gorgeous Halloween topping bar ready in no time. I’ve included some notes from my own trial-and-error moments so you can skip the mistakes I made.
- Prep the apples (5 minutes): Fill a large bowl with 1 cup of water and 1 tablespoon of lemon juice. Wash and core your apples, then slice them into rounds about 1/4-inch thick. I like to cut them crosswise so you get a star shape from the core in the center. Drop each slice into the lemon water immediately to prevent browning. Let them soak for 2 minutes, then pat them dry with paper towels. This step is non-negotiable if you’re prepping more than 30 minutes ahead.
- Warm the caramel (2 minutes): Pour the caramel sauce into a small saucepan and warm it over low heat, stirring occasionally. If using a microwave, transfer to a microwave-safe bowl and heat in 20-second bursts, stirring between each. You want it warm and pourable, not hot. I learned this the hard way—hot caramel slides right off the apple and makes a mess.
- Arrange the toppings (3 minutes): Set out your small bowls and fill each one with a different topping: chocolate chips, crushed pretzels, toffee bits, Halloween sprinkles, chopped nuts, and flaky sea salt. If you’re using white chocolate, melt it in a small bowl the same way you did the caramel. Arrange the bowls around your serving platter so people can move along the line easily.
- Assemble the bar (2 minutes): Place the dried apple slices on your serving platter in a single layer or slightly overlapping. Pour the warm caramel into a small bowl or a ramekin and place it in the center of the platter. Add a small spoon or a mini ladle for drizzling. If you want to get fancy, you can drizzle the caramel directly over the apple slices and let people add their own toppings. I prefer letting everyone drizzle their own—it’s more interactive and keeps the apples from getting soggy.
- Serve immediately: Invite everyone to grab a slice, drizzle caramel over it, and then sprinkle or dip their chosen toppings. The combination possibilities are endless. My personal favorite is Granny Smith apple with caramel, dark chocolate chips, crushed pretzels, and a tiny pinch of sea salt. It’s sweet, salty, and crunchy all at once.
- Optional: Drizzle white chocolate (2 minutes): If you melted white chocolate, drizzle it over the finished slices using a fork or a small piping bag. It adds a beautiful visual contrast and an extra layer of sweetness. I like to do this right before serving so it looks fresh and glossy.
Cooking Tips & Techniques
I’ve made this Easy Caramel Apple Slices Halloween Topping Bar at least a dozen times now, and I’ve learned a few things the hard way. Here are my best tips to make yours perfect on the first try.
Choose the right apple. Granny Smith is my go-to because the tartness cuts through the sweet caramel beautifully. Honeycrisp is a close second—it’s sweet but still firm enough to hold up. Avoid Red Delicious; they turn mealy and soft within minutes. I learned this when I grabbed the wrong bag at the store and ended up with sad, mushy slices.
Dry the apples thoroughly. After the lemon water bath, pat each slice completely dry. If there’s any moisture on the surface, the caramel will slide right off. I usually lay them out on a clean kitchen towel and blot the tops gently. It makes a huge difference.
Don’t overheat the caramel. Warm it just enough to make it pourable. If it gets too hot, it becomes thin and runny and won’t stick to the apples. I aim for a consistency similar to warm honey—thick but flowy. If you accidentally overheat it, let it cool for a minute before using.
Crush the pretzels unevenly. Some big pieces, some small crumbs—this gives you texture variety. I put the pretzels in a zip-top bag and hit them a few times with a rolling pin. It’s oddly satisfying and gives you perfect control over the chunkiness.
Prep everything before anyone arrives. This is a bar-style setup, so you want everything ready to go when guests show up. Slice the apples, arrange the toppings, warm the caramel—all of it can be done 30 minutes ahead. The apples will stay fresh if you keep them in the lemon water until the last minute.
Variations & Adaptations
One of the best things about this recipe is how easy it is to adapt. Here are a few ways I’ve changed it up depending on the crowd or the occasion.
Dietary Adaptations: For a dairy-free version, use a dairy-free caramel sauce (many store-bought brands are naturally dairy-free) and skip the chocolate chips or use dairy-free chocolate. For a gluten-free option, swap the pretzels for gluten-free pretzels or crushed gluten-free cookies. I’ve done both, and honestly, nobody noticed the difference.
Seasonal Twists: In the fall, I add crushed cinnamon graham crackers and a sprinkle of pumpkin pie spice. For Christmas, I swap the Halloween sprinkles for red and green ones and add crushed candy canes. In summer, fresh berries and a drizzle of honey make a lighter, fruitier version. The base stays the same; the toppings just change with the season.
Flavor Variations: Try using different caramel flavors—salted caramel, bourbon caramel, or even apple cider caramel. I made a batch with bourbon caramel last Thanksgiving, and it was gone in ten minutes. You can also swap the chocolate chips for white chocolate, butterscotch, or peanut butter chips. Each one gives a completely different vibe.
Different Cooking Methods: If you’re feeling adventurous, you can grill the apple slices for about 2 minutes per side before assembling. The heat softens them slightly and brings out their natural sweetness. I tried this at a summer barbecue, and the smoky caramel combination was incredible.
Serving & Storage Suggestions
This recipe is best served immediately, but I’ve got some tips for making it work even if you need to prep ahead or deal with leftovers.
Serving Temperature: Serve the apple slices cold or at room temperature, with the caramel warm. The temperature contrast is part of the magic. If you’re serving outdoors, keep the caramel in a small slow cooker on warm to maintain its pourable consistency.
Presentation Ideas: Arrange the apple slices in a circular pattern on a large wooden board, with the caramel bowl in the center and the topping bowls scattered around. Add a few mini pumpkins or fake spider webs for a Halloween touch. I like to use small black cauldron bowls for the toppings—it’s cheesy but everyone loves it.
Storage: Store leftover apple slices in an airtight container in the refrigerator for up to 24 hours. Keep the caramel and toppings separate. The apples will brown slightly, but a quick dip in lemon water before serving helps refresh them. Leftover caramel sauce keeps in the fridge for up to two weeks.
Reheating: Warm the caramel sauce in the microwave in 15-second bursts, stirring between each. Don’t let it boil. If it thickens too much, stir in a teaspoon of milk or cream to loosen it up.
Flavor Development: Honestly, these are best fresh. The apples stay crisp, the caramel stays sticky, and the toppings stay crunchy. If you let them sit too long, the pretzels and nuts get soft. So make only what you think you’ll eat in one sitting, and prep more if needed.
Nutritional Information & Benefits
While this is definitely a treat, there are a few bright spots worth noting. Per serving (one apple slice with caramel and a sprinkle of toppings), you’re looking at approximately 120-150 calories, 4 grams of fat, 22 grams of carbohydrates, and 1 gram of protein.
Health Benefits of Key Ingredients: Apples are packed with fiber and vitamin C, and they contain antioxidants that support heart health. The fiber in the apple helps slow down sugar absorption, so you get a more steady energy release instead of a spike and crash. Dark chocolate chips (if you use them) add a small dose of antioxidants called flavonoids, which are good for circulation.
Dietary Considerations: This recipe can easily be made gluten-free and dairy-free with simple swaps. It’s naturally vegetarian. If you’re watching your sugar intake, use a sugar-free caramel sauce and skip the sweeter toppings. The apples themselves provide natural sweetness.
Potential Allergens: This recipe contains dairy (caramel, chocolate), gluten (pretzels), and nuts (if you add them). Always check labels on store-bought caramel sauce, as some brands may contain hidden allergens. I personally recommend reading ingredients even on familiar brands—I once grabbed a caramel that turned out to have condensed milk in it, which was fine for me but not for my dairy-free friend.
My Personal Wellness Perspective: I believe in balance. This is a fun, festive treat that brings people together, and that has its own kind of nutritional value. I serve it alongside veggie platters and lighter options so everyone can choose their own adventure. One slice of caramel apple isn’t going to derail anyone’s health goals—it’s going to make their Halloween a little brighter.
Conclusion
This Easy Caramel Apple Slices Halloween Topping Bar is the kind of recipe that makes you wonder why you didn’t think of it sooner. It’s fast, flexible, and endlessly customizable. Whether you’re hosting a Halloween party, looking for a fun activity for the kids, or just want a dessert that feels special without the stress, this is it.
I love this recipe because it reminds me that sometimes the best ideas are the simplest ones. A crisp apple, warm caramel, and a handful of toppings—that’s all it takes to turn a regular October evening into something worth celebrating. And honestly, watching people build their own perfect bite never gets old.
I’d love to hear how yours turns out! Leave a comment below and tell me your favorite topping combination—I’m always looking for new ideas. And if you share a photo on social media, tag me so I can see your beautiful creation. Happy Halloween, and happy snacking!
Frequently Asked Questions
Can I make these ahead of time?
You can prep the toppings and caramel ahead of time, but I recommend slicing the apples and assembling the bar just before serving. The apples stay crispiest when they’re freshly cut. If you need to prep the apples a few hours ahead, keep them in the lemon water bath in the refrigerator, then pat them dry right before serving.
What if I don’t have a lemon for the water bath?
No problem! You can use 1 tablespoon of white vinegar or apple cider vinegar mixed with 1 cup of water instead. The vinegar prevents browning just as effectively, and you won’t taste it once the apples are dried and topped with caramel. I’ve used this trick many times when I ran out of lemons.
Can I use pre-sliced apples from the store?
You can, but I don’t recommend it. Pre-sliced apples are usually treated with preservatives to prevent browning, which can leave a slightly odd aftertaste. Freshly sliced apples also have a better texture—they’re crisper and more flavorful. It takes just a few extra minutes to slice them yourself, and the difference is noticeable.
How do I keep the caramel from sliding off the apples?
The key is making sure the apple slices are completely dry before adding the caramel. Any moisture creates a barrier that prevents the caramel from sticking. Also, warm the caramel just enough to make it pourable—if it’s too hot, it becomes thin and runny. If you’re still having trouble, try dipping the apple slice in the caramel rather than drizzling it.
What’s the best way to transport this for a party?
Transport the components separately. Slice the apples and store them in a container with a little lemon water. Keep the caramel in a small jar or squeeze bottle. Pack the toppings in individual containers or zip-top bags. Assemble everything at the party location. It takes about five minutes to set up, and everything stays fresh and crisp.
Pin This Recipe!
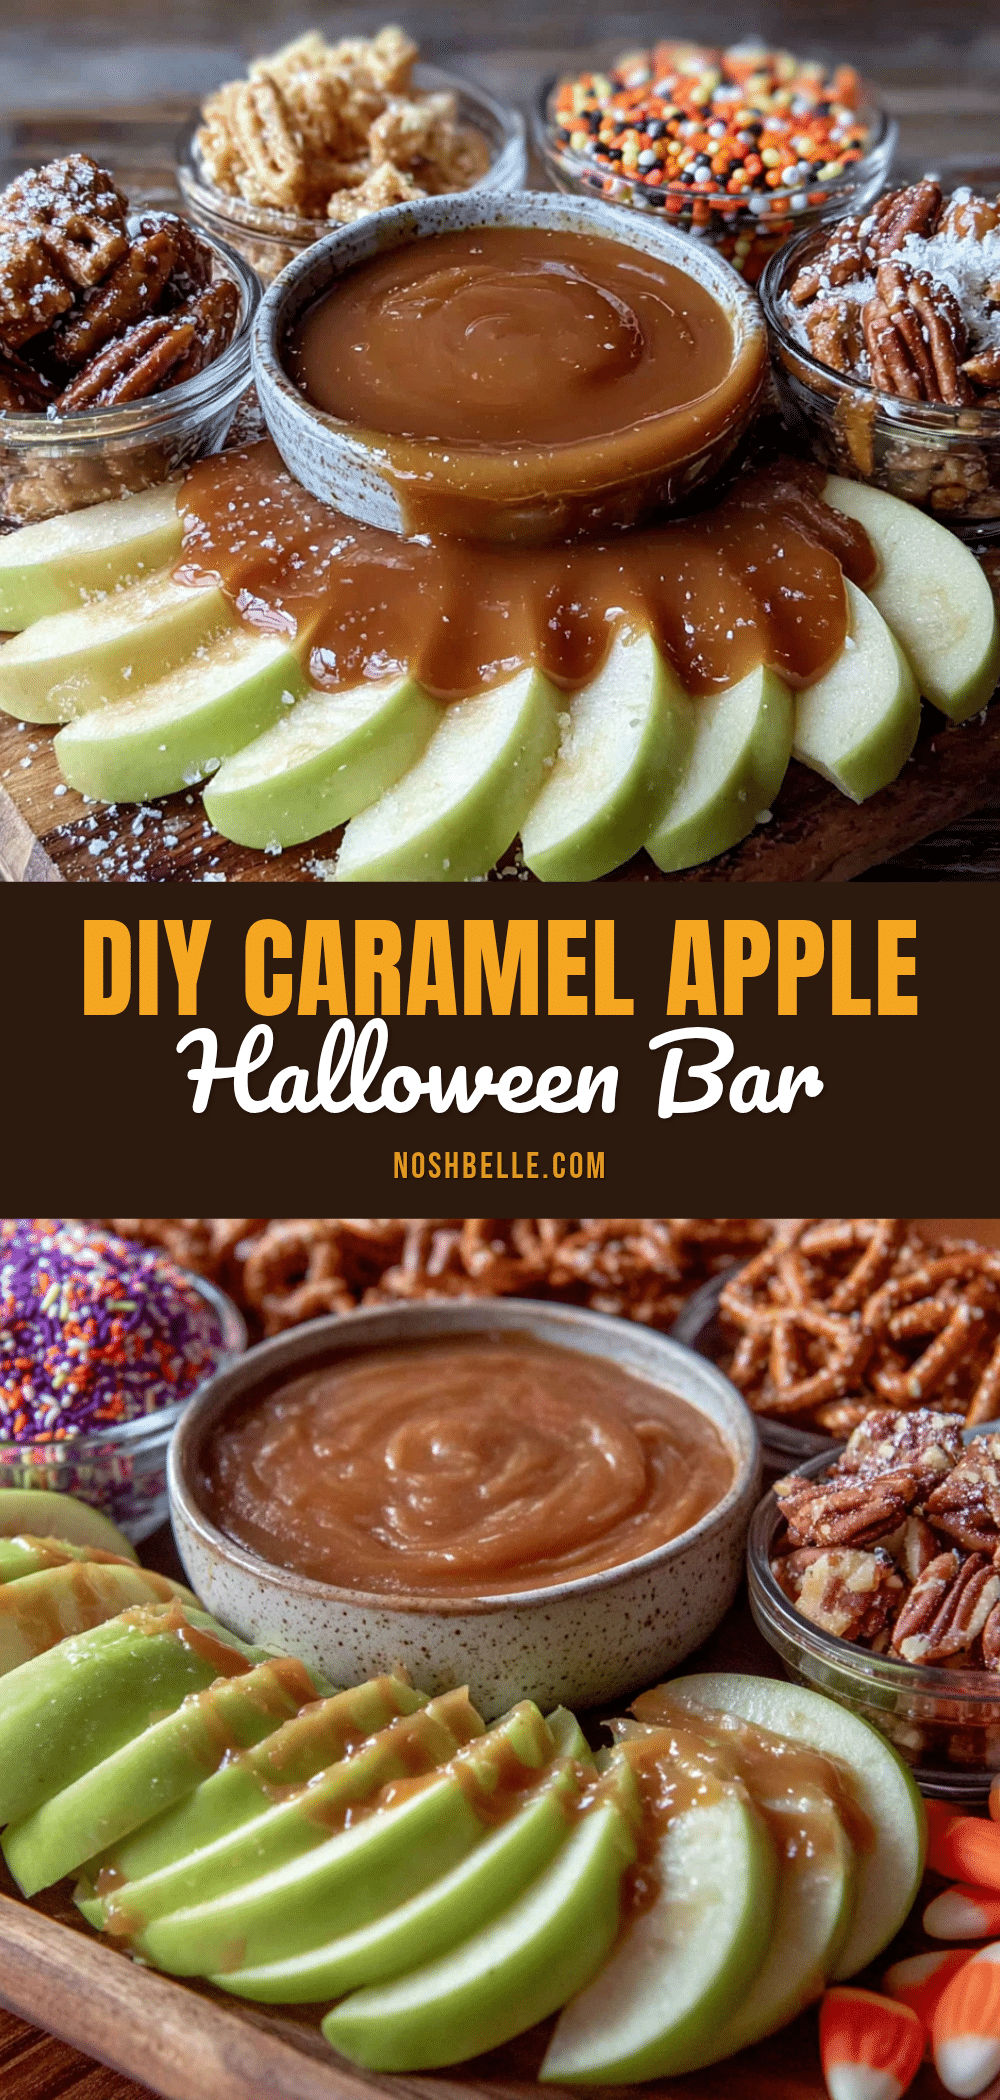
Easy Caramel Apple Slices Halloween Topping Bar
A fun and interactive Halloween dessert where guests build their own perfect bite with crisp apple slices, warm caramel, and a variety of crunchy, sweet, and salty toppings. Ready in under 15 minutes, this no-bake treat is perfect for parties and guaranteed to be a crowd-pleaser.
- Prep Time: 15 minutes
- Cook Time: 2 minutes
- Total Time: 17 minutes
- Yield: 4 servings 1x
- Category: Dessert
- Cuisine: American
Ingredients
- 4 large apples (Honeycrisp or Granny Smith preferred)
- 1 cup caramel sauce (store-bought or homemade)
- 1/2 cup semi-sweet or dark chocolate chips
- 1/2 cup crushed pretzel twists
- 1/4 cup toffee bits or crushed Heath bars
- 2 tablespoons Halloween sprinkles (orange, black, purple)
- 1/2 teaspoon flaky sea salt (like Maldon)
- 1/4 cup chopped peanuts or pecans (optional)
- 1/4 cup white chocolate chips (optional)
- 1 tablespoon lemon juice mixed with 1 cup water (for preventing browning)
Instructions
- Prep the apples: Fill a large bowl with 1 cup water and 1 tablespoon lemon juice. Wash, core, and slice apples into 1/4-inch thick rounds. Drop slices into lemon water for 2 minutes, then pat dry thoroughly with paper towels.
- Warm the caramel: Pour caramel sauce into a small saucepan and warm over low heat, stirring occasionally. Alternatively, microwave in 20-second bursts, stirring between each, until warm and pourable (not hot).
- Arrange the toppings: Set out small bowls and fill each with a different topping: chocolate chips, crushed pretzels, toffee bits, Halloween sprinkles, chopped nuts, and flaky sea salt. If using white chocolate, melt it similarly.
- Assemble the bar: Place dried apple slices on a serving platter. Pour warm caramel into a small bowl and place in the center. Add a small spoon or mini ladle for drizzling.
- Serve immediately: Invite guests to grab a slice, drizzle caramel over it, and add their chosen toppings. For an optional touch, drizzle melted white chocolate over finished slices using a fork or piping bag.
Notes
Choose Granny Smith or Honeycrisp apples for best texture. Dry apple slices thoroughly to help caramel stick. Don’t overheat caramel or it will become too thin. Crush pretzels unevenly for texture variety. Best served immediately; prep components ahead but assemble just before serving.
Nutrition
- Serving Size: 1 apple slice with c
- Calories: 120150
- Sugar: 16
- Sodium: 150
- Fat: 4
- Saturated Fat: 2
- Carbohydrates: 22
- Fiber: 2
- Protein: 1
Keywords: caramel apples, Halloween dessert, apple slices, topping bar, easy dessert, no-bake, party food, fall recipe


