I was elbow-deep in suds last Tuesday evening, scrubbing a baking dish that had seen better days, when the faintest whiff of ginger and cinnamon drifted up from the sponge. And just like that, I was seven years old, standing on a wobbly step stool in my Aunt Rose’s tiny kitchen, watching her press crushed gingersnaps into a buttered pan with the heel of her hand. She’d let me lick the spatula clean afterward, and I remember thinking, with the absolute certainty only a child possesses, that this was the most important job in the entire world. I haven’t thought about that moment in years. Aunt Rose moved to Florida a decade ago, and those gingersnap crusts of hers became a ghost in my memory—something I could almost taste but never quite reach.
So I did what any reasonable person would do. I dried my hands, dug a box of gingersnaps out of the pantry, and decided to recreate that feeling. Not just the crust, but the whole thing—a pumpkin cheesecake bar that would make my own kids pause their endless negotiations over who got the bigger piece. Honestly, I wasn’t sure it would work. Pumpkin and cheesecake can be a tricky pair; one is earthy and spiced, the other tangy and rich. But I had a hunch that the gingersnap base would bridge them perfectly. Maybe you’ve been there—chasing a flavor from your childhood, hoping you can get it right for the people you love now.
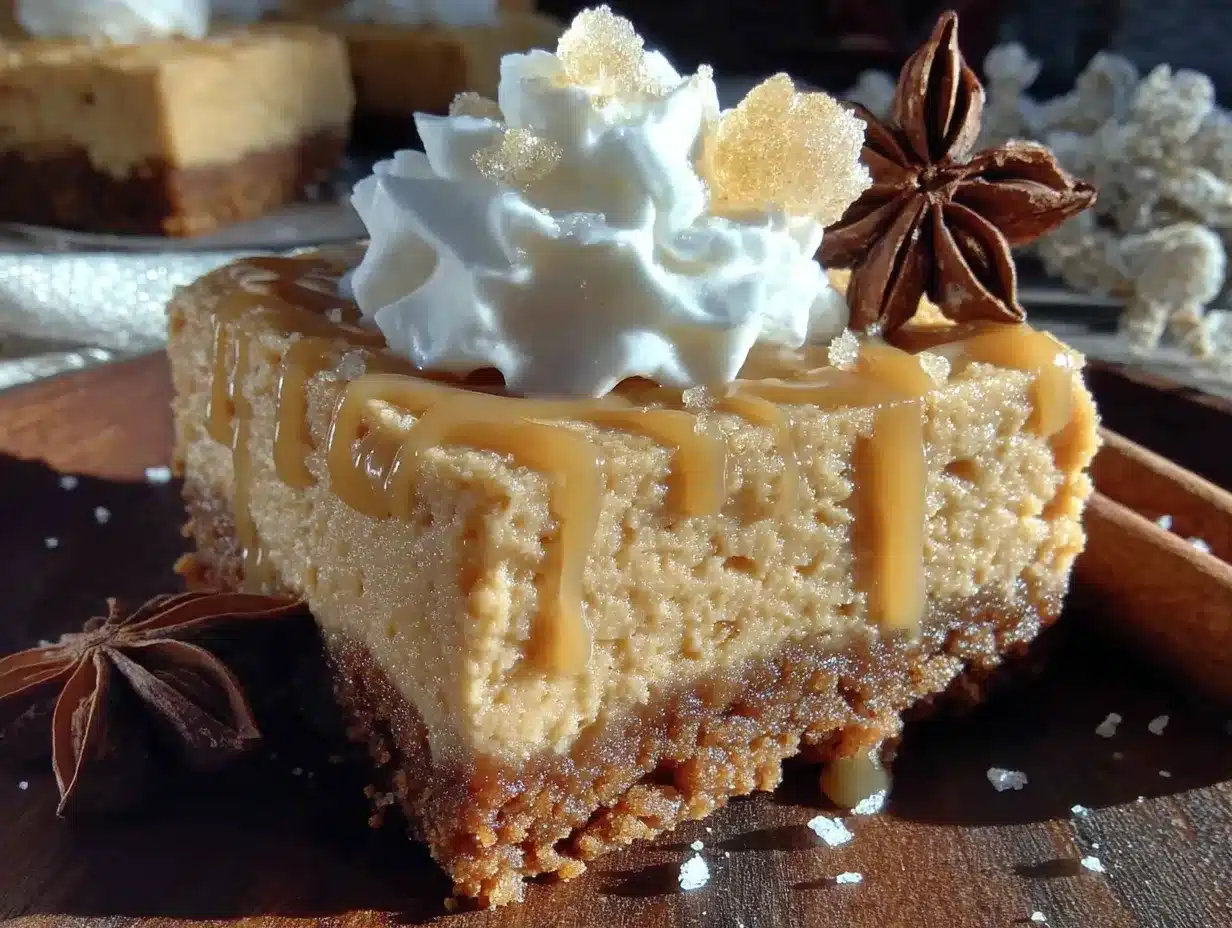
The first batch was a mess. I used too much butter in the crust, and it turned into a soggy, sandy situation that refused to set. My youngest walked through the kitchen with muddy boots and tracked dirt across the floor mid-mix. I almost gave up. But the second batch? That was the one. The bars came out of the oven with a set, creamy top and a crust that snapped cleanly when I cut into it. I let them cool, then snuck a corner piece while no one was watching. The texture was exactly what I’d been chasing—smooth, spiced, with that gingersnap crunch bringing it all back. I knew then this recipe was staying in our rotation for good.
Why You’ll Love This Recipe
These aren’t just another pumpkin dessert. They’re the kind of bars that make everyone at the table go quiet for a minute—then ask for seconds. Here’s why they work so well for real family life:
- Kid-Approved, No Question: I tested these on my own picky eaters, and they vanished before I could even take a photo. The gingersnap crust is sweet enough to win them over, but the pumpkin filling isn’t too heavy or weirdly spiced.
- Budget-Friendly Ingredients: You probably already have most of this stuff in your kitchen. Canned pumpkin, cream cheese, eggs, sugar, and a box of gingersnaps. No expensive extracts or hard-to-find spices.
- Perfect for Busy Weeknights or Holidays: They come together in about 30 minutes of active prep, then bake while you do something else. Great for Thanksgiving dessert tables, but also for a random Tuesday when everyone needs a little comfort.
- Leftovers That Reheat Beautifully: Not that there will be many leftovers, but if you stash a few in the fridge, they taste even better the next day. The flavors meld together overnight.
- Crowd-Pleaser Across Ages: I’ve brought these to potlucks and school events. Kids grab them because they look like bars. Adults grab them because they taste like a cheesecake that didn’t require a water bath.
What makes this recipe different from all the other pumpkin cheesecake bars out there? It’s the crust, honestly. Most recipes use a graham cracker base, which is fine, but it doesn’t bring that warm, spicy kick that gingersnaps do. The molasses in the cookies adds a depth that plain crackers just can’t match. And the filling has a secret trick: a tiny splash of lemon juice. It sounds odd, but it brightens the pumpkin and cream cheese without making it taste lemony. I learned that from a chef friend who insisted that every cheesecake needs a little acid. She was right.
What Ingredients You Will Need
This recipe uses simple, everyday ingredients to deliver big flavor. Most are pantry staples, and the few that aren’t are easy to find at any grocery store. Here’s what you’ll need, broken down by component.
For the Gingersnap Crust
- 2 cups (about 200g) crushed gingersnap cookies (I prefer Nabisco or a store brand that’s crisp, not soft—you want them to hold their crunch)
- 5 tablespoons (70g) unsalted butter, melted (salted butter works too, just skip the added salt in the crust)
- 2 tablespoons (25g) granulated sugar (optional, but helps the crust set if your gingersnaps aren’t very sweet)
- Pinch of salt (skip if using salted butter)
For the Pumpkin Cheesecake Filling
- 16 ounces (450g) cream cheese, softened to room temperature (full-fat is best for creamy texture; low-fat can make the filling grainy)
- 1 cup (200g) granulated sugar
- 1 cup (245g) canned pumpkin puree (not pumpkin pie filling—make sure it’s 100% pumpkin)
- 3 large eggs, room temperature
- 1 teaspoon vanilla extract
- 1 teaspoon pumpkin pie spice (or a mix of ½ teaspoon cinnamon, ¼ teaspoon nutmeg, ¼ teaspoon ginger, and a pinch of cloves)
- 1 tablespoon (15ml) lemon juice, freshly squeezed (trust me on this one)
- 2 tablespoons (16g) all-purpose flour (helps stabilize the filling so it doesn’t crack)
Optional Topping
- ½ cup (120ml) heavy cream, whipped with 1 tablespoon powdered sugar (or a dollop of Greek yogurt for a lighter option)
- A light dusting of cinnamon or extra crushed gingersnaps for garnish
A quick note on ingredient selection: I always use full-fat cream cheese for baking. The lower-fat versions have more water, which can make your cheesecake filling weep or turn runny. And for the pumpkin, Libby’s is my go-to brand because it’s consistently thick and not watery. If you’re using a store brand, just give it a quick stir in the can to make sure it’s uniform. Oh, and if you can’t find gingersnaps, you can substitute with graham crackers and add ½ teaspoon of ground ginger and ¼ teaspoon of molasses to the butter mixture. It’s not quite the same, but it’ll still be delicious.
Equipment Needed
You don’t need a fancy kitchen to pull these off. Here’s what I used:
- 9×9-inch baking pan (an 8×8 works too, but your bars will be slightly thicker and may need an extra 5 minutes of baking time)
- Parchment paper (for easy lifting—don’t skip this unless you want to fight with stuck bars)
- Food processor or zip-top bag and rolling pin (for crushing the gingersnaps; I’ve used both, and honestly, the bag and rolling pin method is oddly satisfying)
- Mixing bowls (one medium for the crust, one large for the filling)
- Electric hand mixer or stand mixer (you can do it by hand with a whisk, but your arm will get a workout—I’ve been there)
- Spatula (for scraping every last bit of filling into the pan)
- Measuring cups and spoons
- Cooling rack
If you don’t have a food processor, don’t worry. Place the gingersnaps in a sturdy zip-top bag, seal it, and go at them with a rolling pin. It’s a great way to let out some frustration after a long day. Just make sure the bag doesn’t have any tiny holes, or you’ll have crumbs everywhere. Ask me how I know.
Preparation Method
Let’s get to the fun part. Here’s how to make these bars step by step.
- Preheat your oven to 350°F (175°C). Line your 9×9-inch baking pan with parchment paper, leaving a little overhang on two opposite sides. This will make lifting the bars out later a breeze.
- Make the crust. In a food processor, pulse the gingersnap cookies until they become fine crumbs. You should have about 2 cups. Transfer them to a medium bowl. Pour in the melted butter, sugar, and salt, and stir with a fork until every crumb is moistened. The mixture should look like wet sand and hold together when you squeeze a handful.
- Press the crust into the pan. Dump the crumb mixture into your prepared pan. Use the bottom of a measuring cup or a flat glass to press it down firmly and evenly. Don’t just pat it—really press. A loose crust will fall apart when you cut the bars. Bake the crust for 10 minutes, then set it aside to cool slightly while you make the filling.
- Beat the cream cheese. In a large mixing bowl, beat the softened cream cheese with an electric mixer on medium speed until it’s smooth and creamy, about 2 minutes. Scrape down the sides of the bowl with a spatula.
- Add the sugar and pumpkin. Add the sugar and beat until combined, then add the pumpkin puree and beat again until everything is smooth and uniform. The mixture should be a lovely pale orange color.
- Add the eggs one at a time. Crack each egg into a small bowl first (just in case you get a shell), then add it to the mixture. Beat on low speed after each addition until just combined. Overbeating at this stage can incorporate too much air, which leads to cracks in the finished bars. Trust me, I’ve made that mistake.
- Mix in the vanilla, spices, lemon juice, and flour. Add the vanilla, pumpkin pie spice, lemon juice, and flour. Beat on low until just combined. Give it one final scrape down the sides and bottom of the bowl to make sure everything is mixed evenly.
- Pour the filling over the crust. Pour the cheesecake filling over the pre-baked crust. Use a spatula to spread it evenly to the edges. Tap the pan gently on the counter a few times to release any air bubbles.
- Bake the bars. Place the pan in the preheated oven and bake for 35 to 40 minutes. The edges should look set and slightly puffed, but the center should still jiggle just a little when you gently shake the pan. That’s your cue that it’s done—overbaking will make it dry and cracked.
- Cool completely. Place the pan on a cooling rack and let it cool to room temperature, about 1 hour. Then cover it with plastic wrap and refrigerate for at least 4 hours, preferably overnight. This is the hardest part, I know, but it’s non-negotiable. The bars need time to firm up so you can cut clean slices.
- Cut and serve. Once chilled, lift the bars out of the pan using the parchment overhang. Place them on a cutting board and use a sharp knife to cut into 16 squares. Wipe the knife clean between cuts for the neatest edges.
Cooking Tips & Techniques
I’ve made these bars more times than I can count, and I’ve learned a few things along the way. Here are the tricks that make the difference between good bars and great ones.
Room temperature ingredients matter. I know it’s tempting to use cold cream cheese straight from the fridge, but it will give you a lumpy filling that takes forever to smooth out. Let your cream cheese and eggs sit on the counter for about 30 minutes before you start. If you’re in a hurry, you can cut the cream cheese into small cubes and microwave it for 10 seconds—just be careful not to melt it.
Don’t overmix the filling. This is probably the most common mistake I see. Once you add the eggs, you want to mix just until they disappear into the batter. Overmixing beats too much air into the filling, which expands in the oven and then collapses, leaving you with a cracked surface. A few tiny cracks are fine, but a giant canyon in the middle is avoidable.
Watch the bake time. Every oven runs a little differently. My old oven took exactly 38 minutes; my new one is done at 35. Start checking at the 30-minute mark. The center should still have a slight wobble, like Jell-O that’s just set. If the entire surface is firm, you’ve gone too far.
Use a hot knife for clean cuts. After the bars have chilled, run your knife under hot water, dry it off, then make your cuts. The heat glides through the cheesecake without dragging. Wipe and reheat the knife between each cut for the prettiest squares.
Let them rest overnight if you can. I know, I said this already, but it’s worth repeating. The flavors deepen and meld together after a full night in the fridge. The first time I made these, I tried to cut them after only 2 hours, and they were a gooey mess. Patience pays off.
Variations & Adaptations
One of the best things about this recipe is how flexible it is. Here are some ways to make it your own.
- Gluten-Free Version: Use gluten-free gingersnap cookies (I like the brand Mi-Del) and substitute the 2 tablespoons of flour with a gluten-free all-purpose blend. The texture will be slightly more delicate, but still delicious.
- Dairy-Free Adaptation: Swap the cream cheese for a dairy-free alternative like Kite Hill or Tofutti. Use a vegan butter stick (not margarine) for the crust. The filling won’t be quite as rich, but it still sets up nicely. I tested this for a friend with lactose intolerance, and she gave it two thumbs up.
- Spice It Up: If you like a stronger ginger kick, add ½ teaspoon of ground ginger to the filling and use double-ginger gingersnaps for the crust. The heat is subtle but noticeable.
- Chocolate Twist: Melt ¼ cup of semi-sweet chocolate chips and drizzle it over the top of the bars after they’ve chilled. Or swirl a tablespoon of melted chocolate into the filling before baking for a marbled effect.
- Pumpkin-Free Option: You can substitute the pumpkin puree with an equal amount of sweet potato puree (canned or homemade). The flavor will be earthier and less sweet, so you might want to add an extra tablespoon of sugar.
- Mini Version: Press the crust into a mini muffin tin (lined with paper liners) and fill each cup with about 1 tablespoon of filling. Bake for 12-15 minutes. They’re perfect for lunchboxes or parties.
My personal favorite variation? I add a tablespoon of bourbon to the filling during the holidays. It sounds fancy, but it really just rounds out the spices and makes the bars taste more grown-up. My kids have no idea, and honestly, they don’t need to know.
Serving & Storage Suggestions
These bars are versatile enough to fit any occasion. Here’s how to serve and store them like a pro.
Serving: Serve the bars chilled, straight from the fridge. They hold their shape best when cold. If you want to dress them up, add a dollop of whipped cream and a light dusting of cinnamon or pumpkin pie spice. For a holiday presentation, arrange them on a platter with fresh cranberries and a few sprigs of rosemary. The red and green pop beautifully against the orange bars.
What to Serve With Them: A cup of hot coffee or spiced chai is the perfect companion. For a dessert spread, pair them with vanilla ice cream or a warm apple crisp. They also work great alongside a simple fruit salad for a lighter finish to a heavy meal.
Storage: Store the bars in an airtight container in the refrigerator for up to 5 days. Place a sheet of parchment paper between layers if you’re stacking them to prevent sticking. I’ve found that they actually taste better on day two or three, as the flavors continue to meld.
Freezing: These bars freeze beautifully. Once they’re fully chilled and cut, place the squares on a baking sheet and freeze for 1 hour until firm. Then transfer them to a freezer-safe container or zip-top bag, separating layers with parchment paper. They’ll keep for up to 3 months. To thaw, transfer them to the refrigerator overnight or let them sit at room temperature for about 30 minutes.
Reheating: I actually prefer these bars cold, but if you want a warm dessert, pop a single bar in the microwave for 10-15 seconds. It softens the cheesecake slightly without melting it. Don’t reheat the whole pan at once, or you’ll end up with a soupy mess.
Nutritional Information & Benefits
Here’s the approximate nutritional breakdown for one bar (based on 16 servings). Values are estimates and will vary based on specific brands and substitutions.
- Calories: 285
- Fat: 17g
- Saturated Fat: 10g
- Carbohydrates: 29g
- Sugar: 20g
- Protein: 5g
- Fiber: 1g
- Sodium: 210mg
Health Highlights: Pumpkin is packed with vitamin A, which is great for eye health and immune function. It also provides fiber and potassium. The cream cheese adds calcium and protein, though it’s also higher in saturated fat, so moderation is key. The gingersnaps contribute a small amount of iron from the molasses.
Dietary Considerations: This recipe contains gluten, dairy, and eggs. For a gluten-free or dairy-free version, see the variations section above. It’s not suitable for vegans as written, but you can try a cashew-based cheesecake filling if you’re adventurous.
From my perspective, this is a treat, not a health food. But it’s a treat made with real ingredients, and that counts for something. I’d rather my kids eat a homemade bar with pumpkin and cream cheese than something from a box full of preservatives and artificial flavors.
Conclusion
These kid-approved pumpkin cheesecake bars with gingersnap crust have become a staple in my kitchen, and I think they’ll become one in yours too. They’re the kind of recipe that feels special enough for a holiday but simple enough for a regular weeknight. The gingersnap crust adds that nostalgic warmth, the pumpkin filling is creamy and spiced, and the whole thing comes together without any fancy techniques or expensive equipment.
I love that I can make a batch on a Sunday afternoon, stash them in the fridge, and have a homemade dessert ready for the entire week. My kids fight over the corner pieces (extra crust, obviously), and my husband has been known to sneak one before breakfast. It’s become one of those recipes that just feels like home.
Now I want to hear from you. Have you tried these bars? Did you add your own twist? Drop a comment below and let me know how they turned out. And if you snapped a photo, share it on Pinterest and tag me—I love seeing your creations. Happy baking, friends. You’ve got this.
Frequently Asked Questions
Can I use fresh pumpkin instead of canned?
Yes, you can. Roast a sugar pumpkin until tender, then puree it in a food processor. Just make sure to drain off any excess liquid by letting it sit in a fine-mesh strainer for 30 minutes. Fresh pumpkin has more water than canned, and too much moisture will make your bars runny.
Why did my cheesecake filling crack?
Cracks usually happen from overbaking or overmixing. The center should still jiggle slightly when you take it out of the oven. Also, make sure your cream cheese is fully softened before you start beating it. Cold cream cheese creates lumps that lead to uneven baking and cracks.
Can I make these bars ahead of time for a party?
Absolutely. In fact, I recommend it. These bars need at least 4 hours to chill, and they taste even better after a full day in the fridge. You can make them up to 3 days in advance and store them covered in the refrigerator. Just add the whipped cream topping right before serving.
How do I crush the gingersnaps without a food processor?
Place the cookies in a sturdy zip-top bag, seal it, and use a rolling pin or even a heavy skillet to crush them into fine crumbs. You can also pulse them in a blender if you have one. Just don’t overdo it, or you’ll end up with ginger dust.
Can I freeze the unbaked bars to bake later?
I don’t recommend it. The crust can become soggy as it thaws, and the filling may separate. It’s much better to bake the bars first, then freeze them after they’ve cooled and been cut. That way, you can pull out individual squares whenever a craving hits.
Pin This Recipe!
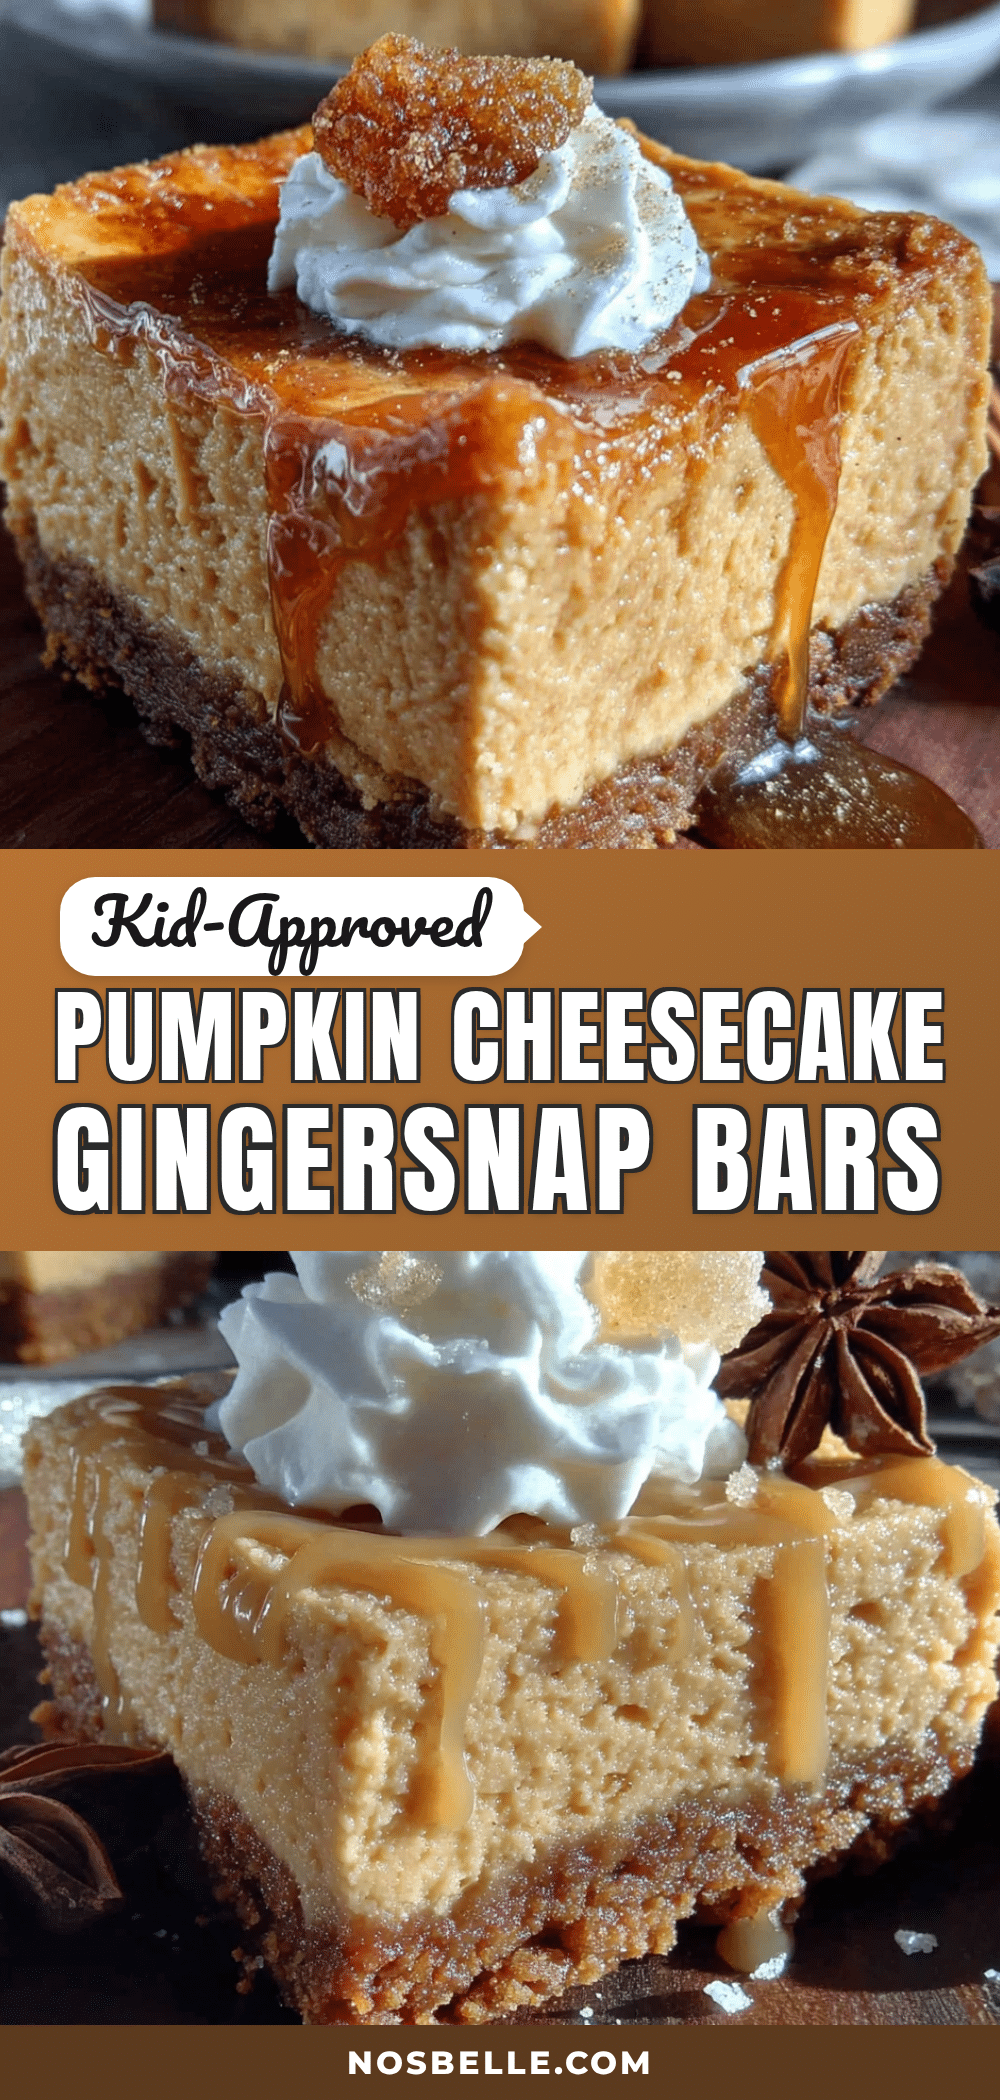
Easy Kid-Approved Pumpkin Cheesecake Bars with Gingersnap Crust
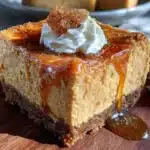
These pumpkin cheesecake bars feature a warm, spicy gingersnap crust and a creamy pumpkin filling. They’re kid-approved, budget-friendly, and perfect for busy weeknights or holiday dessert tables.
- Prep Time: 30 minutes
- Cook Time: 35-40 minutes
- Total Time: 5 hours 10 minutes (includes chilling time)
- Yield: 16 servings 1x
- Category: Dessert
- Cuisine: American
Ingredients
- 2 cups (about 200g) crushed gingersnap cookies
- 5 tablespoons (70g) unsalted butter, melted
- 2 tablespoons (25g) granulated sugar
- Pinch of salt
- 16 ounces (450g) cream cheese, softened to room temperature
- 1 cup (200g) granulated sugar
- 1 cup (245g) canned pumpkin puree
- 3 large eggs, room temperature
- 1 teaspoon vanilla extract
- 1 teaspoon pumpkin pie spice
- 1 tablespoon (15ml) lemon juice, freshly squeezed
- 2 tablespoons (16g) all-purpose flour
- ½ cup (120ml) heavy cream, whipped with 1 tablespoon powdered sugar (optional topping)
- A light dusting of cinnamon or extra crushed gingersnaps (optional garnish)
Instructions
- Preheat your oven to 350°F (175°C). Line your 9×9-inch baking pan with parchment paper, leaving a little overhang on two opposite sides.
- Make the crust: In a food processor, pulse the gingersnap cookies until they become fine crumbs. Transfer to a medium bowl. Pour in the melted butter, sugar, and salt, and stir with a fork until every crumb is moistened. The mixture should look like wet sand and hold together when squeezed.
- Press the crust into the pan: Dump the crumb mixture into your prepared pan. Use the bottom of a measuring cup or a flat glass to press it down firmly and evenly. Bake the crust for 10 minutes, then set it aside to cool slightly.
- Beat the cream cheese: In a large mixing bowl, beat the softened cream cheese with an electric mixer on medium speed until smooth and creamy, about 2 minutes. Scrape down the sides of the bowl.
- Add the sugar and pumpkin: Add the sugar and beat until combined, then add the pumpkin puree and beat again until smooth and uniform.
- Add the eggs one at a time: Crack each egg into a small bowl first, then add to the mixture. Beat on low speed after each addition until just combined. Do not overbeat.
- Mix in the vanilla, spices, lemon juice, and flour: Add the vanilla, pumpkin pie spice, lemon juice, and flour. Beat on low until just combined. Scrape down the sides and bottom of the bowl.
- Pour the filling over the crust: Pour the cheesecake filling over the pre-baked crust. Use a spatula to spread it evenly to the edges. Tap the pan gently on the counter a few times to release air bubbles.
- Bake the bars: Place the pan in the preheated oven and bake for 35 to 40 minutes. The edges should look set and slightly puffed, but the center should still jiggle just a little when you gently shake the pan.
- Cool completely: Place the pan on a cooling rack and let it cool to room temperature, about 1 hour. Then cover with plastic wrap and refrigerate for at least 4 hours, preferably overnight.
- Cut and serve: Once chilled, lift the bars out of the pan using the parchment overhang. Place on a cutting board and use a sharp knife to cut into 16 squares. Wipe the knife clean between cuts for neat edges.
Notes
Room temperature ingredients are crucial for a smooth filling. Don’t overmix the filling to avoid cracks. The bars need at least 4 hours to chill, but overnight is best for clean slices and deeper flavor. Use a hot knife for clean cuts. For a gluten-free version, use gluten-free gingersnaps and gluten-free flour. For a dairy-free version, use dairy-free cream cheese and vegan butter.
Nutrition
- Serving Size: 1 bar
- Calories: 285
- Sugar: 20
- Sodium: 210
- Fat: 17
- Saturated Fat: 10
- Carbohydrates: 29
- Fiber: 1
- Protein: 5
Keywords: pumpkin cheesecake bars, gingersnap crust, kid-friendly dessert, fall dessert, Thanksgiving dessert, easy cheesecake bars