I was standing in the baking aisle of our local grocery store last Tuesday when the smell hit me—a sharp, cool burst of peppermint from a display of candy canes someone had knocked over. And suddenly I was seven years old in my Aunt Carol’s tiny kitchen, the radiator hissing, snow piling up on the windowsill, and her hand gently guiding mine as we stirred a pot of milk that smelled like Christmas morning. She’s been gone five years now, and I still can’t walk past that aisle without stopping. I bought three boxes of candy canes that day, honestly, because I knew exactly what I was going to do with them. I was going to build the quickest, coziest hot cocoa bar this side of a weeknight blizzard, and I was going to make it feel like her kitchen felt—warm, unhurried, and full of small joys.
Let me tell you, I’ve made a lot of hot cocoa in my time. I’ve done the from-scratch versions with real chocolate shavings and homemade marshmallows that take an entire afternoon. They’re lovely, they really are. But most nights, you’re not looking for a project. You’re looking for a mug of something that tastes like comfort, and you need it in about ten minutes flat. That’s where this easy peppermint hot cocoa bar comes in. It’s not about being fancy—it’s about having a system. You set it up once, and then every cold night for the rest of the season, you’re ten minutes away from pure happiness. Maybe you’ve been there, standing in your kitchen at 8 p.m. on a Tuesday, tired and hungry, and you just need something warm that doesn’t require a recipe.
This setup is my answer to that feeling. It’s fast, it uses stuff you probably already have, and it brings that little spark of holiday magic without any of the stress. Honestly, I think Aunt Carol would approve. She was all about making things special without making them complicated. So let me show you how to put together a hot cocoa bar that works for busy weeknights, lazy weekends, and everything in between. I promise, once you try it, you’ll wonder why you ever bought the powdered stuff in a packet again.
Why You’ll Love This Recipe
Okay, let’s be real for a second. There are a million ways to make hot cocoa, and most of them involve a lot of stirring, a lot of dirty dishes, and a lot of waiting. This easy peppermint hot cocoa bar is the opposite of all that. It’s designed for real life, for the nights when you’re juggling homework and laundry and just need something good without the fuss. Here’s why it works:
- Quick & Easy: We’re talking about 10 minutes from start to finish. No melting chocolate in a double boiler, no whisking egg yolks. Just simple, reliable cocoa that tastes like you spent hours on it.
- Simple Ingredients: You probably have most of this in your pantry right now. No fancy grocery trips, no specialty stores. Just good milk, good cocoa powder, and a few fun toppings that make it feel special.
- Perfect for Weeknights: This isn’t a weekend-only treat. It’s designed for Tuesday nights when the kids need warming up after sledding, or for that quiet moment after everyone else has gone to bed.
- Crowd-Pleaser: I’ve set this up for holiday parties and for just my husband and me on a random Wednesday. Every single time, people go quiet for a second after that first sip. That’s the sign of a winner.
- Unbelievably Delicious: The secret is in the balance—rich, dark cocoa, creamy milk, and that sharp, cool hit of peppermint that cuts through the sweetness. Plus, the marshmallows melt into this silky cloud on top. It’s next-level comfort, I’m telling you.
What makes this different from every other hot cocoa recipe out there? It’s the method. I tested this for weeks to find the perfect ratio of cocoa to milk, the exact moment to add the peppermint extract so it doesn’t boil off, and the best way to get that frothy top without a fancy machine. This isn’t just another version—it’s the version I make for my own family, and I wouldn’t change a thing.
This recipe is the kind that makes you close your eyes after the first bite—or sip, I should say. It’s comfort food reimagined: faster, simpler, but with the same soul-soothing satisfaction. Perfect for impressing guests without stress, or turning a simple Tuesday night into something memorable.
What Ingredients You Will Need
This recipe uses simple, wholesome ingredients to deliver bold flavor and satisfying texture without the fuss. Most of these are pantry staples, which is exactly what you want on a busy weeknight. Let me walk you through each one and why it matters.
For the Hot Cocoa Base
- Whole milk, 4 cups (960 ml): This is my go-to for the creamiest texture. Whole milk gives you that rich, velvety mouthfeel that makes hot cocoa feel indulgent. If you’re dairy-free, oat milk works beautifully here—it has a similar creaminess. I’ve tested it with almond milk too, but it’s a bit thinner, so you might want to add an extra tablespoon of cocoa powder to compensate.
- Unsweetened cocoa powder, 1/3 cup (40 g): I prefer Dutch-processed cocoa for this recipe. It’s darker, smoother, and less acidic than natural cocoa powder. My favorite brand is Droste—it’s consistently rich and dissolves easily. But honestly, any good quality cocoa works. Just make sure it’s unsweetened so you control the sugar level.
- Granulated sugar, 1/4 cup (50 g): This is adjustable. I like my cocoa on the less sweet side so the peppermint and marshmallows can shine. If you have a sweet tooth, bump it up to 1/3 cup. You can also use honey or maple syrup, but add it after the milk is warm so it dissolves properly.
- Vanilla extract, 1 teaspoon (5 ml): Don’t skip this. Vanilla rounds out the chocolate flavor and makes everything taste more luxurious. Use pure vanilla extract if you have it—the imitation stuff works in a pinch, but the real deal is noticeably better.
- Salt, a pinch: This is my secret weapon. A tiny pinch of salt doesn’t make the cocoa salty—it makes the chocolate taste more chocolatey. Trust me on this one.
- Peppermint extract, 1/2 teaspoon (2.5 ml): Here’s the star. Be careful with this—peppermint extract is potent, and too much can make it taste like toothpaste. I use 1/2 teaspoon for a gentle, refreshing kick. If you’re using peppermint oil (which is even stronger), start with just 1/8 teaspoon. My favorite brand is Nielsen-Massey—it’s pure and clean-tasting.
For the Toppings Bar

- Mini marshmallows, 2 cups (about 100 g): The classic. I use the plain white ones, but the colored ones are fun for holidays. Pro tip: if you want that toasted marshmallow flavor without a torch, scatter a few on a baking sheet and broil them for 30 seconds. Watch them closely—they burn fast!
- Crushed candy canes, 1/2 cup (about 60 g): This is where the magic happens. I crush mine by putting them in a zip-top bag and whacking them with a rolling pin. It’s oddly satisfying. Leave some pieces chunky and some fine—the texture contrast is lovely. You can buy pre-crushed candy canes, but they’re often too fine and lose that satisfying crunch.
- Whipped cream, 1 cup (240 ml): Homemade is best, but canned works in a pinch. If you’re making your own, whip 1 cup of heavy cream with 1 tablespoon of powdered sugar and 1/2 teaspoon of vanilla until soft peaks form. It takes about 3 minutes with a hand mixer.
- Chocolate shavings, 1/4 cup (30 g): Optional but gorgeous. I run a vegetable peeler along the edge of a dark chocolate bar to get those lovely curls. It makes the whole thing look like it came from a fancy café.
Optional Add-Ins
- Peppermint sticks or stirring spoons: These double as stirrers and flavor boosters. As you stir, the peppermint slowly infuses into the cocoa.
- Dark chocolate chips, 1/4 cup (45 g): For the extra-chocolatey crowd. Stir them into the warm cocoa until melted.
- Cinnamon stick: Drop one into the pot while heating for a subtle warmth that pairs beautifully with peppermint.
One thing I’ve learned the hard way: don’t skip the salt. I did once, thinking it wouldn’t matter, and the cocoa tasted flat. That tiny pinch makes all the difference. Also, if you’re making this for a crowd, double the base recipe—trust me, everyone will want a second cup.
Equipment Needed
You don’t need much for this easy peppermint hot cocoa bar, which is exactly the point. Here’s what you’ll want to have on hand:
- A medium saucepan (3-4 quart): This is for heating the milk and cocoa base. I use a heavy-bottomed one to prevent scorching—nothing ruins cocoa faster than burnt milk. My favorite is a stainless steel All-Clad, but any decent saucepan works.
- A whisk: A good whisk is essential for getting the cocoa powder to dissolve smoothly. I prefer a balloon whisk—it gets into the corners of the pan and creates a little froth on top.
- Mugs: Obviously! I like using clear glass mugs for this setup because you can see the layers of marshmallows and crushed candy canes. But any microwave-safe mug works.
- Small bowls or ramekins: For setting up your toppings bar. I use little ceramic dishes, but even small paper cups work in a pinch. You want each topping to have its own container so people can customize.
- A rolling pin or hammer: For crushing candy canes. A rolling pin is more controlled, but honestly, a hammer is more fun. Just put the candy canes in a sturdy zip-top bag first.
- A hand mixer or stand mixer (optional): Only if you’re making homemade whipped cream. You can also whip cream by hand with a whisk, but it takes about 5 minutes of vigorous effort. I usually just use my hand mixer—it’s faster.
If you don’t have a saucepan, you can actually make this in the microwave. Heat the milk in a large microwave-safe bowl for 2-3 minutes, then whisk in the cocoa, sugar, and extracts. It’s not quite as smooth, but it works in a dorm room or office break room. I’ve done it more times than I care to admit.
One maintenance tip: if you’re using a metal whisk in a nonstick pot, be gentle. You don’t want to scratch the coating. I learned that one the expensive way.
Preparation Method
Alright, let’s make some cocoa. This whole process takes about 10 minutes, and I promise it’s easier than you think. Here’s the step-by-step:
- Heat the milk (3-4 minutes): Pour 4 cups of whole milk into your medium saucepan. Set it over medium heat and warm it gently, stirring occasionally with your whisk. You want it hot but not boiling—little bubbles should form around the edges, but it shouldn’t be rolling. If it boils, the milk can scorch and develop a skin. I usually stop heating when I see steam rising steadily, which takes about 3-4 minutes.
- Whisk in the dry ingredients (1 minute): Once the milk is warm, remove the pan from the heat. Add 1/3 cup of unsweetened cocoa powder, 1/4 cup of granulated sugar, and a pinch of salt. Whisk vigorously until everything is smooth and there are no lumps. This is where a good whisk matters—you want to get into the corners of the pan. Don’t worry if it looks a little thin at first; it will thicken as it sits.
- Add the extracts (30 seconds): Stir in 1 teaspoon of vanilla extract and 1/2 teaspoon of peppermint extract. Give it a good stir and taste. This is your moment to adjust. Want more peppermint? Add another 1/4 teaspoon. Want it sweeter? Stir in another tablespoon of sugar. Trust your taste buds here—everyone’s perfect cocoa is a little different.
- Prepare the toppings bar (5 minutes): While the cocoa is heating, set up your toppings. Crush your candy canes by putting them in a zip-top bag and smashing them with a rolling pin. I like to leave some pieces about the size of a pea and some almost powdery—it gives a nice texture contrast. Pour the crushed candy canes into a small bowl. Fill another bowl with mini marshmallows. If you’re making whipped cream, whip 1 cup of heavy cream with 1 tablespoon of powdered sugar and 1/2 teaspoon of vanilla until soft peaks form—this takes about 3 minutes with a hand mixer.
- Assemble and serve (1 minute per mug): Ladle the hot cocoa into mugs, filling them about 3/4 full. Top with a generous dollop of whipped cream, a handful of mini marshmallows, and a sprinkle of crushed candy canes. If you’re feeling fancy, add a few chocolate shavings on top. Serve immediately with a peppermint stick for stirring.
A few notes I’ve learned the hard way: First, don’t let the milk boil. I did that once while I was distracted by my phone, and I ended up with a skin on top and a slightly burnt smell. The cocoa was still drinkable, but it wasn’t as good. Second, if you’re making a big batch for a party, keep the cocoa warm in a slow cooker on the “warm” setting. It stays perfect for hours. Just don’t leave it on “high” or it will scorch.
One more thing: the cocoa will thicken slightly as it cools, so don’t worry if it seems a bit thin when you first pour it. That’s normal. By the time you’ve added your toppings and taken that first sip, it will be just right.
Cooking Tips & Techniques
I’ve made this easy peppermint hot cocoa bar probably fifty times now, and I’ve learned a few things along the way. Some through success, some through spectacular failure. Let me share what I’ve figured out so you can skip the mistakes.
The biggest mistake people make is adding the peppermint extract too early. Peppermint is volatile—its flavor compounds evaporate quickly when heated. If you add it while the milk is still on the stove, you’ll lose half the peppermint kick. Always take the pan off the heat first, then stir in the extract. This one change makes a huge difference.
Temperature control is everything. Medium heat is your friend. I know it’s tempting to crank it up to high to save time, but that’s how you get scorched milk. Scorched milk has this unpleasant, slightly bitter taste that no amount of marshmallows can cover. If you’re in a hurry, you can start with cold milk and use medium-high heat for the first minute, then immediately drop it to medium. Just watch it closely.
Here’s a tip for perfectly smooth cocoa: Before you add the cocoa powder to the milk, whisk it with a few tablespoons of the warm milk in a small bowl until it forms a smooth paste. This is called “tempering” the cocoa, and it prevents lumps. I learned this from a pastry chef friend, and it works like a charm. Once the paste is smooth, whisk it back into the rest of the milk.
Multitasking strategy for busy nights: While the milk is heating, set up your toppings bar. Crush the candy canes, fill the bowls, whip the cream if you’re making it. By the time the milk is ready, everything else is done. You can even prep the toppings the night before—crushed candy canes and marshmallows keep fine in airtight containers. Then all you have to do is heat the milk.
One failure I’ll admit to: I once tried to make this with skim milk because that’s all I had. Don’t do it. The cocoa came out thin and watery, and the flavor was weak. Whole milk or at least 2% is non-negotiable for the right texture. If you’re dairy-free, oat milk is the best substitute—it has a similar viscosity and a natural sweetness that complements the cocoa.
For consistency, measure your cocoa powder carefully. Cocoa powder is light and fluffy, so it’s easy to accidentally add too much or too little. Spoon it into your measuring cup and level it off with a knife. Don’t scoop directly with the measuring cup—that packs it down and you’ll end up with too much.
Variations & Adaptations
One of the best things about this easy peppermint hot cocoa bar is how easy it is to make it your own. Here are some of my favorite variations, tested and approved:
Dairy-Free Version
Swap the whole milk for oat milk or full-fat coconut milk. Oat milk gives the closest texture to dairy, while coconut milk adds a subtle tropical note that actually pairs really well with peppermint. Use dairy-free whipped cream (coconut cream whipped with a little powdered sugar works great) and check that your marshmallows are vegan—many brands are, but some contain gelatin.
Extra-Chocolatey Version
Stir in 1/4 cup of dark chocolate chips or chopped dark chocolate when you add the cocoa powder. Let them melt into the milk as you whisk. This gives you a richer, more decadent cocoa that’s almost like drinking a melted chocolate bar. I do this on really cold nights when I need extra comfort.
Spiced Peppermint Version
Add a cinnamon stick and a star anise to the milk while it heats. Remove them before serving. The warm spices play beautifully with the cool peppermint, and it makes your whole kitchen smell incredible. I discovered this by accident when I was out of vanilla and grabbed cinnamon instead—best accident ever.
Minty Mocha Version
Add 1 shot of espresso or 1/2 cup of strong brewed coffee to the cocoa base. The coffee deepens the chocolate flavor and adds a little grown-up edge. This is my go-to on weekend mornings when I want something special with my breakfast.
Allergen-Friendly Notes
This recipe is naturally nut-free if you use whole milk. For a nut-free dairy-free version, use oat milk. The peppermint extract is usually gluten-free, but double-check the label if that’s a concern. Marshmallows are typically gluten-free, but some brands use wheat starch—again, check the label if it matters.
Serving & Storage Suggestions
This easy peppermint hot cocoa bar is best served immediately, while it’s hot and the marshmallows are still fluffy. But let me give you a few tips for making it work in different situations.
Serving temperature: Serve the cocoa piping hot, around 160°F. If it’s too hot, it will burn your tongue and you won’t taste the peppermint. If it’s too cool, the marshmallows won’t melt properly. I let it sit for about 30 seconds after pouring before handing it over—that’s usually the sweet spot.
Presentation ideas: For a party, set up your toppings bar on a tray with small bowls for each topping. Use a ladle to serve the cocoa from a slow cooker or a pretty pitcher. I like to put out a jar of peppermint sticks for stirring—they look festive and add extra flavor as they dissolve. Clear glass mugs show off the layers of marshmallows and crushed candy canes, which makes everything look more inviting.
What to serve alongside: This cocoa pairs beautifully with shortbread cookies, gingerbread, or a simple sugar cookie. The buttery, crisp texture of shortbread is a perfect contrast to the creamy cocoa. For a savory option, I sometimes serve it with a cheese board—the saltiness of the cheese balances the sweetness of the drink.
Storage instructions: Leftover cocoa keeps in the refrigerator for up to 3 days. Store it in an airtight container. The flavor actually deepens overnight as the peppermint and vanilla meld together. To reheat, pour it into a saucepan and warm it over medium-low heat, stirring occasionally. You can also microwave it in 30-second bursts, stirring between each. The texture won’t be quite as smooth as fresh, but it’s still delicious.
Freezer instructions: You can freeze the cocoa base (without toppings) for up to 2 months. Let it cool completely, then pour it into a freezer-safe container, leaving an inch of headspace for expansion. Thaw in the refrigerator overnight, then reheat gently. The texture might separate slightly—just whisk it well and it will come back together.
One more thing: The flavors develop beautifully over time. I actually prefer the cocoa on day two—the peppermint mellows out and the chocolate becomes more pronounced. So don’t hesitate to make a double batch. Future you will thank you.
Nutritional Information & Benefits
Let’s talk numbers. This easy peppermint hot cocoa bar is a treat, but it’s not as indulgent as you might think. Here’s the breakdown for one serving (about 1 cup of cocoa with 2 tablespoons of marshmallows and 1 tablespoon of crushed candy canes):
| Nutrient | Amount per Serving |
|---|---|
| Calories | 285 |
| Total Fat | 12g |
| Saturated Fat | 7g |
| Carbohydrates | 38g |
| Sugar | 28g |
| Protein | 9g |
| Calcium | 300mg (23% DV) |
| Iron | 2mg (11% DV) |
Health benefits worth noting: Cocoa powder is actually rich in antioxidants called flavonoids, which can help reduce inflammation and support heart health. The milk provides calcium and vitamin D for strong bones. Peppermint has natural digestive benefits—it can help soothe an upset stomach and reduce bloating. So while this isn’t health food, it’s not empty calories either.
Dietary considerations: This recipe is vegetarian and nut-free (if using whole milk). To make it gluten-free, just check that your marshmallows and candy canes are certified gluten-free—most are, but it’s worth verifying. For a lower-sugar version, use unsweetened cocoa powder and reduce the sugar to 2 tablespoons. The peppermint and vanilla will still give you plenty of flavor.
Potential allergens: This recipe contains dairy (milk, cream). It is free of eggs, soy, and gluten (with the caveat above). If you’re serving a crowd, I recommend labeling the toppings so guests with allergies can easily see what’s safe.
From my perspective, this cocoa is about balance. It’s a treat, yes, but it’s one that brings genuine joy and comfort. I’d rather have one cup of this made with real ingredients than three cups of the powdered stuff. Quality over quantity, you know?
Conclusion
Look, I know setting up a hot cocoa bar might feel like a little thing. But honestly, those little things—the warm mug in your hands, the smell of peppermint, the first bite of a marshmallow that’s just starting to melt—they add up. They’re what make a cold Tuesday night feel a little less ordinary and a little more special.
This easy peppermint hot cocoa bar is worth trying because it works. It’s fast enough for a school night, simple enough for a beginner, and customizable enough that everyone in your family can make it their own. My niece likes hers with extra crushed candy canes. My husband adds a shot of espresso. I keep mine classic with a mountain of marshmallows and a peppermint stick for stirring. There’s no wrong way to do it.
I’d love to hear how yours turns out. Did you try a variation I haven’t thought of? Did your kids go crazy for the toppings bar? Drop a comment below and let me know. And if you share a photo on Pinterest, tag me—I love seeing your creations. Until next time, stay warm and keep making things that feel like home.
Frequently Asked Questions
Can I use dark chocolate instead of cocoa powder?
Absolutely! Melt 4 ounces of dark chocolate (about 2/3 cup of chips) into the warm milk instead of the cocoa powder. You’ll want to reduce the sugar slightly since dark chocolate already has some sweetness. The result is richer and smoother—almost like a European-style drinking chocolate.
How do I make this without a stovetop?
No problem. Heat the milk in a large microwave-safe bowl for 2-3 minutes, stopping to stir every minute. Then whisk in the cocoa, sugar, and extracts. The texture won’t be quite as smooth, but it works perfectly in a dorm room, office, or anywhere without a stove.
Can I make this in a slow cooker for a party?
Yes! Combine all the ingredients in a slow cooker and cook on low for 1-2 hours, stirring occasionally. Keep it on the “warm” setting for serving. Just don’t add the peppermint extract until the end—remember, it loses flavor with prolonged heat. Stir it in just before serving.
Why did my cocoa turn out grainy?
That usually happens when the cocoa powder doesn’t dissolve fully. Next time, try whisking the cocoa powder with a few tablespoons of warm milk first to make a smooth paste, then whisk that into the rest of the milk. Also, make sure your milk isn’t too hot—if it’s boiling, the cocoa can seize up and become grainy.
Can I use peppermint oil instead of extract?
You can, but be careful—peppermint oil is much more concentrated. Start with just 1/8 teaspoon (about 2 drops) and taste before adding more. Too much will make your cocoa taste like toothpaste. I prefer extract for its more balanced, gentler flavor, but oil works in a pinch.
Pin This Recipe!

Easy Peppermint Hot Cocoa Bar with Marshmallows
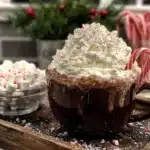
A quick and cozy hot cocoa bar featuring rich, creamy peppermint hot cocoa with a toppings bar of marshmallows, crushed candy canes, and whipped cream. Perfect for busy weeknights or holiday gatherings, ready in about 10 minutes.
- Prep Time: 5 minutes
- Cook Time: 5 minutes
- Total Time: 10 minutes
- Yield: 4 servings
- Category: Beverage
- Cuisine: American
Ingredients
- Whole milk, 4 cups (960 ml)
- Unsweetened cocoa powder, 1/3 cup (40 g)
- Granulated sugar, 1/4 cup (50 g)
- Vanilla extract, 1 teaspoon (5 ml)
- Salt, a pinch
- Peppermint extract, 1/2 teaspoon (2.5 ml)
- Mini marshmallows, 2 cups (about 100 g)
- Crushed candy canes, 1/2 cup (about 60 g)
- Whipped cream, 1 cup (240 ml)
- Chocolate shavings, 1/4 cup (30 g) (optional)
- Peppermint sticks or stirring spoons (optional)
- Dark chocolate chips, 1/4 cup (45 g) (optional)
- Cinnamon stick (optional)
Instructions
- Heat the milk: Pour 4 cups of whole milk into a medium saucepan. Warm over medium heat, stirring occasionally, until hot but not boiling (little bubbles form around edges, about 3-4 minutes).
- Whisk in dry ingredients: Remove pan from heat. Add 1/3 cup cocoa powder, 1/4 cup sugar, and a pinch of salt. Whisk vigorously until smooth and no lumps remain.
- Add extracts: Stir in 1 teaspoon vanilla extract and 1/2 teaspoon peppermint extract. Taste and adjust sweetness or peppermint as desired.
- Prepare toppings bar: While cocoa heats, crush candy canes in a zip-top bag with a rolling pin. Fill small bowls with crushed candy canes, mini marshmallows, and optional toppings. If making whipped cream, whip 1 cup heavy cream with 1 tablespoon powdered sugar and 1/2 teaspoon vanilla until soft peaks form.
- Assemble and serve: Ladle hot cocoa into mugs, filling about 3/4 full. Top with whipped cream, marshmallows, and crushed candy canes. Add chocolate shavings if desired. Serve immediately with a peppermint stick for stirring.
Notes
Don’t let the milk boil to avoid scorching. Add peppermint extract off heat to preserve flavor. For smoother cocoa, temper cocoa powder with a little warm milk first. Leftover cocoa keeps in the fridge for up to 3 days; reheat gently. For a dairy-free version, use oat milk.
Nutrition
- Serving Size: 1 cup
- Calories: 285
- Sugar: 28
- Sodium: 150
- Fat: 12
- Saturated Fat: 7
- Carbohydrates: 38
- Fiber: 2
- Protein: 9
Keywords: hot cocoa, peppermint, hot chocolate, marshmallows, candy canes, Christmas, winter, easy, quick, toppings bar


