There used to be a tiny ice cream parlor on the corner of Elm and 3rd in my old neighborhood — a cramped, pink-and-white striped place called “The Scoop.” When they closed their doors three summers ago, I felt a genuine pang of loss. It wasn’t just any ice cream they made; it was their salted caramel. It had this perfect balance of sweet, buttery caramel and those sharp, flaky salt crystals that hit you right at the end. I spent a solid two years trying to crack that code. After about twelve attempts — some were icy, some were too sweet, one was a crystallized disaster — I finally got it. And the crazy thing? It only takes four ingredients and no ice cream maker. Honestly, this homemade no-churn salted caramel ice cream is better than anything I ever bought from a shop.
I remember the day it finally worked. It was a Tuesday, and the power had flickered on and off all morning from a summer storm. I was determined, maybe a little stubborn. I had a whisk in one hand and a can of sweetened condensed milk in the other. The texture was so creamy, so smooth, I almost didn’t believe it. I mean, no machine, no churning, no fuss — just a bowl, a whisk, and a lot of patience. That first spoonful brought me right back to that pink-striped parlor. Maybe you’ve been there, chasing a flavor from a place that no longer exists. This recipe is your ticket back.
Why You’ll Love This Recipe
Let me tell you why this is the only ice cream recipe you’ll ever need. I’ve tested this in every season — humid summer afternoons, dry winter evenings — and it never fails. It’s the kind of recipe that makes you look like a kitchen wizard without any of the stress.
- Quick & Easy: You only need about 15 minutes of active prep time. The hardest part is waiting for it to freeze!
- Simple Ingredients: Heavy cream, sweetened condensed milk, vanilla, and homemade salted caramel. That’s it. No weird stabilizers or hard-to-find items.
- Perfect for Cozy Nights: This is your go-to for a slow evening at home, a cold winter night, or a rough day that needs fixing. It’s comfort in a bowl.
- Crowd-Pleaser: I’ve brought this to potlucks and family dinners, and it disappears faster than anything else. Kids and adults fight over the last scoop.
- Unbelievably Delicious: The texture is so velvety and rich, you’ll swear it’s from a fancy creamery. The salted caramel ribbons throughout are pure magic.
What makes this recipe different from the rest? It’s the technique. Most no-churn recipes are just cream and condensed milk, but the homemade salted caramel adds a depth of flavor you can’t get from store-bought sauce. It’s also the way we fold everything together — gently, patiently — to keep that airy, scoopable texture. This isn’t just another version; it’s my best version, and I’m so excited to share it with you.
This recipe is the kind that makes you close your eyes after the first bite. It’s comfort food reimagined — faster, simpler, but with the same soul-soothing satisfaction. Perfect for impressing guests without stress, or turning a simple Tuesday night into something memorable.
What Ingredients You Will Need
This recipe uses simple, wholesome ingredients to deliver bold flavor and satisfying texture without the fuss. Most of these are pantry staples, which makes this even more irresistible.
- For the Salted Caramel Sauce:
- 1 cup (200g) granulated sugar — (the base of the caramel, use pure cane sugar for best results)
- 6 tablespoons (85g) unsalted butter, cut into cubes — (adds richness and smoothness; I prefer Kerrygold for its creaminess)
- 1/2 cup (120ml) heavy cream, room temperature — (creates the silky sauce; don’t use cold cream or it will seize)
- 1 teaspoon flaky sea salt, plus more for finishing — (Maldon salt is my go-to for that perfect crunch)
- For the Ice Cream Base:
- 2 cups (480ml) cold heavy cream — (whipped to stiff peaks for that airy texture)
- 1 can (14 ounces or 397g) sweetened condensed milk — (the secret to no-churn ice cream; use full-fat for best results)
- 1 teaspoon vanilla extract — (pure vanilla, not imitation, for a warm flavor)
- Pinch of fine sea salt — (balances the sweetness)
Ingredient Selection Tips: For the caramel, don’t skimp on the butter. I’ve tried this with salted butter, and while it works, unsalted gives you more control over the final salt level. For the heavy cream, look for one with at least 36% milk fat — it whips up much better and gives a creamier texture. If you’re feeling adventurous, you can swap the vanilla for a vanilla bean paste for those beautiful speckles.
Substitution Guidance: Need a dairy-free option? Use full-fat coconut cream (chilled overnight) and a dairy-free sweetened condensed milk alternative. It won’t be quite as rich, but it’s still delicious. For a lower-sugar version, you can use a sugar-free sweetened condensed milk, but the texture will be slightly softer.
Equipment Needed
You don’t need a fancy ice cream maker for this, and that’s the beauty of it. Here’s what you’ll need:
- Medium saucepan — for making the caramel; a light-colored pan helps you see the color change
- Large mixing bowl — for whipping the cream
- Hand mixer or stand mixer — whisking by hand is possible, but your arm will thank you for the mixer
- Rubber spatula — for folding everything together gently
- 9×5-inch loaf pan — or any freezer-safe container; I love using a metal loaf pan for even freezing
- Parchment paper or plastic wrap — for covering the surface
- Whisk — for the caramel (a silicone whisk is great if you have one)
- Candy thermometer — optional but helpful for caramel beginners
Budget-Friendly Options: Don’t have a hand mixer? You can absolutely whisk the cream by hand — it just takes about 5-7 minutes of vigorous whisking. No loaf pan? Any freezer-safe container works, even a metal mixing bowl. I’ve used a plastic takeout container in a pinch, and it worked fine!
Personal Experience: I learned the hard way that a dark-colored saucepan makes it tricky to see when the caramel is done. I ended up with a burnt batch that smelled like a campfire gone wrong. Now I always use my trusty light-bottomed saucepan. Trust me on this one.
Preparation Method
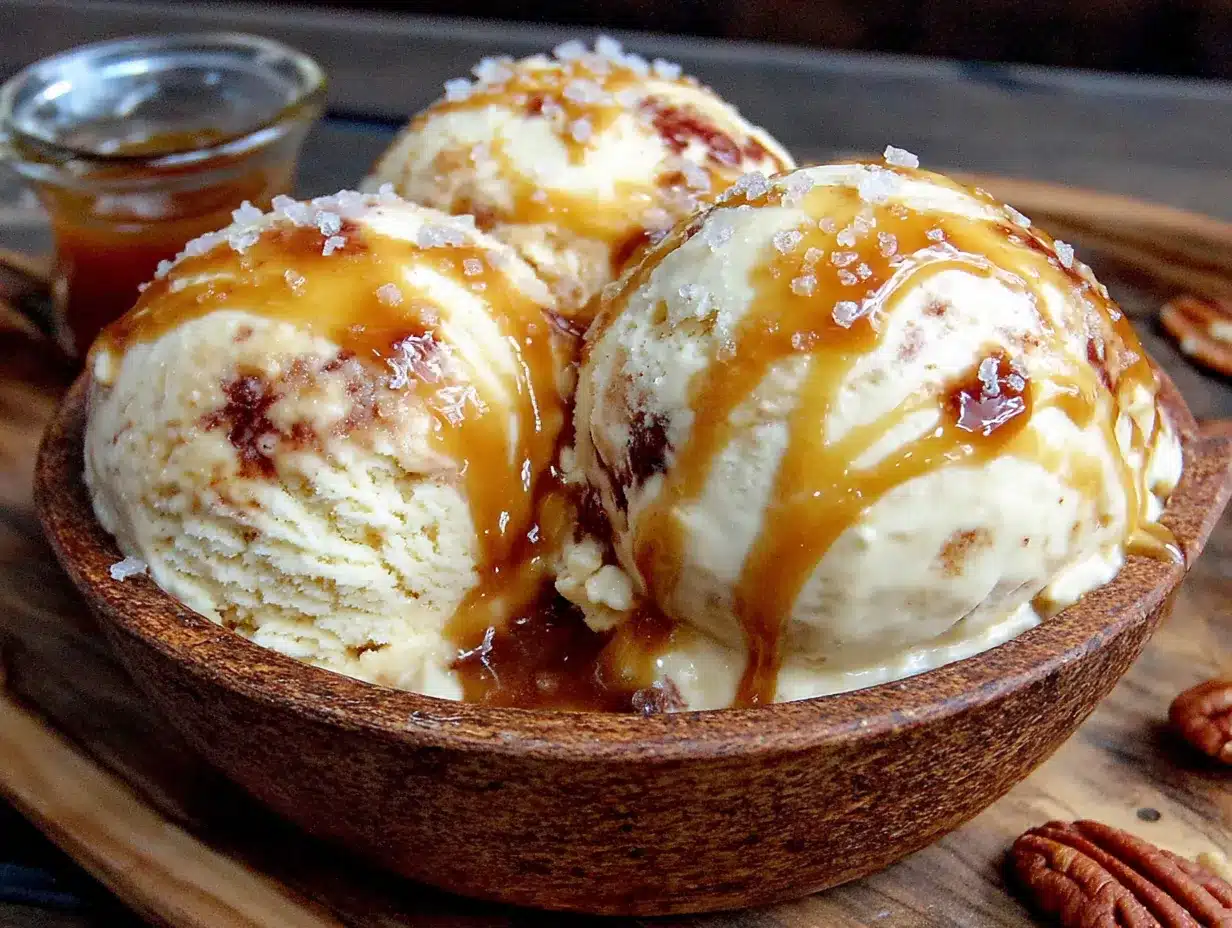
Alright, let’s make some magic. This might look like a lot of steps, but I promise it’s simple. Just take it one step at a time.
- Make the Salted Caramel Sauce: In a medium saucepan over medium heat, add the 1 cup of granulated sugar. Stir it gently with a whisk or spatula as it begins to melt. It will clump at first — don’t panic, that’s normal. Keep stirring until it melts into a smooth, amber-colored liquid. This takes about 6-8 minutes. Be patient; don’t crank up the heat or it will burn.
- Add the Butter: Once the sugar is fully melted and a deep amber color (think of a shiny penny), add the cubed butter. The mixture will bubble up vigorously — that’s okay! Whisk constantly until the butter is fully melted and incorporated. It should look smooth and glossy.
- Add the Cream: Slowly drizzle in the room-temperature heavy cream while whisking continuously. Again, it will bubble up. Keep whisking until the sauce is smooth and all the cream is incorporated. Remove from heat.
- Season and Cool: Stir in the 1 teaspoon of flaky sea salt. Let the caramel cool in the pan for about 15 minutes, then transfer it to a heat-safe jar or bowl. Let it cool completely at room temperature, then refrigerate until cold — at least 2 hours or overnight. The caramel will thicken as it cools.
- Whip the Cream: In a large mixing bowl, pour in the 2 cups of cold heavy cream. Using a hand mixer or stand mixer with the whisk attachment, beat the cream on medium-high speed until stiff peaks form. This takes about 3-5 minutes. You want it thick and fluffy, like a cloud. Don’t over-whip or you’ll end up with butter!
- Fold in the Condensed Milk: In a separate small bowl, whisk together the can of sweetened condensed milk, 1 teaspoon of vanilla extract, and a pinch of fine sea salt. Gently fold this mixture into the whipped cream using a rubber spatula. Use a light hand — you want to keep as much air in the mixture as possible. Fold until just combined, with no white streaks remaining.
- Layer the Caramel: Spoon about one-third of the ice cream base into your loaf pan. Drizzle about one-third of the cold salted caramel sauce over the top. Use a knife or skewer to gently swirl it into the base. Repeat with the remaining layers — base, caramel, swirl. Don’t over-swirl or you’ll lose the distinct ribbons of caramel.
- Freeze: Cover the surface of the ice cream with a piece of parchment paper or plastic wrap, pressing it directly onto the surface to prevent ice crystals. Cover the pan with foil or a lid. Freeze for at least 6 hours, but preferably overnight. The longer it freezes, the better the texture.
- Serve: When you’re ready to serve, let the ice cream sit at room temperature for about 5-10 minutes to soften slightly. This makes scooping so much easier. Drizzle with extra caramel sauce and a sprinkle of flaky sea salt before serving.
Sensory Cues: When the caramel is ready, it should smell nutty and sweet, like toasted sugar. The color should be a deep amber, not dark brown. When you fold the base, it should feel light and airy, like a soft marshmallow. And when you take that first bite, the caramel should be soft and chewy, not hard or crystallized.
Personal Tip: I always make the caramel the day before. It gives it time to chill completely, and it makes the assembly the next day feel like a breeze. Plus, you can use any leftover caramel on pancakes, coffee, or just eat it with a spoon — no judgment here.
Cooking Tips & Techniques
Let me save you from some of my own mistakes. I’ve made this recipe more times than I can count, and I’ve learned a few things along the way.
Caramel Troubleshooting: If your caramel seizes up when you add the butter or cream, don’t panic. Just return it to low heat and whisk gently. It will come back together. The key is to have your cream at room temperature — cold cream will shock the hot sugar and cause it to seize. Also, don’t stir the sugar too much once it starts melting; let it do its thing. I once stirred it constantly and ended up with a grainy mess.
Whipping Cream Tips: Make sure your cream is very cold — straight from the fridge. If your kitchen is warm, you can place the bowl and beaters in the freezer for 10 minutes before whipping. This helps the cream whip up faster and hold its shape better. And please, don’t walk away while whipping. I’ve done that and ended up with sweetened butter. Not the worst thing in the world, but not ice cream.
Texture Secrets: The secret to creamy no-churn ice cream is air. The more air you incorporate when whipping the cream, the lighter and creamier the final texture will be. That’s why folding is so important — you don’t want to deflate all that air. Also, the sweetened condensed milk acts as a stabilizer, preventing ice crystals from forming. It’s basically magic in a can.
Timing Strategy: I like to make the caramel in the morning, let it chill in the fridge while I go about my day, then whip up the base in the evening. It takes about 15 minutes to assemble, and then it’s off to the freezer overnight. By the next afternoon, you have perfect ice cream.
Variations & Adaptations
This recipe is a great starting point, but don’t be afraid to make it your own. Here are some of my favorite variations:
- Chocolate Salted Caramel: Add 1/4 cup of unsweetened cocoa powder to the sweetened condensed milk before folding it into the whipped cream. It creates this incredible chocolate-caramel combo that’s absolutely divine. I made this for a friend’s birthday, and she said it was the best ice cream she’d ever had.
- Vegan Version: Use full-fat coconut cream (chilled overnight) instead of heavy cream, and a dairy-free sweetened condensed coconut milk. The caramel can be made with vegan butter and coconut cream. It’s a little softer, but still incredibly creamy and delicious.
- Boozy Salted Caramel: Add 2 tablespoons of bourbon or dark rum to the caramel sauce after removing it from the heat. The alcohol keeps the ice cream slightly softer and adds a warm, complex flavor. Perfect for adult gatherings!
- Nutty Crunch: Fold in 1/2 cup of toasted pecans or candied walnuts along with the caramel layers. The crunch adds a wonderful texture contrast to the creamy ice cream. I love this version for fall.
- Espresso Kick: Dissolve 1 tablespoon of instant espresso powder in the vanilla extract before adding it to the condensed milk. The coffee flavor pairs beautifully with the salted caramel. It’s like a fancy affogato in ice cream form.
Serving & Storage Suggestions
This ice cream is best served slightly softened — about 5-10 minutes at room temperature after taking it out of the freezer. Scoop it into bowls or cones, and drizzle with extra salted caramel sauce and a sprinkle of flaky sea salt. The contrast of cold, creamy ice cream with the warm, salty caramel is just perfection.
Presentation Ideas: Serve in chilled glass bowls for an elegant touch. Top with a dollop of whipped cream and a drizzle of caramel. For a fun twist, serve it between two chocolate cookies for an ice cream sandwich. I’ve also used it as a topping for warm brownies — the hot-and-cold combination is incredible.
Pairing Suggestions: This ice cream pairs beautifully with fresh berries, chocolate cake, or a warm apple crisp. For drinks, it goes wonderfully with a strong cup of coffee, a cold glass of milk, or even a shot of bourbon on the side.
Storage Instructions: Store the ice cream in an airtight container in the freezer for up to 2 weeks. Press a piece of parchment paper directly onto the surface before sealing to prevent ice crystals. If you’re storing it for longer, wrap the container in plastic wrap as well.
Reheating Tips: If the ice cream becomes too hard after a few days, let it sit at room temperature for 10-15 minutes before scooping. You can also microwave the container for 10-15 seconds to soften it slightly. The caramel ribbons will soften up beautifully.
Flavor Development: The flavors actually deepen after a day or two in the freezer. The caramel becomes more pronounced, and the saltiness mellows out a bit. It’s one of those rare recipes that gets better with time. That said, it never lasts more than a week in my house!
Nutritional Information & Benefits
Here’s a rough estimate per serving (based on 8 servings):
- Calories: Approximately 450-500
- Fat: 32g
- Carbohydrates: 42g
- Protein: 6g
- Sugar: 38g
- Sodium: 280mg
Health Benefits: While this is definitely a treat, it does have some redeeming qualities. The heavy cream provides calcium and vitamin A, which are great for bone health and vision. The butter in the caramel contains butyrate, a fatty acid that supports gut health. And the salt? Well, it helps with electrolyte balance.
Dietary Considerations: This recipe is gluten-free and vegetarian. For a lower-sugar option, you can use a sugar-free sweetened condensed milk, but the texture will be slightly different. As mentioned, it can be made dairy-free with some substitutions.
Potential Allergens: This recipe contains dairy. The caramel is also made with butter, so it’s not dairy-free. If you have nut allergies, the basic recipe is nut-free, but be careful with any variations that include nuts.
Personal Wellness Perspective: I believe in balance. This ice cream is a treat, something to enjoy on a cozy night in or after a long week. It’s not an everyday food, but it’s absolutely worth every spoonful when you do have it. Life is too short for boring desserts.
FAQs
Can I use store-bought caramel sauce instead of making my own?
You can, but I really recommend making your own. Homemade salted caramel has a deeper, more complex flavor that store-bought sauces just can’t match. Plus, it’s surprisingly easy to make! If you’re in a pinch, use a high-quality jarred caramel and add a pinch of flaky sea salt.
Why is my no-churn ice cream icy?
Icy texture usually means not enough air was incorporated when whipping the cream, or the mixture wasn’t folded gently enough. Make sure you whip the cream to stiff peaks, and fold the condensed milk in gently to preserve the air. Also, pressing parchment paper directly onto the surface before freezing helps prevent ice crystals.
Can I make this without a hand mixer?
Absolutely! You can whisk the cream by hand, but it will take some elbow grease — about 5-7 minutes of vigorous whisking. Make sure the cream is very cold, and use a large bowl to give yourself room. It’s a great arm workout!
How long does this ice cream last in the freezer?
It’s best within the first 2 weeks. After that, it can start to develop ice crystals and lose some of its creamy texture. If you’re storing it longer, make sure it’s in an airtight container with parchment paper pressed onto the surface. It will still be safe to eat for up to a month, but the texture won’t be as perfect.
Can I double this recipe?
Yes! This recipe doubles beautifully. Just make sure you have a large enough bowl for whipping the cream — you don’t want it splattering everywhere. You’ll also need a bigger container for freezing. A 9×13-inch baking dish works great for a double batch.
Conclusion
This homemade no-churn salted caramel ice cream is everything I wanted it to be — creamy, rich, perfectly salty-sweet, and so much easier than you’d think. It’s the kind of recipe that feels special but doesn’t require a special occasion. It’s for those slow evenings when you need a little comfort, or those hot summer days when only ice cream will do.
I love this recipe because it’s proof that you don’t need fancy equipment or complicated techniques to make something truly amazing. Just four ingredients, a little patience, and a whole lot of love. I hope you make this your own — add your favorite mix-ins, adjust the salt to your liking, and don’t forget to save some extra caramel for drizzling.
I’d love to hear how it turns out for you! Drop a comment below and let me know if this brought back any memories or created new ones. And if you tweak it, share your variation — I’m always looking for new ideas. Until next time, happy scooping!
Pin This Recipe!
Homemade No-Churn Salted Caramel Ice Cream (Easy 4-Ingredient Recipe)

This homemade no-churn salted caramel ice cream is creamy, rich, and perfectly salty-sweet, made with just four ingredients and no ice cream maker. It’s the perfect comfort dessert for cozy nights or impressing guests.
- Prep Time: 15 minutes
- Cook Time: 10 minutes
- Total Time: 6 hours 25 minutes (including freezing time)
- Yield: 8 servings 1x
- Category: Dessert
- Cuisine: American
Ingredients
- 1 cup (200g) granulated sugar
- 6 tablespoons (85g) unsalted butter, cut into cubes
- 1/2 cup (120ml) heavy cream, room temperature
- 1 teaspoon flaky sea salt, plus more for finishing
- 2 cups (480ml) cold heavy cream
- 1 can (14 ounces or 397g) sweetened condensed milk
- 1 teaspoon vanilla extract
- Pinch of fine sea salt
Instructions
- Make the Salted Caramel Sauce: In a medium saucepan over medium heat, add the 1 cup of granulated sugar. Stir it gently with a whisk or spatula as it begins to melt. It will clump at first — don’t panic, that’s normal. Keep stirring until it melts into a smooth, amber-colored liquid. This takes about 6-8 minutes. Be patient; don’t crank up the heat or it will burn.
- Add the Butter: Once the sugar is fully melted and a deep amber color (think of a shiny penny), add the cubed butter. The mixture will bubble up vigorously — that’s okay! Whisk constantly until the butter is fully melted and incorporated. It should look smooth and glossy.
- Add the Cream: Slowly drizzle in the room-temperature heavy cream while whisking continuously. Again, it will bubble up. Keep whisking until the sauce is smooth and all the cream is incorporated. Remove from heat.
- Season and Cool: Stir in the 1 teaspoon of flaky sea salt. Let the caramel cool in the pan for about 15 minutes, then transfer it to a heat-safe jar or bowl. Let it cool completely at room temperature, then refrigerate until cold — at least 2 hours or overnight. The caramel will thicken as it cools.
- Whip the Cream: In a large mixing bowl, pour in the 2 cups of cold heavy cream. Using a hand mixer or stand mixer with the whisk attachment, beat the cream on medium-high speed until stiff peaks form. This takes about 3-5 minutes. You want it thick and fluffy, like a cloud. Don’t over-whip or you’ll end up with butter!
- Fold in the Condensed Milk: In a separate small bowl, whisk together the can of sweetened condensed milk, 1 teaspoon of vanilla extract, and a pinch of fine sea salt. Gently fold this mixture into the whipped cream using a rubber spatula. Use a light hand — you want to keep as much air in the mixture as possible. Fold until just combined, with no white streaks remaining.
- Layer the Caramel: Spoon about one-third of the ice cream base into your loaf pan. Drizzle about one-third of the cold salted caramel sauce over the top. Use a knife or skewer to gently swirl it into the base. Repeat with the remaining layers — base, caramel, swirl. Don’t over-swirl or you’ll lose the distinct ribbons of caramel.
- Freeze: Cover the surface of the ice cream with a piece of parchment paper or plastic wrap, pressing it directly onto the surface to prevent ice crystals. Cover the pan with foil or a lid. Freeze for at least 6 hours, but preferably overnight. The longer it freezes, the better the texture.
- Serve: When you’re ready to serve, let the ice cream sit at room temperature for about 5-10 minutes to soften slightly. This makes scooping so much easier. Drizzle with extra caramel sauce and a sprinkle of flaky sea salt before serving.
Notes
Make the caramel the day before for best results. For dairy-free, use full-fat coconut cream and dairy-free sweetened condensed milk. For a lower-sugar version, use sugar-free sweetened condensed milk (texture will be softer). Store in an airtight container for up to 2 weeks.
Nutrition
- Serving Size: 1 serving (about 1/2
- Calories: 475
- Sugar: 38
- Sodium: 280
- Fat: 32
- Saturated Fat: 20
- Carbohydrates: 42
- Protein: 6
Keywords: no-churn ice cream, salted caramel ice cream, homemade ice cream, easy ice cream, 4-ingredient ice cream, no ice cream maker