My neighbor, a retired baker named Gloria, watched me wrestling with a bag of flour on my front porch one October afternoon. I was trying to balance three pumpkins, a bag of groceries, and my phone all at once. She didn’t say anything at first. Then she just shook her head, smiled, and walked over to her garden fence. “You’re trying too hard,” she said. “Come over tomorrow. I’ll show you how to make something that actually tastes like fall feels.”
I thought she was going to teach me some complicated pie crust technique or a fancy layered cake. Instead, she handed me a cupcake. It was dark, almost black, with a tiny ghost perched on top made of the fluffiest frosting I had ever seen. One bite and I honestly forgot about those pumpkins entirely. The cake was tender, moist, and had this deep, almost mysterious chocolate flavor—nothing like the dry, crumbly black cupcakes I had tried from box mixes before. She called them her “cozy ghosts,” and said she only made them when the weather turned cold enough for a sweater.
I asked her for the recipe, and she pulled a crumpled index card from her apron pocket. It was stained with cocoa powder and butter, and the handwriting was tiny and cramped. “Don’t overmix it,” she warned. “That’s the only rule.” I went home that evening, made a test batch, and promptly ate three before dinner. Maybe you’ve been there—when a recipe just hits that spot you didn’t even know needed filling. These Cozy Black Velvet Ghost Cupcakes are that recipe. They’re the kind of treat you make not for a party, but for a quiet Tuesday night when the wind is howling and you need something warm and sweet to hold onto. Let me tell you, they’ve become my favorite Halloween tradition, and I think they’re about to become yours too.
Why You’ll Love This Recipe
I’ve tested this recipe more times than I care to admit. There was the batch where the cupcakes came out gray instead of black (lesson learned: don’t skimp on the cocoa powder). Then the batch where the ghosts looked more like sad blobs (too much milk in the frosting). But after all those trials, I finally nailed it. Here is why this version is the one you’ll come back to year after year:
- Quick & Easy: From start to finish, these cupcakes are ready in about 45 minutes. The batter comes together in one bowl, and the frosting whips up while the cupcakes cool. Perfect for a last-minute Halloween craving or a cozy weekend baking session.
- Simple Ingredients: You probably already have most of these in your pantry. No weird food coloring gels or specialty extracts. Just butter, sugar, flour, cocoa powder, and a little coffee to deepen the flavor.
- Perfect for Cozy Evenings: These aren’t just for Halloween parties. They’re for movie nights, rainy afternoons, or any time you want a little comfort in cupcake form. The ghosts make them fun, but the flavor makes them unforgettable.
- Crowd-Pleaser: I have brought these to potlucks, office parties, and family gatherings. Kids love the ghost decorations. Adults love the rich, velvety cake. Everyone asks for the recipe.
- Unbelievably Delicious: The secret is in the texture. The cake is incredibly moist with a fine crumb, thanks to a combination of buttermilk and oil. The black velvet flavor is deep and chocolatey without being overly sweet, and the vanilla frosting is light as air. It’s next-level comfort food disguised as a cute Halloween treat.
What makes this recipe different from every other black cupcake out there? It’s the balance. Many black velvet recipes rely on loads of artificial coloring and end up tasting bitter or chemical. This one gets its dark color naturally from Dutch-process cocoa powder and a touch of instant coffee, which also enhances the chocolate flavor. The frosting is stabilized with a little cream cheese, so it holds its shape for the ghost decorations without being heavy. It’s not just another version—it’s the best version, born from a dozen failed batches and one very patient neighbor.
This recipe is the kind that makes you close your eyes after the first bite. Seriously. It’s comfort food reimagined—cozy, cute, and with the same soul-soothing satisfaction as a warm blanket on a cold night. Perfect for impressing guests without stress, or turning a simple evening into something memorable.
What Ingredients You Will Need
This recipe uses simple, wholesome ingredients to deliver that rich black velvet flavor and tender crumb. Most of these are pantry staples, so you likely have everything on hand already. Let me walk you through each one and why it matters.
For the Cupcakes
- All-purpose flour, 1 ½ cups (190g): This gives the cupcakes structure. I prefer unbleached flour for a softer texture, but bleached works fine too. Spoon and level your flour—don’t scoop directly from the bag, or you’ll end up with dry cupcakes.
- Granulated sugar, 1 cup (200g): Regular white sugar provides sweetness and helps with browning. I’ve tried reducing the sugar, but the cupcakes lose their tenderness. Stick with the full amount for the best texture.
- Dutch-process cocoa powder, ½ cup (50g): This is the star ingredient. Dutch-process cocoa is alkalized, which means it’s darker and less acidic than natural cocoa. It gives the cupcakes their deep black velvet color without needing loads of food coloring. I recommend Droste or Guittard for the richest flavor.
- Baking soda, 1 teaspoon: This reacts with the buttermilk to help the cupcakes rise. Make sure it’s fresh—test it by dropping a little into vinegar; it should fizz vigorously.
- Salt, ½ teaspoon: Just a pinch to balance the sweetness and enhance the chocolate flavor. I use fine sea salt.
- Instant coffee granules, 1 tablespoon (optional but recommended): You won’t taste the coffee. It deepens the chocolate flavor and makes the black color more intense. I use Folgers instant—nothing fancy needed.
- Buttermilk, 1 cup (240ml), room temperature: Buttermilk adds tanginess and keeps the cake incredibly moist. If you don’t have buttermilk, you can make a quick substitute: add 1 tablespoon of lemon juice or white vinegar to a measuring cup, then fill with regular milk to the 1-cup line. Let it sit for 5 minutes until it curdles.
- Vegetable oil, ½ cup (120ml): Oil keeps the cupcakes moist longer than butter. I use a neutral oil like canola or grapeseed. Avoid olive oil—the flavor is too strong.
- Eggs, 2 large, room temperature: Eggs provide structure and richness. Let them sit on the counter for 30 minutes before baking so they incorporate more smoothly into the batter.
- Vanilla extract, 2 teaspoons: Pure vanilla extract is worth the splurge here. It rounds out the chocolate flavor beautifully. Imitation vanilla works in a pinch, but the flavor is less complex.
- Black food coloring, 1-2 teaspoons (optional): If you want that dramatic jet-black color, add a little gel food coloring. I use Americolor Super Black. But honestly, with the Dutch-process cocoa and coffee, the cupcakes are already a deep, dark brown that looks black in dim lighting. I often skip the coloring entirely.
For the Ghost Frosting
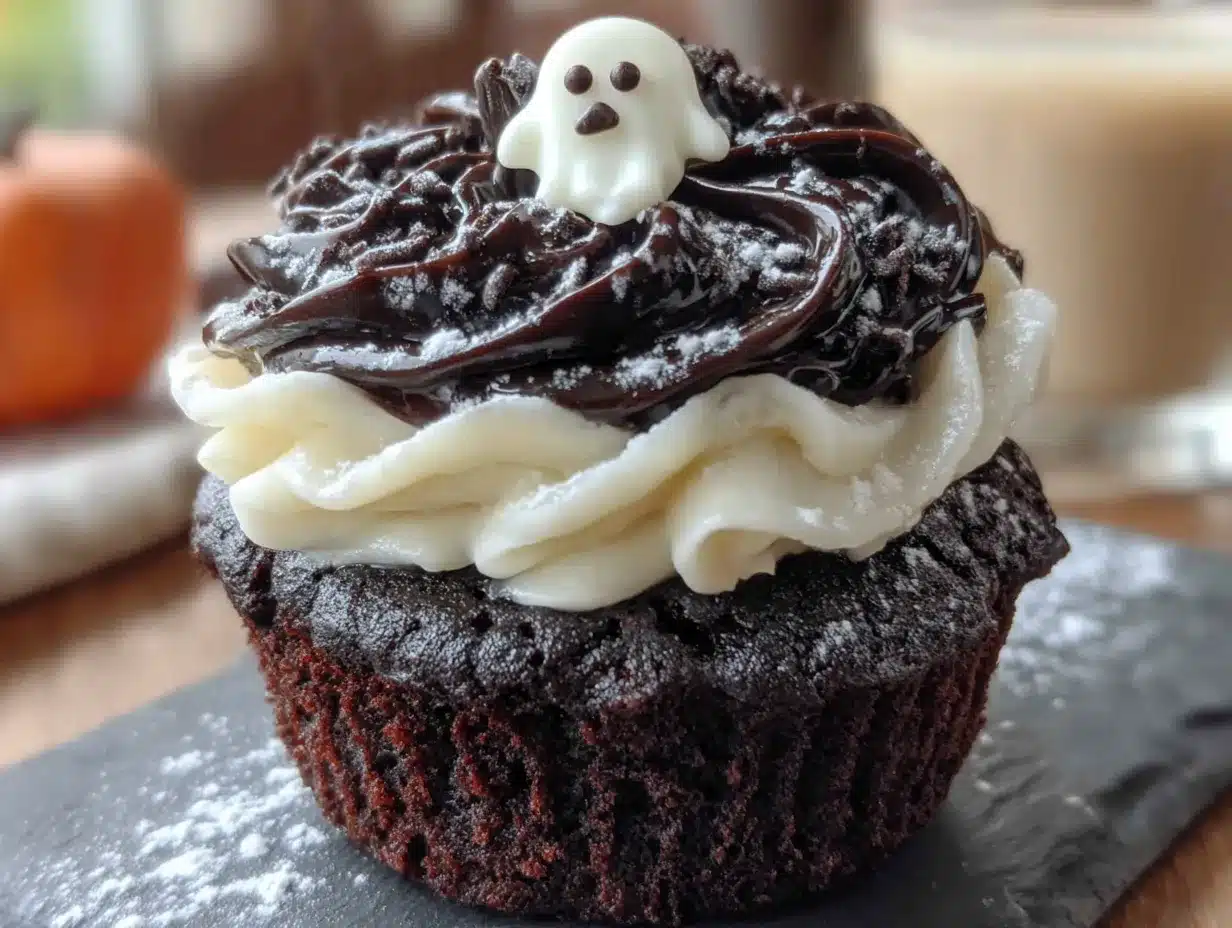
- Unsalted butter, ½ cup (113g), softened: Butter gives the frosting its creamy base. Make sure it’s truly softened—you should be able to press your finger into it easily. Cold butter will give you lumpy frosting.
- Cream cheese, 4 oz (113g), softened: This is my secret for stable, pipe-able frosting that isn’t too sweet. The cream cheese adds a subtle tang and helps the ghosts hold their shape. Use full-fat cream cheese for the best results—low-fat versions are too watery.
- Powdered sugar, 2 cups (240g), sifted: Sifting removes lumps and gives you silky smooth frosting. Don’t skip this step, or you’ll have tiny sugar granules in your ghosts.
- Heavy cream, 2-3 tablespoons (30-45ml): This thins the frosting to the perfect piping consistency. Add it slowly—you might not need all of it. The frosting should be thick enough to hold a peak but soft enough to pipe smoothly.
- Vanilla extract, 1 teaspoon: Pure vanilla again for that warm, cozy flavor. You can also use vanilla bean paste for little specks of vanilla in the frosting.
- Mini chocolate chips or black sprinkles, for eyes (optional): These give the ghosts their cute little faces. I use mini chocolate chips because I always have them on hand.
Equipment Needed
You don’t need a fancy bakery setup to make these ghosts. Here is what you’ll need, along with a few alternatives if you’re working with a minimalist kitchen.
- Muffin tin (12-cup): A standard metal muffin tin works perfectly. If you have a non-stick one, great. If not, just use paper liners and you’re good to go. I have an old, slightly warped tin from a thrift store, and it still turns out perfect cupcakes.
- Paper cupcake liners: I like using black or orange liners for Halloween, but plain white ones work too. The ghosts pop nicely against dark liners. Avoid the cheap, thin liners that peel away from the cake—invest in good quality ones like Reynolds or Wilton.
- Mixing bowls: You’ll need one large bowl for the dry ingredients and another for the wet ingredients. I use glass or stainless steel—plastic bowls can retain grease and affect the batter.
- Whisk and spatula: A whisk for combining dry ingredients and a rubber spatula for folding everything together. A wooden spoon works too, but a spatula gives you better control for scraping the bowl.
- Electric mixer (hand or stand): For the frosting, you’ll want an electric mixer. A hand mixer works perfectly—I use a $20 one from Target. You can make the frosting by hand with a whisk, but your arm will get a workout. The cupcake batter is best mixed by hand to avoid overmixing.
- Piping bag and round tip (Wilton #12 or similar): For piping the ghost shapes. If you don’t have a piping bag, you can use a zip-top bag with a corner snipped off. The round tip gives you more control, but a snipped bag works in a pinch. I’ve used both methods, and honestly, the zip-top bag is easier to clean.
- Cooling rack: Important for cooling the cupcakes evenly. If you don’t have one, you can let them cool in the pan for 10 minutes, then carefully transfer them to a plate. The bottoms might get a little soggy, but it’s fine for home baking.
- Measuring cups and spoons: For accuracy. I use dry measuring cups for flour and sugar, and a liquid measuring cup for buttermilk and oil. It makes a difference in the final texture.
Preparation Method
Let’s get baking! I’ve broken this down into simple steps with all the little details I wish someone had told me the first time. Take your time, and don’t rush—baking is supposed to be relaxing, not stressful.
- Preheat your oven to 350°F (175°C). Line your muffin tin with 12 paper liners. I like to spray the inside of the liners lightly with non-stick spray—it helps the cupcakes release cleanly, especially if you’re using dark liners that tend to stick.
- Mix the dry ingredients. In a large bowl, whisk together the flour, sugar, cocoa powder, baking soda, salt, and instant coffee granules. Make sure there are no lumps in the cocoa powder. I use a fork to break up any clumps before whisking. The coffee granules should be well distributed—if they’re clumpy, crush them with your fingers.
- Combine the wet ingredients. In a separate bowl or large liquid measuring cup, whisk together the buttermilk, oil, eggs, and vanilla extract. Whisk until the eggs are fully incorporated and the mixture is smooth. If you’re using food coloring, add it here and whisk until the mixture is uniformly dark. This is also where you can check the temperature—the buttermilk should feel cool but not cold. Room temperature ingredients emulsify better and give you a more tender crumb.
- Combine wet and dry. Pour the wet ingredients into the dry ingredients. Use a rubber spatula to fold everything together gently. Stir just until you no longer see streaks of flour—about 15 to 20 strokes. A few small lumps are okay. Do not overmix! Overmixing develops gluten and makes the cupcakes tough. I learned this the hard way when my first batch came out like hockey pucks. Stop as soon as the batter comes together. The batter will be thin—thinner than regular cake batter—and that’s exactly how it should be.
- Fill the liners. Divide the batter evenly among the 12 liners. I use a ¼-cup measuring cup or a cookie scoop to get consistent portions. Each liner should be about ⅔ full. Don’t overfill, or the cupcakes will dome over the top and lose their flat surface for the ghosts. If you have extra batter, you can make a mini cupcake or two in a separate tin.
- Bake. Place the muffin tin in the preheated oven and bake for 18 to 22 minutes. Start checking at 18 minutes—insert a toothpick into the center of a cupcake. If it comes out with a few moist crumbs attached, they’re done. If it comes out wet with batter, give them another 2 minutes. The tops should spring back when lightly touched. Every oven is different, so trust your senses more than the timer. My old oven runs hot, so I usually start checking at 16 minutes.
- Cool completely. Let the cupcakes cool in the pan for 5 minutes. This allows them to set and makes them easier to handle. Then transfer them to a wire rack to cool completely. Do not frost them while they’re warm, or the frosting will melt into a puddle. I know it’s tempting, but patience pays off. If you’re in a hurry, you can pop them in the fridge for 15 minutes to speed up cooling.
- Make the frosting. While the cupcakes cool, make the ghost frosting. In a medium bowl, beat the softened butter and cream cheese together with an electric mixer on medium speed until smooth and creamy—about 2 minutes. Scrape down the sides of the bowl. Add the sifted powdered sugar, one cup at a time, beating on low speed until combined. Add the vanilla extract and 2 tablespoons of heavy cream. Beat on medium-high speed for 3 to 4 minutes until the frosting is light, fluffy, and holds stiff peaks. If it’s too thick, add the remaining tablespoon of heavy cream. If it’s too thin, add a little more powdered sugar. The frosting should be thick enough to hold its shape when piped.
- Pipe the ghosts. Transfer the frosting to a piping bag fitted with a round tip. Hold the bag vertically over a cooled cupcake, about ½ inch above the surface. Squeeze gently to create a round base for the ghost’s body. As you squeeze, slowly lift the bag straight up to create a tall, tapered shape. Release the pressure and pull away quickly to form a little peak on top. This takes a little practice—my first few ghosts looked more like blobs with hats. If you mess up, just scrape the frosting off and try again. The frosting is very forgiving. Repeat with the remaining cupcakes.
- Add the eyes. While the frosting is still soft, gently press two mini chocolate chips into each ghost to create eyes. Position them close together near the top of the ghost shape. You can also use black sprinkles or tiny candies. If the frosting starts to crust over, the chips won’t stick as well, so do this immediately after piping each ghost. I like to pipe three or four ghosts, then add the eyes, then pipe the next batch.
- Chill and serve. Refrigerate the finished cupcakes for at least 15 minutes to set the frosting. This makes the ghosts firmer and easier to transport. Serve chilled or at room temperature. The cupcakes taste even better the next day after the flavors have had time to meld.
Cooking Tips & Techniques
After making these cupcakes more times than I can count, I’ve collected a few tricks that make the process smoother and the results more consistent. Here are my best tips, straight from my kitchen to yours.
Don’t skip the coffee. I know it sounds weird in a cupcake, but instant coffee is a game-changer. It doesn’t make the cupcakes taste like coffee at all. Instead, it deepens the chocolate flavor and helps the black color look more intense. Think of it as a flavor enhancer, not a separate ingredient. If you’re out of instant coffee, you can use a shot of espresso or even a tablespoon of strong brewed coffee, but reduce the buttermilk by the same amount.
Room temperature ingredients matter. I used to think this was a myth until I did a side-by-side test. Cold buttermilk and eggs don’t emulsify as well with the oil, leading to a slightly denser, greasier cake. Take the eggs and buttermilk out of the fridge 30 minutes before you start baking. Set a timer if you need to—I’ve forgotten many times and ended up microwaving the buttermilk for 15 seconds to take the chill off.
Measure flour correctly. This is the most common mistake in baking. Scooping your measuring cup directly into the flour bag packs it down, and you can end up with 20-30% more flour than the recipe calls for. The result? Dry, crumbly cupcakes. Instead, spoon the flour into your measuring cup, then level it off with a knife. I use a kitchen scale for accuracy, but the spoon-and-level method works great.
Watch your oven temperature. Ovens lie. My oven runs 25 degrees hot, so I use an oven thermometer to check the actual temperature. If your cupcakes are browning too quickly on the edges but still raw in the center, your oven is too hot. If they’re pale and flat after 20 minutes, it’s too cool. Adjust accordingly. Also, don’t open the oven door during the first 15 minutes of baking—the cold air can cause the cupcakes to sink.
Practice piping on parchment. If you’re nervous about piping the ghosts, practice on a piece of parchment paper first. Pipe a few test ghosts, scrape them back into the bowl, and try again. This builds muscle memory and confidence. I still do this every time I make these cupcakes, especially if I haven’t made them in a while. It takes the pressure off and ensures your final ghosts look cute, not wonky.
My biggest failure: The first time I made these, I used natural cocoa powder instead of Dutch-process. The cupcakes came out a sad, reddish-brown color and tasted slightly metallic. I was so disappointed. That’s when Gloria explained the difference to me. Dutch-process cocoa is treated with an alkali to neutralize its acidity, which gives it that dark color and smooth flavor. Natural cocoa is more acidic and reacts with baking soda differently. For this recipe, Dutch-process is non-negotiable. Learn from my mistake and save yourself a batch.
Timing strategy: I like to bake the cupcakes a day ahead and store them in an airtight container at room temperature. Then I make the frosting and decorate them the next day. This breaks the work into manageable chunks and means I’m not rushing before a party. The cupcakes actually taste better on day two—the moisture distributes more evenly through the crumb.
Variations & Adaptations
One of the best things about this recipe is how adaptable it is. Over the years, I’ve tried several variations, and they’ve all been delicious in their own way. Here are a few ideas to make these ghosts your own.
Gluten-Free Version: Substitute the all-purpose flour with a good gluten-free baking blend. I’ve had great success with Bob’s Red Mill 1-to-1 Baking Flour. Add an extra tablespoon of buttermilk to compensate for the drier texture of gluten-free flour. The cupcakes will be slightly more delicate, so handle them gently. The frosting is naturally gluten-free, so no changes needed there.
Dairy-Free Version: Use a plant-based buttermilk substitute—mix 1 cup of unsweetened almond milk or oat milk with 1 tablespoon of lemon juice and let it sit for 5 minutes. Replace the butter in the frosting with vegan butter (I like Miyoko’s), and use a dairy-free cream cheese alternative. The frosting will be slightly softer, so chill the cupcakes well before serving.
Spiced Pumpkin Ghost Cupcakes: For a fall twist, replace ½ cup of the buttermilk with ½ cup of pumpkin puree. Add 1 teaspoon of pumpkin pie spice to the dry ingredients. The cupcakes will be a little denser but incredibly moist and flavorful. Top them with the same ghost frosting, or try a cinnamon cream cheese frosting instead.
Mint Chocolate Ghosts: Add ½ teaspoon of peppermint extract to the cupcake batter along with the vanilla. Stir in ½ cup of mini chocolate chips. For the frosting, replace the vanilla extract with ¼ teaspoon of peppermint extract. The combination of mint and dark chocolate is surprisingly cozy and perfect for winter holidays.
Mini Ghost Cupcakes: Use a mini muffin tin and bake for 10 to 12 minutes instead of 18 to 22. You’ll get about 36 mini cupcakes. Pipe tiny ghosts on top—they’re adorable and perfect for parties or lunchbox surprises. Just be prepared for them to disappear quickly.
No-Food-Coloring Version: If you want to avoid artificial colors entirely, skip the black food coloring. The cupcakes will be a deep, dark chocolate brown from the Dutch-process cocoa and coffee. They won’t look jet black, but they’ll taste just as amazing. I actually prefer this version for everyday baking—it feels more natural and wholesome.
I once made a batch with orange zest in the frosting for a Halloween party. The citrus cut through the richness of the chocolate beautifully. It wasn’t traditional, but everyone loved it. Don’t be afraid to experiment—some of the best recipes come from happy accidents.
Serving & Storage Suggestions
These cupcakes are best enjoyed the same day you make them, but they keep well with proper storage. Here is everything you need to know about serving and storing your Cozy Black Velvet Ghost Cupcakes.
Serving temperature: I prefer these cupcakes at cool room temperature. The cake is moist and tender, and the frosting is creamy but firm. If you refrigerate them, let them sit on the counter for 15 to 20 minutes before serving. Cold frosting can taste a little stiff, and the cake loses some of its softness. On the flip side, if it’s a warm day, keep them chilled until just before serving so the ghosts don’t droop.
Presentation ideas: Arrange the cupcakes on a dark cake stand or a wooden board for a cozy, rustic look. Scatter a few mini pumpkins or autumn leaves around the base for a seasonal touch. If you’re serving them at a Halloween party, place them on a tray lined with black or orange tissue paper. The contrast between the dark cupcakes and the bright paper makes the ghosts pop.
Complementary pairings: These cupcakes pair beautifully with a warm drink. A mug of hot cocoa, a spiced chai latte, or a simple cup of black coffee all work wonderfully. For a fun adult pairing, try a glass of dark stout beer or a creamy Irish coffee. The bitterness of the drinks balances the sweetness of the cupcakes. If you’re serving them as dessert after a meal, a scoop of vanilla ice cream on the side is never a bad idea.
Storage instructions: Store the decorated cupcakes in an airtight container in the refrigerator for up to 4 days. Place them in a single layer, or use a cupcake carrier with a lid to protect the ghosts. If you need to stack them, place a sheet of parchment paper between layers. The frosting is sturdy enough to hold its shape, but it can get squished if you’re not careful.
Freezer instructions: You can freeze the unfrosted cupcakes for up to 3 months. Wrap each cupcake individually in plastic wrap, then place them in a freezer-safe bag. When you’re ready to serve, thaw them at room temperature for about an hour, then make the frosting and decorate. The frosting doesn’t freeze well—it can become grainy when thawed—so always make it fresh. I often bake a double batch of cupcakes and freeze half for last-minute treats. It’s a lifesaver during the busy holiday season.
Flavor development: Here is something interesting I’ve noticed: the cupcakes actually taste better on the second day. The moisture from the buttermilk and oil distributes more evenly through the crumb, and the chocolate flavor becomes deeper and more rounded. If you have the patience, bake them a day ahead and store them unfrosted. Then frost and serve the next day. Your taste buds will thank you.
Nutritional Information & Benefits
Let’s be honest—these are cupcakes, not health food. But that doesn’t mean they can’t have a place in a balanced lifestyle. Here is the nutritional breakdown for one cupcake with frosting, based on the recipe as written.
| Nutrient | Amount per Cupcake |
|---|---|
| Calories | 320 |
| Total Fat | 18g |
| Saturated Fat | 9g |
| Cholesterol | 55mg |
| Sodium | 220mg |
| Total Carbohydrates | 38g |
| Dietary Fiber | 2g |
| Sugars | 26g |
| Protein | 4g |
Health benefits of key ingredients: Dark cocoa powder is rich in flavonoids, which are antioxidants that can support heart health. Buttermilk provides calcium and probiotics, which are good for digestive health. Eggs are a great source of high-quality protein and essential vitamins like B12 and D. And while sugar and butter should be enjoyed in moderation, they make these cupcakes a truly special treat that nourishes the soul as much as the body.
Dietary considerations: This recipe contains gluten, dairy, and eggs. For gluten-free and dairy-free adaptations, see the variations section above. The cupcakes are nut-free as written, but check your chocolate chips and food coloring for potential cross-contamination if allergies are a concern. The recipe is also low in fiber, so consider serving it alongside a fiber-rich snack like apple slices or a handful of almonds.
My personal perspective: I believe in the power of occasional indulgence. These cupcakes are not an everyday food, but they are a wonderful way to celebrate a special occasion, brighten a gloomy day, or simply enjoy a moment of cozy sweetness. Baking them from scratch is an act of self-care and love. So go ahead, enjoy that cupcake. You’ve earned it.
Conclusion
These Cozy Black Velvet Ghost Cupcakes are more than just a Halloween dessert. They’re a warm hug on a plate, a little piece of comfort that turns an ordinary evening into something special. The rich, velvety chocolate cake paired with the fluffy vanilla ghost frosting is a combination that never gets old. And honestly, the look on someone’s face when they see those cute little ghosts is worth every minute of effort.
I’ve shared this recipe with friends, family, and even my neighbor Gloria, who gave me a knowing smile when I told her how many batches I had made since that first lesson. “I knew you’d get it,” she said. And now I’m passing it on to you. Make them your own. Experiment with the variations. Mess up a ghost or two—I still do. That’s part of the fun.
If you make these cupcakes, I would love to hear about it. Leave a comment below and tell me how they turned out. Did you try a variation? Did your kids help pipe the ghosts? Did you eat three in one sitting like I did? Share your stories, your photos, and your questions. This recipe is meant to be shared, and I can’t wait to see your cozy creations. Happy baking, and remember—the secret ingredient is always a little bit of love.
Frequently Asked Questions
Can I use natural cocoa powder instead of Dutch-process?
I don’t recommend it. Natural cocoa powder is more acidic and will react differently with the baking soda. The cupcakes will turn out reddish-brown instead of black, and the flavor may taste slightly metallic. Dutch-process cocoa is essential for the deep color and smooth chocolate flavor. You can find it in most grocery stores near the baking aisle.
How do I make the ghosts look perfect?
Practice makes progress! The key is to hold the piping bag vertically and squeeze gently while lifting straight up. Start with a small base and build upward. If the ghost looks lopsided, scrape the frosting off and try again—it’s very forgiving. Chilling the cupcakes for 10 minutes before piping can help the frosting hold its shape better. And remember, imperfect ghosts are still adorable and delicious.
Can I make these cupcakes ahead of time?
Absolutely. You can bake the cupcakes up to two days in advance and store them in an airtight container at room temperature. Make the frosting and decorate them the day you plan to serve them. The frosting is best fresh, but the cupcakes actually taste better after a day. You can also freeze the unfrosted cupcakes for up to three months—just thaw them at room temperature before decorating.
What if I don’t have buttermilk?
No problem! You can make a quick buttermilk substitute by adding 1 tablespoon of lemon juice or white vinegar to a measuring cup, then filling it with regular milk to the 1-cup line. Let it sit for 5 minutes until it curdles and thickens slightly. It works perfectly in this recipe and you won’t taste the difference. I’ve used this trick many times when I’ve run out of buttermilk.
Can I use a different frosting?
Of course! While the vanilla ghost frosting is the classic choice, you can get creative. A cream cheese frosting with a hint of orange zest would be lovely for fall. A chocolate buttercream would make these cupcakes extra decadent. Or try a simple whipped cream frosting for a lighter option—just keep the cupcakes refrigerated until serving. The ghosts are the star, but the frosting is your canvas.
Pin This Recipe!
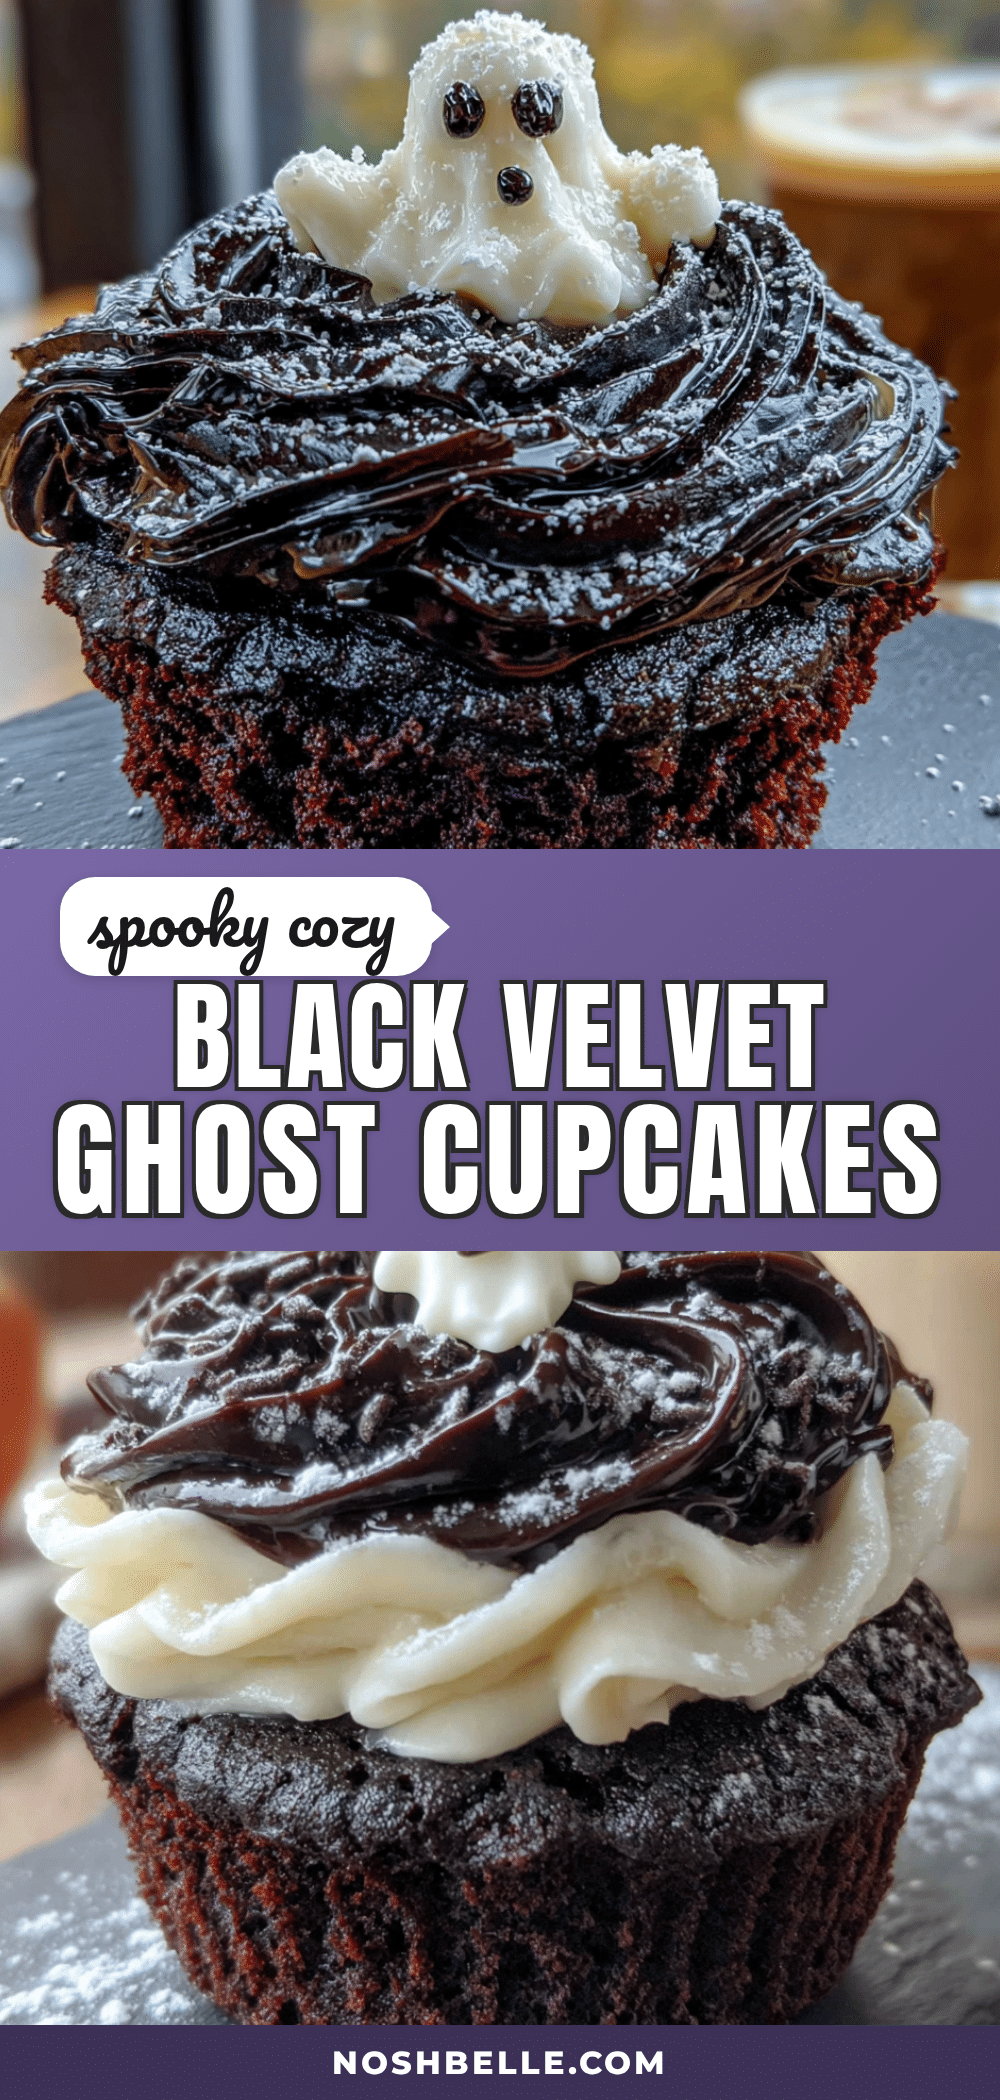
Cozy Black Velvet Ghost Cupcakes: Easy Halloween Treat
These Cozy Black Velvet Ghost Cupcakes are a warm hug on a plate—rich, moist chocolate cupcakes topped with fluffy vanilla ghost frosting. Perfect for Halloween parties or cozy evenings, they’re quick to make with simple ingredients and guaranteed to delight.
- Prep Time: 15 minutes
- Cook Time: 20 minutes
- Total Time: 45 minutes
- Yield: 12 cupcakes
- Category: Dessert
- Cuisine: American
Ingredients
- All-purpose flour, 1 ½ cups (190g)
- Granulated sugar, 1 cup (200g)
- Dutch-process cocoa powder, ½ cup (50g)
- Baking soda, 1 teaspoon
- Salt, ½ teaspoon
- Instant coffee granules, 1 tablespoon (optional but recommended)
- Buttermilk, 1 cup (240ml), room temperature
- Vegetable oil, ½ cup (120ml)
- Eggs, 2 large, room temperature
- Vanilla extract, 2 teaspoons
- Black food coloring, 1-2 teaspoons (optional)
- Unsalted butter, ½ cup (113g), softened
- Cream cheese, 4 oz (113g), softened
- Powdered sugar, 2 cups (240g), sifted
- Heavy cream, 2-3 tablespoons (30-45ml)
- Vanilla extract, 1 teaspoon
- Mini chocolate chips or black sprinkles, for eyes (optional)
Instructions
- Preheat your oven to 350°F (175°C). Line your muffin tin with 12 paper liners. Lightly spray the inside of the liners with non-stick spray.
- In a large bowl, whisk together the flour, sugar, cocoa powder, baking soda, salt, and instant coffee granules until well combined and no lumps remain.
- In a separate bowl or large liquid measuring cup, whisk together the buttermilk, oil, eggs, and vanilla extract until smooth. If using food coloring, add it here and whisk until uniformly dark.
- Pour the wet ingredients into the dry ingredients. Use a rubber spatula to fold gently until just combined—about 15 to 20 strokes. Do not overmix. The batter will be thin.
- Divide the batter evenly among the 12 liners, filling each about ⅔ full.
- Bake for 18 to 22 minutes, until a toothpick inserted into the center comes out with a few moist crumbs. Let cool in the pan for 5 minutes, then transfer to a wire rack to cool completely.
- While the cupcakes cool, make the frosting: In a medium bowl, beat the softened butter and cream cheese with an electric mixer on medium speed until smooth and creamy, about 2 minutes. Scrape down the sides.
- Add the sifted powdered sugar, one cup at a time, beating on low speed until combined. Add the vanilla extract and 2 tablespoons of heavy cream. Beat on medium-high speed for 3 to 4 minutes until light, fluffy, and holds stiff peaks. If too thick, add the remaining tablespoon of heavy cream; if too thin, add more powdered sugar.
- Transfer the frosting to a piping bag fitted with a round tip. Hold the bag vertically over a cooled cupcake, about ½ inch above the surface. Squeeze gently to create a round base, then slowly lift the bag straight up to form a tall, tapered ghost shape. Release pressure and pull away quickly to form a peak.
- Immediately press two mini chocolate chips into each ghost for eyes, positioning them close together near the top.
- Refrigerate the finished cupcakes for at least 15 minutes to set the frosting. Serve chilled or at room temperature.
Notes
Don’t skip the instant coffee—it deepens the chocolate flavor without making the cupcakes taste like coffee. Use Dutch-process cocoa for the best dark color. Room temperature ingredients are key for a tender crumb. Practice piping ghosts on parchment paper first if needed. The cupcakes taste even better the next day.
Nutrition
- Serving Size: 1 cupcake
- Calories: 320
- Sugar: 26
- Sodium: 220
- Fat: 18
- Saturated Fat: 9
- Carbohydrates: 38
- Fiber: 2
- Protein: 4
Keywords: Halloween cupcakes, black velvet cupcakes, ghost cupcakes, chocolate cupcakes, easy Halloween treat, cozy cupcakes


