I was standing in the produce aisle of my local grocery store last Tuesday when a woman walked past me carrying a paper bag that smelled faintly of browned butter and sage. It hit me like a freight train — and suddenly I was seven years old, standing in my neighbor Mrs. Chen’s tiny galley kitchen on a gray November afternoon. She was lifting a spoon to my lips, and I tasted something so warm and nutty and sweet that I thought I’d died and gone to heaven. I didn’t even know what squash was back then. I just knew that soup made everything right in the world.
Mrs. Chen has been gone for years now. She moved to Arizona to be closer to her daughter, and I never got her recipe. Honestly, I’ve spent the last decade trying to recreate that exact moment — that perfect bowl of squash soup that tasted like autumn had been distilled into liquid gold. And let me tell you, I’ve made some real disasters along the way. Too watery, too sweet, too bland, too complicated. You know that feeling when you’re chasing a memory and you just can’t quite catch it?
Then last fall, I stumbled on honeynut squash at the farmers market. The farmer called them “butternut’s cuter, sweeter cousin,” and I bought a whole case on impulse. That was the day everything changed. The deeper flavor, the naturally creamy texture, the way they caramelize in the oven — it was like the missing puzzle piece I didn’t know I was looking for. I paired it with brown butter (because honestly, when does brown butter ever make things worse?) and a whisper of fresh sage, and there it was. That taste. That feeling. That seven-year-old moment, back again.
This soup is my love letter to Mrs. Chen, to that rainy afternoon, and to everyone who’s ever wanted to bottle up a season and drink it slowly. I think you’re going to love it too.
Why You’ll Love This Recipe
I’m not supposed to play favorites with recipes, but this one? This one lives in a special place in my kitchen heart. Here’s why I keep coming back to it, and why I think you will too:
- Deep, Complex Flavor with Minimal Effort: Roasting the honeynut squash brings out its natural sweetness and creates this incredible caramelized depth. Then you add brown butter — which is basically liquid gold — and suddenly you have a soup that tastes like it simmered all day, when really it came together in under an hour. The secret is letting the squash get a little charred on the edges. Trust me on this one.
- Simple, Whole-Food Ingredients: You won’t find any cream, heavy cream, or weird thickeners here. The soup gets its velvety texture entirely from the roasted squash itself, with just a splash of broth to loosen things up. It’s naturally dairy-free if you use vegetable broth and plant-based butter for the brown butter. And everything on the list is something you can find at any grocery store, no specialty trips required.
- Perfect for Cozy Fall Evenings: This is the soup you want when the leaves are turning and the air has that crisp, smoky smell. It’s the first course for Thanksgiving dinner, the comfort food after a long walk in the cold, the thing you make when you want your kitchen to smell like heaven. It’s also fantastic for meal prep — it gets even better after a day in the fridge.
- Crowd-Pleaser Status: I’ve served this to kids, picky eaters, and serious food snobs, and every single time someone asks for the recipe. There’s something about that brown butter-sage combo that just hits a primal comfort note. One friend told me it was “the best thing I’ve put in my mouth this year,” which I’m still not sure how to feel about, but I’ll take it.
- Better Than Restaurant Versions: Most squash soups I’ve had out are either too sweet, too thin, or drowning in cream. This one is perfectly balanced — savory, nutty, slightly sweet, with a silky texture that feels decadent without being heavy. The brown butter drizzle on top is non-negotiable. It’s what makes this soup feel special, like something you’d order at a fancy farm-to-table place.
This recipe isn’t just good — it’s the kind that makes you close your eyes after the first bite. It’s comfort food reimagined: healthier, faster, but with the same soul-soothing satisfaction. Perfect for impressing guests without stress, or turning a simple Tuesday dinner into something memorable.
What Ingredients You Will Need
This recipe uses simple, wholesome ingredients to deliver that deep, complex flavor without any fuss. Most of these are pantry staples or easy fall finds. Here’s what you’ll need and why each one matters:
For the Roasted Squash Base
- 2 medium honeynut squash (about 2 pounds total) — These little guys are the star of the show. They’re smaller and sweeter than butternut squash, with a deeper orange color and a thinner skin that roasts up beautifully. If you can’t find honeynut, you can substitute butternut squash or kabocha squash. Just know the flavor won’t be quite as intense. I get mine at Whole Foods or the local farmers market in October and November.
- 2 tablespoons olive oil — For roasting. Use a good-quality extra virgin olive oil here, but nothing too fancy since it’s getting cooked at high heat. Avocado oil works too if that’s what you have.
- 1/2 teaspoon salt — I use fine sea salt for roasting. It helps draw out moisture and concentrate the flavor.
- 1/4 teaspoon black pepper — Freshly ground, please. It makes a difference.
For the Soup Base
- 1 tablespoon unsalted butter (or olive oil for dairy-free) — For sautéing the aromatics. I know we’re making brown butter later, but this is just for the initial sweat.
- 1 medium yellow onion, chopped (about 1 1/2 cups) — Adds savory depth. Don’t skip it.
- 3 cloves garlic, minced — Because garlic makes everything better. Use fresh, not the jarred stuff.
- 1 teaspoon fresh sage, chopped (plus more for garnish) — Sage and squash are a match made in heaven. If you only have dried, use 1/2 teaspoon and add it with the broth.
- 3 cups vegetable broth or chicken broth — Use a good-quality broth here since it’s a major flavor component. I like Pacific Foods or Kitchen Basics. Low-sodium is best so you can control the salt.
- 1/2 cup full-fat coconut milk (optional, for extra creaminess) — This is totally optional, but it adds a lovely richness and a subtle sweetness that plays well with the squash. Use the canned kind, not the carton. Shake it well before opening.
For the Brown Butter & Garnish
- 4 tablespoons unsalted butter — This is the magic ingredient. Use good butter here — I prefer Kerrygold or Plugrà because their higher fat content makes for better browning and a nuttier flavor.
- 6-8 fresh sage leaves — For frying in the brown butter. They get crispy and add a gorgeous texture on top.
- Optional garnishes: Toasted pumpkin seeds, a drizzle of maple syrup, a swirl of coconut cream, or a pinch of flaky sea salt. I usually do the fried sage and pumpkin seeds for crunch.
Substitution Notes
- Dairy-free version: Use olive oil instead of butter for the sauté, and use a plant-based butter (like Miyoko’s or Earth Balance) for the brown butter. The flavor will be slightly different but still delicious.
- Low-FODMAP version: Use garlic-infused oil instead of garlic cloves, and skip the onion. Add extra leek greens or fennel for savory depth.
- Nut-free: Skip the pumpkin seeds or use sunflower seeds instead.
- Whole30/Paleo: Use ghee instead of butter, and make sure your broth is compliant.
Equipment Needed
You don’t need a lot of fancy equipment for this soup, which is part of why I love it. Here’s what you’ll want to have on hand:
- Baking sheet — A rimmed half-sheet pan works best. Line it with parchment paper for easy cleanup, though I’ve gone without in a pinch and just scrubbed a little harder.
- Chef’s knife and cutting board — A sharp knife makes cutting squash so much safer and easier. I learned this the hard way after a near-miss with a dull knife and a butternut squash that shall not be named.
- Large soup pot or Dutch oven — I use my 5.5-quart Le Creuset for this, but any heavy-bottomed pot will work. A Dutch oven holds heat better and gives you more even cooking for the sauté.
- Immersion blender — This is my preferred method for pureeing the soup because it’s less cleanup and you can blend it right in the pot. I have a Breville that’s served me well for years. If you don’t have one, a regular blender works fine — just be careful with hot liquids (work in batches and vent the lid).
- Small saucepan — For making the brown butter. Use a light-colored pan so you can see the color change. I have a cheap stainless steel one that’s perfect for this.
- Measuring spoons and cups — Pretty standard, but worth mentioning.
- Wooden spoon or silicone spatula — For stirring the soup as it cooks. I prefer wood because it feels right for fall cooking.
If you don’t have an immersion blender, don’t let that stop you. A regular blender works great — just let the soup cool slightly before blending, and never fill the blender more than halfway. Hold the lid down with a kitchen towel to be safe. I’ve had a hot soup explosion before, and it’s not pretty.
Preparation Method
Alright, let’s make some soup! This comes together in about 45 minutes total, with about 15 minutes of active prep. Here’s the step-by-step:
- Preheat your oven to 400°F (200°C). Line a baking sheet with parchment paper for easy cleanup. While the oven heats, prep your squash.
- Cut the honeynut squash in half lengthwise. Here’s the trick: pierce the squash in a few places with a fork first (this lets steam escape and makes them easier to cut). Then use a sharp chef’s knife to slice through from stem to tip. Scoop out the seeds and stringy bits with a spoon. You can save the seeds to roast later if you want — they make a great snack.
- Place the squash halves cut-side up on the baking sheet. Drizzle with the olive oil and sprinkle with salt and pepper. Use your hands to rub the oil all over the cut surfaces and a little on the skin too. Flip them cut-side down — this helps them steam and caramelize at the same time. Roast for 25-30 minutes, until the flesh is fork-tender and the edges are starting to brown and caramelize. The skin should look slightly wrinkled and the flesh should give easily when pressed.
- While the squash roasts, start the aromatics. In your large soup pot or Dutch oven, melt 1 tablespoon of butter over medium heat. Add the chopped onion and cook, stirring occasionally, until softened and translucent, about 5-7 minutes. You want them to be soft but not brown. Add the minced garlic and chopped sage, and cook for another minute until fragrant. Your kitchen should smell amazing at this point.
- When the squash is done, let it cool for a few minutes. Then use a spoon to scoop the flesh away from the skin. The skin should come off easily — if it doesn’t, it probably needed another few minutes in the oven. Add the squash flesh to the pot with the onions and garlic. Don’t worry about getting every last bit; a little leftover on the skin is fine.
- Add the broth to the pot. Pour in 3 cups of broth and stir everything together. Bring it to a gentle simmer over medium heat, then reduce the heat to low and let it cook for about 10 minutes. This lets all the flavors meld together. If you’re using coconut milk, add it now and stir to combine.
- Blend the soup until smooth. If using an immersion blender, carefully blend directly in the pot until velvety smooth. If using a regular blender, work in batches — fill the blender no more than halfway, hold the lid down with a towel, and blend until smooth. Return the blended soup to the pot. Taste and adjust seasoning — you might want more salt, a pinch of cayenne for heat, or a squeeze of lemon to brighten things up.
- Now for the magic: make the brown butter. In a small saucepan (preferably light-colored so you can see the color change), melt 4 tablespoons of butter over medium heat. Swirl the pan occasionally as it melts. The butter will start to foam, then the foam will subside, and you’ll see little brown specks forming at the bottom. This happens fast — once the specks appear and the butter smells nutty and toasty, immediately remove it from the heat. Total time is about 3-4 minutes. Don’t walk away; burnt butter is a sad thing.
- Fry the sage leaves. While the brown butter is still hot, drop in the fresh sage leaves. They’ll sizzle and crisp up in about 10-15 seconds. Use a fork to transfer them to a paper towel-lined plate. They’ll get even crispier as they cool.
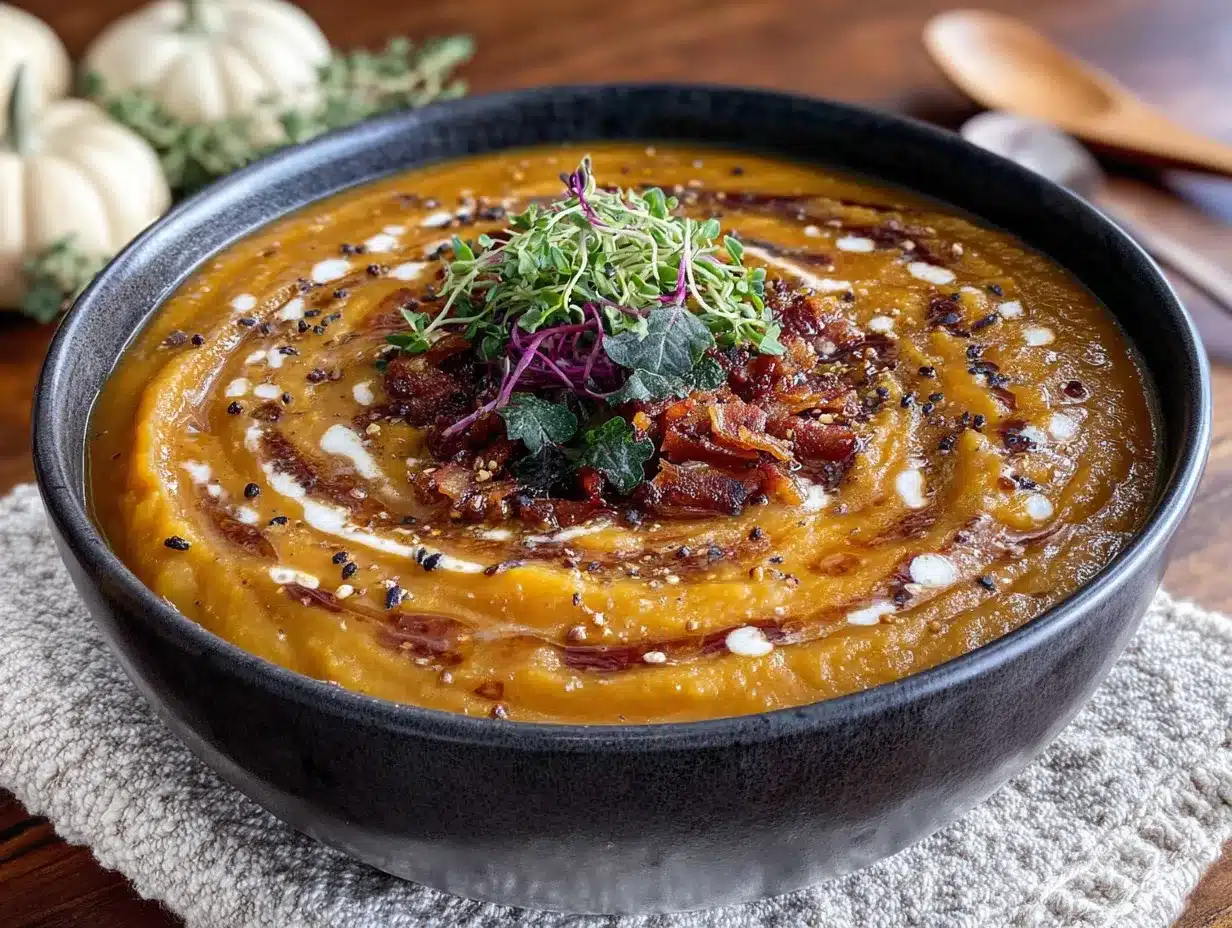
- Ladle the soup into bowls. Drizzle each bowl with a spoonful of brown butter (the brown specks are pure flavor — don’t strain them out). Top with a few crispy sage leaves, some toasted pumpkin seeds if you’re using them, and a pinch of flaky sea salt. Serve immediately.
A few notes: The soup will thicken as it sits, so if you’re reheating leftovers, you might want to add a splash of broth or water to thin it out. And if you want an extra-silky texture, you can strain the soup through a fine-mesh sieve after blending, but honestly, I never bother. The immersion blender gets it smooth enough for me.
Cooking Tips & Techniques
I’ve made this soup probably twenty times now, and I’ve learned a few things along the way. Here are my best tips for getting it perfect every time:
- Don’t rush the roasting. I know it’s tempting to pull the squash out as soon as it’s tender, but letting it get some color on the cut edges is where the magic happens. Those caramelized bits add so much depth to the final soup. If your squash isn’t browning after 30 minutes, crank the oven to 425°F for the last 5 minutes.
- Watch the brown butter like a hawk. I cannot stress this enough. Brown butter goes from perfect to burnt in about 15 seconds. The moment you see golden-brown specks forming and smell that nutty aroma, pull it off the heat. If you’re unsure, err on the side of taking it off early — you can always put it back on, but you can’t un-burn it. I’ve ruined more batches than I’d like to admit while answering a text or checking on the kids.
- Season in layers. Add salt at every stage — when roasting the squash, when sautéing the onions, and at the end after blending. This builds flavor from the ground up instead of just adding it all at the end. But go easy on the salt in the broth if you’re using a salted variety.
- Use room-temperature ingredients where possible. The butter for browning should be cold from the fridge (it browns more evenly), but the broth can be at room temperature or warm. If you add cold broth to hot squash, it’ll take longer to come back to a simmer.
- Make it ahead. This soup is actually better the next day. The flavors meld and deepen overnight. I often make it on Sunday for Monday night dinner. Just reheat gently on the stove, adding a splash of broth if it’s too thick.
- Don’t skip the garnish. I know it’s tempting to just eat the soup as-is, but that drizzle of brown butter and those crispy sage leaves are what take this from “good” to “I can’t stop thinking about this soup.” The texture contrast is everything.
One mistake I made early on: I used pre-cut butternut squash from the store. It was convenient, but the pieces were uneven and some burned while others were still undercooked. If you’re going to use pre-cut, try to get pieces that are roughly the same size. But honestly, cutting a honeynut squash is so easy — the skin is thin and the shape is manageable — that I always do it fresh now.
Variations & Adaptations
This soup is incredibly versatile. Here are some ways to make it your own:
Dietary Variations
- Vegan: Use olive oil or vegan butter for the sauté and brown butter. Use vegetable broth. The coconut milk option makes it extra creamy and works perfectly.
- Keto/Low-Carb: Skip the coconut milk and use chicken broth. The squash itself has carbs, but a serving is reasonable for most low-carb diets. Top with extra pumpkin seeds for healthy fats.
- Paleo/Whole30: Use ghee instead of butter and compliant broth. Skip the coconut milk or use a compliant canned coconut milk without additives.
Flavor Twists
- Spicy version: Add a pinch of red pepper flakes or a small chopped jalapeño when sautéing the onions. The heat plays beautifully with the sweet squash.
- Curried squash soup: Add 1 tablespoon of curry powder and 1 teaspoon of grated ginger when you add the garlic. Finish with a swirl of yogurt (dairy or coconut) on top.
- Apple-squash combo: Roast a peeled, chopped apple alongside the squash. A Honeycrisp or Fuji works great. The apple adds natural sweetness and a hint of tartness.
- Smoky version: Use smoked paprika or a dash of liquid smoke in the sauté. Top with crispy bacon or smoked almonds for extra smokiness.
Cooking Method Alternatives
- Instant Pot: Sauté the onions and garlic using the sauté function. Add the roasted squash (you can roast it ahead or use a shortcut by pressure cooking the raw squash in 1 cup of broth for 8 minutes), remaining broth, and cook on high pressure for 5 minutes. Blend and finish with brown butter.
- Crockpot: Roast the squash as directed, then add it to the slow cooker with the sautéed onions, garlic, and broth. Cook on low for 4-6 hours or high for 2-3 hours. Blend and serve.
- Stovetop shortcut: If you’re really short on time, you can peel and cube the raw squash and simmer it directly in the broth for 20 minutes until tender. You won’t get the caramelized flavor, but it’s still good in a pinch.
My personal favorite variation: I add a tablespoon of maple syrup and a pinch of cinnamon to the roasted squash before it goes in the oven. It makes the soup taste like fall in a bowl. My husband thinks it’s too sweet, so I only do it when he’s not home. That’s the beauty of cooking for yourself — you get to make it exactly how you like it.
Serving & Storage Suggestions
This soup is lovely on its own, but here are some ideas for making it a meal:
Serving: Serve the soup hot, ladled into warm bowls. The brown butter drizzle is essential — don’t skip it. I like to add a swirl on top and then let it pool a little. The crispy sage leaves go on last so they stay crunchy. A sprinkle of flaky sea salt (like Maldon) right before serving adds a nice textural pop.
What to serve with it: This soup pairs beautifully with a crusty sourdough bread or a warm baguette for dipping. A simple green salad with a tangy vinaigrette balances the richness. For a heartier meal, serve it alongside a grilled cheese sandwich — the classic combo for a reason. It’s also fantastic as a starter for Thanksgiving or any fall dinner party.
Storage: Let the soup cool completely before storing. Transfer to an airtight container and refrigerate for up to 5 days. The flavors actually get better after a day or two. The brown butter and sage garnish should be stored separately — the sage will lose its crunch if stored with the soup.
Freezing: This soup freezes beautifully. Pour cooled soup into freezer-safe containers or zip-top bags (lay them flat for easy stacking). Freeze for up to 3 months. Thaw overnight in the refrigerator before reheating. Don’t freeze the brown butter or sage garnish — make those fresh when you’re ready to serve.
Reheating: Reheat gently on the stovetop over medium-low heat, stirring occasionally. Add a splash of broth or water if the soup has thickened too much. You can also reheat individual portions in the microwave — just cover the bowl and heat in 30-second intervals, stirring between each. The brown butter should be made fresh each time for the best flavor.
Make-ahead tip: I often roast the squash and make the soup base a day ahead, then just blend and finish with the brown butter right before serving. It makes hosting so much less stressful.
Nutritional Information & Benefits
This soup is as good for you as it is delicious. Here’s a rough breakdown per serving (serves 4, without optional coconut milk):
- Calories: Approximately 220-250 per serving
- Fat: 14g (mostly from the olive oil and brown butter — the good kind)
- Carbohydrates: 22g (from the squash and onion — complex carbs with fiber)
- Fiber: 5g — surprisingly high for a soup!
- Protein: 3g (not a protein powerhouse, but it’s a soup, not a steak)
- Vitamin A: Over 200% of your daily value — honeynut squash is loaded with beta-carotene
- Vitamin C: About 20% of your daily value
- Potassium: More than a banana — great for muscle function and blood pressure
Honeynut squash is a nutritional powerhouse. It’s packed with antioxidants, especially beta-carotene, which your body converts to vitamin A for healthy vision and immune function. The fiber content helps keep you full and supports digestive health. And the brown butter, while not exactly a health food, provides fat-soluble vitamins and makes the soup satisfying enough that you won’t be hungry an hour later.
If you’re watching your sodium, use low-sodium broth and go easy on the added salt. The soup is flavorful enough that you won’t miss it. For a lower-fat version, skip the brown butter drizzle and use a little olive oil and toasted seeds for garnish instead.
Conclusion
This honeynut squash soup with brown butter is the recipe I turn to when I need a hug in a bowl. It’s the soup I make when the leaves are falling and the air has that crisp, smoky smell. It’s the soup I bring to friends who are sick, to potlucks where I want to impress, and to my own table on a quiet Tuesday when I just need something warm and good.
What I love most about it is how forgiving it is. You can swap the squash, adjust the spices, skip the coconut milk, or double the brown butter (I won’t tell). It’s a recipe that rewards your intuition and your personal taste. Make it your own. Add a pinch of cayenne if you like heat. Throw in a roasted apple if you want more sweetness. Top it with bacon if that’s your thing. The base is perfect, but the variations are endless.
I hope this soup brings you the same comfort it’s brought me. I’d love to hear how it turns out for you — drop a comment below and let me know what twist you added, or tag me in your photos on social media. And if you’re looking for another cozy fall recipe, check out my creamy mushroom risotto — it’s the perfect companion to this soup for a cozy dinner at home.
Now go make some soup. Your kitchen is about to smell amazing.
Frequently Asked Questions
Can I use butternut squash instead of honeynut?
Absolutely. Honeynut squash is smaller and sweeter, but butternut works perfectly. You might need to roast it a little longer (35-40 minutes), and the flavor won’t be quite as intense, but it’ll still be delicious. Kabocha or acorn squash also work well.
Can I make this soup without an immersion blender?
Yes! A regular blender works great. Just let the soup cool slightly before blending, work in batches, and never fill the blender more than halfway. Hold the lid down with a kitchen towel to prevent any hot soup explosions. A food processor also works in a pinch.
Is this soup gluten-free?
Yes, as written, this soup is naturally gluten-free. Just make sure your broth is certified gluten-free if you have celiac disease or a severe sensitivity. Some broths contain hidden gluten or are processed on shared equipment.
Can I freeze this soup?
Yes, it freezes beautifully. Let the soup cool completely, then transfer to freezer-safe containers or zip-top bags. Freeze for up to 3 months. Thaw overnight in the refrigerator and reheat gently on the stovetop. Make the brown butter and sage garnish fresh when you’re ready to serve.
How do I prevent the brown butter from burning?
Watch it like a hawk. Use a light-colored pan so you can see the color change. Once the butter melts, it will foam, then the foam will subside, and you’ll see golden-brown specks forming at the bottom. The moment you see those specks and smell a nutty aroma, remove it from the heat immediately. It happens fast — about 3-4 minutes total. If you’re unsure, take it off early. Burnt butter is bitter and will ruin the soup.
Pin This Recipe!

Cozy Honeynut Squash Soup with Brown Butter: Easy Fall Recipe

This velvety honeynut squash soup is roasted to caramelized perfection, then blended with savory aromatics and finished with nutty brown butter and crispy sage. It’s a comforting, dairy-free fall soup that tastes like autumn in a bowl.
- Prep Time: 15 minutes
- Cook Time: 30 minutes
- Total Time: 45 minutes
- Yield: 4 servings 1x
- Category: Soup
- Cuisine: American
Ingredients
- 2 medium honeynut squash (about 2 pounds total)
- 2 tablespoons olive oil
- 1/2 teaspoon salt
- 1/4 teaspoon black pepper
- 1 tablespoon unsalted butter (or olive oil for dairy-free)
- 1 medium yellow onion, chopped (about 1 1/2 cups)
- 3 cloves garlic, minced
- 1 teaspoon fresh sage, chopped (plus more for garnish)
- 3 cups vegetable broth or chicken broth
- 1/2 cup full-fat coconut milk (optional, for extra creaminess)
- 4 tablespoons unsalted butter (for brown butter)
- 6–8 fresh sage leaves (for frying)
- Optional garnishes: toasted pumpkin seeds, maple syrup, coconut cream, flaky sea salt
Instructions
- Preheat your oven to 400°F (200°C). Line a baking sheet with parchment paper.
- Cut the honeynut squash in half lengthwise. Pierce the squash in a few places with a fork first, then use a sharp chef’s knife to slice through from stem to tip. Scoop out the seeds and stringy bits with a spoon.
- Place the squash halves cut-side up on the baking sheet. Drizzle with olive oil and sprinkle with salt and pepper. Rub the oil all over the cut surfaces and a little on the skin. Flip them cut-side down. Roast for 25-30 minutes, until fork-tender and edges are browned and caramelized.
- While the squash roasts, in a large soup pot or Dutch oven, melt 1 tablespoon of butter over medium heat. Add the chopped onion and cook, stirring occasionally, until softened and translucent, about 5-7 minutes. Add the minced garlic and chopped sage, and cook for another minute until fragrant.
- When the squash is done, let it cool for a few minutes. Scoop the flesh away from the skin and add it to the pot with the onions and garlic.
- Add the broth to the pot. Bring to a gentle simmer over medium heat, then reduce heat to low and let cook for about 10 minutes. If using coconut milk, add it now and stir to combine.
- Blend the soup until smooth using an immersion blender directly in the pot, or in batches in a regular blender. Return blended soup to the pot. Taste and adjust seasoning.
- In a small saucepan, melt 4 tablespoons of butter over medium heat. Swirl the pan occasionally. The butter will foam, then the foam will subside, and brown specks will form at the bottom. Once the specks appear and the butter smells nutty, immediately remove from heat (about 3-4 minutes total).
- Drop the fresh sage leaves into the hot brown butter. They’ll sizzle and crisp up in about 10-15 seconds. Transfer to a paper towel-lined plate.
- Ladle the soup into bowls. Drizzle each bowl with a spoonful of brown butter. Top with crispy sage leaves, toasted pumpkin seeds if using, and a pinch of flaky sea salt. Serve immediately.
Notes
The soup thickens as it sits; add a splash of broth when reheating. For extra-silky texture, strain through a fine-mesh sieve after blending. Brown butter goes from perfect to burnt quickly—watch carefully. The soup is even better the next day as flavors meld.
Nutrition
- Serving Size: 1 serving (about 1 1
- Calories: 235
- Sugar: 8
- Sodium: 480
- Fat: 14
- Saturated Fat: 6
- Carbohydrates: 22
- Fiber: 5
- Protein: 3
Keywords: honeynut squash soup, brown butter, fall soup, roasted squash, sage, easy, dairy-free option, gluten-free