My neighbor Carol wasn’t trying to impress me. I’d stopped by to borrow a lug wrench—my car had made a concerning noise on the drive home—and the smell hit me before I even got to her front door. It was buttery, savory, and deeply comforting, like a warm blanket you didn’t know you needed. She opened the door with flour on her cheek and said, “Oh, that’s just something I threw together.” Just something. She handed me the wrench and went back to the kitchen like she hadn’t just created the most intoxicating aroma of my entire week.
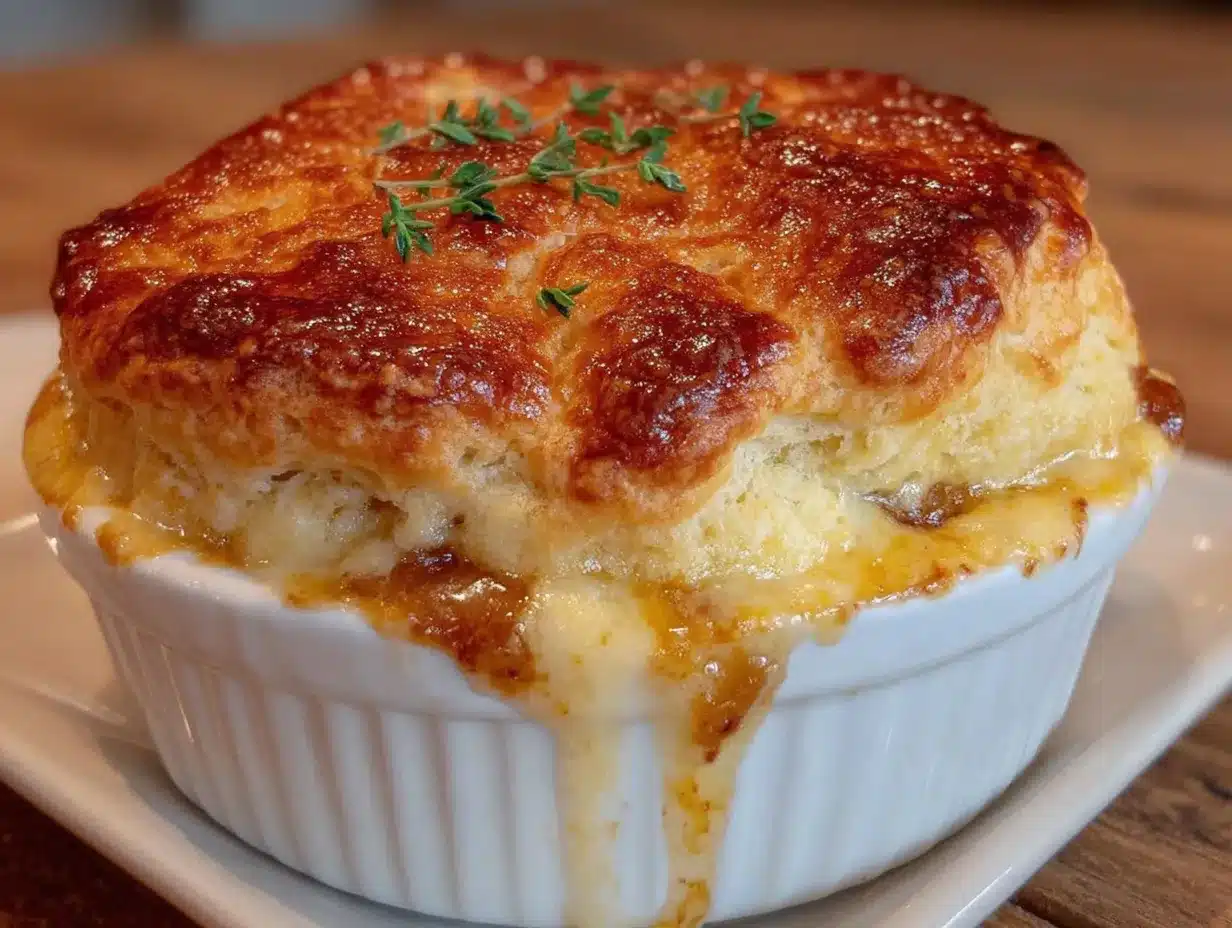
I stood there for a second, honestly a little offended on behalf of the dish. This wasn’t “just something.” This was the kind of meal that makes you cancel plans and stay home. The kind you want to serve at a dinner party where you actually want people to remember the food. I mean, I’ve made chicken pot pie before—the kind with the soggy top crust and the sauce that’s either too thin or too pasty. But this? This had a biscuit topping that was golden and craggy, with edges that caught every bit of that creamy filling.
Carol shrugged when I asked about it. “It’s nothing special.” But you know that feeling when you taste something and immediately start planning when you’ll make it yourself? That was me, standing in her doorway, lug wrench in hand, mentally rewriting my entire week’s dinner plan. Maybe you’ve been there—tasting something so unexpectedly perfect that it sticks with you. That’s this pot pie. And honestly, the best part is how completely unpretentious it is. No fancy techniques, no hard-to-find ingredients. Just pure, crowd-pleasing magic in a baking dish.
Why You’ll Love This Recipe
This isn’t just another chicken pot pie recipe. I’ve tested this one at least seven times to get the filling-to-biscuit ratio exactly right. Here’s why this version stands out from the crowd:
- Perfect for Hosting: This dish is made for gatherings. It serves 8 generously, and you can assemble it entirely before guests arrive. Pop it in the oven 35 minutes before dinner, and you look like a hero with zero last-minute stress.
- Flaky Biscuit Topping, Not Soggy Crust: The biscuit topping stays light and fluffy on top while soaking up just enough of that creamy filling around the edges. It’s the best of both worlds—no sad, soggy bottom crust here.
- Simple Pantry Ingredients: No cream-of-anything canned soups. No frozen pie crusts. Just real butter, chicken, vegetables, and a few pantry staples. You probably have most of this already.
- Make-Ahead Friendly: You can prep the filling two days ahead, keep it in the fridge, and add the biscuit topping right before baking. Perfect for when you’re hosting and want to actually enjoy your guests.
- Crowd-Pleaser Guaranteed: I’ve brought this to three different potlucks and a Friendsgiving. Every single time, someone asked for the recipe. It’s that good.
The first time I made it for a dinner party, my friend Mark—who claims he “doesn’t really like pot pie”—went back for thirds. That’s when I knew this recipe was special. It’s comfort food that feels familiar but tastes elevated, and it lets you spend time with your guests instead of hovering over the stove.
What Ingredients You Will Need
This recipe uses simple, wholesome ingredients that come together to create something truly special. Most of these are kitchen staples, which makes this perfect for last-minute hosting or a cozy weeknight dinner.
For the Filling
- 2 tablespoons unsalted butter (I use Kerrygold for the richer flavor, but any good butter works)
- 1 medium yellow onion, diced (about 1 cup)
- 3 medium carrots, peeled and diced (about 1½ cups)
- 2 celery stalks, diced (about 1 cup)
- 3 cloves garlic, minced
- 1 teaspoon dried thyme (or 1 tablespoon fresh thyme leaves)
- ½ teaspoon dried rosemary
- ½ teaspoon dried sage
- ½ cup all-purpose flour
- 3 cups low-sodium chicken broth (homemade is amazing here, but store-bought works great)
- 1 cup whole milk (or half-and-half for extra richness)
- 3 cups cooked chicken, shredded or diced (rotisserie chicken is perfect for this)
- 1 cup frozen peas (no need to thaw)
- ½ cup frozen corn kernels (optional, but adds nice sweetness)
- 1 teaspoon salt (plus more to taste)
- ½ teaspoon black pepper
- ¼ cup fresh parsley, chopped (for color and freshness)
For the Flaky Biscuit Topping
- 2 cups all-purpose flour
- 1 tablespoon baking powder
- 1 teaspoon sugar
- ½ teaspoon salt
- ½ teaspoon garlic powder (trust me on this)
- 6 tablespoons cold unsalted butter, cut into small cubes
- ¾ cup cold buttermilk (plus 2 tablespoons extra if needed)
- 1 large egg, beaten with 1 tablespoon water (for egg wash)
- Flaky sea salt, for sprinkling
A few ingredient notes from my testing: For the chicken, rotisserie chicken is my go-to shortcut. It’s already seasoned and cooked perfectly, which saves you a ton of time. If you’re cooking chicken from scratch, poach 1½ pounds of boneless, skinless chicken breasts in the broth you’ll use for the filling—double duty! For the buttermilk, if you don’t have it, add 1 tablespoon of lemon juice to regular milk and let it sit for 5 minutes. It works like a charm. I’ve tested this with 2% milk in the filling instead of whole milk, and it’s still creamy but slightly less rich. Both are delicious.
Equipment Needed
- Large Dutch oven or heavy-bottomed pot (at least 5-quart capacity)
- 9×13-inch baking dish (or a 10-inch cast-iron skillet if you want to go from stovetop to table)
- Mixing bowls (one large for biscuit dough, one medium for egg wash)
- Whisk (for the roux and biscuit dough)
- Pastry cutter or two forks (for cutting butter into flour)
- Measuring cups and spoons
- Chef’s knife and cutting board
- Wooden spoon or silicone spatula
- Pastry brush (for the egg wash)
If you don’t have a Dutch oven, any heavy pot will work—just make sure it’s big enough to hold all the filling. For the baking dish, I’ve used a 9×13-inch ceramic dish and a cast-iron skillet, and both give great results. The cast-iron skillet actually gives you prettier edges because you can bake and serve in the same dish. I got mine at a thrift store for $12, and it’s become my favorite pot pie vessel.
Preparation Method
This recipe comes together in about an hour, but most of that is hands-off oven time. Here’s how to make it happen.
Step 1: Cook the Vegetables
Preheat your oven to 400°F. In your Dutch oven or large pot, melt the 2 tablespoons of butter over medium heat. Add the diced onion, carrots, and celery. Cook for 6-8 minutes, stirring occasionally, until the vegetables have softened and the onion is translucent. You want them to start smelling sweet, not browning. Add the minced garlic, thyme, rosemary, and sage. Cook for another minute until the garlic is fragrant. I once forgot the garlic until the very end, and honestly, the filling was still good—just less complex. Don’t be like me.
Step 2: Make the Roux
Sprinkle the ½ cup of flour over the cooked vegetables and stir constantly for 2 minutes. This cooks the raw flour taste out and starts the thickening process. The mixture will look dry and pasty—that’s exactly what you want. Keep stirring, scraping the bottom of the pot. If it starts to stick, lower the heat slightly.
Step 3: Build the Sauce
Slowly pour in the chicken broth, whisking constantly to prevent lumps. I learned the hard way that dumping it all in at once creates a lumpy mess. Add the milk and continue whisking until the sauce is smooth. Bring the mixture to a gentle simmer—you’ll see bubbles around the edges—and cook for 3-4 minutes, stirring occasionally. The sauce should thicken enough to coat the back of a spoon. If it seems too thick, add a splash more broth. Too thin? Let it simmer another minute or two.
Step 4: Add the Chicken and Vegetables
Stir in the shredded chicken, frozen peas, and frozen corn (if using). Add the salt, pepper, and fresh parsley. Taste the filling and adjust seasoning—this is your chance to get it right. I always add a little more pepper than I think I need. Simmer for 2 minutes, then remove from heat. Pour the filling into your 9×13-inch baking dish or keep it in the Dutch oven if it’s oven-safe.
Step 5: Make the Biscuit Topping
In a large mixing bowl, whisk together the 2 cups flour, baking powder, sugar, salt, and garlic powder. Add the cold butter cubes and cut them into the flour using a pastry cutter or two forks until the mixture looks like coarse meal with some pea-sized butter pieces remaining. These butter chunks are what create the flaky layers, so don’t overwork it. Make a well in the center and pour in the cold buttermilk. Stir with a fork just until the dough comes together. It will be shaggy and slightly sticky. Turn the dough onto a floured surface and gently knead 3-4 times—no more. Pat the dough into a ½-inch thick rectangle.
Step 6: Assemble and Bake
Using a biscuit cutter or a knife, cut the dough into rounds or squares. Arrange them on top of the hot filling, overlapping slightly. This is where the magic happens. Brush each biscuit with the egg wash and sprinkle with flaky sea salt. Bake for 20-25 minutes, until the biscuits are golden brown and the filling is bubbling up around the edges. Let it rest for 10 minutes before serving—this lets the filling set so it doesn’t run everywhere when you scoop it out.
Cooking Tips & Techniques
After making this pot pie more times than I can count, here are the things I wish I’d known from the start.
Cold butter is non-negotiable. For flaky biscuits, the butter needs to be cold when it goes into the oven. If your kitchen is warm, pop the cut biscuits in the fridge for 10 minutes before baking. I forgot this once on a hot summer day and ended up with dense, flat biscuits. Still tasty, but not the showstoppers they could have been.
Don’t skip the egg wash. That golden, glossy top is what makes people stop and stare when you bring this to the table. It also helps the flaky sea salt stick, and that little crunch on top is worth the extra step.
Let the filling cool slightly before adding biscuits. If the filling is boiling hot, it can start melting the butter in the biscuits before they even hit the oven. Let it sit for 5 minutes after coming off the stove. This gives you a better rise on the biscuits.
Multitasking is your friend. While the vegetables are cooking, measure out your dry ingredients for the biscuits. While the sauce simmers, shred your chicken. Having everything ready before you start makes the process so much smoother, especially if you’re cooking for guests and want to stay relaxed.
Trust the visual cues. The filling should be thick enough that it doesn’t look soupy. The biscuits should be deep golden brown—not pale. If your biscuits are browning too quickly, tent the dish with foil for the last 5 minutes. I’ve had ovens that run hot, and foil has saved many a biscuit.
Variations & Adaptations
This recipe is wonderfully adaptable, and I’ve tried several variations over the years.
Vegetarian Version: Swap the chicken for 3 cups of mixed mushrooms (cremini, shiitake, or oyster) and 1 can of drained chickpeas. Sauté the mushrooms with the vegetables until they release their liquid and start browning. Use vegetable broth instead of chicken broth. It’s surprisingly hearty and satisfying.
Gluten-Free Adaptation: Use a gluten-free all-purpose flour blend (I like Bob’s Red Mill 1-to-1) for both the roux and the biscuit topping. Add ¼ teaspoon xanthan gum to the biscuit dough if your flour blend doesn’t include it. The biscuits won’t be quite as fluffy, but they’ll still be delicious.
Dairy-Free Option: Use olive oil or vegan butter for the roux, unsweetened oat milk or cashew milk for the sauce, and a dairy-free biscuit recipe (substitute coconut oil for butter and use almond milk with lemon juice for buttermilk). I tested this for a friend with dairy allergies, and it worked beautifully.
Seasonal Vegetable Swap: In summer, add diced zucchini and fresh corn kernels. In fall, swap in cubed butternut squash and chopped kale. Just make sure to cook harder vegetables before adding them to the filling. I’ve done a spring version with asparagus and leeks that was absolutely lovely.
Herb Variations: Try fresh dill instead of parsley for a different flavor profile, or add a teaspoon of smoked paprika for a deeper, earthier taste. My personal favorite twist is adding a tablespoon of Dijon mustard to the sauce—it adds a subtle tang that cuts through the richness.
Serving & Storage Suggestions
This pot pie is best served warm, straight from the oven, with the filling still bubbling and the biscuits at their flakiest. Let it rest for 10 minutes after baking—I know it’s hard to wait, but it makes a difference. The filling sets up perfectly so you get clean, beautiful servings.
For a dinner party, I love serving this with a simple green salad dressed with lemon vinaigrette. The acidity cuts through the richness of the pot pie beautifully. Roasted green beans or steamed broccoli also work wonderfully on the side. If you’re going all out, a glass of crisp Sauvignon Blanc or a light lager pairs perfectly.
Storage: Leftovers keep in the refrigerator for up to 4 days in an airtight container. The biscuits will soften slightly from the filling, but honestly, that’s part of the charm. To reheat, place individual portions in a 350°F oven for 10-15 minutes, or microwave for 2-3 minutes if you’re in a hurry. The microwave will soften the biscuits more, so the oven is better if you want to preserve some texture.
Freezing: You can freeze the assembled but unbaked pot pie for up to 3 months. Assemble everything in a freezer-safe dish (use a metal or glass dish that can go from freezer to oven), wrap tightly in plastic wrap and foil. To bake from frozen, add 15-20 minutes to the baking time and cover with foil for the first half of baking to prevent over-browning.
The flavors actually deepen overnight, so leftovers might taste even better the next day. I’ve been known to make this on a Sunday just for Monday’s lunch.
Nutritional Information & Benefits
Here’s an estimated nutritional breakdown per serving (based on 8 servings):
| Nutrient | Amount Per Serving |
|---|---|
| Calories | 475 |
| Total Fat | 22g |
| Saturated Fat | 12g |
| Cholesterol | 95mg |
| Sodium | 720mg |
| Total Carbohydrates | 42g |
| Dietary Fiber | 4g |
| Sugars | 6g |
| Protein | 28g |
This pot pie is a good source of protein from the chicken and provides a solid dose of vitamin A from the carrots. The peas add a bit of fiber and vitamin C. While it’s not a low-calorie dish, it’s made with real, whole ingredients—no processed shortcuts. I love that I know exactly what’s in it, and I can feel good about serving it to my family and friends. If you’re watching your sodium, use low-sodium broth and go easy on the added salt.
Conclusion
This chicken pot pie with flaky biscuit topping has become my go-to for every gathering, from casual weeknight dinners with friends to holiday potlucks where I need to bring something impressive. It’s the recipe that makes people lean in and say, “Wait, you made this from scratch?” And the best part? It’s so simple that you’ll feel a little bit like Carol—like you just threw something together, even though you know it’s something special.
I’d love to hear how this turns out for you. Did you add your own twist? Serve it at a dinner party? Make it for a rainy Tuesday when you needed comfort food? Drop a comment below and let me know. And if you share it on social media, tag me—I want to see those golden biscuits and bubbly edges. Trust me, once you make this, it’ll become your go-to too.
Frequently Asked Questions
Can I use a store-bought biscuit mix instead of making biscuits from scratch?
Absolutely. If you’re short on time, a high-quality biscuit mix like Bisquick works in a pinch. Just prepare the biscuits according to the package directions, drop them on top of the filling, and bake. The texture won’t be quite as flaky, but it’ll still be delicious.
How do I prevent the biscuit topping from getting soggy?
Make sure your filling isn’t too thin—it should coat the back of a spoon. Also, don’t let the filling sit too long before adding the biscuits. The hotter the filling, the more steam it produces, which can make the bottom of the biscuits soggy. Letting the filling cool for 5 minutes before adding the biscuits helps.
Can I make this in a slow cooker?
You can make the filling in a slow cooker by sautéing the vegetables on the stove first, then transferring everything except the milk and flour to the slow cooker. Cook on low for 4-6 hours. Before serving, stir in a slurry of flour and milk to thicken. For the biscuits, bake them separately on a sheet pan and serve on top of the filling.
What’s the best way to reheat leftovers?
The oven is your best bet for maintaining texture. Reheat individual portions in a 350°F oven for 10-15 minutes. The microwave works in a pinch but will soften the biscuits more. If you’re reheating a whole dish, cover with foil and bake at 350°F for 20-25 minutes.
Can I use dark meat chicken instead of breast meat?
Yes, and many people prefer it! Dark meat from thighs and drumsticks has more fat and flavor, which makes the filling even richer. Just make sure to shred or dice the meat and remove any bones or skin before adding it to the filling.
Pin This Recipe!
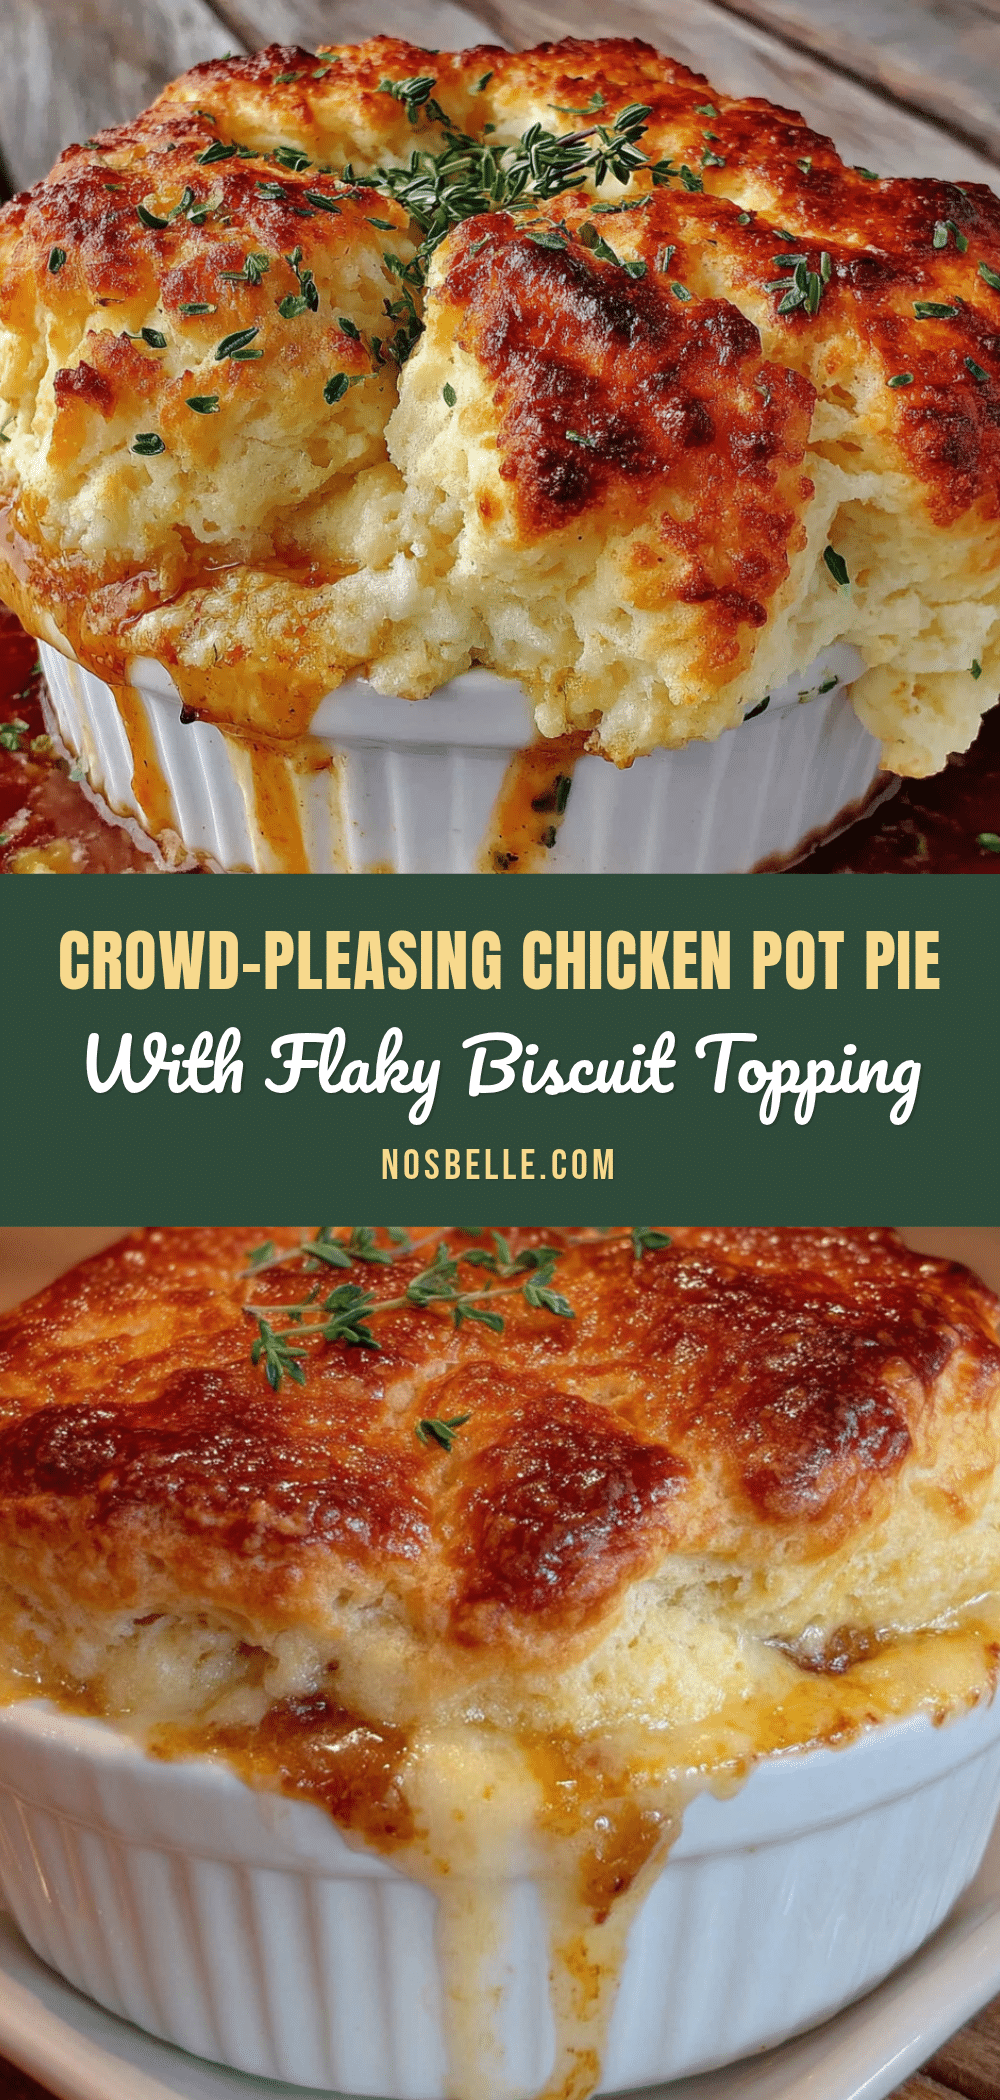
Best Crowd-Pleasing Chicken Pot Pie with Flaky Biscuit Topping

This chicken pot pie features a creamy, savory filling loaded with tender chicken and vegetables, topped with golden, flaky biscuits. It’s a comforting, crowd-pleasing dish made with simple pantry ingredients, perfect for gatherings and weeknight dinners.
- Prep Time: 20 minutes
- Cook Time: 35 minutes
- Total Time: 55 minutes
- Yield: 8 servings 1x
- Category: Main Course
- Cuisine: American
Ingredients
- 2 tablespoons unsalted butter
- 1 medium yellow onion, diced (about 1 cup)
- 3 medium carrots, peeled and diced (about 1½ cups)
- 2 celery stalks, diced (about 1 cup)
- 3 cloves garlic, minced
- 1 teaspoon dried thyme (or 1 tablespoon fresh thyme leaves)
- ½ teaspoon dried rosemary
- ½ teaspoon dried sage
- ½ cup all-purpose flour
- 3 cups low-sodium chicken broth
- 1 cup whole milk (or half-and-half for extra richness)
- 3 cups cooked chicken, shredded or diced (rotisserie chicken is perfect)
- 1 cup frozen peas (no need to thaw)
- ½ cup frozen corn kernels (optional)
- 1 teaspoon salt (plus more to taste)
- ½ teaspoon black pepper
- ¼ cup fresh parsley, chopped
- 2 cups all-purpose flour (for biscuit topping)
- 1 tablespoon baking powder
- 1 teaspoon sugar
- ½ teaspoon salt
- ½ teaspoon garlic powder
- 6 tablespoons cold unsalted butter, cut into small cubes
- ¾ cup cold buttermilk (plus 2 tablespoons extra if needed)
- 1 large egg, beaten with 1 tablespoon water (for egg wash)
- Flaky sea salt, for sprinkling
Instructions
- Preheat your oven to 400°F.
- In a Dutch oven or large pot, melt 2 tablespoons of butter over medium heat. Add diced onion, carrots, and celery. Cook for 6-8 minutes, stirring occasionally, until softened and onion is translucent.
- Add minced garlic, thyme, rosemary, and sage. Cook for another minute until fragrant.
- Sprinkle ½ cup of flour over the vegetables and stir constantly for 2 minutes to cook out the raw flour taste.
- Slowly pour in the chicken broth, whisking constantly to prevent lumps. Add the milk and continue whisking until smooth.
- Bring the mixture to a gentle simmer and cook for 3-4 minutes, stirring occasionally, until the sauce thickens enough to coat the back of a spoon.
- Stir in the shredded chicken, frozen peas, frozen corn (if using), salt, pepper, and fresh parsley. Simmer for 2 minutes, then remove from heat.
- Pour the filling into a 9×13-inch baking dish or keep in the Dutch oven if oven-safe.
- In a large mixing bowl, whisk together 2 cups flour, baking powder, sugar, ½ teaspoon salt, and garlic powder.
- Cut in the cold butter cubes using a pastry cutter or two forks until the mixture resembles coarse meal with pea-sized butter pieces.
- Make a well in the center and pour in the cold buttermilk. Stir with a fork just until the dough comes together (it will be shaggy and slightly sticky).
- Turn the dough onto a floured surface and gently knead 3-4 times. Pat the dough into a ½-inch thick rectangle.
- Cut the dough into rounds or squares using a biscuit cutter or knife. Arrange them on top of the hot filling, overlapping slightly.
- Brush each biscuit with the egg wash and sprinkle with flaky sea salt.
- Bake for 20-25 minutes, until the biscuits are golden brown and the filling is bubbling around the edges.
- Let it rest for 10 minutes before serving.
Notes
Cold butter is essential for flaky biscuits. Don’t skip the egg wash for a golden top. Let the filling cool slightly before adding biscuits to prevent them from getting soggy. For make-ahead, prep the filling up to two days in advance and add biscuit topping before baking. To freeze, assemble unbaked pot pie and freeze for up to 3 months; add 15-20 minutes to baking time when baking from frozen.
Nutrition
- Serving Size: 1 serving (1/8 of re
- Calories: 475
- Sugar: 6
- Sodium: 720
- Fat: 22
- Saturated Fat: 12
- Carbohydrates: 42
- Fiber: 4
- Protein: 28
Keywords: chicken pot pie, biscuit topping, comfort food, crowd-pleasing, dinner party, make-ahead, potluck


