My husband had claimed for years that he didn’t like chocolate chip cookies. Honestly, I thought it was some kind of joke at first. “Who doesn’t like chocolate chip cookies?” I’d ask, genuinely baffled. He’d shrug and say they were fine, but he’d rather have a brownie or a piece of pie. I made my standard batch for a work party once, and he barely touched them. So, I stopped making them. It felt pointless to bake a dozen or more cookies for just me, and I wasn’t about to become a short-order baker. Then, last Tuesday, I came home from a long day of writing to find him standing at the kitchen counter. The power had gone out for a few hours that afternoon, and I guess he’d gotten bored. There, on a small plate, were three perfectly golden, slightly misshapen cookies. He’d used my last chocolate bar, chopped it up himself, and baked exactly six cookies. “I made a small batch,” he said, not quite meeting my eyes. I grabbed one before he could protest, and that first bite—warm, with pools of melted chocolate and a perfectly crisp edge—changed everything. He wasn’t a man who disliked chocolate chip cookies. He was a man who had never had a *good* one, fresh from the oven, made with a little bit of patience and a lot of butter. This recipe is for that exact moment, when you just need a few perfect cookies, and you don’t want to be stuck with a whole tin for the rest of the week.
Why You’ll Love This Recipe
This isn’t just another cookie recipe. This is the one you’ll turn to when you need a baking win without the commitment of a full batch. I’ve tested this ratio more times than I can count to get the texture just right—crispy edges, chewy centers, and enough chocolate in every bite. Let me tell you, it was a delicious journey of trial and error.
- Perfectly Portioned: This recipe makes exactly 6 to 8 cookies. No more, no less. It’s the ideal size for a quiet night in, a small family treat, or a test run before a big event.
- Simple Pantry Ingredients: You likely have everything you need in your kitchen right now. No need for a special trip to the store for unusual flours or extracts.
- Fast & Easy: From start to finish, you can have warm cookies in about 20 minutes. The dough comes together in one bowl with a whisk and a spatula.
- Crowd-Pleasing Texture: These have that perfect balance of slightly crunchy edges and a soft, gooey center. It’s the kind of texture that makes you close your eyes after the first bite.
- Stress-Free Hosting: If you’re having friends over and want that fresh-baked smell without the mess of a huge batch, this is your recipe. You can even prep the dough ahead of time and bake them off while your guests are settling in.
What makes this recipe different from the rest is the technique. We’re using melted butter, which gives the cookies a richer, more caramel-like flavor and a denser, chewier texture. It also means no waiting for butter to soften, which is a win in my book. This recipe is comfort food, reimagined for the moment you need it most—quick, satisfying, and absolutely delicious.
What Ingredients You Will Need
This recipe uses simple, wholesome ingredients to deliver a bold, buttery flavor and that perfect chewy texture. Most of these are pantry staples, making it incredibly easy to whip up a batch on a whim.
- 4 tablespoons unsalted butter (56g) – Melted and slightly cooled. I use unsalted to control the salt level. Kerrygold is my go-to for its rich flavor, but any good quality butter works.
- ¼ cup granulated sugar (50g) – This provides the crispness on the edges.
- ¼ cup packed light brown sugar (50g) – This is the secret to the chewy center and adds a lovely molasses note. Make sure it’s packed firmly into the measuring cup.
- 1 large egg yolk – We only use the yolk for richness and to help bind the dough without making it too wet. Save the white for an omelet!
- ½ teaspoon vanilla extract – Use pure vanilla extract if you have it. It makes a real difference in the depth of flavor.
- ¾ cup all-purpose flour (95g) – Spoon and level your flour for the best results. Scooping directly from the bag can pack in too much flour, leading to dry cookies.
- ½ teaspoon baking soda – This helps the cookies spread just the right amount.
- ¼ teaspoon fine sea salt – Balances the sweetness and enhances the chocolate. I prefer sea salt for its clean taste.
- ⅓ cup semi-sweet chocolate chips (60g) – Or roughly chopped chocolate from a bar. I love using a mix of semi-sweet and dark chocolate for a more complex flavor. Guittard or Ghirardelli chips are reliable choices.
- Flaky sea salt (optional, for finishing) – A small sprinkle on top right out of the oven is a game-changer. It adds a wonderful salty crunch.
Substitution Guidance: For a dairy-free version, you can use a high-quality vegan butter stick (like Miyoko’s) in place of the unsalted butter. If you are gluten-sensitive, a 1:1 gluten-free baking flour blend (like King Arthur’s Measure for Measure) works beautifully here. I’ve tested it, and the texture is remarkably similar.
Equipment Needed
You don’t need a stand mixer or a fancy kitchen for this recipe. It’s all about simplicity and minimal cleanup, which I appreciate.
- Mixing bowls: One medium-sized bowl is all you need.
- Whisk: For mixing the wet ingredients and sugar.
- Rubber spatula or wooden spoon: For folding in the flour and chocolate chips.
- Measuring cups and spoons: For accurate ingredient portions. A kitchen scale is even better for precision, especially with the flour.
- Baking sheet: A standard half-sheet pan is perfect.
- Parchment paper or silicone baking mat: This prevents sticking and promotes even browning. I prefer parchment for the crispiest bottoms.
- Cookie scoop (about 1.5 tablespoons): For evenly sized cookies. If you don’t have one, two spoons work just fine.
- Cooling rack: Optional, but helps the cookies cool without getting soggy on the bottom.
Personal Note: I used an old, dark baking sheet for years and wondered why my cookies always burned on the bottom. Switching to a light-colored, aluminum baking sheet was a total game-changer for consistent results.
Preparation Method
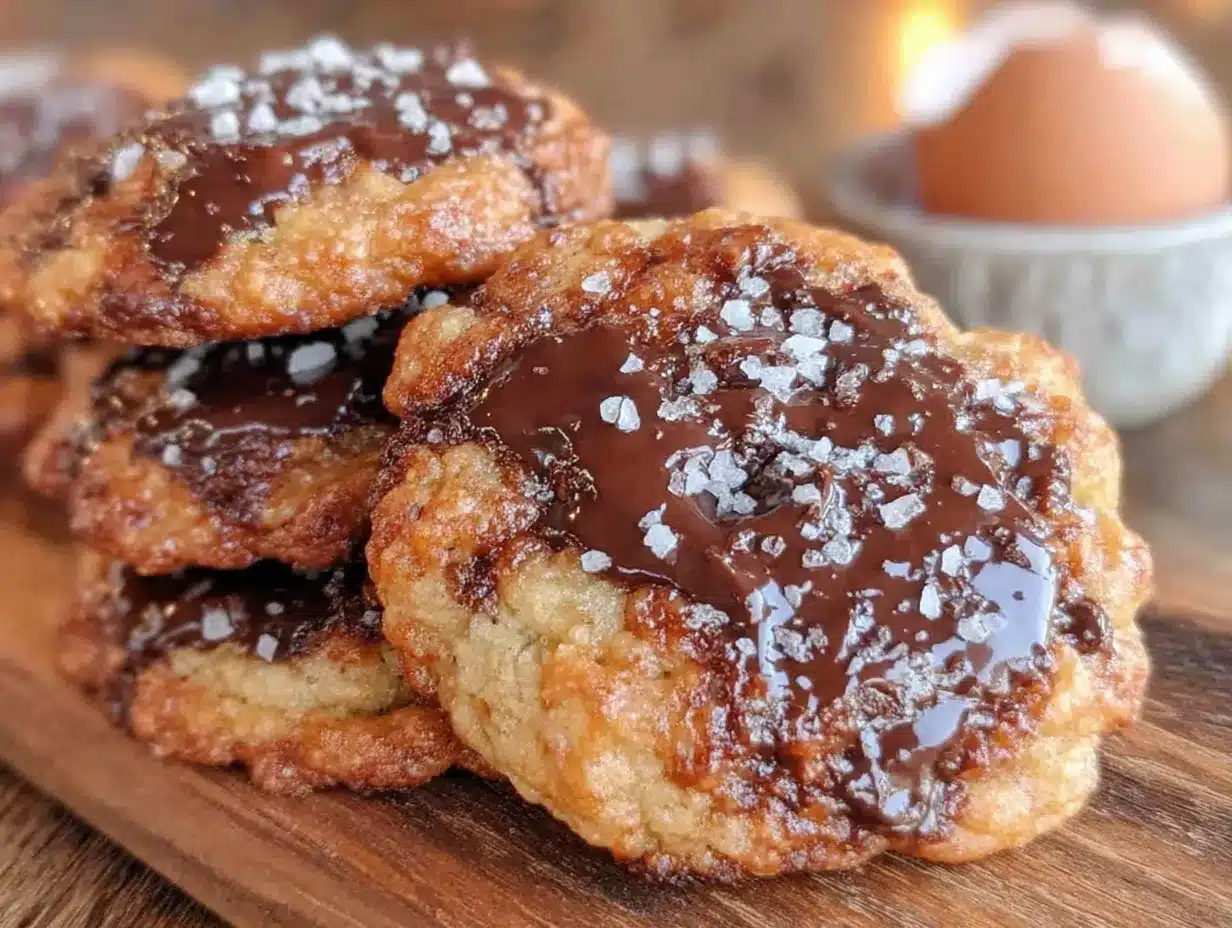
Follow these steps carefully, and you’ll have a perfect batch of small-batch chocolate chip cookies in no time. Pay attention to the sensory cues—they are your best guide.
- Preheat and Prep: Preheat your oven to 350°F (175°C). Line your baking sheet with parchment paper or a silicone mat. This step is non-negotiable for easy cleanup and perfect bottoms.
- Melt the Butter: Place the 4 tablespoons of unsalted butter in a microwave-safe bowl. Microwave in 15-second bursts until just melted. It should be fully liquid but not hot. Let it cool for a minute or two while you gather the other ingredients. You don’t want it to be piping hot, or it will cook the egg yolk.
- Combine Sugars and Butter: Add the ¼ cup granulated sugar and ¼ cup packed light brown sugar to the melted butter. Whisk vigorously for about 30 seconds to a minute. The mixture should look like a thick paste and smell wonderfully buttery and sweet. This step is crucial for dissolving the sugar and creating that chewy texture.
- Add the Wet Ingredients: Whisk in the 1 large egg yolk and ½ teaspoon vanilla extract. Continue whisking until the mixture is smooth, pale, and slightly thickened. It should look like a thin caramel sauce. If it looks separated or greasy, keep whisking—it will come together.
- Add the Dry Ingredients: Switch to your rubber spatula. Sprinkle the ¾ cup all-purpose flour, ½ teaspoon baking soda, and ¼ teaspoon fine sea salt over the wet mixture. Fold gently until just combined. A few streaks of flour are okay. Do not overmix at this stage, or your cookies will be tough.
- Fold in the Chocolate: Add the ⅓ cup semi-sweet chocolate chips (or chopped chocolate). Fold them in with a few gentle strokes until they are evenly distributed throughout the dough. The dough will be soft, slightly sticky, and look absolutely glorious.
- Chill the Dough (Optional but Recommended): For the best flavor and texture, cover the bowl and pop it in the fridge for 30 minutes. This allows the flavors to meld and prevents the cookies from spreading too much. If you’re in a hurry, you can skip this step, but the cookies will be slightly flatter.
- Scoop and Portion: Using your cookie scoop or two spoons, portion the dough into 6 to 8 equally sized balls. I usually get 7. Place them on the prepared baking sheet, leaving about 2 inches (5 cm) of space between each. They will spread, but not excessively.
- Bake: Bake for 9 to 11 minutes. At the 9-minute mark, the edges should be golden brown and set, but the centers will still look soft, puffy, and slightly underdone. This is exactly what you want. The cookies will continue to bake on the hot sheet as they cool.
- Finish and Cool: Remove the baking sheet from the oven. If using, immediately sprinkle a tiny pinch of flaky sea salt on top of each cookie. Let the cookies rest on the hot baking sheet for 5 minutes. This is critical for setting the centers. After 5 minutes, transfer them to a cooling rack to cool completely, or enjoy one warm right away (I won’t tell).
Cooking Tips & Techniques
Over the years, I’ve made a lot of mistakes with small batches. Let me save you the trouble with a few hard-won lessons.
- The Butter Temperature Trap: The first time I made a small batch, I used butter that was too hot, and my cookies spread into flat, greasy discs. Let the melted butter cool for a solid minute or two before adding the sugars. It should be warm, not hot.
- The “Just Combined” Rule: When you add the flour, stir only until you can’t see any more dry streaks. Overmixing develops gluten, which leads to tough, cakey cookies. We want tender, chewy cookies here.
- Don’t Skip the Rest: Letting the cookies rest on the hot baking sheet for that 5 minutes after baking is the most important step. It allows the residual heat to finish cooking the centers. If you try to move them too soon, they’ll fall apart. Be patient!
- Size Matters: Use a cookie scoop for evenly sized cookies. If your cookies are different sizes, some will burn while others are still raw. A 1.5-tablespoon scoop is the perfect size for this batch.
- Multitasking for Hosting: If you’re making these for a gathering, you can prepare the dough up to 48 hours in advance. Keep it covered in the fridge. When your guests arrive, just scoop and bake. The fresh-baked smell will make you look like a hero, and you get to enjoy the party, too.
Variations & Adaptations
This basic recipe is a fantastic canvas for customization. Here are a few of my favorite twists.
- Double Chocolate Chip: Replace 2 tablespoons of the all-purpose flour with 2 tablespoons of unsweetened cocoa powder. Use dark chocolate chips for an intensely rich, fudgy cookie.
- Sea Salt & Toffee: Fold in ¼ cup of chopped toffee bits along with the chocolate chips. The toffee gets wonderfully crunchy and buttery. Finish with that flaky sea salt for a sweet-salty masterpiece.
- Gluten-Free Adaptation: As mentioned, a good 1:1 gluten-free flour blend works perfectly. I’ve found that letting the dough rest for 10 minutes after mixing helps the gluten-free flours hydrate and results in a better texture.
- Vegan Version: Use 4 tablespoons of vegan butter and replace the egg yolk with 1 tablespoon of ground flaxseed mixed with 2.5 tablespoons of water (a “flax egg”). Let the flax mixture sit for 5 minutes to thicken before adding it. The texture will be slightly more cakey, but still delicious.
- Personal Favorite Variation: My husband, the former cookie skeptic, now requests these with a handful of chopped pecans and a few white chocolate chips mixed in with the semi-sweet. It adds a lovely crunch and a different sweetness. It’s his personal “victory” cookie.
Serving & Storage Suggestions
These cookies are best enjoyed warm, fresh from the oven. That’s the whole point of a small batch, right?
Serving: Serve them on a small, beautiful plate with a tall glass of cold milk or a steaming cup of coffee. For a dessert board, pair them with fresh berries, a dollop of whipped cream, and a few squares of dark chocolate. They are also fantastic crumbled over vanilla ice cream for an impromptu sundae.
Storage: Store any leftover cookies (if there are any!) in an airtight container at room temperature for up to 3 days. To bring back that just-baked softness, pop one in the microwave for about 10 seconds. The flavors actually develop and meld together more after a day, so day-old cookies are still a wonderful treat.
Freezing: You can freeze the unbaked cookie dough balls. Scoop them onto a parchment-lined baking sheet and freeze until solid, about 1 hour. Transfer the frozen balls to a zip-top bag. To bake, place the frozen dough balls on a baking sheet and add 1 to 2 minutes to the baking time. You can have a fresh cookie anytime you want one!
Nutritional Information & Benefits
While these are a treat, not a health food, it’s good to know what’s in them. The following is an estimate for one cookie out of a batch of 7.
| Nutrient | Amount Per Cookie (approx.) |
|---|---|
| Calories | 180-220 |
| Fat | 10-12g |
| Carbohydrates | 24-28g |
| Protein | 2-3g |
| Sugar | 15-18g |
Health Benefits of Key Ingredients: Dark chocolate is rich in antioxidants, and the butter provides a small amount of Vitamin A. The main benefit here, however, is portion control. By making a small batch, you are less likely to overindulge compared to a full recipe. It’s about mindful indulgence.
Dietary Considerations: This recipe is vegetarian. For gluten-free or vegan options, please see the variations section above. It contains dairy (butter) and eggs.
Conclusion
This small-batch chocolate chip cookie recipe is more than just a recipe; it’s a permission slip. It’s permission to satisfy a craving without the guilt of a whole tin of cookies sitting on the counter. It’s permission to bake on a Tuesday night just because. It’s the recipe that changed my husband’s mind and has become our little secret for a perfect, low-stakes treat. I honestly believe that everyone deserves a warm, homemade chocolate chip cookie, and this recipe makes that possible any day of the week.
I would love to hear how these turn out for you! Did you try a fun variation? Did you manage to save any for the next day? Please leave a comment below and share your baking wins. And if you loved this recipe, don’t forget to share it with a friend who needs a little cookie magic in their life. Happy baking!
Frequently Asked Questions
Can I double this small-batch recipe?
Absolutely! This recipe scales up perfectly. Simply double all the ingredients. You might need to bake them in two batches so the baking sheet isn’t overcrowded.
Why are my cookies flat?
Flat cookies usually happen for two reasons: the butter was too hot when mixed, or the dough wasn’t chilled. Make sure your melted butter is just warm, not hot, and consider chilling the dough for at least 30 minutes.
Can I use margarine or a butter substitute?
I don’t recommend using margarine, as it has a higher water content, which can lead to flat, greasy cookies. A high-quality vegan butter stick is a much better substitute for a dairy-free option.
How do I make these cookies more chewy or more crispy?
For chewier cookies, use an extra tablespoon of brown sugar and reduce the granulated sugar by a tablespoon. For crispier cookies, use an extra tablespoon of granulated sugar and bake them for an extra minute or two.
Can I use different types of chocolate?
Definitely! Chopped chocolate bars melt into beautiful puddles, while chips hold their shape better. You can use milk, dark, white, or even butterscotch chips. A mix is always a good idea.
Pin This Recipe!

Best Small-Batch Chocolate Chip Cookies: Easy Recipe
This small-batch chocolate chip cookie recipe yields 6 to 8 perfectly golden cookies with crispy edges, chewy centers, and plenty of melted chocolate. Made with simple pantry ingredients and ready in about 20 minutes, it’s the ideal treat for a quiet night in or a stress-free dessert for guests.
- Prep Time: 10 minutes
- Cook Time: 10 minutes
- Total Time: 20 minutes (plus optional 30 minutes chilling)
- Yield: 6-8 cookies 1x
- Category: Dessert
- Cuisine: American
Ingredients
- 4 tablespoons unsalted butter (56g), melted and slightly cooled
- 1/4 cup granulated sugar (50g)
- 1/4 cup packed light brown sugar (50g)
- 1 large egg yolk
- 1/2 teaspoon vanilla extract
- 3/4 cup all-purpose flour (95g), spooned and leveled
- 1/2 teaspoon baking soda
- 1/4 teaspoon fine sea salt
- 1/3 cup semi-sweet chocolate chips (60g) or roughly chopped chocolate
- Flaky sea salt (optional, for finishing)
Instructions
- Preheat oven to 350°F (175°C). Line a baking sheet with parchment paper or a silicone mat.
- Melt the butter in a microwave-safe bowl in 15-second bursts until just melted. Let cool for 1-2 minutes.
- Add granulated sugar and brown sugar to the melted butter. Whisk vigorously for 30 seconds to 1 minute until thick and paste-like.
- Whisk in the egg yolk and vanilla extract until smooth, pale, and slightly thickened.
- Switch to a rubber spatula. Sprinkle flour, baking soda, and salt over the wet mixture. Fold gently until just combined (a few streaks of flour are okay).
- Fold in the chocolate chips until evenly distributed. Dough will be soft and slightly sticky.
- For best results, cover and chill the dough for 30 minutes (optional but recommended).
- Using a cookie scoop or two spoons, portion dough into 6-8 equal balls. Place on prepared baking sheet, spacing 2 inches apart.
- Bake for 9-11 minutes. Edges should be golden and set, centers still soft and puffy.
- Remove from oven. If using, sprinkle flaky sea salt on top. Let cookies rest on the hot baking sheet for 5 minutes, then transfer to a cooling rack.
Notes
For best texture, chill the dough for 30 minutes. Let cookies rest on the hot baking sheet for 5 minutes after baking to set the centers. Use a light-colored aluminum baking sheet for even browning.
Nutrition
- Serving Size: 1 cookie
- Calories: 200
- Sugar: 17
- Sodium: 120
- Fat: 11
- Saturated Fat: 7
- Carbohydrates: 26
- Fiber: 1
- Protein: 3
Keywords: small batch chocolate chip cookies, easy cookie recipe, chewy chocolate chip cookies, 6 cookies, quick dessert