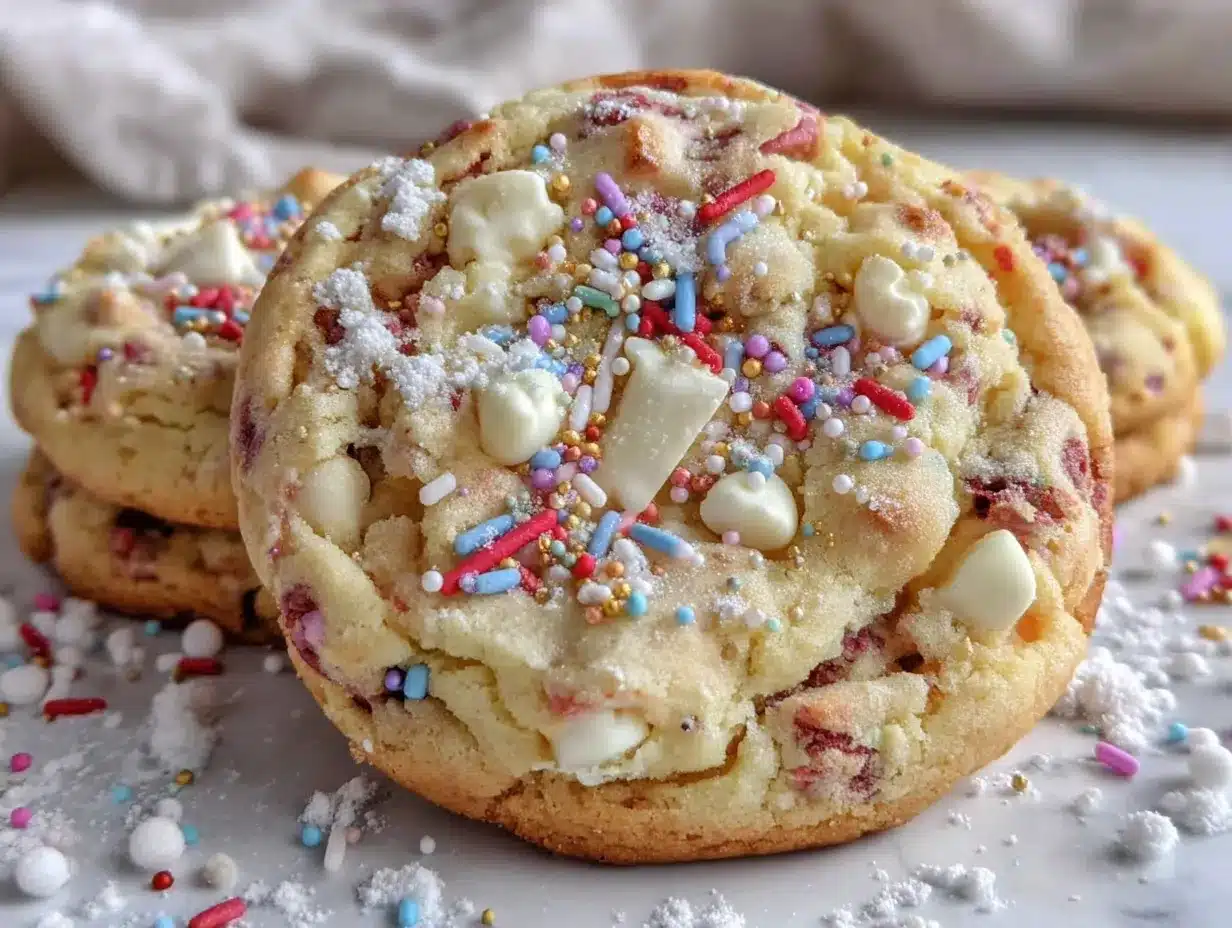
My older brother swore he hated sprinkles for thirty-seven years. No joke. He’d pick them off cupcakes, push frosted cookies to the side of the plate, and make this little face like he’d bitten into a lemon. It was a whole thing. Then last December, I was testing this recipe on a snowy Tuesday afternoon—just me, a bag of rainbow jimmies, and the quiet hum of the mixer. I made a batch, set them on the counter to cool, and walked away to answer a text. When I came back, he was standing there, caught red-handed, a cookie halfway to his mouth, sprinkles clinging to his sweater. He just shrugged and said, “These are different.” And honestly? That’s the whole story of these cookies. They’re not trying to be fancy birthday cake in cookie form. They’re soft, buttery, and just sweet enough, with that nostalgic *funfetti* vibe that makes you feel like a kid again—without the cloying, artificial aftertaste that usually ruins it. I mean, let me tell you, I’ve tried a dozen versions of this idea, and most of them were dry, crumbly, or tasted like a chemistry experiment. This one actually delivers on the cozy, homemade promise. Maybe you’ve been there—looking for a sprinkle cookie that tastes like a real, honest-to-goodness celebration, not a gimmick. These are it. They’re the kind of cookie you bake on a lazy Sunday, the kind that fills your kitchen with that warm vanilla scent and makes everyone wander in asking, “What’s that smell?” I keep making them because they’re simple, they’re reliable, and they turned a lifelong sprinkle-hater into a convert. That’s a pretty good trick for a cookie.
Why You’ll Love These Cozy Birthday Cake Cookies
I’ve tested this recipe about seven times to get the texture just right. The first batch was too cakey—more like a dropped muffin than a cookie. The second was flat and greasy. But this version? It’s the Goldilocks of sprinkle cookies. Here’s why it works:
- Quick & Easy: From bowl to oven in under 20 minutes. No chilling required, which means you can satisfy a sprinkle craving almost instantly.
- Simple Ingredients: You probably have everything already—butter, sugar, flour, eggs, vanilla. No weird extracts or specialty flours needed.
- Perfect for Cozy Occasions: These are great for a quiet birthday at home, a rainy afternoon bake, or just because you need a little joy on a Tuesday.
- Crowd-Pleaser: Kids love the color, adults love the buttery flavor, and even my sprinkle-hating brother loves them.
- Unbelievably Delicious: The secret is a touch of sour cream in the dough. It keeps them soft for days and adds a subtle tang that balances the sweetness. It’s not just another birthday cookie—it’s the one with the perfect chewy center and slightly crisp edges.
This recipe isn’t just good—it’s the kind that makes you close your eyes after the first bite. It’s comfort food reimagined: familiar, nostalgic, but with a texture that feels like a warm hug. Perfect for celebrating a birthday without the fuss of a layer cake, or turning a simple afternoon into something memorable.
What Ingredients You Will Need
This recipe uses simple, wholesome ingredients to deliver that cozy birthday cake flavor without any fuss. Most of these are pantry staples, so you likely have them on hand already.
- Unsalted butter, softened (1 cup / 2 sticks) — I always use unsalted so I can control the salt level. Let it sit out for about 30 minutes until it’s soft but not melty.
- Granulated sugar (3/4 cup / 150g) — Just regular white sugar. It gives the cookies that classic sweetness and helps them spread just the right amount.
- Light brown sugar, packed (1/4 cup / 50g) — This is my secret for a chewier texture. The molasses in brown sugar adds a tiny bit of depth that makes the birthday cake flavor feel more *baked* and less artificial.
- Large egg (1, room temperature) — Cold eggs can seize the butter, so let it sit out for 15 minutes. If you forget, place the egg in a bowl of warm water for 5 minutes.
- Sour cream (1/4 cup / 60g) — This is the magic ingredient. It adds moisture and a slight tang that keeps the cookies soft for days. Full-fat works best, but low-fat is fine in a pinch.
- Vanilla extract (2 teaspoons) — Pure vanilla makes a difference. I love Nielsen-Massey for its rich flavor, but any good brand works.
- Almond extract (1/4 teaspoon) — Optional, but highly recommended. It gives that classic “birthday cake” bakery flavor. If you don’t have it, just use more vanilla.
- All-purpose flour (2 cups / 250g) — Spoon and level it. Scooping directly from the bag packs in too much flour and makes dry cookies.
- Cornstarch (2 tablespoons) — This keeps the cookies tender and soft. It’s the trick for that melt-in-your-mouth texture.
- Baking soda (1/2 teaspoon) — Helps them spread just a little and gives a nice lift.
- Salt (1/2 teaspoon) — Balances the sweetness. Don’t skip it.
- Rainbow sprinkles (1/2 cup / 80g) — Use jimmies (the long, skinny kind), not nonpareils (the tiny round balls). Nonpareils bleed their color into the dough and turn it gray. I prefer Betty Crocker or Wilton brand for the best color payoff.
For the optional glaze, you’ll need 1 cup of powdered sugar, 2-3 tablespoons of milk or heavy cream, and 1/2 teaspoon of vanilla. It’s not necessary, but it makes them look extra festive.
Equipment Needed
You don’t need fancy tools for these cookies. Here’s what I use:
- Stand mixer or hand mixer — I use my KitchenAid, but a hand mixer works just as well. You could even mix by hand with a wooden spoon, but it’ll take some elbow grease to cream the butter and sugar properly.
- Large mixing bowl — For the dry ingredients.
- Medium mixing bowl — For the wet ingredients.
- Whisk — To combine the flour mixture evenly.
- Rubber spatula — For folding in the sprinkles gently so they don’t break.
- Cookie scoop (2-tablespoon size) — This gives you uniform cookies that bake evenly. I use a #40 scoop. If you don’t have one, use two spoons.
- Baking sheets (2) — Light-colored metal sheets work best. Dark sheets can over-brown the bottoms.
- Parchment paper or silicone baking mats — Parchment is cheap and makes cleanup a breeze. Silicone mats work well too, but they can spread the cookies slightly more.
- Cooling rack — Essential for letting the cookies set without steaming on the pan.
If you’re on a budget, skip the cookie scoop and just roll the dough into balls with your hands. It’s not as precise, but the cookies will still taste amazing.
Preparation Method
- Preheat and prep. Preheat your oven to 350°F (175°C). Line two baking sheets with parchment paper. This ensures the cookies don’t stick and bake evenly.
- Cream the butter and sugars. In a large bowl, beat the softened butter, granulated sugar, and brown sugar together on medium speed for about 2-3 minutes. It should look light, fluffy, and pale in color. Scrape down the sides of the bowl with a spatula halfway through. This step is important—don’t rush it. Proper creaming incorporates air, which gives the cookies a tender structure.
- Add the wet ingredients. Beat in the egg, sour cream, vanilla extract, and almond extract (if using) on medium speed until fully combined. The mixture might look a little curdled at first—that’s okay. It will come together as you keep mixing. Scrape the bowl again.
- Mix the dry ingredients. In a separate medium bowl, whisk together the flour, cornstarch, baking soda, and salt. Whisking ensures the cornstarch and baking soda are evenly distributed—no one wants a pocket of baking soda in one cookie.
- Combine wet and dry. Gradually add the dry ingredients to the wet mixture, mixing on low speed. Stop as soon as the flour disappears. Over-mixing at this stage develops gluten, which makes cookies tough. You want a soft, slightly sticky dough.
- Fold in the sprinkles. Gently fold the rainbow sprinkles into the dough using a rubber spatula. Be gentle—over-stirring can cause the sprinkles to bleed their color. The dough will look festive and speckled.
- Scoop and shape. Use a 2-tablespoon cookie scoop to portion the dough. Roll each portion into a smooth ball with your hands. Place the balls on the prepared baking sheets, spacing them about 2 inches apart. They will spread, but not excessively.
- Bake. Bake one sheet at a time for 10-12 minutes. The cookies should look puffed and slightly golden around the edges, but the centers will still look soft and underdone. That’s perfect. If you bake until they look fully set, they’ll be overdone.
- Cool. Let the cookies cool on the baking sheet for 5 minutes. This allows them to set up without breaking. Then transfer them to a wire rack to cool completely. If you’re adding the glaze, wait until they’re fully cool—otherwise, it will melt right off.
- Optional glaze. Whisk together the powdered sugar, milk, and vanilla until smooth. Drizzle over the cooled cookies using a spoon or a piping bag. Add a few extra sprinkles on top for that bakery look.
Pro tip from my own mistakes: The first time I made these, I used a dark baking sheet and the bottoms burned at 11 minutes. Stick with light-colored pans and check them at 10 minutes. Every oven runs a little differently.
Cooking Tips & Techniques
I’ve made a lot of mistakes so you don’t have to. Here’s what I’ve learned:
- Don’t skip the cornstarch. It’s not just filler. It inhibits gluten formation, which keeps these cookies soft and tender. Without it, you’ll get a denser, more bread-like cookie.
- Use room temperature ingredients. Cold butter won’t cream properly, and cold egg can cause the batter to separate. If you forget to take the egg out, place it in a bowl of warm water for 5 minutes. For the butter, cut it into small cubes and let it sit for 15 minutes—it’ll soften faster.
- Chill if you have time, but you don’t have to. This dough works fine without chilling. But if you want thicker, puffier cookies, pop the scooped dough balls in the fridge for 30 minutes. It’s a trade-off: softer texture vs. more spread. I usually skip chilling because I’m impatient.
- Avoid nonpareils. I learned this the hard way. Those tiny round sprinkles bleed their color into the dough, turning it a sad, muddy gray. Jimmies (the long ones) hold their color and shape.
- Underbake slightly. The cookies will continue to bake on the hot pan after you pull them out. If you wait until they look fully done in the oven, they’ll be overdone on the counter. Trust the puffed, soft-center look.
- Rotate the pan halfway. If your oven has hot spots, rotate the baking sheet at the 5-minute mark. It ensures even browning.
Variations & Adaptations
These cookies are super flexible. Here are some ways to change them up:
- Gluten-Free Version: Swap the all-purpose flour with a 1:1 gluten-free baking flour (I like Bob’s Red Mill). Add an extra tablespoon of sour cream to compensate for the dryness of gluten-free flours. The texture will be slightly more delicate, but still delicious.
- Dairy-Free Adaptation: Use vegan butter (like Earth Balance) and a dairy-free sour cream (Tofutti works well). The cookies will spread a bit more, so chill the dough for 20 minutes before baking.
- Flavor Twist: Swap the almond extract for lemon or orange zest. Add 1 teaspoon of lemon zest to the wet ingredients for a bright, citrusy birthday cookie. It pairs beautifully with the vanilla.
- Chocolate Version: Reduce the flour to 1 3/4 cups and add 1/4 cup of unsweetened cocoa powder. Use chocolate sprinkles instead of rainbow. It tastes like a chocolate birthday cake in cookie form.
- Confetti Cookie Bars: Press the dough into a greased 9×13-inch pan and bake for 18-20 minutes. Let cool completely, then cut into squares. Drizzle with glaze for a quick, shareable dessert.
- Personal Variation I Tried: I once added 1/2 cup of white chocolate chips along with the sprinkles. It was a little too sweet for my taste, but my neighbor’s kids devoured them. If you have a serious sweet tooth, go for it.
Serving & Storage Suggestions
These cookies are best served slightly warm, when the edges are still a little tender and the center is soft. If you’ve added the glaze, let it set for about 15 minutes before serving so it doesn’t smear.
Storage: Keep the cookies in an airtight container at room temperature for up to 5 days. Place a slice of bread in the container—it absorbs excess moisture and keeps the cookies soft. Replace the bread slice every other day. I learned this trick from my grandmother, and it works like a charm.
Freezing: You can freeze the baked cookies for up to 3 months. Place them in a single layer in a freezer-safe bag or container, with parchment paper between layers. Thaw at room temperature for about 30 minutes. The glaze may get a little sticky after thawing, so if you’re planning to freeze, I’d hold off on the glaze until after they thaw.
Freezing the dough: Scoop the dough into balls, place them on a baking sheet, and freeze until solid (about 1 hour). Transfer the frozen dough balls to a freezer bag. You can bake them straight from frozen—just add 2-3 minutes to the baking time.
How flavors develop: Honestly, these cookies taste even better on day two. The flavors meld together, and the texture becomes even softer. If you can resist eating them all on day one, you’ll be rewarded.
Nutritional Information & Benefits
Here’s an approximate nutritional breakdown per cookie (based on 24 cookies, without glaze):
| Nutrient | Amount |
|---|---|
| Calories | 145 |
| Total Fat | 7g |
| Saturated Fat | 4g |
| Carbohydrates | 20g |
| Sugar | 11g |
| Protein | 2g |
These cookies are a treat, not a health food, but they do have a few redeeming qualities. The sour cream adds a small amount of calcium and protein. The butter provides vitamin A. And honestly? Sometimes the mental health benefit of a warm, sprinkle-covered cookie is worth more than any nutrient. I’m a big believer in balance—eat your vegetables, but don’t skip the birthday cookies.
If you’re watching your sugar intake, you can reduce the granulated sugar to 1/2 cup and add a tablespoon of maple syrup for sweetness. The texture will be slightly different, but still satisfying.
Frequently Asked Questions
Can I use margarine instead of butter?
I wouldn’t recommend it. Margarine has a higher water content, which makes the cookies spread too much and turn out flat. Stick with real butter for the best texture and flavor.
Why did my cookies spread too much?
This usually happens if the butter was too soft or if you skipped the cornstarch. Make sure your butter is softened but not melted—it should still hold its shape when you press it. Also, check that your baking soda is fresh. Old baking soda loses its oomph and can cause excessive spreading.
Can I use gel food coloring in the dough?
You can, but it will change the texture slightly. Gel colors add extra liquid, so you might need to add a tablespoon more flour to compensate. If you want a pink or blue cookie, I’d recommend using colored sprinkles instead—it’s easier and more predictable.
How do I keep the sprinkles from bleeding?
Use jimmies (long sprinkles) and fold them in gently at the very end. Over-mixing breaks the coating and releases the color. Also, avoid adding the sprinkles to the wet ingredients—always fold them into the finished dough.
Can I double this recipe?
Absolutely. This recipe doubles beautifully. Just make sure you have enough oven space, or chill the extra dough while the first batch bakes. The dough keeps in the fridge for up to 3 days.
Conclusion
These cozy birthday cake cookies are proof that simple ingredients can create something truly special. They’re soft, buttery, and just the right amount of nostalgic—without being overly sweet or artificial. Whether you’re baking for a birthday, a rainy afternoon, or just because you need a little color in your day, this recipe delivers. I love them because they remind me of that snowy Tuesday when my brother got caught with sprinkles on his sweater. They’re not trying to be fancy. They’re just good, honest cookies that make people smile. So go ahead—preheat that oven, dig out the sprinkles, and make a batch. And when you do, I’d love to hear about it. Leave a comment below, share your photos, or tell me about the person you converted. Happy baking, friend!
Pin This Recipe!

Cozy Birthday Cake Cookies – Easy Sprinkles Recipe

Soft, buttery, and just sweet enough, these funfetti cookies have a nostalgic birthday cake vibe without the artificial aftertaste. Perfect for cozy occasions, they’re quick to make and guaranteed to please even the biggest sprinkle skeptics.
- Prep Time: 20 minutes
- Cook Time: 12 minutes
- Total Time: 32 minutes
- Yield: 24 cookies 1x
- Category: Dessert
- Cuisine: American
Ingredients
- 1 cup (2 sticks) unsalted butter, softened
- 3/4 cup (150g) granulated sugar
- 1/4 cup (50g) light brown sugar, packed
- 1 large egg, room temperature
- 1/4 cup (60g) sour cream
- 2 teaspoons vanilla extract
- 1/4 teaspoon almond extract (optional)
- 2 cups (250g) all-purpose flour
- 2 tablespoons cornstarch
- 1/2 teaspoon baking soda
- 1/2 teaspoon salt
- 1/2 cup (80g) rainbow sprinkles (jimmies)
- For the optional glaze: 1 cup powdered sugar, 2-3 tablespoons milk or heavy cream, 1/2 teaspoon vanilla extract
Instructions
- Preheat oven to 350°F (175°C). Line two baking sheets with parchment paper.
- In a large bowl, beat softened butter, granulated sugar, and brown sugar together on medium speed for 2-3 minutes until light, fluffy, and pale. Scrape down the bowl halfway through.
- Beat in the egg, sour cream, vanilla extract, and almond extract (if using) on medium speed until fully combined. The mixture may look curdled at first but will come together. Scrape the bowl again.
- In a separate medium bowl, whisk together flour, cornstarch, baking soda, and salt.
- Gradually add the dry ingredients to the wet mixture, mixing on low speed until just combined. Do not over-mix.
- Gently fold the rainbow sprinkles into the dough using a rubber spatula. Be careful not to over-stir to prevent color bleeding.
- Using a 2-tablespoon cookie scoop, portion the dough and roll into smooth balls. Place on prepared baking sheets, spacing 2 inches apart.
- Bake one sheet at a time for 10-12 minutes. Cookies should look puffed and slightly golden around the edges, with soft centers.
- Let cookies cool on the baking sheet for 5 minutes, then transfer to a wire rack to cool completely.
- For the optional glaze: whisk together powdered sugar, milk, and vanilla until smooth. Drizzle over cooled cookies and add extra sprinkles if desired.
Notes
Use jimmies (long sprinkles) instead of nonpareils to prevent color bleeding. For thicker cookies, chill the dough balls for 30 minutes before baking. Underbake slightly for the best texture. Store in an airtight container at room temperature for up to 5 days; place a slice of bread in the container to keep cookies soft. Baked cookies can be frozen for up to 3 months.
Nutrition
- Serving Size: 1 cookie
- Calories: 145
- Sugar: 11
- Sodium: 95
- Fat: 7
- Saturated Fat: 4
- Carbohydrates: 20
- Protein: 2
Keywords: birthday cake cookies, funfetti cookies, sprinkle cookies, soft cookies, easy cookie recipe, birthday cookies, homemade cookies


