My sister asked why I couldn’t just toss the oat topping on raw apples and bake it all at once. I started to explain why that wouldn’t work — then stopped. Honestly, I had no good reason other than “that’s how I’ve always done it.” She was visiting for the weekend, and we were standing in my kitchen with a mountain of farmer’s market apples spread across the counter. I had my mise en place ready: the butter was cubed, the oats were measured, and I was about to start the tedious process of pre-cooking the filling. She looked at me like I was making things harder than they needed to be, which, let’s face it, I absolutely was.
I almost argued with her. I mean, every apple crisp recipe I’d ever made required cooking the apples on the stovetop first to soften them and release their juices. That’s just how it’s done, right? But she kept pushing, and I was tired from a long week. So I shrugged, scraped the butter back into the fridge, and decided to try it her way. I layered the sliced apples straight into the baking dish, sprinkled them with cinnamon and a tiny bit of maple syrup, and piled that oat-pecan topping right on top. I felt like I was breaking some sacred rule of baking.
Forty-five minutes later, I pulled the most beautiful crisp out of the oven. The topping was perfectly golden and crunchy, and the apples had softened into this tender, jammy filling without turning into mush. I took one bite and just laughed at myself. All those years of extra dishes and extra steps, and the simple way turned out to be the best way. Now I make this wholesome harvest apple crisp with oat pecan topping all fall long, and I think of my sister every single time. Maybe you’ve been there too — overcomplicating a recipe because you assumed the harder method was the right one. Trust me on this one. Just toss it all together and let the oven do the work.
Why You’ll Love This Recipe
This isn’t just another apple crisp recipe. After testing this version at least a dozen times across two different ovens, I can tell you it’s the one that finally stuck. The oat pecan topping gets shatteringly crisp without being greasy, and the apples hold their shape perfectly. Here’s why it deserves a permanent spot in your fall baking rotation:
- Quick & Easy: No stovetop cooking required. You can have this assembled and in the oven in under 15 minutes. It’s perfect for those evenings when you want a warm dessert but don’t want to spend an hour on prep.
- Simple Ingredients: You probably have most of these in your pantry right now. Oats, pecans, butter, flour, and apples are all you really need. No weird specialty items or expensive extracts.
- Perfect for Fall Gatherings: This wholesome harvest apple crisp with oat pecan topping is the star of Thanksgiving dessert tables, cozy weekend brunches, and casual dinner parties. It feeds a crowd without any fuss.
- Crowd-Pleaser: I’ve served this to everyone from my picky nephew to my health-conscious aunt, and it disappears every time. The combination of buttery oats and crunchy pecans is basically irresistible.
- Unbelievably Delicious: The texture is what gets me every time. You get that crackly, nutty topping followed by soft, cinnamon-spiced apples. It’s comfort food that somehow feels light and wholesome at the same time.
What makes this recipe different from all the others? It’s the ratio, honestly. Most crisps use too much butter in the topping, which makes it greasy and heavy. I’ve dialed it back just enough so the oats and pecans stay crunchy without turning into a soggy mess. Plus, I use a mix of tart and sweet apples, which gives the filling a complex flavor that doesn’t need a ton of added sugar. It’s comfort food reimagined — healthier, faster, but with the same soul-soothing satisfaction you crave on a cool autumn evening.
What Ingredients You Will Need
This recipe uses simple, wholesome ingredients to deliver bold flavor and satisfying texture without any fuss. Most of these are pantry staples, which means you can whip up this crisp on a whim without a special trip to the store.
For the Apple Filling
- 6 medium apples, mixed varieties (I like using 3 Granny Smith and 3 Honeycrisp — the tart-sweet combo is perfect)
- 3 tablespoons maple syrup (use pure maple syrup, not pancake syrup; it adds a deeper flavor)
- 2 tablespoons lemon juice (freshly squeezed is best, but bottled works in a pinch)
- 1 teaspoon ground cinnamon
- 1/4 teaspoon ground nutmeg (freshly grated if you have it)
- 2 tablespoons all-purpose flour (helps thicken the juices as the apples bake)
- Pinch of salt
For the Oat Pecan Topping
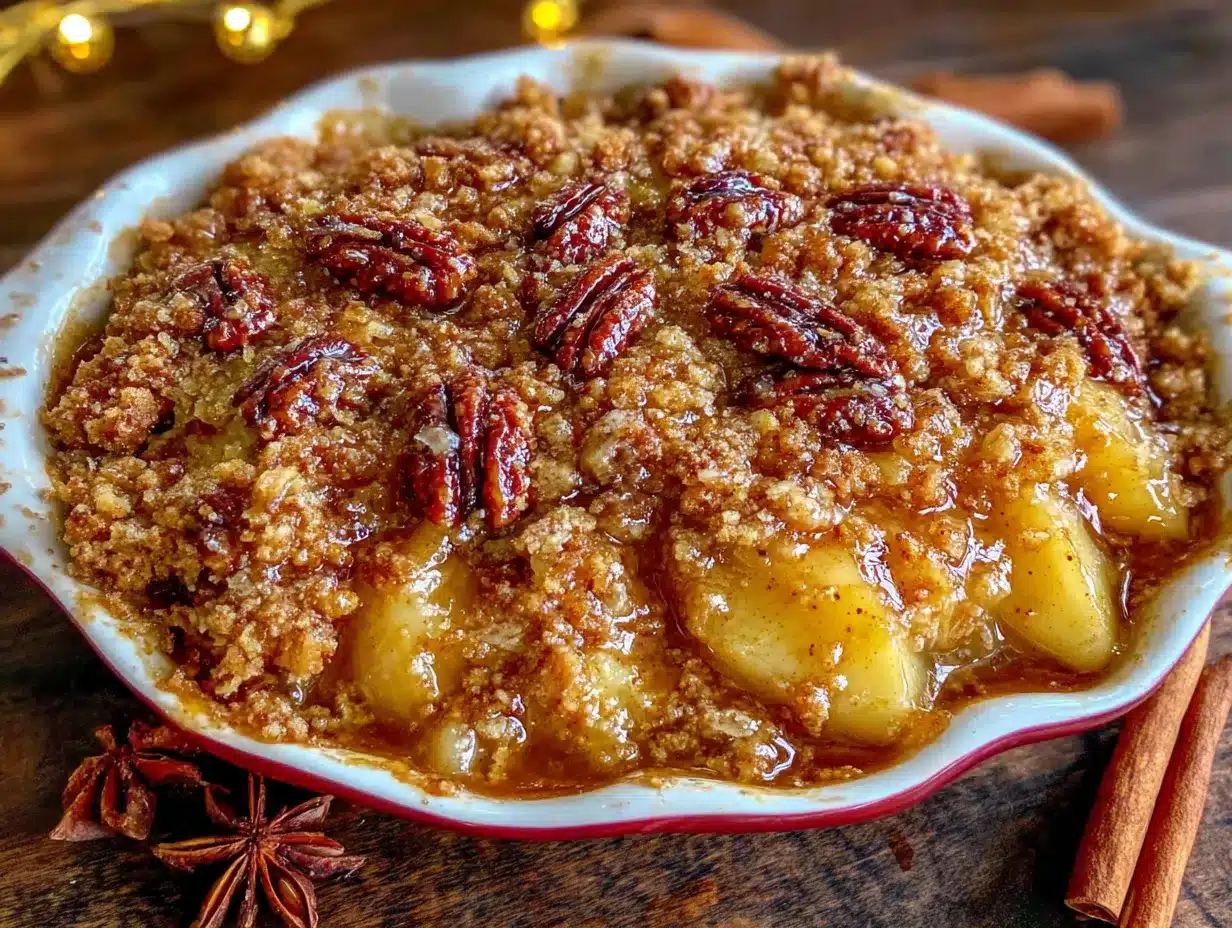
- 1 cup old-fashioned rolled oats (don’t use quick oats here — they turn mushy)
- 1/2 cup all-purpose flour (you can substitute with oat flour for a gluten-free option)
- 1/2 cup packed brown sugar (light or dark both work; dark gives a richer molasses flavor)
- 1/2 cup chopped pecans (I prefer raw pecans and chop them myself for bigger chunks)
- 1/2 teaspoon ground cinnamon
- 1/4 teaspoon salt
- 1/2 cup unsalted butter, cold and cut into small cubes (I recommend Kerrygold for its rich flavor, but any good-quality butter works)
A few ingredient notes: For the apples, look for firm apples that hold their shape during baking. Granny Smith, Honeycrisp, Braeburn, and Pink Lady are all excellent choices. Avoid Red Delicious or McIntosh, as they tend to turn into applesauce. For the pecans, I’ve tried both toasted and raw, and honestly, raw works better here because they toast perfectly in the oven as the crisp bakes. If you only have toasted pecans on hand, that’s fine too — just reduce the baking time by about 5 minutes so the topping doesn’t burn.
If you’re looking for a dairy-free version, you can substitute the butter with a solid coconut oil or a plant-based butter stick. Just make sure it’s cold when you cut it into the topping. For a gluten-free option, swap the all-purpose flour with a 1:1 gluten-free baking flour blend or oat flour. I’ve tested both, and they work beautifully.
Equipment Needed
You don’t need any fancy gadgets for this recipe, which is part of its charm. Here’s what you’ll need:
- 9×13-inch baking dish (an 8×8 or 9×9 square dish also works if you want a thicker crisp)
- Large mixing bowl (for the apple filling)
- Medium mixing bowl (for the oat pecan topping)
- Sharp knife and cutting board (for slicing the apples)
- Pastry cutter or two forks (for cutting the butter into the topping; your hands work too if you work quickly)
- Measuring cups and spoons
- Spatula or wooden spoon (for mixing)
I’ve made this wholesome harvest apple crisp with oat pecan topping in a cast-iron skillet before, and it turned out fantastic. The edges get extra caramelized, and it looks beautiful for serving straight from the skillet. If you go that route, just use a 10-inch skillet and keep an eye on the baking time — it might be done a few minutes earlier. Also, I learned the hard way that a glass baking dish needs about 5 extra minutes compared to a metal one, so adjust accordingly.
Preparation Method
- Preheat your oven to 350°F (175°C). Position the rack in the center of the oven. This ensures even baking and prevents the topping from burning before the apples are tender.
- Prepare the apples. Peel, core, and slice the apples into 1/4-inch thick slices. I like to keep them relatively uniform so they cook evenly. Don’t stress about perfection — rustic is the whole vibe here. You should end up with about 6 to 7 cups of sliced apples.
- Toss the apple filling. In a large mixing bowl, combine the sliced apples, maple syrup, lemon juice, cinnamon, nutmeg, flour, and salt. Use your hands or a spatula to toss everything together until the apples are evenly coated. The flour might look a little clumpy at first, but it will dissolve as the apples release their juices during baking. Let this sit while you make the topping — about 5 to 10 minutes.
- Make the oat pecan topping. In a medium mixing bowl, whisk together the rolled oats, flour, brown sugar, chopped pecans, cinnamon, and salt. Add the cold butter cubes. Using a pastry cutter, two forks, or your fingertips, cut the butter into the dry ingredients until the mixture resembles coarse crumbs with some pea-sized butter pieces remaining. You want some bigger chunks — those create the best crunchy clusters. If the butter starts to feel soft, pop the bowl in the fridge for 5 minutes.
- Assemble the crisp. Transfer the apple mixture to your greased baking dish and spread it into an even layer. Sprinkle the oat pecan topping evenly over the apples. Don’t press it down — let it sit loosely so it gets nice and crispy. I’ve made the mistake of packing it down before, and it turns into a dense, almost doughy layer. Loose is the way to go.
- Bake. Place the dish on a baking sheet to catch any bubbling juices (trust me on this one — I’ve had to clean the bottom of my oven more times than I’d like to admit). Bake for 40 to 45 minutes, or until the topping is golden brown and the juices are bubbling around the edges. If the topping is browning too quickly after 30 minutes, tent the dish loosely with aluminum foil for the remaining time.
- Cool and serve. Let the crisp cool on a wire rack for at least 15 minutes before serving. This allows the juices to thicken up a bit. If you dig in too soon, you’ll end up with a soupy mess — delicious, but soupy. The filling will continue to set as it cools.
Sensory cue: When it’s done, your kitchen will smell like a fall candle come to life — cinnamon, toasted oats, and caramelized apples. The topping should be deep golden brown, and you should see bubbles of thick, syrupy juice breaking through the edges. If you tap the topping with a spoon, it should feel firm and crunchy, not soft.
Cooking Tips & Techniques
After making this wholesome harvest apple crisp with oat pecan topping more times than I can count, I’ve picked up a few tricks that make a real difference. Let me share the ones that saved me from some pretty disappointing batches.
Don’t skip the lemon juice. I know it seems like a small detail, but the acid in the lemon juice does two important things. First, it prevents the apples from browning while you’re prepping. Second, it balances the sweetness of the maple syrup and brown sugar. Without it, the crisp tastes one-dimensional and cloying. I learned this the hard way when I ran out of lemons one time and thought I could just leave it out. Nope. The whole thing tasted like sugary applesauce.
Use cold butter for the topping. This is non-negotiable. If your butter is too soft, it will melt into the oats and flour before the crisp even hits the oven, creating a dense, greasy topping instead of those beautiful crunchy clusters. I cube my butter and pop it in the freezer for 10 minutes before I start. It makes cutting it into the dry ingredients so much easier.
Watch your apple variety. I mentioned this earlier, but it’s worth repeating. Using all soft apples like Gala or Fuji will give you a mushy filling. Using all tart apples like Granny Smith might leave you with chunks that are too firm. The sweet spot is a 50-50 mix of tart and sweet. My go-to combo is Granny Smith and Honeycrisp, but Braeburn and Pink Lady also work beautifully.
Let it rest before serving. I know the smell is intoxicating, and you’re going to want to dive in immediately. But giving the crisp at least 15 minutes to rest allows the juices to thicken into a syrupy consistency. If you serve it too soon, the filling will run all over the plate. I once served it after only 5 minutes to a group of friends, and it looked like apple soup with croutons. Still tasted great, but presentation-wise? Not my finest moment.
Toast the oats for extra crunch. If you have an extra 5 minutes, spread the oats on a baking sheet and toast them in the oven at 350°F for 3 to 4 minutes before adding them to the topping. This gives them a deeper, nuttier flavor and ensures they stay crunchy even after a day or two in the fridge.
Variations & Adaptations
One of the best things about this recipe is how flexible it is. I’ve played around with it quite a bit, and here are some of my favorite variations:
Gluten-Free Version: Swap the all-purpose flour with a 1:1 gluten-free baking flour blend or oat flour. I’ve tested this with Bob’s Red Mill 1:1 Baking Flour, and it works perfectly. The topping might be slightly more crumbly, but the flavor is just as good. Make sure your oats are certified gluten-free if that’s a concern.
Vegan Version: Use melted coconut oil or a plant-based butter stick instead of regular butter. I like using Miyoko’s salted European-style plant butter — it has a high fat content that mimics dairy butter really well. The topping won’t be quite as crunchy, but it’s still delicious. Also, swap the maple syrup for an extra tablespoon of coconut sugar or brown sugar if you want it a bit sweeter.
Nut-Free Version: If you’re serving this to someone with nut allergies, simply leave out the pecans and add an extra 1/4 cup of oats. You can also substitute with pumpkin seeds or sunflower seeds for a similar crunch factor. I’ve tried it with pepitas, and they add a nice savory note that balances the sweetness.
Seasonal Fruit Swaps: This topping works beautifully with other fruits too. In the summer, try it with sliced peaches and a handful of blueberries. In the winter, use firm pears like Bosc or Anjou. The baking time stays about the same, though you might need to add 5 minutes for firmer fruits like pears.
Spice It Up: For a more warming flavor profile, add 1/4 teaspoon of cardamom or ginger to the apple filling. I made a version with cardamom last Thanksgiving, and it was the first thing to disappear from the dessert table. The floral notes of the cardamom pair surprisingly well with the pecans.
Serving & Storage Suggestions
This crisp is best served warm, when the topping is still crunchy and the filling is soft and syrupy. I like to serve it in shallow bowls with a generous scoop of vanilla ice cream melting into the warm apples. The contrast between the cold ice cream and the warm crisp is pure magic. If you’re not in the mood for dairy, a dollop of coconut whipped cream or a drizzle of coconut yogurt works beautifully too.
For a more indulgent presentation, serve it with a drizzle of caramel sauce and a sprinkle of flaky sea salt. The salt cuts through the sweetness and makes the pecans taste even toastier. I also love serving it for brunch with a side of Greek yogurt and a drizzle of honey — it feels like a treat but still keeps things relatively wholesome.
Storage: Cover the baking dish tightly with foil or plastic wrap and store it in the refrigerator for up to 4 days. The topping will lose some of its crunch over time, but the flavor actually gets better as the spices meld with the apples. To reheat, place individual portions in the microwave for 30 to 45 seconds, or reheat the entire dish in a 350°F oven for 10 to 15 minutes. If you want to restore some of the crunch, pop it under the broiler for 1 to 2 minutes — just watch it carefully so it doesn’t burn.
Freezer Instructions: You can freeze the assembled but unbaked crisp for up to 3 months. Assemble it in a disposable aluminum pan, wrap it tightly in plastic wrap and then foil, and freeze. When you’re ready to bake, add about 15 minutes to the baking time and bake from frozen. I’ve done this for Thanksgiving prep, and it’s a lifesaver. You can also freeze the baked and cooled crisp, but the texture won’t be quite as good.
Flavor development note: This crisp actually tastes even better the next day. The apples continue to absorb the spices and maple syrup, and the flavors become more cohesive. If you have leftovers, heat them up for breakfast the next morning — nobody’s judging, and it’s honestly one of the best ways to start a fall day.
Nutritional Information & Benefits
While I wouldn’t call this a health food, this wholesome harvest apple crisp with oat pecan topping is definitely on the lighter side of dessert. Here’s the approximate nutritional breakdown per serving (based on 8 servings):
- Calories: 320
- Total Fat: 16g
- Saturated Fat: 7g
- Carbohydrates: 44g
- Fiber: 5g
- Sugar: 26g
- Protein: 4g
The apples provide a good dose of fiber and vitamin C, while the oats offer soluble fiber that helps with heart health. Pecans are packed with healthy monounsaturated fats and antioxidants, and they add a nice dose of magnesium and zinc. The maple syrup is a more natural sweetener than refined sugar, though it’s still sugar, so moderation is key.
If you’re watching your sugar intake, you can reduce the maple syrup to 2 tablespoons and add an extra sprinkle of cinnamon for sweetness. I’ve done this before, and while the filling is less syrupy, it’s still plenty flavorful. For a lower-carb option, you can swap the brown sugar in the topping for a monk fruit sweetener, though the texture will be slightly different.
Conclusion
This wholesome harvest apple crisp with oat pecan topping has become my go-to fall dessert for a reason. It’s simple enough for a Tuesday night but impressive enough for a holiday gathering. The oat pecan topping gets perfectly crunchy, the apples stay tender without turning to mush, and the whole thing comes together in under 15 minutes of active prep. Plus, it fills your kitchen with the most incredible aroma — honestly, that alone is worth making it.
I love how forgiving this recipe is. You can swap in whatever apples you have, adjust the spices to your liking, or pile on extra pecans if you’re feeling generous. It’s the kind of dessert that doesn’t demand perfection, which makes it perfect for sharing. Whether you serve it with vanilla ice cream, a dollop of yogurt, or just a fork straight from the dish, I hope it brings you the same cozy comfort it’s brought me.
If you give this recipe a try, I’d love to hear how it turns out. Leave a comment below and let me know what apple combination you used, or tag me in your photos on social media. Happy baking, friends!
Frequently Asked Questions
Can I use quick oats instead of old-fashioned rolled oats?
I really don’t recommend it. Quick oats are cut into smaller pieces and processed more, which means they absorb liquid faster and turn mushy during baking. Old-fashioned rolled oats hold their shape and give you that satisfying crunchy texture. If quick oats are all you have, reduce the butter by 2 tablespoons and keep a close eye on the baking time — it might be done a few minutes earlier.
Do I need to peel the apples?
You can leave the peels on if you prefer, but I recommend peeling them for this recipe. The peels can become tough and chewy during baking, and they prevent the apples from breaking down into that soft, jammy filling. If you’re short on time or want extra fiber, you can leave half the apples unpeeled — just slice them thinner so the peels have a chance to soften.
Can I make this ahead of time for a party?
Absolutely. You can assemble the entire crisp (without baking) up to 24 hours in advance. Cover it tightly and store it in the refrigerator. When you’re ready to bake, add about 5 to 10 minutes to the baking time since you’re starting from a cold dish. You can also bake it fully, let it cool, and reheat it in a 350°F oven for 10 to 15 minutes before serving.
Why is my topping not crunchy?
There are a few common culprits. First, your butter might have been too soft when you mixed it into the topping. Make sure it’s cold and cut into small cubes. Second, you might have pressed the topping down into the apples instead of sprinkling it loosely. Third, the crisp might not have baked long enough — the topping needs a full 40 to 45 minutes to get properly golden and crunchy. If your topping is browning too fast, tent it with foil and continue baking until the apples are tender.
Can I use frozen apples?
I don’t recommend using frozen apples for this recipe. Frozen apples release a lot of excess water as they thaw, which makes the filling watery and prevents the topping from getting crispy. If you only have frozen apples, thaw them completely, drain off the excess liquid, and pat them dry before using. You’ll also want to reduce the maple syrup by 1 tablespoon since the apples will be less sweet than fresh ones.
Pin This Recipe!
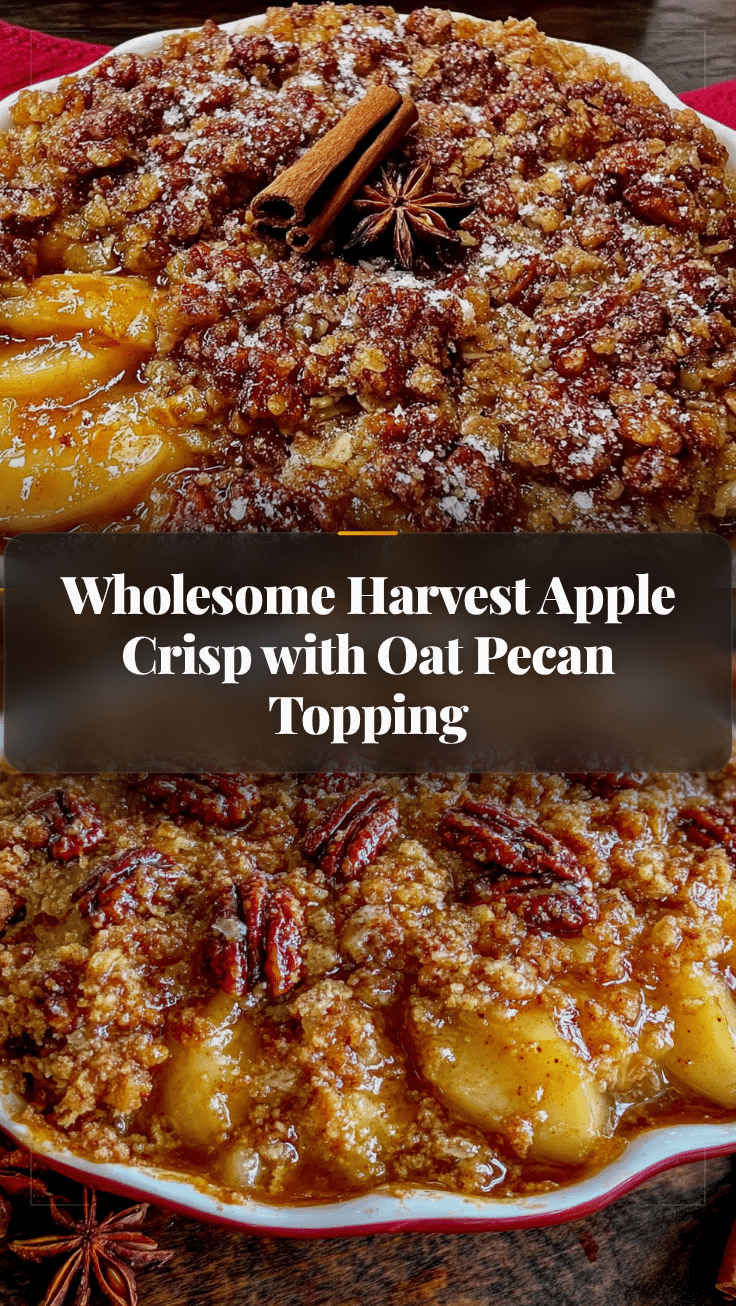
Wholesome Harvest Apple Crisp with Oat Pecan Topping

A quick and easy apple crisp with a crunchy oat pecan topping, made without pre-cooking the apples. Perfect for fall gatherings and weeknight desserts.
- Prep Time: 15 minutes
- Cook Time: 45 minutes
- Total Time: 1 hour
- Yield: 8 servings 1x
- Category: Dessert
- Cuisine: American
Ingredients
- 6 medium apples, mixed varieties (e.g., 3 Granny Smith and 3 Honeycrisp)
- 3 tablespoons maple syrup
- 2 tablespoons lemon juice
- 1 teaspoon ground cinnamon
- 1/4 teaspoon ground nutmeg
- 2 tablespoons all-purpose flour
- Pinch of salt
- 1 cup old-fashioned rolled oats
- 1/2 cup all-purpose flour
- 1/2 cup packed brown sugar
- 1/2 cup chopped pecans
- 1/2 teaspoon ground cinnamon
- 1/4 teaspoon salt
- 1/2 cup unsalted butter, cold and cut into small cubes
Instructions
- Preheat your oven to 350°F (175°C). Position the rack in the center of the oven.
- Peel, core, and slice the apples into 1/4-inch thick slices. You should have about 6 to 7 cups.
- In a large mixing bowl, combine the sliced apples, maple syrup, lemon juice, cinnamon, nutmeg, flour, and salt. Toss until evenly coated. Let sit for 5 to 10 minutes.
- In a medium mixing bowl, whisk together the rolled oats, flour, brown sugar, chopped pecans, cinnamon, and salt. Add the cold butter cubes and cut into the dry ingredients until the mixture resembles coarse crumbs with some pea-sized butter pieces.
- Transfer the apple mixture to a greased 9×13-inch baking dish and spread into an even layer. Sprinkle the oat pecan topping evenly over the apples without pressing down.
- Place the dish on a baking sheet and bake for 40 to 45 minutes, until the topping is golden brown and the juices are bubbling around the edges. If the topping browns too quickly, tent with foil after 30 minutes.
- Let the crisp cool on a wire rack for at least 15 minutes before serving.
Notes
For best results, use a mix of tart and sweet apples (e.g., Granny Smith and Honeycrisp). Cold butter is essential for a crunchy topping. Let the crisp rest before serving to allow juices to thicken. For a gluten-free version, use oat flour or a 1:1 gluten-free baking flour blend. For a vegan version, use solid coconut oil or plant-based butter.
Nutrition
- Serving Size: 1 serving
- Calories: 320
- Sugar: 26
- Sodium: 150
- Fat: 16
- Saturated Fat: 7
- Carbohydrates: 44
- Fiber: 5
- Protein: 4
Keywords: apple crisp, oat pecan topping, fall dessert, easy apple crisp, wholesome harvest