I was packing my car in the grocery store parking lot last Tuesday when the smell hit me—someone nearby was eating garlic bread from the hot food section. It wasn’t even good garlic bread, honestly. It was that pale, chewy kind from a plastic clamshell. But in that split second, I was twenty years younger, standing in my neighbor Mrs. Petrov’s tiny kitchen after school. She was pulling a sheet pan of focaccia from the oven, the whole room fogged with rosemary and roasted garlic. I’d never had bread like that before—pillowy on the inside, crackling on the bottom, with those beautiful dimples holding pools of golden olive oil. I must have eaten half the pan sitting on her cracked linoleum floor while she laughed and told me to slow down. She moved away years ago, and I never got her recipe. So I spent the better part of a year trying to recreate it. Maybe you’ve been there—chasing a taste you can’t quite name? This best rosemary garlic sourdough focaccia bread is the closest I’ve ever come to that afternoon on her floor, and honestly, it might even be better.
Why You’ll Love This Recipe
Let me tell you why this recipe is different from every other focaccia you’ve tried. I tested this thing twelve times before I got it right. Twelve. My coworkers started hiding when they saw me coming with another bread basket. But the final version? It’s the one I keep making even when nobody’s watching.
- Deep, Tangy Flavor: The sourdough starter gives this bread a complexity that commercial yeast just can’t touch. It’s subtle but it’s there—that little something that makes people ask “what’s in this?”
- That Texture, Though: Crispy, almost shattery bottom crust. Airy, chewy crumb. Those big, irregular holes that catch the olive oil. It’s everything focaccia should be.
- Simple Ingredients: Flour, water, salt, olive oil, garlic, rosemary, and your sourdough starter. That’s it. No fancy additives or hard-to-find stuff.
- Forgiving Schedule: This dough waits for you. Need to stretch the fermentation? Leave it in the fridge. Running late? Let it sit on the counter. It adapts to your life, not the other way around.
- Always Impressive: Pull this out at a dinner party and watch people lose their minds. It looks like you spent all day in the kitchen when really, the starter did most of the work.
The first time I made the final version, I actually teared up a little. That sounds dramatic, I know. But when I bit into that warm focaccia and tasted the roasted garlic melting into the olive oil with the rosemary and that perfect sourdough tang—I was right back on Mrs. Petrov’s floor. This isn’t just bread. It’s a time machine.
What Ingredients You Will Need
This recipe uses simple, wholesome ingredients to deliver that signature sourdough tang and herbaceous aroma. Most of these are pantry staples for anyone who keeps a sourdough starter, but I’ve included notes on what to look for at the store.
For the Dough
- 500 grams bread flour (I prefer King Arthur or Bob’s Red Mill for consistent protein content—it matters for that chewy crumb)
- 350 grams warm water (about 80°F, or lukewarm to the touch)
- 150 grams active sourdough starter (fed and bubbly, ideally at its peak)
- 10 grams fine sea salt (don’t use table salt—it’s too harsh and the iodine can mess with fermentation)
- 30 grams extra virgin olive oil (plus more for the pan and topping—use good stuff here, you’ll taste it)
For the Topping
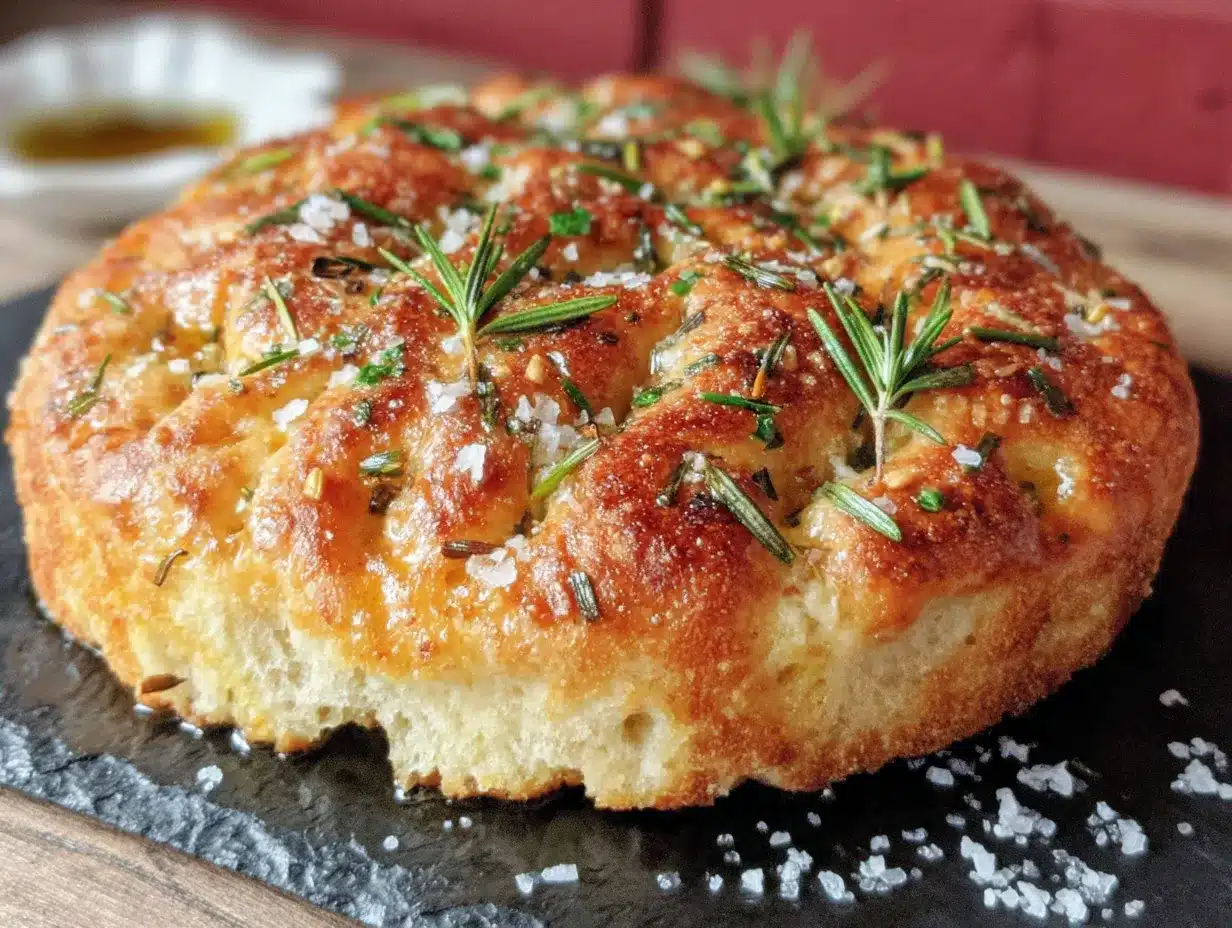
- 4-5 cloves garlic, thinly sliced (not minced—slices get caramelized and sweet)
- 2 tablespoons fresh rosemary, roughly chopped (dried works in a pinch but fresh is so much better)
- Flaky sea salt (like Maldon—trust me on this, the crunch is everything)
- 2-3 tablespoons extra virgin olive oil (for drizzling before and after baking)
A quick note on the starter: if your starter is sluggish or hasn’t been fed in a while, give it a few days of regular feedings before attempting this. A strong, active starter is the difference between a focaccia that soars and one that flops. I learned that the hard way after three flat, dense loaves in a row.
For the rosemary, I grow my own on the windowsill because I use it so much, but the grocery store bunches work fine. Just don’t use dried rosemary that’s been sitting in your pantry for two years—it’ll taste like dust. Same goes for the garlic. Fresh garlic, not the pre-minced stuff in oil. You want those slices to soften and caramelize, not burn into bitter little crisps.
Equipment Needed
You don’t need a lot of fancy gear for this recipe, which is part of why I love it. Here’s what you’ll actually use:
- 10×15-inch sheet pan (or a 9×13 baking dish—the focaccia will just be thicker)
- Digital kitchen scale (please don’t try to measure flour by volume for this—sourdough is finicky enough without guessing)
- Large mixing bowl (glass or ceramic, nothing too cold)
- Dough scraper (a plastic bench scraper is like $5 and makes life so much easier)
- Clean kitchen towel or plastic wrap
- Measuring spoons
- Chef’s knife and cutting board
If you don’t have a sheet pan, a cast iron skillet works beautifully—just adjust the baking time by about 5 minutes. I actually prefer the cast iron version sometimes because the crust gets even crispier. My first attempt at this recipe used a glass baking dish and the bottom didn’t brown right, so stick with metal if you can.
Preparation Method
This recipe follows a stretch-and-fold method rather than traditional kneading. It’s gentler on the dough and creates that open, airy crumb we’re after. Plan for about 4-6 hours total from mixing to baking, but most of that is hands-off time.
- Mix the dough (10 minutes): In your large bowl, combine the warm water and active sourdough starter. Stir until the starter mostly dissolves—it doesn’t need to be perfect. Add the bread flour and mix with your hand or a dough scraper until no dry bits remain. Cover with a towel and let rest for 30 minutes. This is called autolyse, and it lets the flour absorb the water, making the dough easier to work with.
- Add salt and oil: Sprinkle the salt over the dough and pour in the 30 grams of olive oil. Squeeze and fold the dough until the salt is fully incorporated. It’ll feel weird and slippery at first—that’s normal. Keep going until the dough tightens up slightly, about 2-3 minutes.
- Bulk fermentation with stretch and folds (2.5-3 hours): Cover the bowl and let it rest for 30 minutes. Then, wet your hands (this is crucial—dry hands will stick to the dough like crazy) and perform your first stretch and fold. Grab one side of the dough, stretch it up, and fold it over itself. Rotate the bowl and repeat on all four sides. That’s one round. Cover and rest another 30 minutes. Do this 4-6 times total. By the last round, the dough should feel smooth, elastic, and puffy. If it’s still slack, do one more round.
- Cold retard (optional but recommended, 8-24 hours): After the stretch and folds, cover the bowl tightly and stick it in the fridge. This slow fermentation develops flavor and makes the dough easier to handle. You can skip this step if you’re in a hurry, but the flavor won’t be as complex. I almost always do the cold ferment because it makes the timing so much more flexible.
- Prepare the pan (5 minutes): When you’re ready to bake, pour 2-3 tablespoons of olive oil into your sheet pan and spread it around. Dump the cold dough into the pan (it’ll be sticky—that’s okay). Let it sit at room temperature for 30 minutes to warm up slightly.
- Dimple and stretch (15 minutes): Using oiled fingers, gently press the dough out toward the edges of the pan. It’ll resist and try to shrink back—that’s the gluten doing its job. Let it rest 10 minutes, then stretch again. Repeat until the dough fills the pan evenly. Now comes the fun part: use your fingertips to press deep dimples all over the surface, right down to the bottom of the pan. Don’t be shy—those dimples are where the olive oil pools.
- Final proof (1-2 hours): Cover the pan with a towel and let the dough rise at room temperature until it’s puffy and jiggly. It should look like a marshmallow when you gently shake the pan. This can take anywhere from 1 to 2 hours depending on your kitchen temperature.
- Preheat and top (15 minutes): About 30 minutes before baking, preheat your oven to 425°F (220°C). Just before baking, drizzle the dough with more olive oil, then press the garlic slices and rosemary into the dimples. Sprinkle generously with flaky sea salt.
- Bake (25-30 minutes): Place the pan on the middle rack and bake until the focaccia is deep golden brown on top and sounds hollow when tapped on the bottom. Rotate the pan halfway through for even browning. If the top is browning too fast but the bottom isn’t done, tent loosely with foil for the last 5 minutes.
- Cool (15 minutes, if you can wait): Let the focaccia cool in the pan for 5 minutes, then transfer to a wire rack. Drizzle with a little more olive oil and another pinch of flaky salt. I know it’s hard, but let it cool at least 10 minutes before cutting—the structure needs to set or it’ll be gummy inside.
A quick note on the dimpling: I had a batch where I was too gentle and the dimples barely registered. The oil just sat on top and ran off. Be firm. Push those fingertips all the way down. You want little wells that hold the garlic and rosemary and oil.
Cooking Tips & Techniques
After twelve test batches, I’ve made every mistake you can imagine. Here’s what I learned so you don’t have to repeat my failures.
Use warm water, not hot. I killed my starter with hot water on batch number three. The water should feel like a warm bath—comfortable on your wrist, not hot. Anything above 100°F starts damaging the yeast and bacteria in your starter.
Don’t skip the autolyse. That 30-minute rest after mixing flour and water? It’s not optional. It gives the flour time to hydrate fully, which means better gluten development with less work. I tried skipping it once to save time and ended up with a dough that tore instead of stretched.
Wet hands are your friend. Every time you handle this dough, wet your hands first. Dry dough sticks to dry hands like glue. Wet dough slides right off. This is one of those things that sounds obvious but took me three batches to actually remember.
Trust the jiggle test. The dough is ready to bake when it jiggles like Jell-O when you shake the pan. If it’s still stiff, give it more time. I’ve ruined focaccia by rushing the final proof—the crumb was dense and tight instead of airy and open.
Let it cool. I know, I know. But cutting hot bread compresses the crumb and makes it gummy. I’ve done it. Everyone’s done it. Just wait the 10 minutes. Use that time to make garlic butter or slice some cheese.
Variations & Adaptations
Once you’ve mastered the base recipe, the possibilities are endless. Here are some of my favorite variations:
- Everything Bagel Focaccia: Skip the rosemary and garlic. Before baking, brush the top with olive oil and sprinkle generously with everything bagel seasoning. Add some grated parmesan if you’re feeling extra.
- Caramelized Onion and Thyme: While the dough does its final proof, slowly caramelize 2 large onions in butter and olive oil. Spread them over the dough before baking and top with fresh thyme. This version is dangerously good.
- Tomato and Basil: Press cherry tomato halves into the dimples along with the garlic. Use basil instead of rosemary. It’s like summer on a sheet pan.
- Gluten-Free Adaptation: Substitute a good gluten-free bread flour blend (I like Cup4Cup) and add 1 teaspoon xanthan gum if your blend doesn’t already include it. The texture won’t be exactly the same, but it’s surprisingly good. Add an extra 30 minutes to the bulk fermentation.
- Whole Wheat Version: Replace up to 40% of the bread flour with whole wheat flour. You’ll need to add an extra 25 grams of water since whole wheat absorbs more liquid. The flavor is nuttier and more rustic.
My personal favorite variation? I once added chopped kalamata olives and sun-dried tomatoes along with the rosemary. It was supposed to be for a party but I ate half of it standing at the counter before anyone even arrived. No regrets.
Serving & Storage Suggestions
This focaccia is at its absolute best warm from the oven, but it’s still fantastic the next day. Here’s how to handle it:
Serving temperature: Warm or room temperature. If it’s been sitting for a while, pop it in a 350°F oven for 5 minutes to revive the crust. Don’t microwave it—that turns the crispy bottom into a sad, soggy mess.
What to serve with it: This bread is perfect for dipping in good olive oil and balsamic vinegar. It’s also amazing alongside soups (try it with tomato basil soup or minestrone), salads (a simple arugula salad with lemon vinaigrette cuts through the richness), or as the base for sandwiches. I’ve used it for breakfast sandwiches with fried eggs and it’s life-changing.
Storage: Store leftover focaccia cut-side down on a cutting board at room temperature for up to 2 days. Don’t put it in a plastic bag—the crust will get soft and rubbery. If you need to keep it longer, wrap it tightly in foil and freeze for up to 3 months. To reheat from frozen, put it directly in a 350°F oven for 10-12 minutes.
Flavor development: Honestly, this focaccia is even better the next day. The garlic mellows and the rosemary infuses deeper into the bread. I often make it a day ahead on purpose for parties.
Nutritional Information & Benefits
Per serving (based on 12 servings per recipe):
| Nutrient | Amount |
|---|---|
| Calories | 210 |
| Total Fat | 8g |
| Saturated Fat | 1g |
| Carbohydrates | 30g |
| Fiber | 1.5g |
| Protein | 5g |
| Sodium | 390mg |
This sourdough focaccia has some genuine benefits beyond just tasting amazing. The long fermentation breaks down phytic acid in the flour, making the minerals more bioavailable. That means your body can actually absorb more of the nutrients from the bread. The fermentation also produces beneficial organic acids that support gut health. And compared to bread made with commercial yeast, sourdough has a lower glycemic index—it won’t spike your blood sugar as dramatically.
Plus, olive oil is rich in healthy monounsaturated fats and antioxidants. And garlic? It’s been used for centuries for its immune-supporting properties. So really, this bread is practically a health food. That’s my story and I’m sticking to it.
Conclusion
This best rosemary garlic sourdough focaccia bread is more than just a recipe—it’s the culmination of a year of testing, failing, and finally getting it right. It’s the bread I make when I want to feel connected to that afternoon in Mrs. Petrov’s kitchen, when I want to fill my apartment with the smell of garlic and rosemary, when I want to watch people’s eyes light up at the first bite.
The beauty of this recipe is that it asks for patience but rewards you generously. The starter does the heavy lifting. The long fermentation builds flavor. And all you have to do is show up, stretch the dough a few times, and resist the urge to eat it all before it cools.
I’d love to hear how yours turns out. Did you try a variation? Did you eat the whole pan in one sitting? (No judgment here.) Drop a comment below and share your focaccia story. And if you really love it, share this recipe with a friend who needs some carb-induced happiness in their life.
Frequently Asked Questions
Can I use active dry yeast instead of sourdough starter?
You can, but it won’t be the same bread. If you want to use yeast, substitute 1 teaspoon active dry yeast for the starter and increase the water by 75 grams. The flavor will be milder and the texture slightly different—still good focaccia, just not sourdough focaccia.
Why is my focaccia dense and heavy?
This usually means the dough didn’t ferment long enough. The bulk fermentation needs enough time for the dough to become puffy and aerated. If your kitchen is cold, it might take longer. Also check that your starter is active—if it’s sluggish, the bread won’t rise properly.
Can I freeze the dough instead of baking it?
Absolutely. After the cold retard step, you can freeze the dough in the pan, tightly wrapped. When you’re ready to bake, thaw it in the fridge overnight, then proceed with the final proof and baking. The flavor actually improves with longer cold storage.
How do I get more bubbles in my focaccia?
Higher hydration (more water) creates bigger bubbles. You can increase the water to 375 grams if you’re comfortable with wetter dough. Also, be gentle during the stretch and folds—you want to strengthen the dough without deflating the bubbles that are forming.
My garlic burned on top—what went wrong?
Thin garlic slices can burn if they’re exposed directly to the oven heat. Next time, press them deeper into the dimples so they’re partially covered by dough. You can also add the garlic halfway through baking instead of at the beginning.
Pin This Recipe!
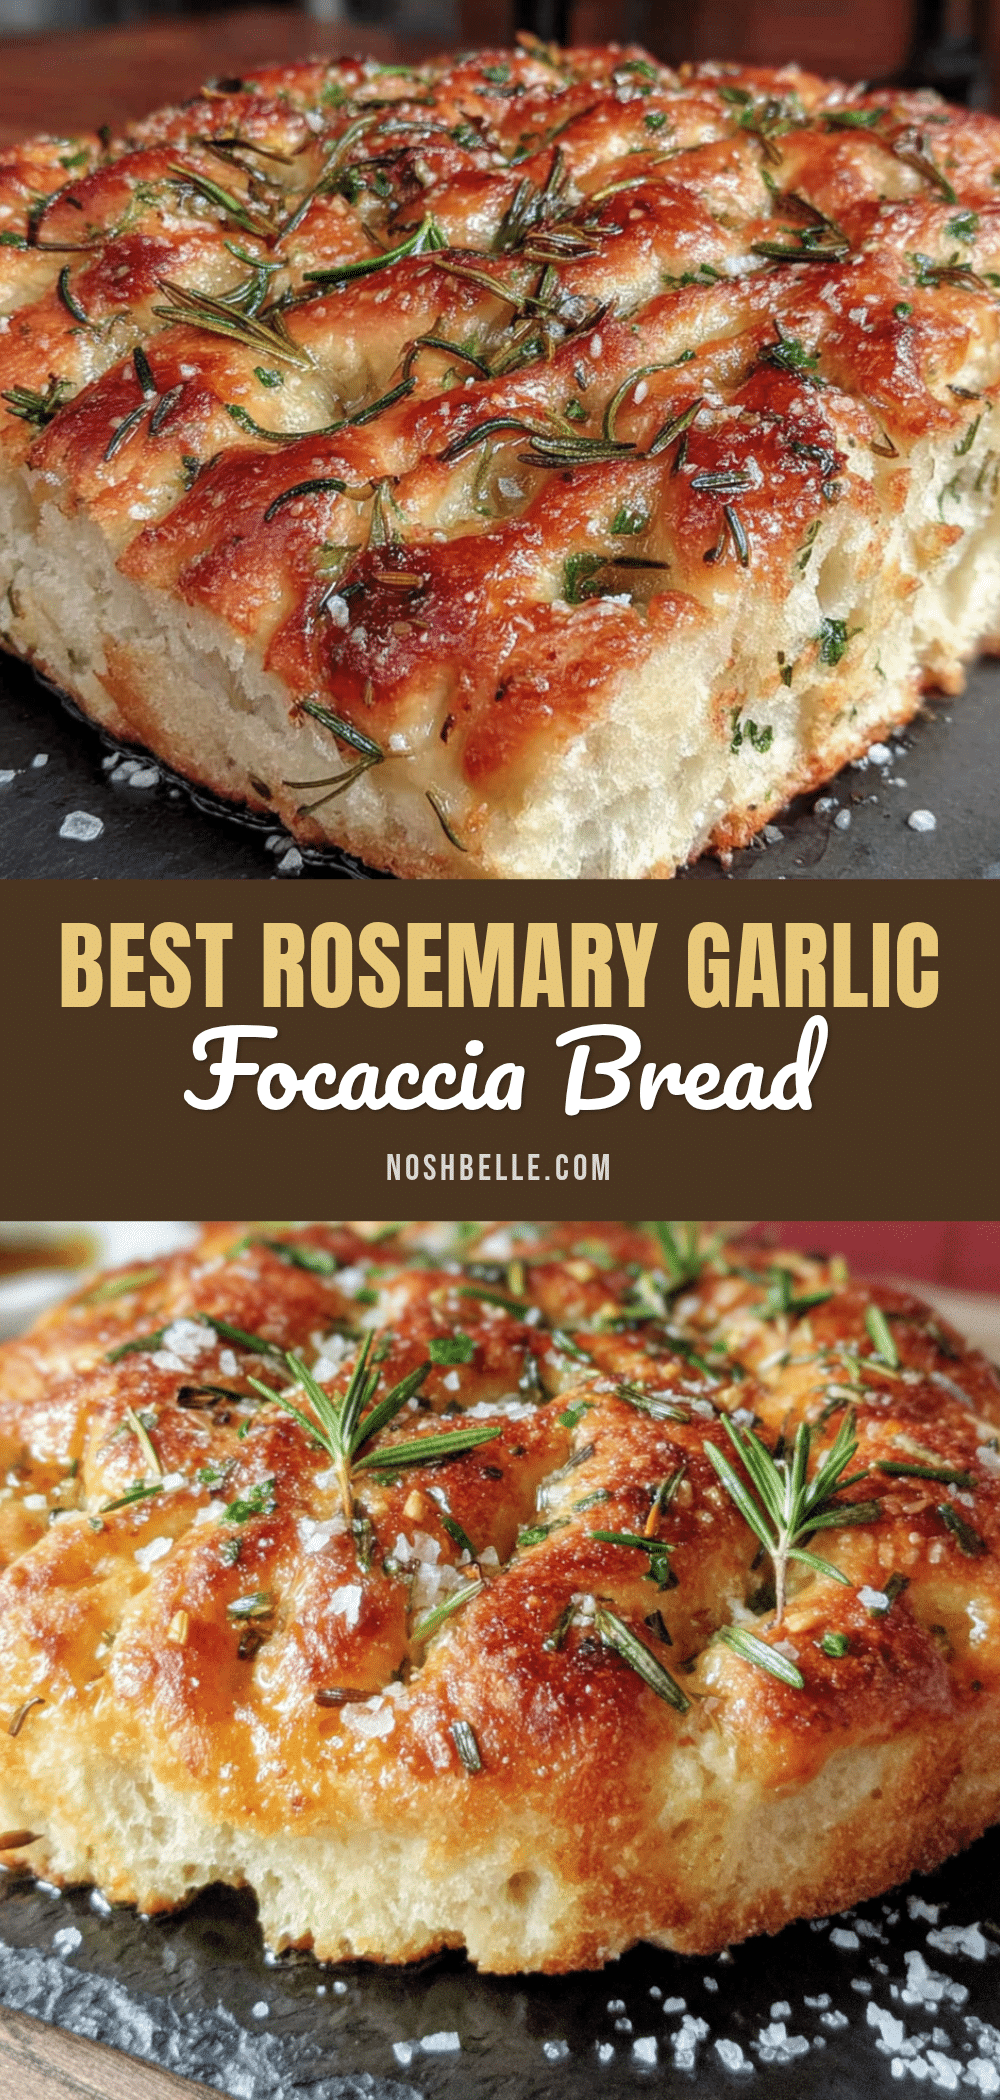
Best Rosemary Garlic Sourdough Focaccia Bread
This best rosemary garlic sourdough focaccia bread is the culmination of a year of testing, failing, and finally getting it right. It’s pillowy on the inside, crackling on the bottom, with beautiful dimples holding pools of golden olive oil, roasted garlic, and fresh rosemary.
- Prep Time: 20 minutes
- Cook Time: 25-30 minutes
- Total Time: 4-6 hours (including fermentation, or up to 24 hours with cold retard)
- Yield: 12 servings 1x
- Category: Bread
- Cuisine: Italian
Ingredients
- 500 grams bread flour (about 4 cups)
- 350 grams warm water (about 1.5 cups, 80°F)
- 150 grams active sourdough starter (about 2/3 cup)
- 10 grams fine sea salt (about 1.5 teaspoons)
- 30 grams extra virgin olive oil (about 2 tablespoons, plus more for pan and topping)
- 4–5 cloves garlic, thinly sliced
- 2 tablespoons fresh rosemary, roughly chopped
- Flaky sea salt (like Maldon, for topping)
- 2–3 tablespoons extra virgin olive oil (for drizzling before and after baking)
Instructions
- Mix the dough (10 minutes): In a large bowl, combine warm water and active sourdough starter. Stir until starter mostly dissolves. Add bread flour and mix with hand or dough scraper until no dry bits remain. Cover with a towel and let rest for 30 minutes (autolyse).
- Add salt and oil: Sprinkle salt over dough and pour in 30 grams olive oil. Squeeze and fold dough until salt is fully incorporated, about 2-3 minutes.
- Bulk fermentation with stretch and folds (2.5-3 hours): Cover bowl and rest 30 minutes. Wet hands, then perform stretch and fold: grab one side of dough, stretch up, fold over itself. Rotate bowl and repeat on all four sides. Cover and rest 30 minutes. Repeat 4-6 times total until dough is smooth, elastic, and puffy.
- Cold retard (optional but recommended, 8-24 hours): Cover bowl tightly and refrigerate for slow fermentation to develop flavor.
- Prepare the pan (5 minutes): Pour 2-3 tablespoons olive oil into a 10×15-inch sheet pan and spread around. Dump cold dough into pan. Let sit at room temperature for 30 minutes.
- Dimple and stretch (15 minutes): Using oiled fingers, gently press dough out toward edges of pan. Let rest 10 minutes, then stretch again until dough fills pan evenly. Use fingertips to press deep dimples all over surface down to bottom of pan.
- Final proof (1-2 hours): Cover pan with towel and let dough rise at room temperature until puffy and jiggly like a marshmallow.
- Preheat and top (15 minutes): About 30 minutes before baking, preheat oven to 425°F (220°C). Just before baking, drizzle dough with more olive oil, press garlic slices and rosemary into dimples, and sprinkle generously with flaky sea salt.
- Bake (25-30 minutes): Place pan on middle rack and bake until deep golden brown on top and sounds hollow when tapped on bottom. Rotate pan halfway through. If top browns too fast, tent loosely with foil for last 5 minutes.
- Cool (15 minutes): Let focaccia cool in pan for 5 minutes, then transfer to wire rack. Drizzle with more olive oil and another pinch of flaky salt. Let cool at least 10 minutes before cutting.
Notes
Use warm water (80°F), not hot, to avoid killing the starter. Don’t skip the autolyse (30-minute rest after mixing flour and water). Wet hands before handling dough to prevent sticking. Trust the jiggle test: dough is ready to bake when it jiggles like Jell-O. Let focaccia cool at least 10 minutes before cutting to avoid gummy texture. For best flavor, do the cold retard (8-24 hours in fridge). Store leftovers cut-side down at room temperature for up to 2 days; freeze for up to 3 months.
Nutrition
- Serving Size: 1 slice (1/12 of rec
- Calories: 210
- Sodium: 390
- Fat: 8
- Saturated Fat: 1
- Carbohydrates: 30
- Fiber: 1.5
- Protein: 5
Keywords: sourdough focaccia, rosemary garlic focaccia, homemade focaccia, sourdough bread, Italian bread, focaccia recipe, garlic rosemary bread