My neighbor asked me why I couldn’t just pour the caramel sauce over the whole pan instead of drizzling it on each individual bar. I started to explain why that wouldn’t work—something about the layers needing to set properly, the structural integrity of the cheesecake, the way caramel pools versus spreads. Then I stopped. Honestly, I had no good reason. I had just always done it the fussy way because that’s how the original recipe said to do it.
So I tried it her way. I poured the entire batch of salted caramel over the top of the unbaked cheesecake layer, let it swirl around with the apple filling, and crossed my fingers. The result was a complete mess in the best possible way—caramel marbled through the apple layer, pooling in the corners, creating these little pockets of sticky sweetness that you’d hit unexpectedly. My neighbor stood there eating a warm bar straight from the pan and just raised her eyebrows at me. She didn’t have to say a word.
That was two Septembers ago, and I haven’t gone back to the drizzle method since. This recipe for the Best Salted Caramel Apple Cheesecake Bars has evolved through about six different versions, each one teaching me something new about how caramel behaves with cream cheese and how apples release their juice during baking. I burned my tongue on the very first batch because I couldn’t wait for them to cool. I’ve forgotten to add the salt at least twice. I once used Granny Smith apples when the recipe clearly called for Honeycrisp, and honestly, it was still fantastic—just a little more tart.
Maybe you’ve been there, standing over a pan of dessert bars wondering if you’re overcomplicating something that should be simple. That’s exactly what these bars are—simple in concept, but with layers of flavor that make people close their eyes when they take a bite. The buttery shortbread crust, the creamy cheesecake filling, the tender apple layer, and that glossy salted caramel on top. It’s the kind of dessert that makes you look like you spent hours in the kitchen when really, the hardest part is waiting for them to chill.
I keep making these bars because they capture everything I want in a fall dessert—warm spices, tart apples, rich caramel, and that salty-sweet balance that never gets old. Plus, they travel beautifully for potlucks and disappear faster than anything else on the dessert table.
Why You’ll Love This Recipe
These aren’t just another dessert bar recipe you’ll forget about after one try. I’ve tested this version more times than I care to admit, tweaking the crust-to-filling ratio, adjusting the baking time, and figuring out exactly when to add the caramel for the best texture. Here’s why this particular combination works so well:
- Perfect for Fall Gatherings : Apple picking season, Thanksgiving dessert tables, or cozy Sunday dinners—these bars fit every autumn occasion without demanding hours of your time.
- Simple Ingredients, Big Flavor : Nothing fancy here. Butter, cream cheese, apples, sugar, and caramel sauce. You probably have most of this in your kitchen right now.
- Make-Ahead Friendly : These bars actually taste better the next day after the flavors have had time to meld together in the fridge.
- No Water Bath Required : Unlike traditional cheesecake, these bars bake up perfectly without any fussy water bath technique.
- That Salted Caramel Finish : The flaky sea salt on top isn’t just decoration—it cuts through the sweetness and makes every bite more interesting.
What makes this recipe different from the countless apple cheesecake bars you’ll find online is the texture. The shortbread crust stays crisp even after refrigeration because I’ve figured out the right ratio of butter to flour. The cheesecake layer is dense enough to hold its shape but creamy enough to melt on your tongue. And the apples? They’re cooked just enough before baking so they don’t release too much liquid and make everything soggy.
I remember the first time I brought these to a Friendsgiving dinner. Someone asked for the recipe before they even finished their first bar. That’s the kind of reaction these get—not because they’re complicated or fancy, but because they hit that perfect note of familiar comfort with just enough sophistication to feel special.
What Ingredients You Will Need
This recipe uses straightforward ingredients that work together to create something genuinely impressive. Let me walk you through each one and why I chose what I did.
For the Shortbread Crust
- 1 ½ cups all-purpose flour (spooned and leveled—don’t scoop directly from the bag or you’ll end up with a dry, crumbly crust)
- ½ cup granulated sugar (just enough sweetness to balance the tart apples)
- ½ cup unsalted butter, cold and cut into small cubes (I use Land O’Lakes because it has consistent fat content, but any good quality butter works)
- ¼ teaspoon salt (enhances the buttery flavor without making it salty)
For the Cheesecake Layer
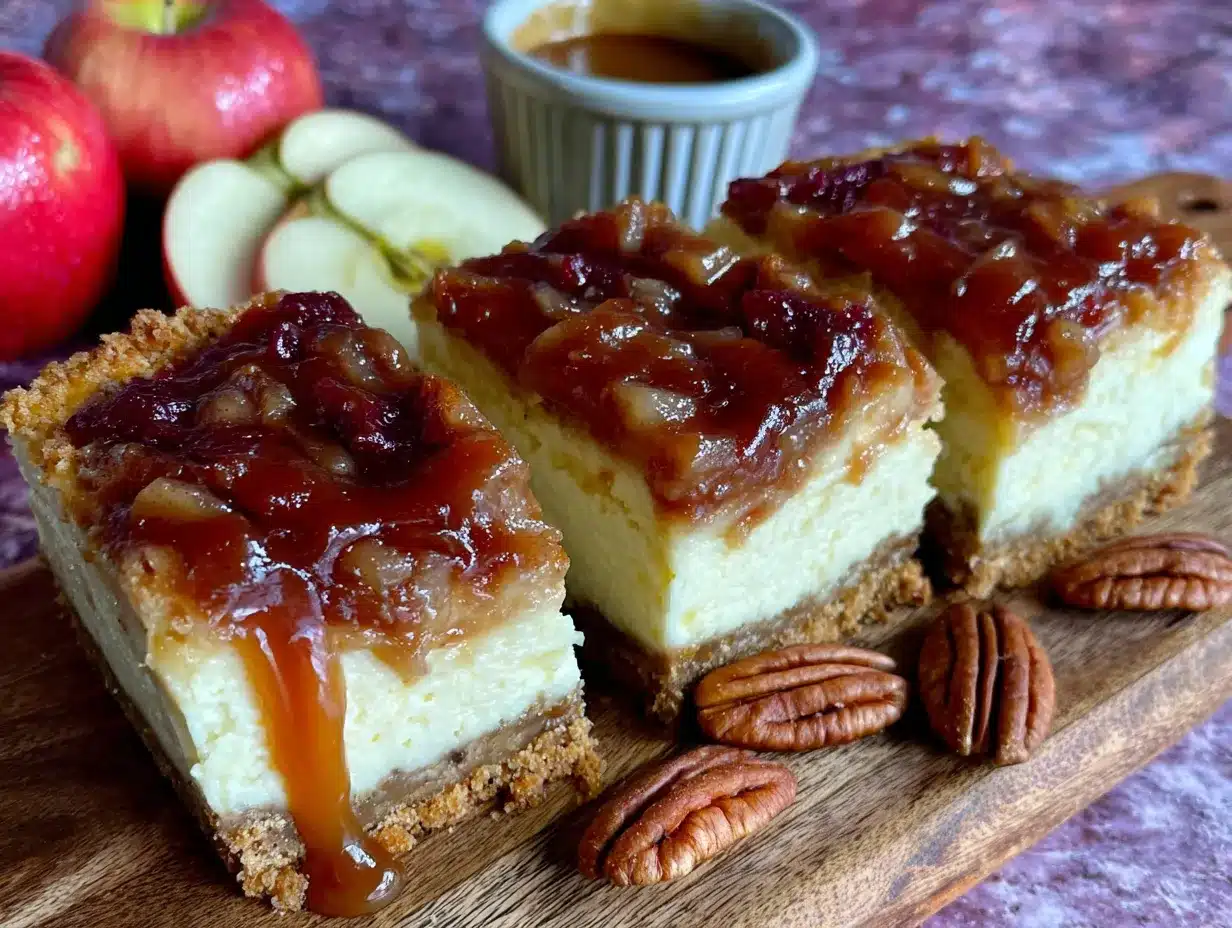
- 16 ounces cream cheese, softened to room temperature (Philadelphia is my go-to—the texture is always reliable)
- ½ cup granulated sugar
- 2 large eggs, room temperature (cold eggs will make the filling lumpy, so let them sit out for 30 minutes)
- 1 teaspoon vanilla extract (use pure vanilla extract, not imitation, for the best flavor)
- 2 tablespoons all-purpose flour (this helps stabilize the cheesecake so it doesn’t crack)
For the Apple Layer
- 3 medium Honeycrisp apples, peeled and diced into ¼-inch pieces (Honeycrisp holds its shape during baking and has the perfect sweet-tart balance; Granny Smith works if you want more tartness)
- 2 tablespoons unsalted butter
- ¼ cup brown sugar, packed (dark brown sugar gives deeper flavor, but light works too)
- 1 teaspoon ground cinnamon
- ¼ teaspoon ground nutmeg
- Pinch of salt
For the Salted Caramel Topping
- ½ cup store-bought or homemade caramel sauce (I like Trader Joe’s salted caramel sauce in a pinch, but homemade is worth the extra effort)
- 1 teaspoon flaky sea salt (Maldon is my favorite—the large flakes provide little bursts of saltiness that make the caramel sing)
The key to this recipe is using room temperature ingredients for the cheesecake layer. I learned this the hard way after making a batch with cold cream cheese and ending up with lumpy filling that never smoothed out. Trust me on this one—set everything out an hour before you start.
For the apples, I’ve tested this with Fuji, Gala, and even Pink Lady varieties. They all work, but Honeycrisp gives you the best texture after baking. The apples soften without turning into mush, and they hold onto their shape when you cut into the bars.
Equipment Needed
You don’t need a professional bakery setup for these bars, but having the right tools makes the process smoother. Here’s what you’ll need:
- 9×13-inch baking pan (metal pans work better than glass for even browning on the crust)
- Parchment paper (cut two strips that overhang on opposite sides so you can lift the bars out easily)
- Electric hand mixer or stand mixer (for the cheesecake filling—you can do it by hand, but your arm will thank you for using a mixer)
- Medium skillet (for cooking the apples before baking)
- Mixing bowls (one large, one medium, one small)
- Pastry cutter or fork (for cutting butter into the flour for the crust)
- Spatula (a rubber spatula for scraping every bit of cheesecake filling into the pan)
- Measuring cups and spoons
- Sharp knife (for dicing the apples uniformly—uneven pieces cook at different rates)
If you don’t have a pastry cutter, you can use two forks or even your fingertips to work the butter into the flour. Just work quickly so the butter stays cold. I’ve also used a food processor in a pinch, pulsing just until the mixture looks like coarse sand. Both methods work perfectly.
Parchment paper is non-negotiable here. I tried making these without it once, thinking I could just grease the pan well enough. The bars stuck to the bottom, the crust crumbled apart, and I spent twenty minutes scraping cheesecake out of the corners. Never again.
Preparation Method
Let me walk you through this step by step. I’ve included all the little details I wish someone had told me the first time I made these.
- Preheat your oven to 350°F (175°C). Line your 9×13-inch baking pan with parchment paper, leaving about 2 inches of overhang on the long sides. This will let you lift the entire block of bars out later for clean cutting.
- Make the shortbread crust. In a medium bowl, whisk together the flour, sugar, and salt. Add the cold butter cubes and cut them into the flour mixture using a pastry cutter or fork until the mixture resembles coarse sand with some pea-sized butter pieces remaining. Don’t overwork it—those little butter pieces create flakiness in the crust. Press the mixture firmly into the bottom of your prepared pan. I use the bottom of a measuring cup to really pack it down evenly. Bake for 15-18 minutes until the edges are just starting to turn golden. Set aside to cool slightly while you make the filling.
- Cook the apples. While the crust bakes, melt 2 tablespoons of butter in a medium skillet over medium heat. Add the diced apples, brown sugar, cinnamon, nutmeg, and a pinch of salt. Cook for 5-7 minutes, stirring occasionally, until the apples have softened slightly but still hold their shape. The liquid from the apples will reduce into a syrupy coating. Remove from heat and let cool while you make the cheesecake layer. This pre-cooking step is crucial—it prevents the apples from releasing too much moisture into the cheesecake during baking.
- Make the cheesecake filling. In a large bowl, beat the softened cream cheese with an electric mixer on medium speed until smooth and creamy, about 2 minutes. Scrape down the sides and bottom of the bowl. Add the sugar and beat for another minute until well combined. Add the eggs one at a time, beating on low speed after each addition just until incorporated. Overbeating at this stage incorporates too much air and can cause cracks. Add the vanilla extract and flour, mixing on low until just combined. The mixture should be smooth and silky with no lumps.
- Assemble the layers. Pour the cheesecake filling over the pre-baked crust and spread it evenly with a spatula. Spoon the cooked apples evenly over the cheesecake layer, distributing them across the entire surface. Don’t press them in—let them sit on top. Drizzle the caramel sauce over the apples. Here’s where my neighbor’s trick comes in: just pour it in a zigzag pattern across the whole pan and let it find its own way. Use a knife to gently swirl the caramel into the apples and cheesecake, but don’t overdo it—you want distinct ribbons of caramel, not a uniform brown mess.
- Bake. Place the pan in the preheated oven and bake for 30-35 minutes. The edges should be set and slightly puffed, but the center should still have a slight jiggle when you gently shake the pan. It will continue to set as it cools. Overbaking leads to dry, cracked cheesecake, so err on the side of underdone.
- Cool completely. Remove the pan from the oven and place it on a wire rack. Let the bars cool at room temperature for 1 hour, then refrigerate for at least 4 hours, preferably overnight. This step requires patience, but it’s essential for clean slices and the best texture. The bars need time to fully set and for the flavors to meld together.
- Add the finishing touch. Just before serving, sprinkle the flaky sea salt over the top. If you add it too early, the salt will dissolve into the caramel and you’ll lose that satisfying crunch and pop of salinity. Use a sharp knife to cut into bars, wiping the blade clean between cuts for neat edges.
The first time I made these, I skipped the chilling step because I couldn’t wait. The bars were a delicious mess—delicious, but a mess. They fell apart when I tried to cut them, and the layers blended together into a single indistinguishable goop. Waiting is hard, but it’s worth it.
Cooking Tips & Techniques
After making these bars more times than I can count, I’ve collected a few tricks that make the process easier and the results more consistent. Let me share what I’ve learned through trial and error.
Room temperature ingredients matter more than you think. Cold cream cheese creates lumps that never fully smooth out, no matter how long you beat it. Cold eggs can cause the cream cheese to seize up and become grainy. Set everything on the counter an hour before you start. I know it feels like a hassle, but the difference in texture is night and day.
Don’t overmix the cheesecake filling. I ruined a batch early on by beating the filling on high speed for too long. All that extra air creates bubbles that rise to the surface during baking and cause cracks. Mix on low speed once the eggs go in, and stop as soon as everything comes together.
Watch the baking time closely. Every oven runs differently. My old oven would bake these perfectly in 32 minutes, but my current one needs 35. Start checking at the 28-minute mark. The edges should look set and slightly puffed, but the center should wobble like Jell-O when you gently shake the pan. It will continue cooking from residual heat after you pull it out.
Use a hot knife for clean cuts. Run your knife under hot water, dry it off, then slice. Wipe the blade clean between each cut. This gives you those beautiful, bakery-style bars with clean edges and distinct layers. I learned this trick from a pastry chef friend and it changed everything.
Let the bars come to room temperature before serving. Cold cheesecake can taste a bit flat. Let the bars sit out for 15-20 minutes before serving, and the flavors will open up. The caramel becomes more fluid, the cheesecake gets creamier, and the whole thing just tastes better.
One mistake I still make occasionally is not pressing the crust firmly enough into the pan. A loose crust crumbles when you try to cut or lift the bars. Take an extra minute to really pack it down with the bottom of a measuring cup or glass. Your future self will thank you.
Variations & Adaptations
This recipe is surprisingly flexible once you understand how the components work together. Here are some variations I’ve tried and loved:
Gluten-Free Version : Swap the all-purpose flour in the crust with a 1:1 gluten-free baking flour blend. I’ve used Bob’s Red Mill with great results. The texture is slightly more crumbly but still delicious. Omit the 2 tablespoons of flour in the cheesecake filling or replace it with an equal amount of cornstarch.
Dairy-Free Adaptation : Use dairy-free cream cheese (Kite Hill makes a good one) and substitute the butter with a plant-based butter stick. The texture won’t be quite as creamy, but the flavor is still fantastic. Use a dairy-free caramel sauce for the topping.
Spiced Apple Variation : Add ¼ teaspoon of ground ginger and a pinch of ground cloves to the apple mixture. This gives the bars a warmer, more complex spice profile that’s perfect for holiday gatherings. I made this version for Christmas last year and it was a hit.
Caramel Apple Crumb Topping : For extra texture, mix ½ cup of flour, ¼ cup of brown sugar, and 3 tablespoons of cold butter into a crumb topping and sprinkle it over the apples before baking. The crumble gets golden and crispy while the cheesecake bakes underneath. This version is a bit more decadent but worth every calorie.
Pear and Cardamom Version : Substitute the apples with ripe but firm pears and replace the cinnamon with ground cardamom. The floral notes of cardamom pair beautifully with the caramel and cream cheese. I stumbled on this combination when I had too many pears from my neighbor’s tree and it turned out to be one of my favorite variations.
Each of these variations changes the character of the bars, but the basic structure remains the same. Feel free to experiment with your favorite fall fruits and spices—that’s half the fun of baking.
Serving & Storage Suggestions
These bars are versatile enough for any occasion, but a few serving tips will help you get the most out of them.
Serving Temperature : Serve the bars chilled or at room temperature. I prefer them slightly cool from the fridge with a 15-minute rest on the counter. The caramel firms up nicely when cold, giving you that satisfying snap when you bite through it. If you’re serving them at a party, let them sit out for 20-30 minutes so the flavors can open up.
Presentation Ideas : Cut the bars into 12-16 even pieces and arrange them on a white platter for maximum visual impact. Drizzle a little extra caramel sauce over the top and sprinkle with additional flaky sea salt just before serving. A dusting of cinnamon adds a nice finishing touch. For individual servings, place each bar on a small plate with a dollop of whipped cream or a scoop of vanilla ice cream.
What to Serve Alongside : These bars pair beautifully with a hot cup of coffee, a spiced chai latte, or a glass of cold milk. For a full dessert spread, serve them alongside a warm apple crisp or a slice of pumpkin pie. They also work well on a brunch table next to cinnamon rolls and fresh fruit.
Storage Instructions : Store the bars in an airtight container in the refrigerator for up to 5 days. Place a sheet of parchment paper between layers to prevent sticking. The bars actually improve after a day or two as the flavors meld together. I’ve eaten them on day four and they were still fantastic.
Freezing Instructions : These bars freeze beautifully for up to 3 months. Wrap individual bars tightly in plastic wrap, then place them in a freezer-safe bag or container. To thaw, transfer a bar to the refrigerator overnight or let it sit at room temperature for about an hour. Don’t microwave frozen bars—the cheesecake gets rubbery and the caramel becomes a sticky mess.
Reheating : If you prefer warm bars, place them in a 300°F oven for 5-7 minutes or microwave on low power for 15-20 seconds. Just be careful not to overheat or the cheesecake will lose its creamy texture.
Nutritional Information & Benefits
Let’s be honest—these are dessert bars and they’re not exactly health food. But knowing what’s in them helps you enjoy them mindfully. Here’s the approximate nutritional breakdown per bar (based on 16 servings):
| Nutrient | Amount Per Bar |
|---|---|
| Calories | 285 |
| Total Fat | 16g |
| Saturated Fat | 10g |
| Cholesterol | 65mg |
| Sodium | 210mg |
| Total Carbohydrates | 32g |
| Dietary Fiber | 1g |
| Sugars | 22g |
| Protein | 4g |
On the positive side, apples provide fiber and vitamin C, and the cream cheese offers a small amount of calcium and protein. The cinnamon in the apple layer has anti-inflammatory properties and can help regulate blood sugar. But really, these bars are about indulgence and enjoyment—something I firmly believe has a place in a balanced life.
For dietary considerations: This recipe contains gluten (from the flour), dairy (from the butter and cream cheese), and eggs. It’s not suitable for vegans or those with dairy or egg allergies without modifications. The gluten-free and dairy-free variations I mentioned earlier work well if you need alternatives.
I’ve learned over the years that enjoying dessert without guilt is part of a healthy relationship with food. These bars are worth every single calorie, and I’d rather eat one really good bar than three mediocre ones.
Conclusion
These Best Salted Caramel Apple Cheesecake Bars have become my signature fall dessert for good reason. They combine everything I love about autumn baking—warm spices, tender apples, rich caramel, and creamy cheesecake—in one portable, shareable package. The buttery shortbread crust provides the perfect foundation for the layers of flavor that build on top of it.
What I love most about this recipe is how forgiving it is. You can swap the apples, adjust the spices, use store-bought or homemade caramel, and it still turns out beautifully. It’s the kind of recipe that invites experimentation and rewards confidence. Don’t be afraid to make it your own.
I’d love to hear how these turn out for you. Did you try a variation? Did your family devour them as quickly as mine does? Drop a comment below and let me know—I read every single one and I’m always looking for new ideas to try in my own kitchen. And if you share a photo on social media, tag me so I can see your beautiful creation.
Go ahead and make these this weekend. Your kitchen will smell incredible, your family will think you’re a baking genius, and you’ll have a pan of the best dessert bars you’ve ever tasted. Honestly, what more could you ask for?
Frequently Asked Questions
Can I use a different type of apple?
Absolutely. Honeycrisp is my top choice for its texture and sweet-tart balance, but Granny Smith, Fuji, and Pink Lady all work well. Avoid Red Delicious or McIntosh—they break down too much during cooking and can make the bars mushy.
How do I know when the cheesecake is done baking?
The edges should look set and slightly puffed, but the center should still have a gentle jiggle when you shake the pan. It will continue to set as it cools. Overbaking is the most common mistake—better to pull it out a minute early than a minute late.
Can I make these bars ahead of time?
Yes, and I actually recommend it. These bars taste even better the next day after the flavors have had time to meld. Make them up to two days in advance and store them covered in the refrigerator. Add the flaky sea salt just before serving.
Why did my crust turn out soggy?
This usually happens when the apples release too much liquid during baking. Make sure you cook the apples before adding them to the cheesecake layer—this removes excess moisture. Also, pre-baking the crust for 15 minutes helps create a barrier that prevents sogginess.
Can I freeze these bars?
Absolutely. Wrap individual bars tightly in plastic wrap and place them in a freezer-safe bag or container. They’ll keep for up to 3 months. Thaw overnight in the refrigerator before serving. I often make a double batch and freeze half for later—they’re a lifesaver when unexpected guests show up.
Pin This Recipe!
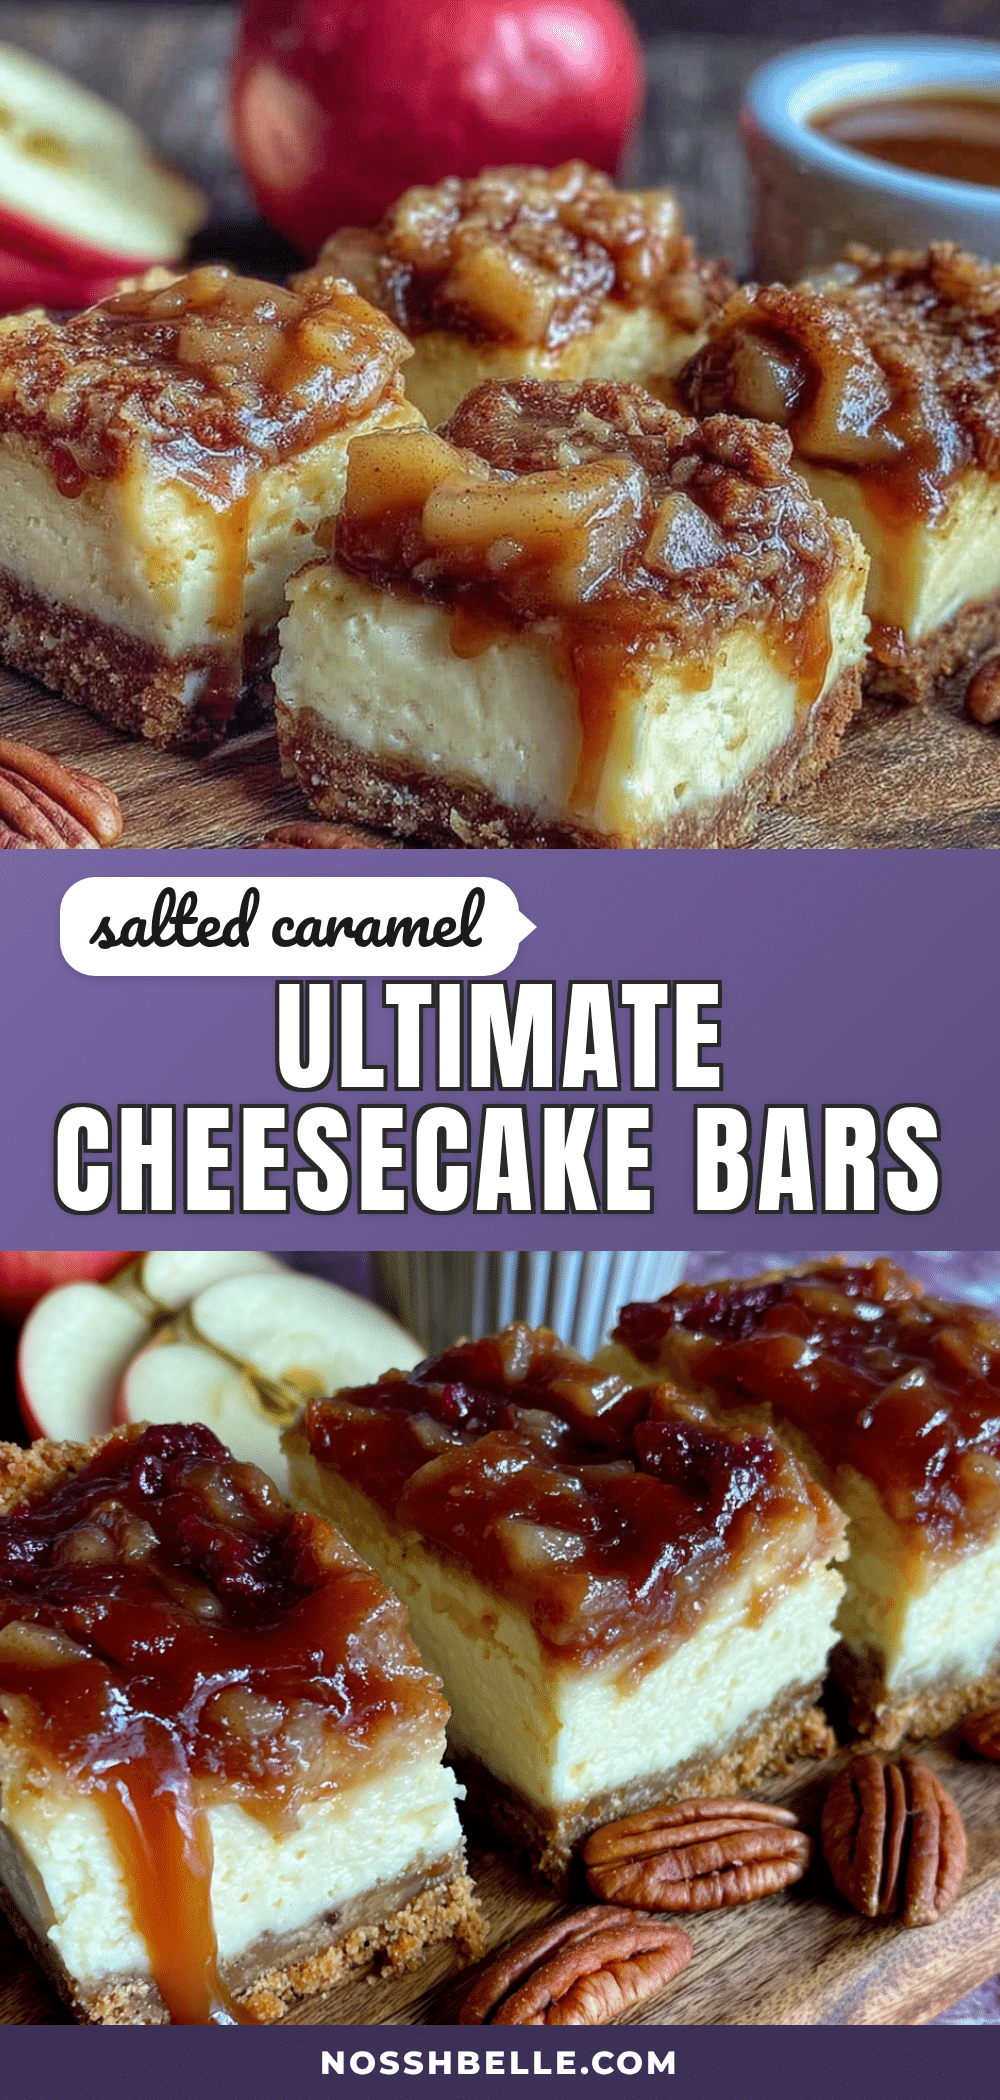
Best Salted Caramel Apple Cheesecake Bars (Easy Recipe)
These salted caramel apple cheesecake bars feature a buttery shortbread crust, creamy cheesecake filling, tender apple layer, and glossy salted caramel topping. They’re perfect for fall gatherings and can be made ahead of time.
- Prep Time: 30 minutes
- Cook Time: 35 minutes
- Total Time: 5 hours 5 minutes (includes chilling)
- Yield: 16 servings 1x
- Category: Dessert
- Cuisine: American
Ingredients
- 1 ½ cups all-purpose flour
- ½ cup granulated sugar
- ½ cup unsalted butter, cold and cut into small cubes
- ¼ teaspoon salt
- 16 ounces cream cheese, softened to room temperature
- ½ cup granulated sugar
- 2 large eggs, room temperature
- 1 teaspoon vanilla extract
- 2 tablespoons all-purpose flour
- 3 medium Honeycrisp apples, peeled and diced into ¼-inch pieces
- 2 tablespoons unsalted butter
- ¼ cup brown sugar, packed
- 1 teaspoon ground cinnamon
- ¼ teaspoon ground nutmeg
- Pinch of salt
- ½ cup store-bought or homemade caramel sauce
- 1 teaspoon flaky sea salt
Instructions
- Preheat your oven to 350°F (175°C). Line your 9×13-inch baking pan with parchment paper, leaving about 2 inches of overhang on the long sides.
- Make the shortbread crust: In a medium bowl, whisk together the flour, sugar, and salt. Add the cold butter cubes and cut them into the flour mixture using a pastry cutter or fork until the mixture resembles coarse sand with some pea-sized butter pieces remaining. Press the mixture firmly into the bottom of your prepared pan. Bake for 15-18 minutes until the edges are just starting to turn golden. Set aside to cool slightly.
- Cook the apples: While the crust bakes, melt 2 tablespoons of butter in a medium skillet over medium heat. Add the diced apples, brown sugar, cinnamon, nutmeg, and a pinch of salt. Cook for 5-7 minutes, stirring occasionally, until the apples have softened slightly but still hold their shape. Remove from heat and let cool.
- Make the cheesecake filling: In a large bowl, beat the softened cream cheese with an electric mixer on medium speed until smooth and creamy, about 2 minutes. Scrape down the sides and bottom of the bowl. Add the sugar and beat for another minute until well combined. Add the eggs one at a time, beating on low speed after each addition just until incorporated. Add the vanilla extract and flour, mixing on low until just combined.
- Assemble the layers: Pour the cheesecake filling over the pre-baked crust and spread it evenly with a spatula. Spoon the cooked apples evenly over the cheesecake layer. Drizzle the caramel sauce over the apples in a zigzag pattern. Use a knife to gently swirl the caramel into the apples and cheesecake.
- Bake: Place the pan in the preheated oven and bake for 30-35 minutes. The edges should be set and slightly puffed, but the center should still have a slight jiggle when you gently shake the pan.
- Cool completely: Remove the pan from the oven and place it on a wire rack. Let the bars cool at room temperature for 1 hour, then refrigerate for at least 4 hours, preferably overnight.
- Add the finishing touch: Just before serving, sprinkle the flaky sea salt over the top. Use a sharp knife to cut into bars, wiping the blade clean between cuts for neat edges.
Notes
Room temperature ingredients are crucial for a smooth cheesecake filling. Pre-cooking the apples prevents sogginess. Chilling overnight yields the best texture and clean slices. Add flaky sea salt just before serving to prevent it from dissolving.
Nutrition
- Serving Size: 1 bar
- Calories: 285
- Sugar: 22
- Sodium: 210
- Fat: 16
- Saturated Fat: 10
- Carbohydrates: 32
- Fiber: 1
- Protein: 4
Keywords: salted caramel, apple cheesecake bars, fall dessert, cheesecake bars, apple dessert, caramel apple


