This was supposed to be a fancy layered chocolate mousse for a dinner party. I had the good chocolate out, the fresh cream, the whole plan to impress. But somewhere between the toddler asking for a snack and the phone ringing, I grabbed the wrong container from the fridge. Instead of heavy cream, I poured a full cup of cold milk into my melted chocolate. My heart sank. There was no fixing it—the mousse was ruined. I stood there staring at this soupy, chocolatey mess, already frustrated, and the clock was ticking. I had hungry kids and a party in a few hours. What came out of that mistake was nothing like the plan—and honestly, way better. These spooky mini Halloween dirt cups with gummy worms were born from a kitchen fail, and now they’re the thing I get asked for every October.
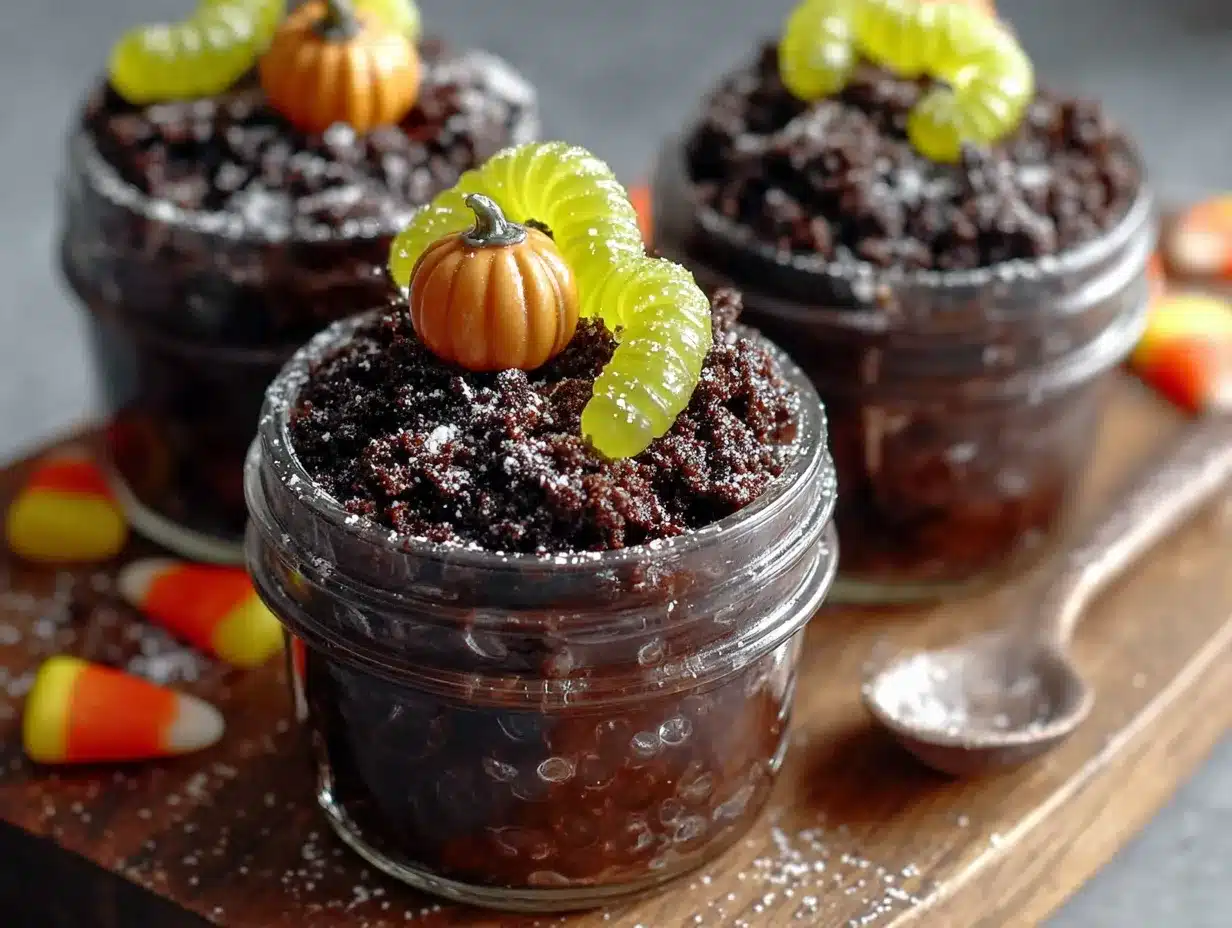
Let me tell you, I almost threw the whole bowl away. But I figured, what’s the worst that could happen? I grabbed some crushed cookies from the pantry, found a bag of gummy worms leftover from last year’s candy stash, and started layering. My daughter walked in, saw what I was doing, and said, “Mom, that looks like a Halloween graveyard.” And she was right. The crushed cookies looked exactly like dirt, the pudding-like chocolate mixture was the perfect creepy base, and those gummy worms poking out made it look like something from a spooky movie. I mean, I couldn’t have planned it better if I tried.
Maybe you’ve been there—you know that feeling when a recipe goes wrong and you just have to pivot? That’s exactly how these dirt cups came to be. Now I make them every Halloween, and honestly, they’re more popular than the fancy mousse ever was. Kids go crazy for them, adults sneak them when nobody’s looking, and they take about fifteen minutes to throw together. No baking, no stress, just pure Halloween fun. The best part? They actually taste incredible—creamy, chocolatey, with that perfect crunch from the cookie “dirt.” It’s the kind of happy accident that makes you believe some things are just meant to be.
Why You’ll Love This Recipe
I’ve tested this recipe more times than I can count—probably twenty batches over the last three Halloweens. I’ve made them with different puddings, different cookies, even tried a vegan version for my sister-in-law. Every single time, they disappear. Here’s why these spooky mini Halloween dirt cups with gummy worms are the best you’ll find:
- Quick & Easy: Comes together in under 15 minutes with zero baking required. Perfect for last-minute Halloween parties or when the kids suddenly announce they need treats for school tomorrow.
- Simple Ingredients: You probably already have most of this stuff in your kitchen. Chocolate pudding mix, milk, Oreo cookies, and gummy worms. No fancy grocery trips needed.
- Perfect for Halloween: These are the ultimate spooky treat for parties, classroom celebrations, or just a fun family night. Kids love assembling them, and they look impressive without any real effort.
- Crowd-Pleaser: I’ve never seen a kid turn these down. Honestly, adults love them too. They’re nostalgic, playful, and just the right amount of creepy.
- Unbelievably Delicious: The combination of creamy chocolate pudding, crunchy cookie dirt, and chewy gummy worms is next-level comfort food. It’s like a deconstructed Oreo sundae with a Halloween twist.
What makes this recipe different from the rest? It’s the texture. Most dirt cups get soggy after a few hours, but I figured out that layering the cookies just before serving keeps everything perfectly crunchy. Plus, using instant pudding instead of homemade saves time without sacrificing flavor. Trust me, I’ve tried both ways, and the instant version actually works better here—it sets up firmer and holds those gummy worms in place like a charm.
This recipe isn’t just good—it’s the kind that makes you close your eyes after the first bite. It’s Halloween comfort food at its finest: spooky, sweet, and ridiculously satisfying. Perfect for impressing a classroom full of kids without any stress, or turning a simple October evening into something memorable.
What Ingredients You Will Need
This recipe uses simple, store-bought ingredients to deliver big flavor and that classic dirt cup texture. No complicated baking science here—just pantry staples that come together in minutes. Here’s what you’ll need:
For the Pudding Base
- 1 box (3.9 oz) instant chocolate pudding mix – I recommend Jell-O brand for the smoothest texture, but any brand works. Make sure it’s instant, not cook-and-serve.
- 2 cups cold whole milk – Whole milk gives the creamiest result, but 2% works fine too. For a dairy-free version, use oat milk or almond milk (just note the pudding may set slightly softer).
For the Dirt & Decoration
- 15-20 chocolate sandwich cookies – Oreos are the classic choice. You’ll crush them into fine crumbs that look just like soil. I’ve tried generic brands and they work well too.
- 1 cup gummy worms – Any brand works. I prefer the sour ones for extra flavor contrast, but regular sweet gummy worms are perfect too. Look for the Halloween mix with green, orange, and purple colors.
- Optional: green-colored shredded coconut – For a “grass” effect on top. Just toss shredded coconut with a drop of green food coloring in a zip-top bag and shake.
- Optional: candy eyeballs – These add an extra creepy touch. You can find them at craft stores or online.
Tips for Ingredient Selection
I’ve learned a few things from making these so many times. First, crush your cookies in a zip-top bag with a rolling pin—it’s faster than a food processor and creates a more varied texture with some bigger chunks that look more like real dirt. Second, let your pudding set for the full 5 minutes before layering. If you rush it, the cookie crumbs will sink into the pudding and get soggy. Third, if you’re making these ahead for a party, keep the pudding and cookie crumbs separate until just before serving. The gummy worms can go in a few hours early, but the dirt layer should be added last minute for maximum crunch.
For the best visual effect, use clear plastic cups so you can see the layers. I found a pack of 16-ounce cups at the dollar store, and they work perfectly. You can also use small mason jars or even paper cups if that’s what you have. The presentation matters less than the fun factor—kids don’t care if it’s fancy, they just want those worms poking out!
Equipment Needed
You don’t need much for this recipe, which is part of the beauty. Here’s what you’ll need:
- Mixing bowl – Medium-sized, for whisking the pudding. I use a glass bowl so I can see if there are any lumps.
- Whisk – A wire whisk works best for smooth pudding. A fork works in a pinch but takes longer.
- Measuring cups – For the milk. A liquid measuring cup with a spout makes pouring easier.
- Zip-top plastic bag – For crushing the cookies. A gallon-size bag gives you room to work.
- Rolling pin or heavy-bottomed pan – For smashing the cookies into crumbs. I’ve used a wine bottle before, and it works just fine.
- Small cups or jars – Clear plastic cups (6-8 ounce size) are ideal so you can see the layers. You’ll need about 6-8 cups depending on size.
- Spoon or small spatula – For layering the pudding and crumbs.
If you don’t have a rolling pin, don’t stress. I’ve crushed cookies with the bottom of a coffee mug, a cast iron skillet, even my fist. The goal is just to get them into fine crumbs. For a more uniform texture, you can use a food processor, but honestly, I like the rustic look of hand-crushed cookies. It makes the “dirt” look more natural.
Preparation Method
Let me walk you through exactly how to make these spooky mini Halloween dirt cups with gummy worms. I’ve broken it down into simple steps with all the little tricks I’ve learned along the way.
- Make the pudding – In your mixing bowl, whisk together the instant chocolate pudding mix and 2 cups cold milk. Whisk for about 2 minutes until it starts to thicken. You’ll notice it go from liquid to a soft, pudding-like consistency. Let it sit for 5 minutes to fully set. Pro tip: Don’t over-whisk or you’ll incorporate too many air bubbles, which makes the pudding look foamy instead of smooth.
- Crush the cookies – While the pudding sets, place your chocolate sandwich cookies in a zip-top bag. Seal it tight (leave a little air in the bag so the cookies have room to move). Use your rolling pin to crush them into fine crumbs. You want a mix of fine powder and small pebbly bits—this looks most like real dirt. If you have a kid helper, this is their favorite job. Just be prepared for some cookie dust to escape the bag!
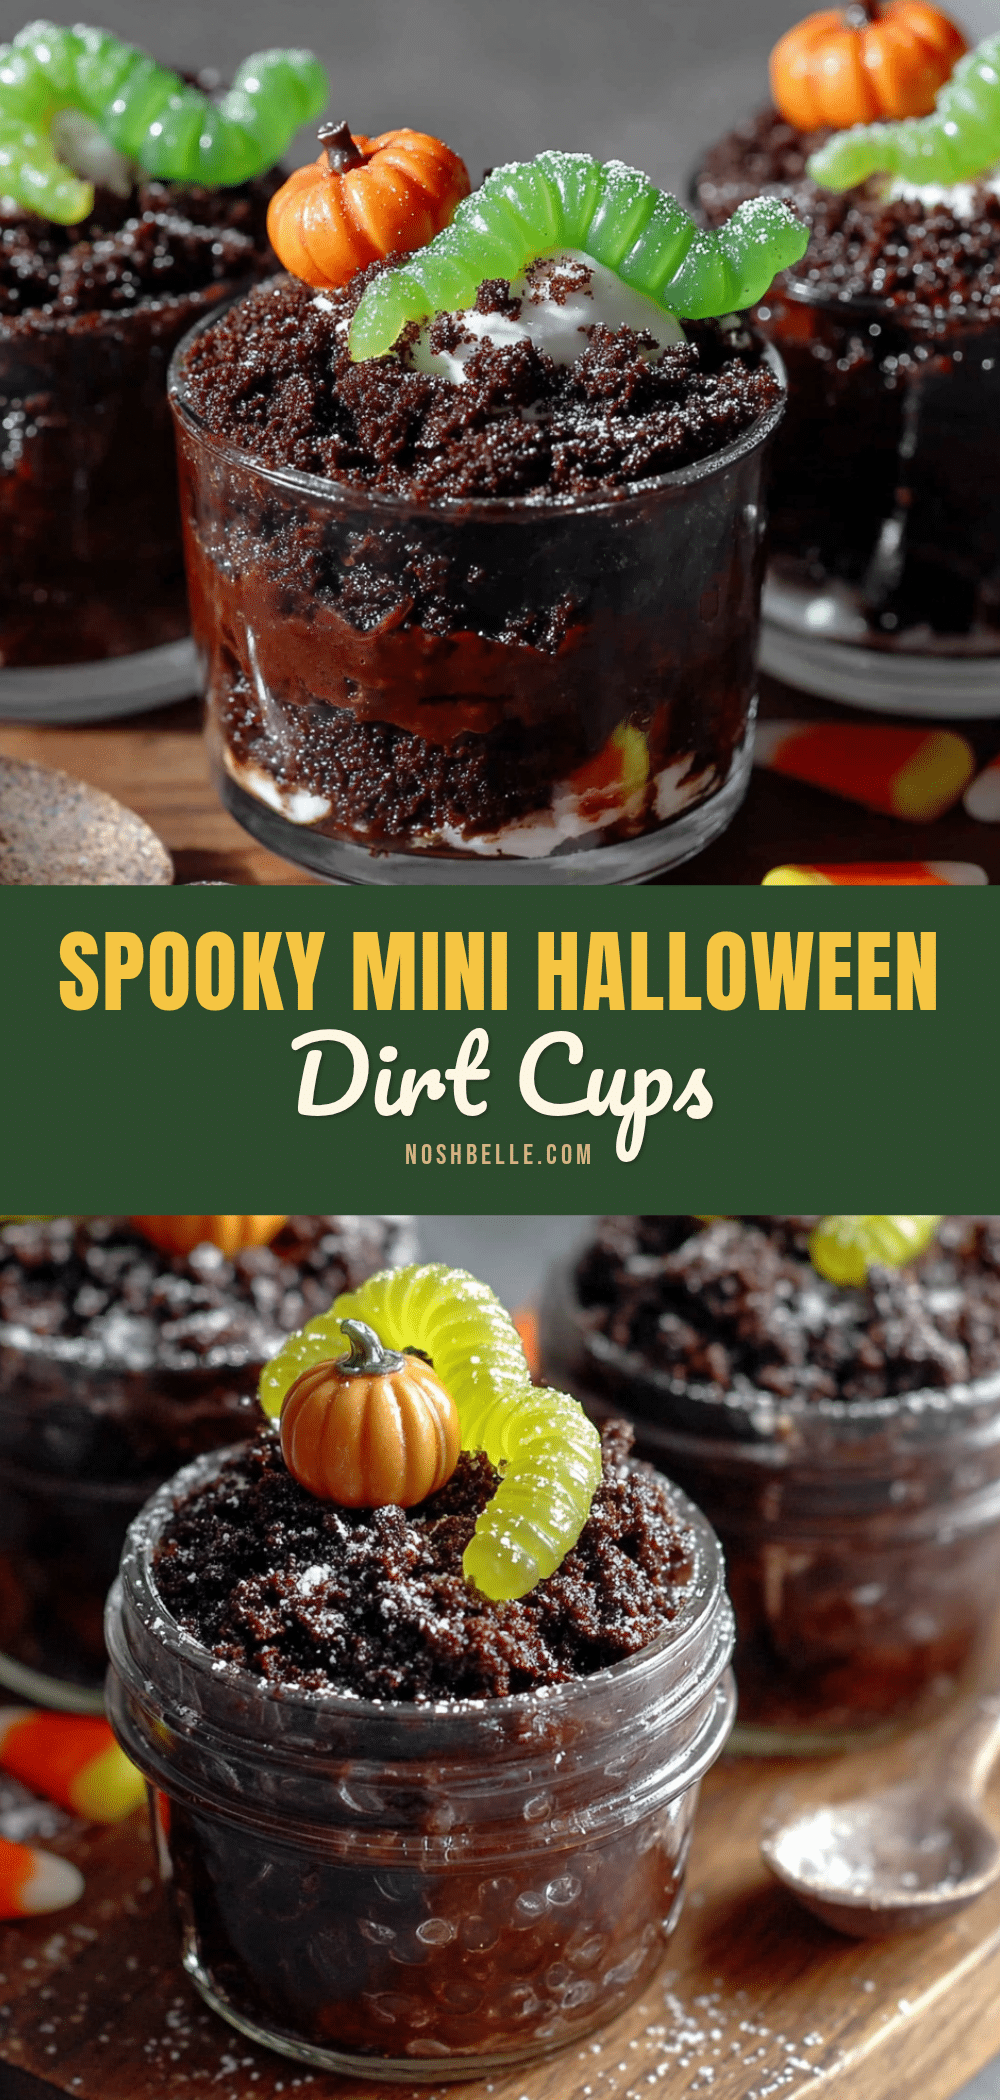
- Layer the cups – Take your clear cups and start with a spoonful of cookie crumbs at the bottom. About 1-2 tablespoons per cup, just enough to cover the bottom. This gives the illusion of deep dirt. Then spoon the chocolate pudding on top, filling each cup about three-quarters full. Leave some room at the top for the final dirt layer.
- Add the worms – Here’s the fun part. Take your gummy worms and poke them into the pudding so they’re sticking out at different angles. Some should be fully visible, others half-buried. I like to use 2-3 worms per cup, positioned as if they’re crawling out of the dirt. Push them down deep enough that they stay upright, but leave enough exposed to look creepy.
- Top with dirt – Sprinkle the remaining cookie crumbs over the top of each cup, covering the pudding completely. This is the “dirt” layer that hides the worms beneath. Make sure it’s thick enough that you can’t see any pudding peeking through. You want it to look like a little pot of soil.
- Add final decorations – If you’re using candy eyeballs, press them gently into the dirt so they peek out. For the green coconut “grass,” sprinkle a small amount around the edges. You can also add a few extra gummy worms on top for good measure. The more the merrier, honestly.
- Chill before serving – Pop the cups in the refrigerator for at least 30 minutes before serving. This helps everything set up and makes the pudding extra cold and creamy. If you’re making them for a party, you can refrigerate them for up to 4 hours before adding the final dirt layer and worms—just add those right before serving for maximum crunch.
A note on timing: The whole process takes about 15 minutes of active work, plus 30 minutes of chilling. If you’re in a rush, you can serve them immediately, but the texture is much better after they’ve had time to set. I once made these for a school Halloween party and assembled them the night before—they were still perfect the next day, though the cookie crumbs had softened slightly. For the crispiest dirt, add the crumbs within an hour of serving.
Cooking Tips & Techniques
After making these spooky mini Halloween dirt cups with gummy worms more times than I care to count, I’ve picked up a few tricks that make a real difference. Let me share what I’ve learned the hard way so you don’t have to.
The biggest mistake people make is using cook-and-serve pudding instead of instant. I did this once when I ran out of instant mix and thought, “How different can it be?” Very different. Cook-and-serve needs to be heated on the stove and then cooled, which takes forever and doesn’t set up as firm. Instant pudding is non-negotiable here—it sets in minutes and holds its shape perfectly.
Another common issue is soggy cookie crumbs. If you add the dirt layer too early, the moisture from the pudding will seep up and turn your crunchy crumbs into mushy paste. The solution is simple: add the cookie layer just before serving, or at most an hour ahead. I learned this the hard way when I made a batch for a neighbor’s party and by the time we ate them, the “dirt” had turned into chocolate mud. Still tasted good, but the texture was all wrong.
For the best visual effect, play with worm placement. Don’t just stick them all in the center. Put some near the edges, some at different heights, some completely buried with just a tail poking out. The more varied the placement, the more realistic (and creepy) they look. I like to imagine the worms are actually crawling out of the dirt—it makes the presentation so much more fun.
Timing tip: If you’re making these for a party, do the prep work in stages. Make the pudding and crush the cookies the night before, store them separately in the fridge and an airtight container, then assemble everything the day of. This makes the process feel effortless and keeps the textures perfect.
One more thing I’ve learned: Let the kids help with assembly. It’s messy, it’s fun, and they’ll be so proud of their creepy creations. My daughter now insists on being the “worm placer” every Halloween, and honestly, her designs are better than mine. She puts worms in the most unexpected places, and it makes each cup unique.
Variations & Adaptations
One of the best things about this recipe is how easy it is to customize. Here are some variations I’ve tried and loved:
Dietary Adaptations – For a gluten-free version, use gluten-free chocolate sandwich cookies (there are several good brands now) and make sure your pudding mix is certified gluten-free. For dairy-free, swap the whole milk with oat milk or coconut milk—I’ve had the best results with oat milk as it’s thickest and sets up nicely. The texture will be slightly softer but still delicious. My sister-in-law is vegan, so I made a batch with oat milk and vegan chocolate cookies, and honestly, nobody could tell the difference.
Flavor Twists – Try using white chocolate or butterscotch pudding instead of chocolate for a different flavor profile. I made a batch with vanilla pudding and crushed vanilla wafers for a “sand” effect, and paired it with sour gummy worms for a sweet-tart combo. You can also add a layer of crushed graham crackers between the pudding and cookie dirt for extra texture. For a grown-up version, add a tablespoon of coffee liqueur to the pudding mix—it gives it a mocha flavor that pairs beautifully with the chocolate.
Seasonal Variations – While these are perfect for Halloween, you can adapt them for other occasions too. For a spring garden party, use green-colored coconut for “grass” and add flower-shaped sprinkles on top. For a birthday party, swap the gummy worms for gummy bears or candy bugs. The basic dirt cup concept works year-round—just change the decorations to match the theme.
Different Cooking Methods – This recipe is no-bake by nature, but you can make a warm version by heating the pudding before layering (though it won’t set as firmly). I’ve also made these as a dip instead of individual cups—just layer the pudding and cookie crumbs in a large serving dish and let everyone scoop their own with graham crackers or pretzels. It’s less spooky but perfect for parties.
My personal favorite variation: I add a layer of chocolate chips between the pudding and cookie dirt. The little pockets of melted chocolate are a惊喜 when you bite into them, and they add another texture to the mix. I also like to use a mix of regular and double-stuffed Oreos for the dirt—the extra cream filling makes the crumbs slightly sweeter and more clumpy, which looks even more like real soil.
Serving & Storage Suggestions
These spooky mini Halloween dirt cups with gummy worms are best served cold, straight from the refrigerator. The contrast between the cold, creamy pudding and the crunchy cookie dirt is what makes them so satisfying. I like to serve them on a tray lined with orange and black napkins for that extra Halloween touch.
Presentation ideas: For a party, arrange the cups on a platter with extra gummy worms scattered around like they’re crawling off the tray. You can also add small plastic spiders or skeleton decorations to make it even spookier. If you’re serving them at a classroom party, label each cup with a silly Halloween name like “Worm Graveyard” or “Monster Mud.” Kids love that stuff.
What to serve with them: These dirt cups pair perfectly with other Halloween treats like pumpkin-shaped cookies, caramel apples, or warm apple cider. For a full Halloween dessert table, I serve them alongside a bowl of popcorn balls and some chocolate-covered pretzels. The sweet-salty combination is unbeatable.
Storage instructions: Store any leftover cups in the refrigerator, covered with plastic wrap or a lid, for up to 3 days. The cookie crumbs will soften over time, but they’ll still taste good. I don’t recommend freezing these—the pudding gets icy and the texture becomes grainy when thawed. If you need to make them ahead, prepare the pudding and cookie crumbs separately, then assemble within 24 hours of serving.
Reheating: These are meant to be served cold, so no reheating needed. If the cups have been sitting out for a while and the pudding has warmed up, just pop them back in the fridge for 15 minutes before serving.
How flavors develop: Interestingly, these taste even better the next day. The flavors meld together as the pudding sits, and the gummy worms soften slightly, making them chewier and more integrated with the pudding. My husband actually prefers them day-old because the worms are easier to bite through. So don’t worry if you make them ahead—they’ll still be delicious.
Nutritional Information & Benefits
Let’s be real—these are a treat, not a health food. But here’s what you can expect per serving (based on one cup with about 2 tablespoons of cookie crumbs and 2 gummy worms):
| Nutrient | Amount Per Serving |
|---|---|
| Calories | 280-320 |
| Total Fat | 10-12g |
| Saturated Fat | 4-5g |
| Carbohydrates | 45-50g |
| Sugar | 32-38g |
| Protein | 4-6g |
| Calcium | 10% DV |
| Iron | 8% DV |
Health benefits (yes, there are a few): The milk in the pudding provides calcium and vitamin D for bone health. The cocoa in the chocolate pudding contains antioxidants called flavonoids, which can support heart health. And gummy worms? Well, they make you smile, and that counts for something, right? Honestly, this is a treat meant for enjoyment, not nutrition. But if you want to feel slightly better about it, use low-fat milk and reduced-sugar pudding mix. I’ve tried it, and it’s still pretty good.
Dietary considerations: This recipe contains dairy (milk) and gluten (cookies). It can be made gluten-free with appropriate substitutions. It is not suitable for vegans in its standard form, but can be adapted. The main allergens are milk, wheat, and soy (found in some cookie brands). Always check labels if you’re serving someone with allergies.
My personal take: Halloween comes once a year, and these dirt cups are part of the fun. I don’t stress about the sugar content because they’re a special occasion treat. Balance is key—enjoy them, share them with friends, and don’t feel guilty about it. Life’s too short to skip the gummy worms.
Conclusion
These spooky mini Halloween dirt cups with gummy worms are proof that the best recipes often come from happy accidents. What started as a ruined chocolate mousse turned into a Halloween tradition that my family looks forward to every year. They’re fun to make, even more fun to eat, and they never fail to get a reaction from kids and adults alike.
I encourage you to make these your own. Play with the flavors, try different candies, let your kids go wild with the decorations. The beauty of this recipe is that it’s forgiving—you really can’t mess it up. And if you do? Well, that’s how new traditions are born.
I’d love to hear how yours turn out! Drop a comment below and tell me about your Halloween creations. Did you add something unexpected? Did your kids come up with a clever decoration? Share your photos and stories—I read every single one. And if you loved this recipe, please share it with your friends. Happy Halloween, and happy cooking!
Frequently Asked Questions
Can I make these dirt cups ahead of time?
Yes, you can prepare the pudding and crush the cookies up to 2 days in advance. Store the pudding in the fridge and the cookie crumbs in an airtight container at room temperature. Assemble the cups within 24 hours of serving for the best texture.
Can I use homemade pudding instead of instant?
You can, but I don’t recommend it. Homemade pudding is thinner and won’t set as firmly, which means the cookie crumbs will sink and get soggy faster. Instant pudding is specifically designed to set up thick and creamy, making it ideal for layering.
How many cups does this recipe make?
This depends on the size of your cups. Using 6-ounce cups, you’ll get about 8 servings. For smaller 4-ounce cups (like the ones used for shot glasses), you’ll get 10-12. Adjust the amount of pudding and crumbs accordingly.
Can I use other types of cookies for the dirt?
Absolutely! Chocolate wafer cookies, chocolate graham crackers, or even crushed chocolate chips work well. For a different look, try vanilla wafers for “sand” or crushed pretzels for a salty-sweet twist. Just make sure they’re finely crushed to mimic dirt.
How do I keep the gummy worms from sinking to the bottom?
Make sure your pudding is fully set before adding the worms. If the pudding is still runny, the worms will sink. Also, insert the worms at an angle rather than straight down—this helps them stay in place. If you’re really worried, add a thin layer of cookie crumbs on top of the pudding first, then place the worms on that layer before adding the final dirt.
Pin This Recipe!
Best Spooky Mini Dirt Cups with Gummy Worms
These spooky mini Halloween dirt cups with gummy worms are a quick, no-bake treat made from chocolate pudding, crushed Oreo cookies, and gummy worms. Perfect for Halloween parties, they come together in under 15 minutes and are a guaranteed crowd-pleaser.
- Prep Time: 15 minutes
- Cook Time: 0 minutes
- Total Time: 45 minutes
- Yield: 8 servings 1x
- Category: Dessert
- Cuisine: American
Ingredients
- 1 box (3.9 oz) instant chocolate pudding mix
- 2 cups cold whole milk
- 15–20 chocolate sandwich cookies (e.g., Oreos)
- 1 cup gummy worms
- Optional: green-colored shredded coconut
- Optional: candy eyeballs
Instructions
- In a mixing bowl, whisk together the instant chocolate pudding mix and 2 cups cold milk for about 2 minutes until it starts to thicken. Let it sit for 5 minutes to fully set.
- While the pudding sets, place the chocolate sandwich cookies in a zip-top bag and crush them into fine crumbs using a rolling pin or heavy-bottomed pan.
- Take clear cups and add a spoonful of cookie crumbs (about 1-2 tablespoons) to the bottom of each cup.
- Spoon the chocolate pudding on top of the crumbs, filling each cup about three-quarters full.
- Poke 2-3 gummy worms into the pudding at different angles so they appear to be crawling out.
- Sprinkle the remaining cookie crumbs over the top of each cup, covering the pudding completely.
- If using, press candy eyeballs into the dirt and sprinkle green coconut ‘grass’ around the edges.
- Refrigerate for at least 30 minutes before serving.
Notes
For the crispiest dirt, add the cookie crumbs within an hour of serving. Use instant pudding, not cook-and-serve. Let kids help with assembly for extra fun.
Nutrition
- Serving Size: 1 cup
- Calories: 300
- Sugar: 35
- Sodium: 380
- Fat: 11
- Saturated Fat: 4.5
- Carbohydrates: 47
- Fiber: 1
- Protein: 5
Keywords: Halloween, dirt cups, gummy worms, chocolate pudding, no-bake, spooky, kids treat


