The Halloween bake sale was in six hours and I’d completely forgotten. Everyone else would be bringing those elaborate cakes with the fondant spiderwebs and the sculpted graveyards and the hand-painted cookies that looked like museum pieces. I had a half-empty carton of egg whites, a bag of sugar that was almost gone, and maybe a teaspoon of vanilla extract rattling around in the back of the spice cabinet. Not exactly the makings of a showstopper, right?
I stood there, staring into the fridge like it owed me an explanation. My neighbor, Carol, had already dropped off her pumpkin cheesecake with a handmade caramel drizzle. I could practically hear the judging happening before the event even started. I mean, I love Halloween—it’s my favorite—but I am not a decorating wizard. I cannot pipe a perfect rose to save my life. So I did what any reasonable person would do when faced with certain failure: I decided to make the simplest thing possible and hope nobody noticed.
These ghost meringue cookies were born from pure desperation. Honestly, I was just trying to use up those egg whites before they went bad. I figured if they were tiny and cute enough, maybe people would eat them out of pity. But then something weird happened. They came out of the oven looking like a little army of friendly ghosts, all puffed up and adorable. I threw them on a plate, rushed to the sale, and set them down next to Carol’s masterpiece. And you know what happened? They vanished. Gone. People were asking me for the recipe before the bake sale even officially started. The ghost meringue cookies—the ones I threw together in a panic—stole the whole show. Maybe you’ve been there, when the thing you almost didn’t make ends up being the thing everyone remembers. That’s why I keep making these. They remind me that sometimes the simplest ideas are the best ones.
Why You’ll Love This Recipe
Let me tell you why these ghost meringue cookies are about to become your new favorite Halloween tradition. I’ve tested this recipe about a dozen times now—tweaking the sugar ratio, playing with baking times, even trying different flavor extracts. What I landed on is the absolute sweet spot between crispy, melt-in-your-mouth texture and that perfect ghostly shape.
- Only 3 Ingredients : You seriously need egg whites, sugar, and vanilla extract. That’s it. No special trips to the store for weird candy melts or expensive food coloring.
- Surprisingly Easy : If you can whip egg whites to stiff peaks, you can make these. No piping bags required—just a spoon or a zip-top bag with the corner snipped off.
- Naturally Gluten-Free : Since there’s no flour involved, these are perfect for anyone avoiding gluten. Always a win for parties.
- Adorable Factor : They look like actual tiny ghosts. The shape holds perfectly without any special molds or cutters.
- Make-Ahead Friendly : These store beautifully for weeks. You can prep them days before your Halloween party and they’ll still be perfect.
What makes these different from every other meringue recipe out there? It’s the technique. Most recipes tell you to bake them low and slow, but I figured out that starting at a slightly higher temperature for the first few minutes gives them that puffed, rounded top that actually looks like a ghost’s head. Then dropping the temperature lets them dry out without browning. It’s a tiny tweak, but it makes all the difference between a flat blob and a recognizable ghost.
This recipe isn’t just good—it’s the kind that makes you feel like a kitchen genius with almost zero effort. Perfect for last-minute Halloween treats, classroom parties, or just because you want something cute to snack on while watching spooky movies.
What Ingredients You Will Need
This recipe uses the simplest ingredients to deliver that light-as-air texture and sweet vanilla flavor. Here’s what you’ll need and a few things I’ve learned about each one.
- 3 large egg whites (room temperature is crucial—cold eggs won’t whip up as fluffy)
- ¾ cup (150g) granulated white sugar (I prefer Domino or C&H for consistent texture; avoid superfine sugar here as it dissolves too quickly)
- 1 teaspoon vanilla extract (pure vanilla extract gives the best flavor, but imitation works fine in a pinch)
A few notes on ingredient selection. For the egg whites, fresh is always best, but if you’re using carton egg whites, make sure they’re 100% pure egg whites with no stabilizers added. Some brands add gums that prevent proper whipping. I learned this the hard way after a very frustrating afternoon of soupy meringue.
The sugar matters more than you’d think. Regular granulated sugar is perfect because it dissolves slowly and helps stabilize the foam. If you use powdered sugar, your meringues will be denser and less crisp. Trust me on this one—I tried it once thinking I was being clever, and they came out chewy and sad.
For the vanilla extract, you can absolutely experiment. I’ve made these with almond extract for a nutty twist, and even peppermint extract for a wintery version. Just keep the amount the same—too much extract can deflate your meringue.
One more thing: room temperature eggs. This isn’t just a suggestion. Cold egg whites are tighter and won’t incorporate as much air. Leave your eggs on the counter for about 30 minutes before starting. If you’re in a hurry, put them in a bowl of warm water for 5 minutes. That works too.
Equipment Needed
You don’t need a fancy kitchen to make these ghost meringue cookies. Here’s what I use and a few alternatives that work just as well.
- Electric mixer (stand mixer or hand mixer both work; I’ve made these with a hand mixer for years before upgrading to a KitchenAid)
- Large mixing bowl (glass or metal is best—plastic can hold onto grease that ruins meringue)
- Baking sheet (any rimmed baking sheet works; I use a Nordic Ware half-sheet pan)
- Parchment paper (non-negotiable—these will stick to everything else)
- Piping bag or zip-top bag (a gallon-sized zip-top bag with a tiny corner snipped off works perfectly)
- Cooling rack (helps them cool evenly and stay crisp)
If you don’t have a piping bag, don’t stress. A zip-top bag with a small hole cut in one corner works exactly the same. I actually prefer it because there’s less cleanup. Just make sure the hole isn’t too big or your ghosts will come out looking like blobs.
For the mixing bowl, give it a quick wipe with a bit of lemon juice or vinegar on a paper towel before you start. This removes any trace of grease that could prevent your egg whites from whipping up. I keep a dedicated bowl just for meringue to avoid this issue entirely.
Preparation Method
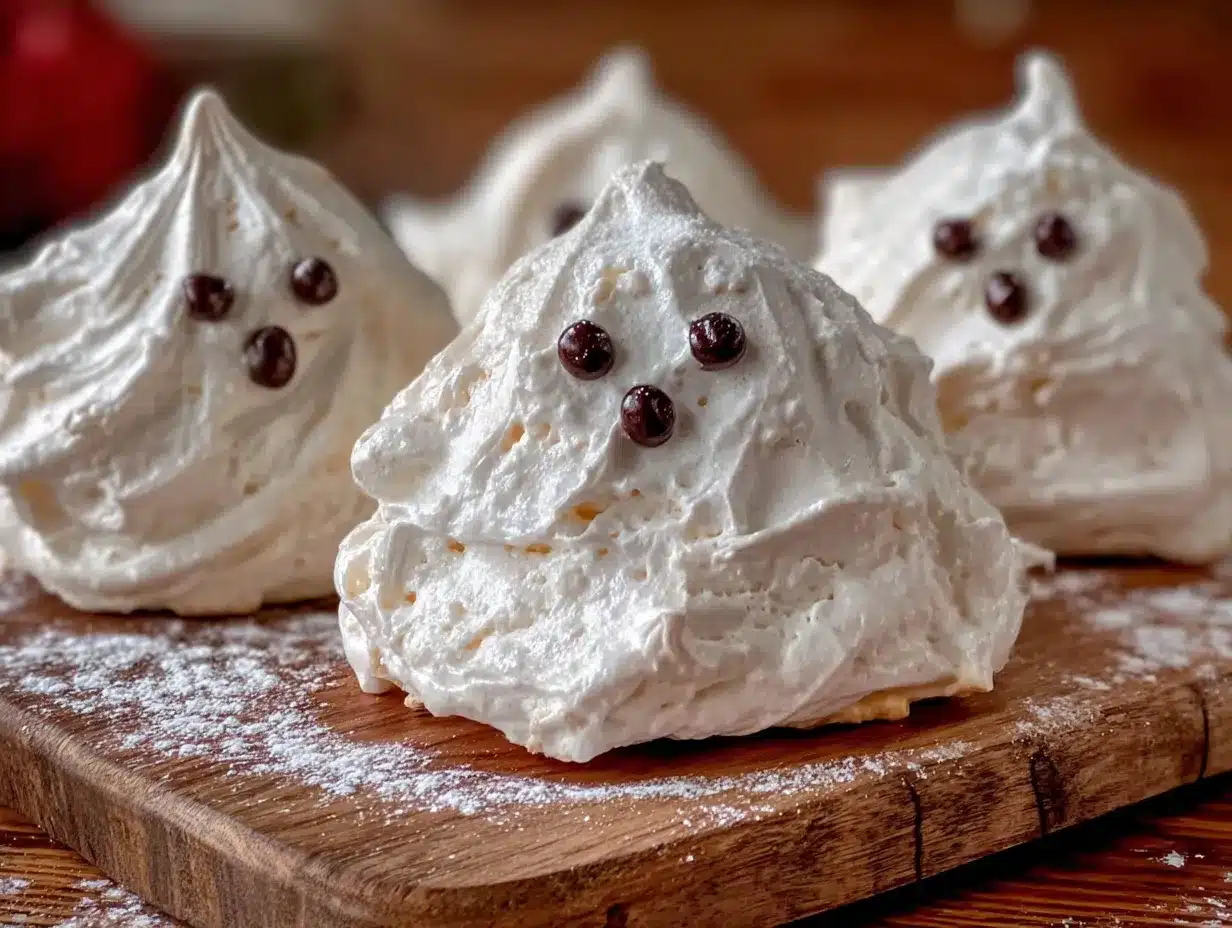
Alright, let’s make some ghost meringue cookies. Follow these steps carefully and you’ll have a tray of adorable ghosts in no time.
- Preheat your oven to 200°F (93°C). Line a baking sheet with parchment paper. This low temperature is key—we’re drying the meringues, not baking them.
- Separate your eggs while cold. Crack each egg and separate the white from the yolk. Make sure absolutely no yolk gets in the whites—even a tiny bit will prevent them from whipping. Let the whites sit at room temperature for 30 minutes.
- Start whipping the egg whites on medium speed until they become frothy and bubbly, about 1-2 minutes. You’ll see lots of tiny bubbles forming. This is the foam stage.
- Gradually add the sugar. With the mixer running on medium-high, add the sugar one tablespoon at a time. Wait about 10 seconds between each addition. This slow process helps the sugar dissolve properly. If you dump it all in at once, your meringue might collapse later.
- Add the vanilla extract once all the sugar is incorporated. Keep mixing on medium-high speed.
- Whip until stiff peaks form. This takes about 5-7 minutes total with a stand mixer, or 8-10 minutes with a hand mixer. You’ll know it’s ready when you lift the whisk and the meringue holds a peak that stands straight up without drooping. Also, rub a tiny bit between your fingers—it should feel smooth, not gritty. If it’s gritty, keep whipping.
- Transfer the meringue to your piping bag. If using a zip-top bag, scoop the meringue in, seal the top, and snip off about ¼ inch from one corner. Don’t cut too much or your ghosts will be huge.
- Pipe the ghost shapes. Hold the bag vertically about ½ inch above the parchment. Squeeze gently to create a round base, then pull upward while reducing pressure to form the ghost’s head. Release pressure completely and pull away quickly to create a little peak on top. Leave about 1 inch between each ghost—they don’t spread much, but they need airflow.
- Add faces (optional but adorable). If you want, you can pipe tiny eyes and a mouth using melted chocolate or just leave them plain. I usually make half with faces and half without for variety.
- Bake for 60-75 minutes. The meringues should be dry to the touch and easily peel off the parchment. They shouldn’t be brown at all—if they start coloring, your oven is too hot. Turn off the oven and leave the meringues inside for another 30 minutes to finish drying.
- Cool completely on the baking sheet before moving them to a cooling rack. They’ll be fragile when warm, so handle gently.
A quick note: if your kitchen is humid, these will take longer to dry out. On rainy days, I add an extra 15-20 minutes to the baking time. Just check them periodically until they feel dry and crisp.
Cooking Tips & Techniques
I’ve made plenty of mistakes with these ghost meringue cookies so you don’t have to. Here’s what I’ve learned the hard way.
Clean bowl equals fluffy meringue. That grease residue I mentioned earlier? It’s real. I once used a bowl that had a tiny smear of butter left from earlier cooking, and my egg whites never got past the frothy stage. I sat there for 15 minutes wondering what was wrong. Wipe your bowl with vinegar or lemon juice. It takes two seconds and saves so much frustration.
Don’t overmix once the sugar is in. There’s a sweet spot between under-whipped and over-whipped. If you whip too long, the meringue becomes grainy and starts to separate. You’ll see liquid pooling at the bottom of the bowl. That’s bad. Stop as soon as you have stiff, glossy peaks.
Weather matters. Meringue is finicky about humidity. On humid days, the sugar absorbs moisture from the air and your meringues can end up sticky instead of crisp. If you live somewhere humid like I do (hello, Florida summers), bake these on a dry day or run your air conditioner while they’re cooling.
Pipe with confidence. Your first few ghosts might look a little wonky. That’s okay. I’ve made hundreds of these and my first batch looked like sad blobs. The trick is to squeeze steadily and pull up smoothly. If you hesitate, you’ll get lumps. Just go for it.
Storage is everything. Once these are baked, they need to be stored in an airtight container immediately. If you leave them out overnight, they’ll absorb moisture from the air and turn chewy. I store mine in a glass jar with a tight lid and they stay crisp for weeks.
Variations & Adaptations
One of the best things about this recipe is how easy it is to change up. Here are some variations I’ve tried and loved.
Chocolate Ghosts : Substitute 2 tablespoons of the granulated sugar with cocoa powder. Sift it together before adding to the egg whites. The ghosts come out a light brown color and taste like chocolate meringues. My kids go crazy for these.
Peppermint Ghosts : Replace the vanilla extract with ½ teaspoon peppermint extract and add a drop of red food coloring for a subtle pink tint. These are perfect for Christmas ghost cookies—yes, ghosts are year-round in my house.
Lemon Ghosts : Add 1 teaspoon of lemon zest along with the vanilla extract. The citrus cuts through the sweetness beautifully and gives them a bright, fresh flavor. These are my personal favorite for spring.
Spooky Colored Ghosts : Add a few drops of gel food coloring after the stiff peaks form. Fold it in gently with a spatula until just combined. Purple or green ghosts are super fun for Halloween parties.
Vegan Version : Use aquafaba (the liquid from a can of chickpeas) instead of egg whites. 3 tablespoons of aquafaba equals one egg white. Whip it exactly the same way—it behaves almost identically. The flavor is slightly different, but the texture is spot on.
I’ve also made these as one large ghost shape for a cake topper. Just pipe a big blob and bake for an extra 30 minutes. It makes a fun centerpiece for a Halloween dessert table.
Serving & Storage Suggestions
These ghost meringue cookies are best served at room temperature. They’re perfect right out of the oven after cooling, but they also hold up beautifully for days.
Serving ideas:
- Pile them in a glass jar or apothecary bottle for a spooky display
- Float them on top of hot chocolate or coffee (they bob around like little ghosts)
- Crush them over ice cream for a crunchy topping
- Dip the bottoms in melted chocolate for extra decadence
- Serve alongside a warm caramel sauce for dipping
Storage instructions:
Store these in an airtight container at room temperature for up to 2 weeks. Do not refrigerate—the moisture in the fridge will ruin them. If you live in a humid climate, add a silica gel packet or a few grains of rice to the container to absorb excess moisture.
For freezing, place them in a freezer-safe container with parchment paper between layers. They’ll keep for up to 3 months. Thaw at room temperature for about 15 minutes before serving. The texture stays surprisingly good.
If your meringues do get a little soft, you can re-crisp them in a 200°F (93°C) oven for 10-15 minutes. Let them cool completely before storing again.
Nutritional Information & Benefits
Per serving (about 3 ghost cookies): Approximately 80 calories, 0g fat, 19g carbohydrates, 18g sugar, 0g fiber, 2g protein. These numbers are estimates based on standard ingredients.
These ghost meringue cookies are naturally fat-free and gluten-free, making them a lighter option for Halloween treats. The main ingredient is egg whites, which are a great source of protein and contain no cholesterol. Egg whites also provide selenium, riboflavin, and potassium.
Because they’re mostly sugar, these are definitely a treat rather than a health food. But compared to a frosted cupcake or candy bar, they’re a lighter option that satisfies that sweet craving without the heavy feeling. I love that I can offer something at parties that works for guests with gluten sensitivities or dairy allergies.
If you’re watching your sugar intake, you can reduce the sugar by up to ¼ cup, but the texture will be slightly less crisp and the ghosts won’t hold their shape as well. I’ve tried it and they still taste good—they just look a little more, well, melted.
Conclusion
These ghost meringue cookies are proof that you don’t need fancy ingredients or complicated techniques to make something truly special. They’re cute, they’re delicious, and they come together in under two hours with stuff you probably already have in your kitchen. Honestly, they’ve become my go-to for Halloween parties, classroom treats, and even just random Tuesday afternoons when I want something sweet without the guilt.
I love that you can make them your own—add different flavors, change the colors, or keep them classic. The first time I made these, I never expected them to become such a staple in my kitchen. But here we are, years later, and I still get excited every time I pull a tray of perfect little ghosts out of the oven.
So go ahead—give them a try. I’d love to hear how yours turn out. Did you add faces? Try a different flavor? Did they disappear as fast as mine did at that bake sale? Drop a comment below and let me know. And if you have a friend who’s always stressed about last-minute party treats, share this recipe with them. Trust me, they’ll thank you later.
Frequently Asked Questions
Why did my meringue cookies turn out chewy instead of crisp?
Chewy meringues usually mean they weren’t baked long enough or the humidity was too high. Make sure you bake them for the full 60-75 minutes and let them cool completely in the turned-off oven. If your kitchen is humid, add extra drying time.
Can I use liquid egg whites from a carton?
Yes, but check the label. Some carton egg whites contain stabilizers that prevent proper whipping. Look for 100% pure egg whites with no additives. Also, make sure they’re at room temperature before whipping.
How do I know when stiff peaks are formed?
Lift your whisk or beater straight up. The meringue should form a peak that stands upright without drooping. Also, rub a tiny bit between your fingers—it should feel completely smooth with no graininess from undissolved sugar.
Can I make these without a piping bag?
Absolutely. Use a zip-top bag with a tiny corner snipped off, or simply spoon small dollops onto the parchment paper. They won’t look as ghost-shaped, but they’ll still taste delicious. You can also use a cookie press with a round tip.
Why did my meringue collapse in the oven?
This usually happens if the oven door was opened too early or if the meringue was under-whipped. Don’t open the oven for at least the first 45 minutes. Also, make sure your egg whites were whipped to stiff, glossy peaks before piping.
Pin This Recipe!
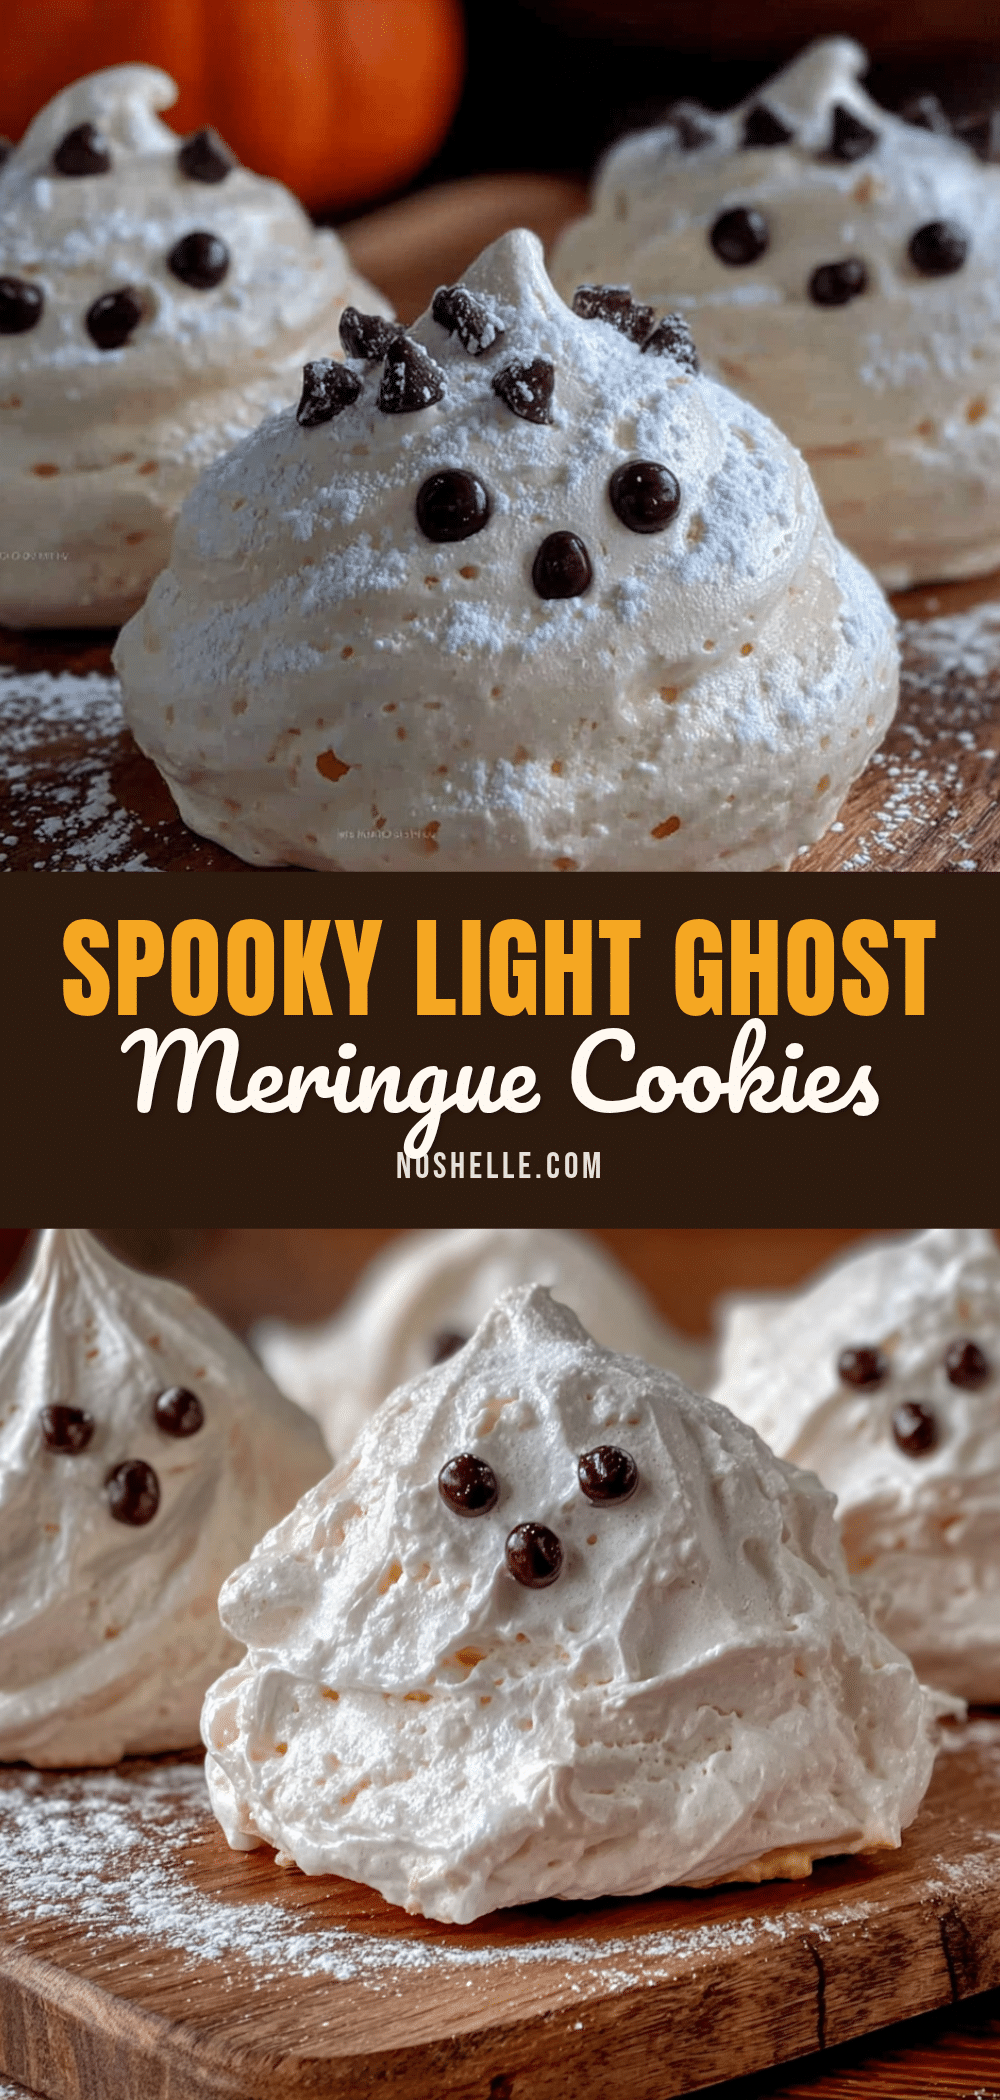
Easy Ghost Meringue Cookies: Best 3-Ingredient Recipe
These ghost meringue cookies are light, airy, and adorable, made with just 3 simple ingredients. Perfect for Halloween parties, bake sales, or any spooky occasion, they’re naturally gluten-free and surprisingly easy to make.
- Prep Time: 15 minutes
- Cook Time: 60-75 minutes
- Total Time: 1 hour 45 minutes to 2 hours
- Yield: 24 servings 1x
- Category: Dessert
- Cuisine: American
Ingredients
- 3 large egg whites (room temperature)
- ¾ cup (150g) granulated white sugar
- 1 teaspoon vanilla extract
Instructions
- Preheat your oven to 200°F (93°C). Line a baking sheet with parchment paper.
- Separate your eggs while cold. Crack each egg and separate the white from the yolk. Make sure absolutely no yolk gets in the whites. Let the whites sit at room temperature for 30 minutes.
- Start whipping the egg whites on medium speed until they become frothy and bubbly, about 1-2 minutes.
- Gradually add the sugar. With the mixer running on medium-high, add the sugar one tablespoon at a time, waiting about 10 seconds between each addition.
- Add the vanilla extract once all the sugar is incorporated. Keep mixing on medium-high speed.
- Whip until stiff peaks form, about 5-7 minutes with a stand mixer or 8-10 minutes with a hand mixer. The meringue should hold a peak that stands straight up without drooping and feel smooth, not gritty.
- Transfer the meringue to a piping bag or a zip-top bag with a ¼ inch corner snipped off.
- Pipe ghost shapes: Hold the bag vertically about ½ inch above the parchment. Squeeze gently to create a round base, then pull upward while reducing pressure to form the ghost’s head. Release pressure completely and pull away quickly to create a little peak on top. Leave about 1 inch between each ghost.
- Optional: Pipe tiny eyes and a mouth using melted chocolate for faces.
- Bake for 60-75 minutes. The meringues should be dry to the touch and easily peel off the parchment. They shouldn’t be brown at all.
- Turn off the oven and leave the meringues inside for another 30 minutes to finish drying.
- Cool completely on the baking sheet before moving them to a cooling rack.
Notes
Room temperature egg whites are crucial for proper whipping. Wipe the mixing bowl with lemon juice or vinegar to remove any grease. On humid days, add extra drying time. Store in an airtight container at room temperature for up to 2 weeks. For a vegan version, use aquafaba (3 tablespoons per egg white).
Nutrition
- Serving Size: 3 cookies
- Calories: 80
- Sugar: 18
- Sodium: 20
- Carbohydrates: 19
- Protein: 2
Keywords: ghost meringue cookies, Halloween cookies, 3-ingredient recipe, gluten-free cookies, easy meringue, spooky treats, egg white cookies