There used to be a tiny Japanese-French fusion bakery tucked behind a laundromat in Portland’s Alberta Arts District that made a persimmon upside-down cake that ruined me for all other desserts. When they closed in 2019—a “retirement, not a casualty,” the owner said with a smile—I actually grieved. That cake was the reason I’d drive forty minutes across town in traffic that made me question my life choices. After seventeen tries—seventeen, let me tell you—I finally cracked it. And honestly? This version might actually be better than the original.
The thing that made that bakery’s cake so unforgettable wasn’t just the persimmons—it was the way the caramel seeped into every crevice, creating these little pockets of sticky, buttery sweetness that caught you off guard with every bite. I remember sitting at that cramped counter, balancing the plate on my knee because there were never enough tables, thinking “I need to figure this out before they’re gone.” Maybe you’ve been there—that desperate feeling when you know a food experience is about to disappear and you’re not ready to let it go.
I finally got it right on a rainy Tuesday afternoon when I was supposed to be working on a completely different recipe. The kitchen was a disaster—persimmon juice on the ceiling (don’t ask), sugar crystallized on the stovetop, and I’d used my last clean towel to wipe up a puddle of caramel that had bubbled over. But when I flipped that pan and saw the caramel release from the bottom in perfect, glossy sheets, I actually yelped. That’s the moment this cake became my permanent dinner party closer.
It’s the kind of dessert that makes people stop mid-conversation. You know that moment when the table goes quiet because everyone’s too busy eating to talk? That’s this cake. And when you bring it out, still warm, with the caramel pooling around the edges and those jewel-toned persimmon slices catching the light, you’ll feel like a rockstar. I keep making it because it delivers that exact same feeling I had at that bakery counter—the feeling of eating something so good you forget where you are.
Why You’ll Love This Recipe
Let’s be real for a second. I’ve tested this cake for everything from casual Sunday dinners to holiday feasts, and it never fails to steal the show. Here’s why this particular version deserves a permanent spot in your hosting rotation:
- Dinner Party Hero : This cake looks like you spent hours on it, but the active prep time is only about 20 minutes. The oven does all the heavy lifting while you’re setting the table or pouring wine.
- Made for a Crowd : It scales beautifully. I’ve made this for eight people and for twenty—just use a bigger pan and add more persimmons. The proportions stay forgiving.
- Prep-Ahead Friendly : You can assemble this cake up to 24 hours in advance and pop it in the oven when your guests arrive. The caramel stays perfectly pourable at room temperature.
- Seasonal Showstopper : Persimmons are at their peak from October through January, which means this cake naturally becomes your go-to for Thanksgiving, Christmas, and New Year’s gatherings.
- Forgiving Technique : Unlike some upside-down cakes that stick or fall apart, this one releases like a dream. I’ve never had it fail, and I’ve made it in three different pans in three different ovens.
What makes this recipe different from every other upside-down cake you’ve tried is the caramel. Most recipes use brown sugar and butter, which works fine but can crystallize or separate. My method uses a cooked caramel—the real deal—that stays silky and never grainy. It’s the same technique I use for crème caramel, and it makes all the difference. The persimmons soften into this jammy, honey-sweet layer that’s worlds apart from the crunchy, undercooked fruit you get in standard versions.
This isn’t just good cake—it’s the kind that makes people ask for the recipe before they’ve finished their first slice. It’s comfort food that feels fancy, which is exactly what you want when you’re hosting. No stress, no complicated techniques, just a dessert that makes you look like a pastry chef.
What Ingredients You Will Need
This recipe relies on simple, high-quality ingredients that work together to create something greater than the sum of their parts. Most of these are pantry staples, with the persimmons being the seasonal star that makes everything special.
For the Caramel Layer
- 1 cup (200g) granulated sugar — regular white sugar works best here. Don’t substitute brown sugar; it has too much moisture and will make the caramel grainy.
- 1/4 cup (60ml) water — just tap water is fine. The water helps the sugar dissolve evenly before it starts caramelizing.
- 3 tablespoons (42g) unsalted butter, cubed — I use Kerrygold for its higher butterfat content, which makes the caramel richer. Cut it into small cubes so it melts evenly.
- 1/2 teaspoon flaky sea salt — Maldon is my go-to. The salt crystals add little bursts of flavor that cut through the sweetness beautifully.
- 1 teaspoon vanilla extract — pure vanilla, not imitation. Nielsen-Massey is worth the splurge here.
For the Persimmon Layer
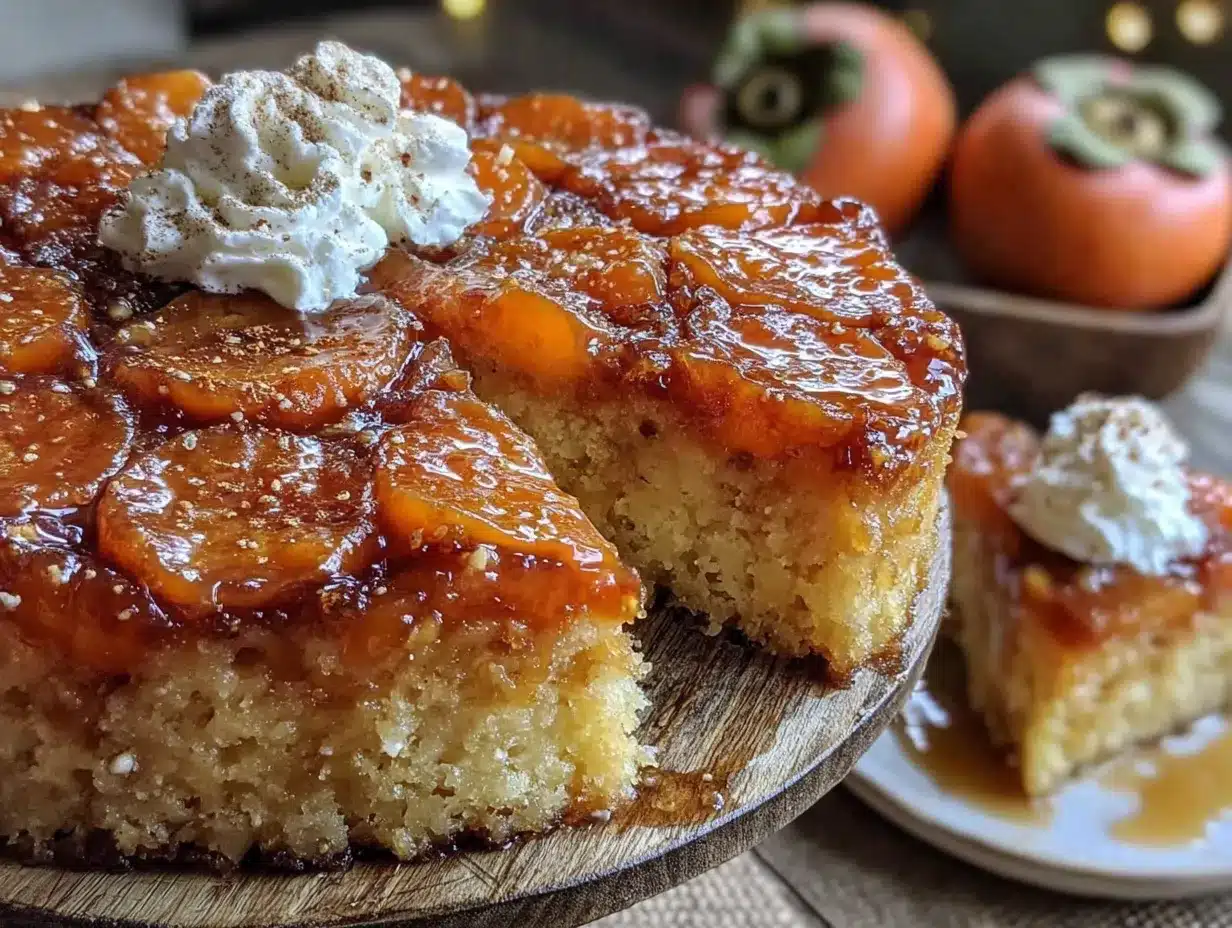
- 3-4 ripe Fuyu persimmons — you want Fuyu, not Hachiya. Fuyu persimmons are squat, tomato-shaped, and firm enough to slice cleanly. They should be deep orange and slightly soft to the touch, like a ripe peach. Hachiya persimmons are acorn-shaped and astringent unless completely mushy—they won’t work here.
- 1 tablespoon fresh lemon juice — this prevents the persimmons from oxidizing and turning brown while you’re assembling the cake. It also brightens their natural sweetness.
For the Cake Batter
- 1 1/2 cups (190g) all-purpose flour — I use King Arthur for consistent results. Spoon and level your flour; don’t scoop directly from the bag or you’ll end up with too much.
- 1 1/2 teaspoons baking powder — make sure it’s fresh. If your baking powder is more than six months old, it won’t give the cake enough lift.
- 1/2 teaspoon baking soda — this helps the cake brown evenly and adds tenderness.
- 1/2 teaspoon salt — fine sea salt, not kosher. It balances the sweetness and enhances the persimmon flavor.
- 1 teaspoon ground cinnamon — I prefer Vietnamese cinnamon for its warm, spicy kick. Regular cinnamon works fine too.
- 1/2 teaspoon ground ginger — this is my secret ingredient. It adds a subtle warmth that pairs perfectly with persimmons without overpowering them.
- 1/4 teaspoon ground cardamom — optional but highly recommended. It adds an almost floral note that makes the cake taste sophisticated.
- 1/2 cup (113g) unsalted butter, softened — room temperature is crucial. Cold butter won’t cream properly and will leave you with a dense cake.
- 3/4 cup (150g) granulated sugar — for the batter. You could use light brown sugar here for a deeper flavor, but I prefer the clean sweetness of white sugar to let the persimmons shine.
- 2 large eggs, room temperature — if you forget to take them out of the fridge, place them in a bowl of warm water for 5 minutes. Cold eggs will seize the batter.
- 1 teaspoon vanilla extract — yes, more vanilla. It rounds out all the flavors.
- 1/2 cup (120ml) buttermilk, room temperature — you can substitute by adding 1 tablespoon of lemon juice to regular milk and letting it sit for 5 minutes. Buttermilk makes the cake incredibly tender.
Equipment Needed
You don’t need fancy equipment for this cake, but a few specific tools make the process smoother. Here’s what I use every time I make this:
- 9-inch round cake pan — a light-colored metal pan works best for even caramelization. Dark pans can cause the caramel to burn before the cake is done. I use a Fat Daddio’s anodized aluminum pan that I’ve had for years.
- Small saucepan — for making the caramel. A light-colored pan helps you see the color changes as the sugar caramelizes. My stainless steel All-Clad is perfect for this.
- Stand mixer or hand mixer — you can absolutely cream the butter and sugar by hand, but it takes about 8 minutes of vigorous whisking. I use my KitchenAid for convenience.
- Sharp knife and cutting board — a serrated knife works best for slicing persimmons cleanly without crushing them.
- Offset spatula — not essential, but it makes spreading the caramel and arranging the persimmons much easier. A regular butter knife works in a pinch.
- Cooling rack — for cooling the cake upside down. If you don’t have one, use a wire rack from your oven.
- Serving plate with a lip — the caramel will pool slightly when you flip the cake, so a plate with a rim catches any drips.
If you don’t have a stand mixer, don’t worry. A hand mixer or even a sturdy whisk and some elbow grease will get the job done. The cake is forgiving—it won’t punish you for not having professional equipment.
Preparation Method
This recipe has three main components: the caramel, the persimmon arrangement, and the cake batter. I’ve broken it down step by step so you can follow along without any surprises. Trust me, I’ve made every mistake possible so you don’t have to.
Step 1: Make the Caramel
Start by placing the sugar and water in a small saucepan. Swirl the pan gently to combine—don’t stir with a spoon, as this can cause crystallization. Place the pan over medium heat and let it come to a boil without touching it. You’ll see the sugar dissolve completely as the mixture becomes clear.
After about 5-7 minutes, the mixture will start to turn amber around the edges of the pan. This is where you need to watch carefully. Swirl the pan occasionally to distribute the heat evenly, but don’t stir. The caramel is ready when it reaches a deep amber color—think the color of a new penny or dark honey. If you have a candy thermometer, it should read 350°F (177°C).
Immediately remove the pan from heat and carefully whisk in the cubed butter. The mixture will bubble up violently—that’s normal. Keep whisking until the butter is fully incorporated and the caramel is smooth. Stir in the flaky salt and vanilla extract. The caramel will be thin and pourable at this point, but it will thicken as it cools.
Pro tip: If the caramel seizes or becomes grainy, don’t panic. Add a tablespoon of warm water and whisk gently over low heat until it smooths out. I’ve saved more caramels this way than I care to admit.
Step 2: Prepare the Persimmons
While the caramel cools slightly, prepare your persimmons. Wash them gently and pat them dry. Cut off the tops and bottoms, then slice them crosswise into rounds about 1/4-inch thick. You should get about 4-5 slices from each persimmon, depending on their size.
Toss the slices in a small bowl with the lemon juice to prevent browning. Don’t skip this step—oxidized persimmons turn an unappealing gray-brown color that will show through the caramel.
Step 3: Assemble the Bottom Layer
Pour the warm caramel into your cake pan and tilt it to coat the bottom evenly. The caramel should be about 1/4-inch deep. Let it cool for 2-3 minutes until it’s slightly thicker but still pourable.
Arrange the persimmon slices on top of the caramel in a single, overlapping layer. Start from the outside edge and work your way in, creating concentric circles. Don’t leave gaps—the persimmons will shrink slightly as they bake, so overlapping them slightly ensures full coverage. If you have extra slices, tuck them into any bare spots.
Step 4: Make the Cake Batter
Preheat your oven to 350°F (177°C) with a rack in the center position. In a medium bowl, whisk together the flour, baking powder, baking soda, salt, cinnamon, ginger, and cardamom. Set aside.
In the bowl of a stand mixer fitted with the paddle attachment, cream the softened butter and sugar together on medium speed until light and fluffy—about 3-4 minutes. The mixture should look pale and increased in volume. Scrape down the sides of the bowl halfway through.
Add the eggs one at a time, beating well after each addition. The batter might look slightly curdled at this point—that’s okay. Add the vanilla extract and mix to combine.
With the mixer on low speed, add the dry ingredients in three additions, alternating with the buttermilk in two additions. Start and end with the dry ingredients. Mix just until combined—overmixing will make the cake tough. Fold the batter once or twice with a rubber spatula to catch any pockets of flour hiding at the bottom of the bowl.
Step 5: Bake the Cake
Gently spoon the batter over the persimmon layer and spread it evenly with an offset spatula. The batter will be thick—don’t worry about disturbing the persimmon arrangement. Just spread it gently from the center outward.
Bake for 35-40 minutes, or until a toothpick inserted into the center comes out clean or with a few moist crumbs. The top should be golden brown and spring back when lightly pressed. If the top is browning too quickly after 25 minutes, tent the pan loosely with aluminum foil.
Step 6: The Flip
This is the moment of truth. Remove the cake from the oven and let it cool in the pan for exactly 5 minutes—no longer. If you wait too long, the caramel will set and the cake will stick.
Run a thin knife around the edge of the pan to loosen the cake. Place your serving plate upside down on top of the pan. Using oven mitts, hold the pan and plate together firmly and flip them over in one confident motion. Let the pan sit on top of the plate for 30 seconds without lifting it—this gives the caramel time to drip down onto the cake.
Slowly lift the pan off. If any persimmon slices stick to the pan, gently nudge them back into place with a knife. Don’t worry if the caramel pools around the edges—that’s the best part for scooping up later.
Cooking Tips & Techniques
After seventeen attempts, I’ve learned a few things the hard way. Here’s what I wish someone had told me before I started this obsession:
Choose your persimmons carefully. Fuyu persimmons should be firm but give slightly under pressure—like a ripe peach. If they’re rock hard, they won’t soften enough during baking and will leave you with crunchy, unpleasant slices. If they’re too soft, they’ll turn into mush. The sweet spot is when they’re deep orange and yield gently when squeezed.
Don’t rush the caramel. I’ve burned more caramels than I want to count because I walked away for “just a second.” Stay by the stove. Watch the color. The caramel goes from perfect to burnt in about 30 seconds. If you’re nervous, pull it off the heat when it’s a shade lighter than you think it should be—the residual heat will continue cooking it.
Room temperature ingredients matter. I know, I know—every recipe says this. But here’s why: cold eggs and cold buttermilk will seize the butter in your batter, leaving you with a dense, greasy cake. Set everything out 30 minutes before you start. Your cake will be noticeably lighter and fluffier.
Let the caramel cool slightly before adding the persimmons. If you pour the persimmons into hot caramel, they’ll start cooking immediately and release too much liquid, making the caramel watery. Let the caramel cool for 2-3 minutes until it’s warm but not hot.
Trust the flip. The first time I made an upside-down cake, I was so nervous I lifted the pan too quickly and half the cake stayed behind. Let the pan sit on the plate for a full 30 seconds before lifting. The weight of the pan helps the caramel release evenly.
Make it ahead. This cake actually tastes better the next day. The persimmons continue to soften and the caramel soaks into the cake, creating this incredible sticky-sweet texture. Bake it the morning of your dinner party and let it cool completely before covering it loosely with foil.
Variations & Adaptations
One of the best things about this cake is how adaptable it is. Here are some variations I’ve tried and loved:
Apple-Persimmon Combo : Swap half the persimmons for thinly sliced Honeycrisp or Fuji apples. The apples add a tartness that balances the sweet persimmons beautifully. I did this for a Thanksgiving potluck and it was the first dessert to disappear.
Gluten-Free Version : Substitute the all-purpose flour with a 1:1 gluten-free baking flour blend. I’ve had great results with King Arthur’s Measure for Measure flour. Add an extra tablespoon of buttermilk to compensate for the drier gluten-free flour.
Dairy-Free Adaptation : Use vegan butter (I like Miyoko’s) and substitute the buttermilk with 1/2 cup oat milk mixed with 1 tablespoon lemon juice. The cake will be slightly less tender but still delicious. Skip the butter in the caramel and use coconut oil instead—it adds a subtle tropical note that works surprisingly well.
Spiced Winter Version : Add 1/4 teaspoon of ground cloves and 1/8 teaspoon of nutmeg to the flour mixture. This makes the cake taste like holiday baking. I serve this version with a dollop of brandied whipped cream for Christmas dinner.
Individual Mini Cakes : Divide the caramel, persimmons, and batter among 6-8 greased ramekins or a jumbo muffin tin. Bake for 18-22 minutes, or until a toothpick comes out clean. These are perfect for dinner parties where everyone wants their own little cake.
Peach Summer Version : When persimmons aren’t in season, substitute with ripe but firm peaches or nectarines. Peel them first, slice them 1/4-inch thick, and proceed with the recipe as written. The caramel-peach combination is absolutely stunning.
Serving & Storage Suggestions
This cake is best served warm, but it’s also incredible at room temperature. Here’s how I like to serve it:
Serving Temperature : Let the cake cool for at least 20 minutes after flipping before slicing. Warm cake will fall apart if you cut it too soon. Room temperature is actually ideal—the caramel sets slightly and the flavors meld together perfectly.
Presentation : Serve each slice with a generous spoonful of the caramel that’s pooled on the plate. Add a dollop of lightly sweetened whipped cream or a scoop of vanilla bean ice cream—the cold creaminess against the sticky cake is pure magic. For a grown-up touch, drizzle a little bourbon or Calvados over the top.
What to Serve With It : This cake is rich enough to stand alone, but it pairs beautifully with a cup of strong coffee or a glass of dessert wine like late-harvest Riesling or Sauternes. For a brunch spread, serve it alongside a cheese board with sharp cheddar and dried figs.
Storage : Cover the cake tightly with plastic wrap or store it in an airtight container at room temperature for up to 3 days. The caramel will continue to soak into the cake, making it even more delicious over time. I actually prefer it on day two.
Reheating : To reheat individual slices, microwave them for 15-20 seconds. For a whole cake, warm it in a 300°F (150°C) oven for 10-12 minutes, covered loosely with foil. The caramel will become pourable again.
Freezing : This cake freezes beautifully. Wrap it tightly in plastic wrap, then in aluminum foil, and freeze for up to 3 months. Thaw overnight in the refrigerator and reheat gently before serving. I always make two—one for now, one for later.
Nutritional Information & Benefits
Let’s be honest—this is a dessert, not a health food. But there are some surprising benefits hidden in that sticky-sweet slice:
Per serving (1/8 of cake) : Approximately 380 calories, 18g fat, 52g carbohydrates, 5g protein, 2g fiber, 32g sugar. These are estimates and will vary based on your specific ingredients.
Persimmon Benefits : Persimmons are packed with vitamin A (great for eye health), vitamin C (immune support), and antioxidants called flavonoids. They also contain fiber, which helps slow down sugar absorption. So yes, this cake has fruit in it—that counts for something, right?
Dietary Considerations : This recipe contains dairy, eggs, and gluten. For a dairy-free version, see the variations section above. The cake is naturally nut-free, making it safe for most allergy-friendly gatherings. It’s also vegetarian.
Moderation Mindset : I believe in enjoying real food in reasonable portions. This cake is meant for celebrations and gatherings—not everyday eating. One slice with good company is worth more than a whole box of processed snacks eaten alone at midnight. Trust me, I’ve done both.
Conclusion
This sticky caramel persimmon upside-down cake isn’t just a recipe—it’s the result of seventeen tries, one closed bakery, and a whole lot of determination. It’s the cake I bring to every dinner party, the one friends request for their birthdays, the one that makes people close their eyes and say “oh wow” after the first bite.
What I love most about it is how it brings people together. There’s something about flipping that pan and revealing those jewel-toned persimmons that makes everyone at the table lean in. It’s a moment. And when you’re hosting, those moments are everything.
I’d love to hear how this cake turns out for you. Did you try a variation? Did your guests fight over the last slice? Drop a comment below and tell me about it. And if you make it for your next gathering, tag me in your photos—I want to see those beautiful caramel-drenched persimmons.
Go ahead, make the cake. Your guests will thank you. And honestly? You’ll thank yourself too.
Frequently Asked Questions
Can I use Hachiya persimmons instead of Fuyu?
No, I really don’t recommend it. Hachiya persimmons are astringent and mouth-puckering unless they’re completely, almost-overripe soft. Even then, they’re too mushy to slice neatly for this cake. Stick with Fuyu persimmons—they’re firm, sweet, and hold their shape beautifully during baking.
Why did my caramel crystallize?
Crystallization happens when sugar granules get into the melting syrup and cause the whole thing to seize. To prevent this, don’t stir the sugar and water while it’s heating—just swirl the pan gently. Also, make sure your pan and utensils are completely clean. Any tiny particle can trigger crystallization. If it does happen, add a tablespoon of water and whisk gently over low heat until it smooths out.
Can I make this cake without a stand mixer?
Absolutely. A hand mixer works perfectly, and you can even make it by hand with a whisk and some patience. The key is creaming the butter and sugar until light and fluffy—this takes about 5-8 minutes by hand. It’s a great arm workout, honestly.
How do I know when the persimmons are ripe enough?
Ripe Fuyu persimmons should be deep orange all over and yield slightly when you press them gently—like a ripe peach or a firm avocado. They shouldn’t be mushy or have any green patches. If they’re still pale orange and rock hard, let them sit at room temperature for a few days until they ripen.
Can I double this recipe for a larger crowd?
Yes! Double all the ingredients and bake it in a 9×13-inch pan. The baking time will increase to about 45-50 minutes. Keep an eye on it and test with a toothpick starting at 40 minutes. This is my go-to for holiday gatherings—it serves about 16 people generously.
Pin This Recipe!
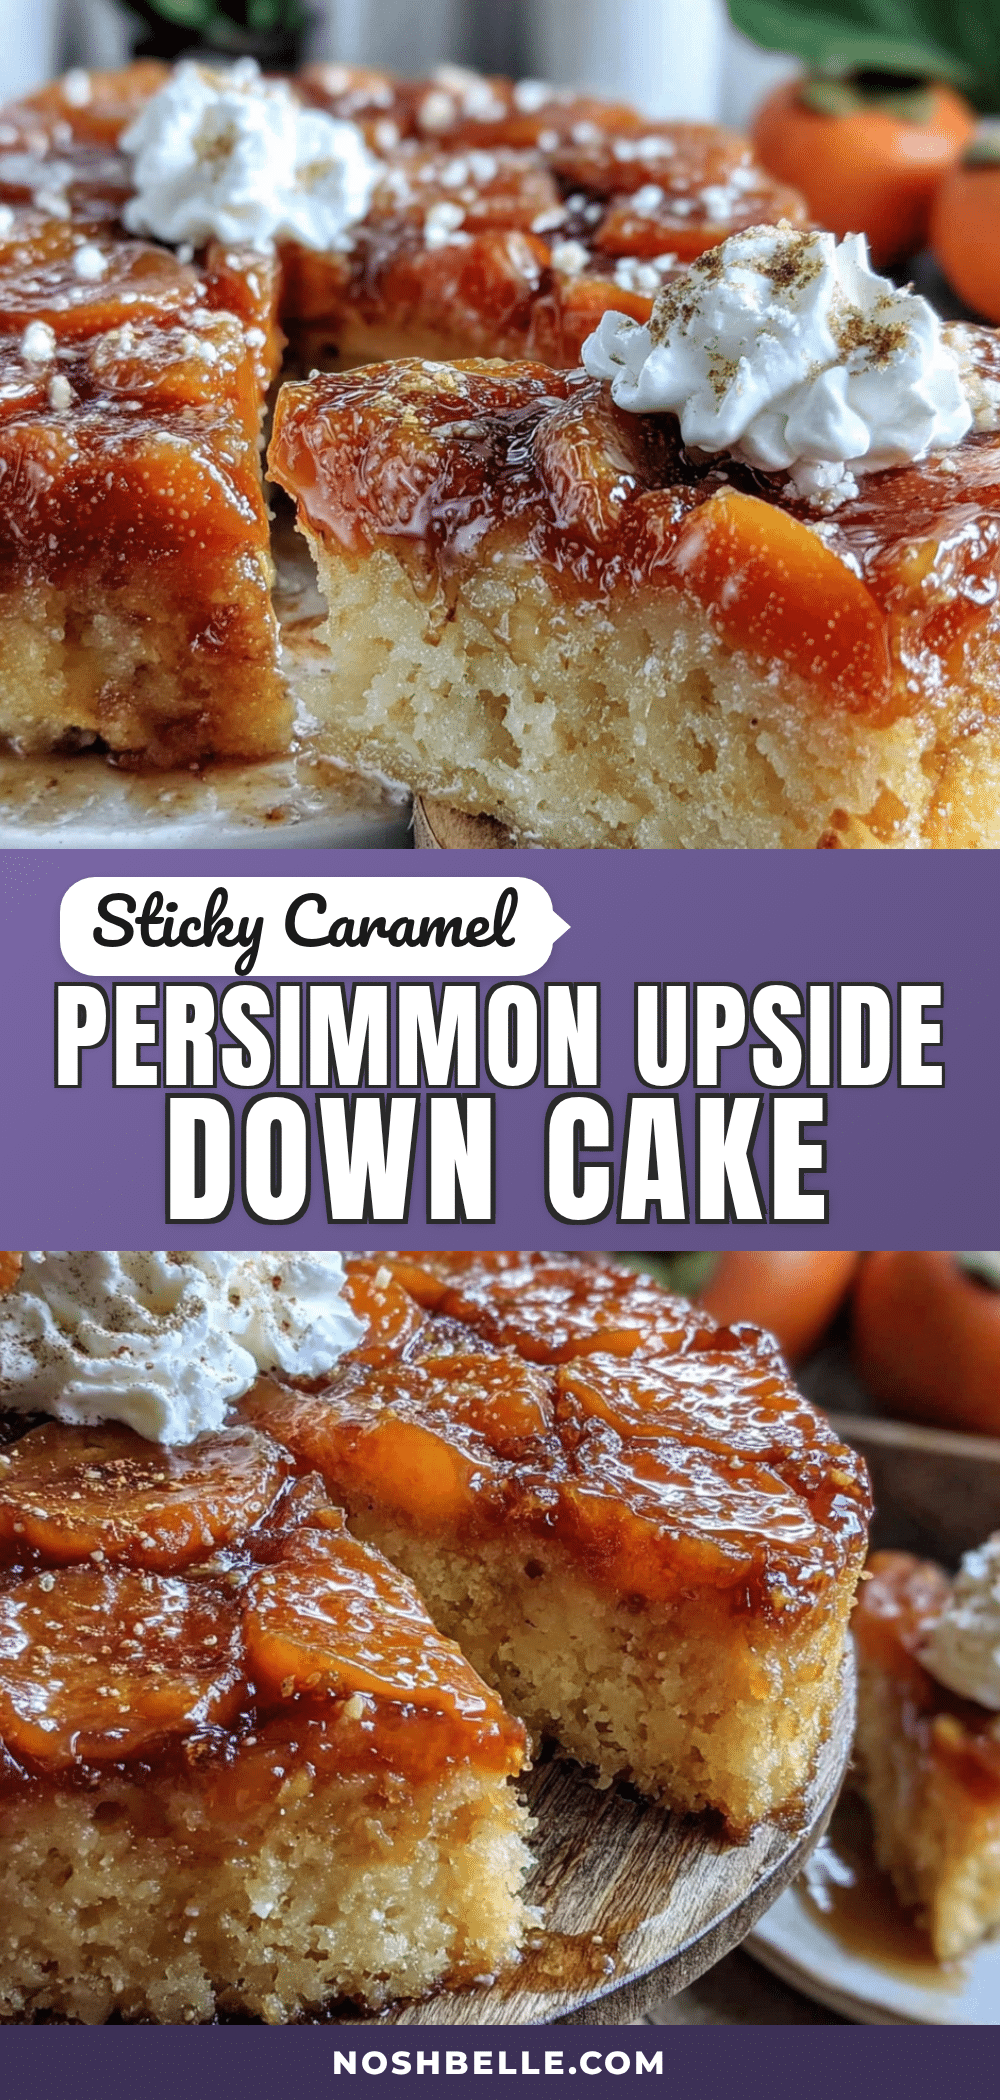
Easy Sticky Caramel Persimmon Upside-Down Cake Recipe

A stunning upside-down cake featuring jewel-toned Fuyu persimmons and a silky, buttery caramel that seeps into every bite. This recipe, perfected after seventeen tries, delivers a showstopping dessert that looks like you spent hours on it but comes together in about 20 minutes of active prep.
- Prep Time: 20 minutes
- Cook Time: 35-40 minutes
- Total Time: 55-60 minutes
- Yield: 8 servings 1x
- Category: Dessert
- Cuisine: American
Ingredients
- 1 cup (200g) granulated sugar
- 1/4 cup (60ml) water
- 3 tablespoons (42g) unsalted butter, cubed
- 1/2 teaspoon flaky sea salt
- 1 teaspoon vanilla extract
- 3–4 ripe Fuyu persimmons
- 1 tablespoon fresh lemon juice
- 1 1/2 cups (190g) all-purpose flour
- 1 1/2 teaspoons baking powder
- 1/2 teaspoon baking soda
- 1/2 teaspoon salt
- 1 teaspoon ground cinnamon
- 1/2 teaspoon ground ginger
- 1/4 teaspoon ground cardamom
- 1/2 cup (113g) unsalted butter, softened
- 3/4 cup (150g) granulated sugar
- 2 large eggs, room temperature
- 1 teaspoon vanilla extract
- 1/2 cup (120ml) buttermilk, room temperature
Instructions
- Make the caramel: Place sugar and water in a small saucepan. Swirl gently to combine. Bring to a boil over medium heat without stirring. Cook until deep amber (350°F/177°C), about 5-7 minutes. Remove from heat, whisk in cubed butter (mixture will bubble), then stir in flaky salt and vanilla extract.
- Prepare persimmons: Wash, dry, and slice Fuyu persimmons crosswise into 1/4-inch rounds. Toss with lemon juice to prevent browning.
- Assemble bottom layer: Pour warm caramel into a 9-inch round cake pan, tilting to coat bottom evenly. Let cool 2-3 minutes. Arrange persimmon slices in overlapping concentric circles on top of caramel.
- Make cake batter: Preheat oven to 350°F (177°C). Whisk together flour, baking powder, baking soda, salt, cinnamon, ginger, and cardamom. In a stand mixer, cream softened butter and sugar until light and fluffy (3-4 minutes). Add eggs one at a time, beating well after each. Add vanilla. With mixer on low, add dry ingredients in three additions alternating with buttermilk in two additions, starting and ending with dry ingredients. Mix just until combined.
- Bake: Gently spoon batter over persimmons and spread evenly. Bake 35-40 minutes until a toothpick inserted in center comes out clean. If top browns too quickly, tent with foil after 25 minutes.
- Flip: Cool cake in pan for exactly 5 minutes. Run a knife around edges. Place serving plate upside down on pan, hold firmly, and flip in one confident motion. Let pan sit on plate for 30 seconds, then slowly lift off. Nudge any stuck persimmon slices back into place.
Notes
Choose Fuyu persimmons that are deep orange and slightly soft. Don’t rush the caramel; watch it closely as it goes from perfect to burnt in about 30 seconds. Room temperature ingredients are crucial for a light, fluffy cake. Let the caramel cool 2-3 minutes before adding persimmons. Trust the flip: let the pan sit on the plate for 30 seconds before lifting. The cake tastes even better the next day.
Nutrition
- Serving Size: 1 slice (1/8 of cake
- Calories: 380
- Sugar: 32
- Sodium: 320
- Fat: 18
- Saturated Fat: 11
- Carbohydrates: 52
- Fiber: 2
- Protein: 5
Keywords: persimmon upside-down cake, caramel cake, fall dessert, Thanksgiving dessert, persimmon recipe, easy cake, dinner party dessert