The class bake sale was in twelve hours and I’d completely forgotten. My daughter had reminded me three times, but between work, homework, and the dog needing stitches, it had slipped right out of my head. I was standing in my kitchen at nine PM, staring into the fridge like it might magically produce something worthy of the “Best Baked Goods” ribbon that the PTA moms competed for every year.
Let’s be honest — those moms bring bakery-level stuff. I’m talking fondant flowers and macarons that look like they came from a Parisian patisserie. I had a box of strawberry cake mix, a carton of heavy cream that was about to expire, and some fresh strawberries that were slightly past their prime. Not exactly a winning combination.
But here’s the thing about being a tired mom on a budget — you get creative. I remembered my grandmother’s shortcake recipe from when I was a kid, the one she’d make when strawberries were cheap at the farmer’s market. And these Kid-Approved Strawberry Shortcake Cupcakes were born out of pure desperation, a half-empty pantry, and a prayer that my daughter wouldn’t be embarrassed at school the next day.
I won’t lie — I was nervous dropping them off. The cupcake stand next to mine had elaborate chocolate ganache creations with gold leaf. Mine looked simple, almost humble. But by pickup time, my container was empty and three moms asked for the recipe. The best part? My daughter told me they were “the only good thing at the whole bake sale.” Kids don’t lie about food, you know. If they love it, it’s real.
Maybe you’ve been there — scrambling for something that tastes amazing without breaking the bank or spending all night in the kitchen. That’s exactly what these cupcakes are. They’re the recipe that saves you when you need it most.
Why You’ll Love This Recipe
These aren’t just another cupcake recipe. After testing this about six times (yes, my family ate cupcakes for breakfast that week), I can tell you exactly why these work so well for real families.
- Budget-Friendly Ingredients: You probably have most of this stuff already. Cake mix goes on sale constantly, and heavy cream is cheaper than you think when you buy it in larger containers. Fresh strawberries are affordable in season, but frozen work just fine too.
- Under 30 Minutes: From start to finish, these come together fast. The hardest part is waiting for them to cool enough to frost. I’ve made these on school mornings for classroom parties — that’s how quick they are.
- Picky Eater Approved: My youngest won’t eat anything with “chunks” or “weird textures.” But these cupcakes? She eats three. The strawberry pieces blend right in, and the whipped cream frosting is light enough that kids don’t complain about it being “too sweet” or “gross.”
- Feeds a Crowd: This recipe makes 24 cupcakes, which is perfect for birthday parties, potlucks, or just having leftovers for the week. And they freeze beautifully — more on that later.
- No Fancy Equipment: You don’t need a stand mixer or piping bags. A hand mixer and a ziplock bag with the corner snipped off works perfectly. I’ve made these in a hotel room once — that’s how forgiving this recipe is.
What makes these different from every other strawberry cupcake recipe out there? It’s the texture. The cake stays moist for days (if they last that long), and the combination of fresh strawberry pieces and light whipped cream frosting feels like summer in your mouth. It’s not heavy or cloying — it’s the kind of dessert that makes you close your eyes after the first bite.
Honestly, this is comfort food that works for real life. It’s not about impressing anyone — though you will. It’s about making something delicious without the stress.
What Ingredients You Will Need
This recipe uses simple, honest ingredients that work together to create something special. Nothing fancy here — just smart choices that taste good and don’t hurt your wallet.
For the Cupcakes:
- 1 box (15.25 oz) strawberry cake mix (I prefer Duncan Hines or Betty Crocker for texture)
- 3 large eggs, room temperature (this matters for fluffiness — set them out 30 minutes before)
- 1/2 cup vegetable oil (not olive oil — it’s too strong for this recipe)
- 1 cup water (or substitute with milk for richer cupcakes)
- 1 cup fresh strawberries, finely diced (about 6-8 medium berries)
- 1 tablespoon all-purpose flour (to coat the strawberries — prevents them from sinking to the bottom)
For the Whipped Cream Frosting:
- 2 cups heavy whipping cream, cold (must be cold — warm cream won’t whip properly)
- 1/2 cup powdered sugar (adds sweetness without grittiness)
- 1 teaspoon vanilla extract (pure vanilla is worth the extra dollar here)
- 1/4 cup cream cheese, softened (optional but recommended — stabilizes the whipped cream so it holds its shape longer)
For Garnish:
- 12-16 fresh strawberries, halved or sliced (for topping each cupcake)
- Optional: Sprinkles or a light dusting of powdered sugar
Here’s the thing about substitutions — they work, but you need to be smart about it. If you’re using frozen strawberries, don’t thaw them first. Toss them frozen in the flour and fold them in quickly. Thawed berries release too much liquid and will make your cupcakes soggy.
For a dairy-free version, use coconut cream instead of heavy whipping cream (chill the can overnight and scoop the solid part). The texture is slightly different but still delicious. I tested this for a friend’s kid with a dairy allergy and honestly, I couldn’t tell the difference.
If you can’t find strawberry cake mix, white or vanilla cake mix works fine — just add an extra teaspoon of strawberry extract or a tablespoon of strawberry jam to the batter. My sister-in-law swears by this trick, and her cupcakes are always a hit.
One more tip — buy your strawberries on sale and freeze the extras. I keep a bag in my freezer specifically for baking. They’re cheaper, and honestly, frozen berries hold up better in baked goods than fresh ones do.
Equipment Needed
You don’t need a fancy kitchen to make these. Here’s what you’ll need:
- Muffin pans (two 12-cup pans or bake in batches)
- Paper cupcake liners (the cheap ones work fine — just don’t use the foil ones, they stick)
- Large mixing bowl (any bowl works, but glass or metal is best)
- Hand mixer or stand mixer (hand mixer is totally fine — that’s what I use)
- Measuring cups and spoons (the basic set from the dollar store works)
- Sharp knife and cutting board for dicing strawberries
- Small bowl for coating strawberries in flour
- Rubber spatula for folding (helps prevent overmixing)
- Piping bag or large ziplock bag (the ziplock trick works perfectly)
- Cooling rack (or just a clean dish towel on the counter)
- Offset spatula or butter knife for frosting
I’ve made these in kitchens with zero fancy equipment — including a cabin with only a hand whisk and a camping stove. The key is preparation, not equipment. If you don’t have a cooling rack, flip a muffin pan upside down and use the gaps. Desperate times, you know?
For the piping bag hack — just fill a gallon ziplock bag with frosting, snip about half an inch off one corner, and squeeze. It’s not fancy, but it works. My daughter actually prefers the “squiggly” look from the ziplock method over the professional piping.
Preparation Method
Let me walk you through this step by step. I’ve made these so many times I could do it in my sleep — and trust me, I practically have.
Step 1: Preheat and Prep (5 minutes)
Preheat your oven to 350°F (175°C). Line your muffin pans with paper liners — this recipe makes 24 cupcakes, so have both pans ready. If you only have one pan, just bake in batches and keep the extra batter at room temperature while you wait.
Step 2: Prep the Strawberries (5 minutes)
Wash and dry your fresh strawberries thoroughly. Dice them into small pieces — about the size of a pea. You want them small enough to distribute evenly but big enough that you get a strawberry piece in every bite. Toss them in the tablespoon of flour until they’re lightly coated. This step is crucial — without the flour coating, they’ll sink to the bottom of your cupcakes and create a soggy mess. I learned this the hard way my first time.
Step 3: Make the Batter (5 minutes)
In your large mixing bowl, combine the strawberry cake mix, eggs, vegetable oil, and water. Beat on medium speed for about 2 minutes until smooth. The batter should be thick but pourable — if it seems too thick, add another tablespoon of water. If it’s too thin, add a tablespoon of flour. Don’t overmix — overmixing makes tough cupcakes. Just until everything comes together.
Step 4: Fold in the Strawberries (2 minutes)
Using your rubber spatula, gently fold the floured strawberry pieces into the batter. Fold just until they’re distributed — about 8 to 10 strokes. You’ll see little pink streaks from the strawberry juice, which is exactly what you want. Don’t stir vigorously or you’ll break up the berries and turn the batter pink.
Step 5: Fill and Bake (18-20 minutes)
Fill each cupcake liner about two-thirds full. I use a cookie scoop for this — it’s faster and gives even portions. Bake at 350°F for 18-20 minutes. The cupcakes are done when a toothpick inserted in the center comes out clean or with just a few moist crumbs. The tops should be golden and spring back when lightly touched.
Here’s a tip — rotate your pans halfway through baking. My oven has hot spots, and the back row always bakes faster than the front. Just a quick turn at the 10-minute mark makes a huge difference.
Step 6: Cool Completely (30 minutes)
Let the cupcakes cool in the pan for 5 minutes, then transfer them to a cooling rack. They need to be completely cool before you frost them — warm cupcakes will melt your whipped cream into a sad puddle. I’ve made that mistake. It’s not pretty. If you’re in a hurry, pop them in the fridge for 15 minutes.
Step 7: Make the Frosting (10 minutes)
While the cupcakes cool, make your whipped cream frosting. In a large chilled bowl (pop it in the freezer for 5 minutes if you remember), combine the cold heavy cream, powdered sugar, and vanilla extract. If you’re using cream cheese for stability, beat it first until smooth, then add the cream mixture.
Beat on medium-high speed until stiff peaks form — about 3-4 minutes. You’ll know it’s ready when you lift the beaters and the cream stands up in peaks without drooping. Be careful not to overbeat, or you’ll end up with butter. Trust me, I’ve done it. It’s still delicious but not pretty.
Step 8: Frost and Garnish (10 minutes)
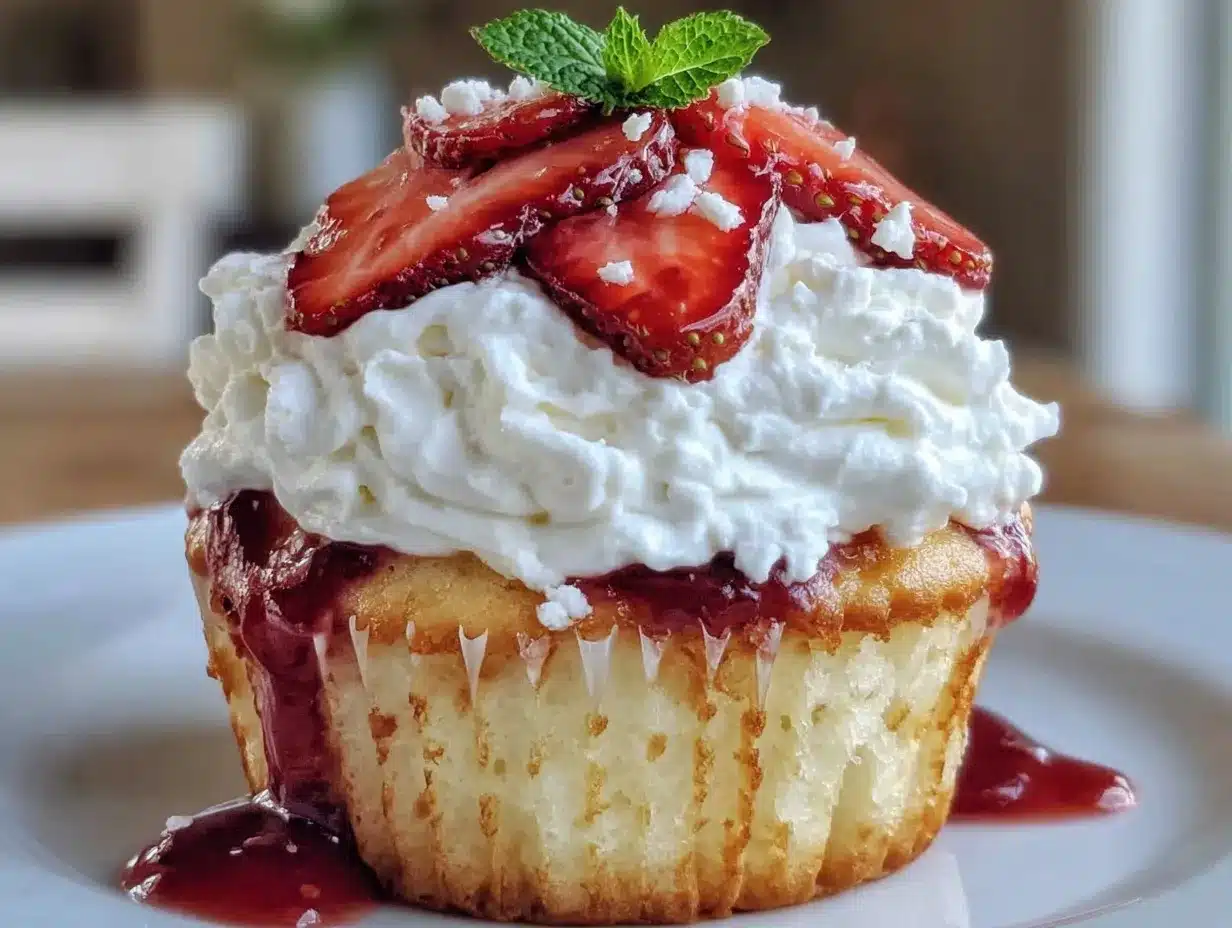
Transfer your frosting to a piping bag or ziplock bag. Pipe a generous swirl onto each cooled cupcake. Top each with a fresh strawberry half or slice. If you’re feeling fancy, add a light dusting of powdered sugar or some rainbow sprinkles. My kids love the sprinkles — it makes them feel like real bakery cupcakes.
And that’s it! Twenty-four cupcakes that taste like you spent hours on them, but really took about 45 minutes total.
Cooking Tips & Techniques
After making these probably twenty times now, I’ve learned a few things the hard way. Let me save you the trouble.
Room Temperature Eggs Matter
I know, I know — who has time to let eggs sit out? But cold eggs don’t incorporate as well into the batter, which means your cupcakes won’t rise as high. If you forget (like I always do), put the eggs in a bowl of warm water for 5 minutes. Problem solved.
Don’t Overmix the Batter
This is probably the most common mistake people make with box mix cupcakes. Overmixing develops the gluten too much and creates tough, dense cupcakes. Mix just until the dry ingredients are incorporated — a few lumps are totally fine. They’ll bake out.
The Flour Coating Trick
I mentioned this before, but it’s worth repeating — coat your diced strawberries in flour before adding them to the batter. This prevents them from sinking to the bottom during baking. Every single strawberry piece stays suspended in the cake. It’s a game-changer.
Cold Cream is Happy Cream
For the whipped cream frosting, everything needs to be cold. The bowl, the beaters, the cream. If your kitchen is warm, put the bowl in the freezer for 10 minutes before you start. Warm cream won’t whip into stiff peaks — it’ll just stay runny and sad.
Fill Evenly
Use a cookie scoop or measuring cup to fill your cupcake liners. Eyeballing it leads to some cupcakes overflowing and others looking sad and flat. I use a #40 cookie scoop — it gives the perfect amount every time.
The Toothpick Test
Start checking your cupcakes at 16 minutes. Every oven runs differently, and overbaked cupcakes are dry. The toothpick should come out with a few moist crumbs — not clean and not wet batter. That sweet spot makes all the difference.
One more thing — don’t skip the cooling step. I know it’s tempting to frost them while they’re still warm, but you’ll regret it. Warm cupcakes + cold frosting = melty mess. Patience, my friend.
Variations & Adaptations
This recipe is flexible — here are some ways to make it your own:
Chocolate Strawberry Shortcake:
Use chocolate cake mix instead of strawberry. The chocolate and strawberry combination is incredible — like chocolate-covered strawberries in cupcake form. My neighbor tried this version and now refuses to make them any other way.
Lemon Berry Cupcakes:
Use lemon cake mix and add blueberries instead of strawberries. The lemon and blueberry combination is bright and fresh — perfect for spring. Add a teaspoon of lemon zest to the frosting for extra punch.
Gluten-Free Version:
Use a gluten-free yellow or white cake mix. Most brands work well — just follow the package instructions for the egg and oil amounts. The flour coating for the strawberries can be replaced with rice flour or cornstarch. I tested this with King Arthur’s gluten-free mix and honestly couldn’t tell the difference.
Dairy-Free Version:
Replace the heavy cream with full-fat coconut cream (chill a can of coconut milk overnight and scoop the solid part). Use dairy-free cake mix — most box mixes are actually dairy-free, but check the label. The texture is slightly different but still delicious.
Mini Cupcake Version:
Use mini muffin pans and bake for 10-12 minutes instead of 18-20. This makes about 48 mini cupcakes — perfect for parties or school events. Kids love the bite-sized version.
Strawberry Cream Filling:
For an extra-special version, core the center of each cooled cupcake and fill with strawberry jam or fresh strawberry compote before frosting. It adds a burst of strawberry flavor in every bite. My daughter calls these “surprise cupcakes.”
I tried the lemon blueberry version last summer and it was a hit at our neighborhood block party. The bright citrus flavor cuts through the sweetness perfectly. Plus, blueberries are usually cheaper than strawberries in the summer, so it’s even more budget-friendly.
Serving & Storage Suggestions
These cupcakes are best served the same day you make them, but they’ll keep for a couple days if stored properly.
Serving Temperature:
Serve at room temperature or slightly chilled. If they’ve been in the fridge, let them sit out for 15 minutes before serving — the cake softens up and the frosting becomes lighter. Cold cupcakes taste fine, but room temperature is where the magic happens.
Presentation Ideas:
Arrange them on a pretty cake stand or platter. Garnish with extra fresh strawberries and mint leaves if you have them. For parties, I like to put them on a tiered stand — it makes them look fancy without any extra effort.
Refrigerator Storage:
Store unfrosted cupcakes in an airtight container at room temperature for up to 3 days. Frosted cupcakes need to be refrigerated — the whipped cream will spoil otherwise. Place them in a single layer in an airtight container and they’ll keep for 2-3 days.
Freezer Instructions:
These freeze beautifully. Freeze unfrosted cupcakes in a freezer-safe bag for up to 3 months. When you’re ready to serve, thaw them at room temperature (about 2 hours) and frost them fresh. You can also freeze the frosted cupcakes — just place them on a baking sheet in the freezer until solid, then transfer to a freezer bag. Thaw in the fridge overnight.
Reheating Tips:
If you want that fresh-from-the-oven warmth, microwave an unfrosted cupcake for 10-15 seconds. Don’t microwave the frosted ones — the whipped cream will melt. For frosted cupcakes, just let them come to room temperature naturally.
Flavor Development:
Honestly, these cupcakes taste even better the next day. The strawberry flavor melds with the cake overnight, creating a deeper, more complex taste. My family fights over the day-old ones. Something about the strawberries releasing their juice into the cake overnight — it’s pure magic.
One more thing — if you’re taking these to a party, assemble them at the destination if possible. Transport the cupcakes and frosting separately, then frost and garnish when you arrive. They’ll look fresher and won’t get smushed in the car.
Nutritional Information & Benefits
I’m not a nutritionist, but here’s what I can tell you about these cupcakes based on standard ingredient calculations.
Per Cupcake (approximate):
- Calories: 220-250
- Fat: 14g
- Carbohydrates: 28g
- Protein: 3g
- Sugar: 18g
- Fiber: 1g
Health Benefits:
Strawberries are packed with vitamin C and antioxidants — so technically, you’re getting some nutrition with your dessert. The heavy cream provides calcium and vitamin D. And the eggs add protein. Is it health food? No. But it’s not the worst thing you could eat either.
Dietary Considerations:
These cupcakes contain gluten, dairy, and eggs. For gluten-free and dairy-free versions, check the variations section above. They’re not low-carb or keto-friendly, but they are nut-free (as long as your cake mix doesn’t contain nuts — check the label).
Portion Control:
One cupcake is a reasonable dessert portion. Two is pushing it. Three means you’re having a rough week and nobody’s judging. I’ve been there.
Personal Wellness Perspective:
Look, I believe in balance. We eat healthy meals most of the time, but dessert is part of life. These cupcakes use simple ingredients without weird preservatives or artificial flavors (if you choose a clean cake mix). They’re made with love and real food — and that counts for something.
Conclusion
These Kid-Approved Strawberry Shortcake Cupcakes saved me that night before the bake sale, and they’ve been saving me ever since. They’re proof that you don’t need fancy ingredients, expensive equipment, or hours of time to make something that people genuinely love.
What I love most about this recipe is how forgiving it is. Mess up the frosting? It still tastes amazing. Overbake them slightly? Nobody’s complaining. The combination of soft strawberry cake, fresh berries, and light whipped cream is just inherently delicious — it’s hard to get wrong.
I’d love to hear how these turn out for you! Did your kids love them? Did you try a fun variation? Drop a comment below and let me know — I read every single one and I answer questions too. If you share photos on social media, tag me so I can see your beautiful creations.
And hey — if you’re making these for a bake sale, school event, or just because it’s Tuesday and you deserve something sweet, know that you’ve got this. Simple food made with love always wins. Happy baking, friend!
Frequently Asked Questions
Can I use frozen strawberries instead of fresh?
Yes, absolutely! Use frozen strawberries straight from the freezer — don’t thaw them first. Toss them in flour while frozen and fold them into the batter quickly. Frozen berries actually hold up better in baking because they don’t get mushy as fast.
Why did my strawberries sink to the bottom?
This usually happens when you skip the flour coating step. The flour creates a barrier that helps the strawberry pieces stay suspended in the batter. Also, make sure your batter isn’t too thin — if it’s runny, add a tablespoon of flour to thicken it up.
Can I make these ahead of time for a party?
Definitely! Bake the cupcakes up to 2 days ahead and store them unfrosted in an airtight container. Make the frosting the day of your event and frost them a few hours before serving. For best results, add the fresh strawberry garnish just before serving so they look their prettiest.
How do I keep the whipped cream frosting from deflating?
The cream cheese trick works wonders — it stabilizes the whipped cream so it holds its shape for hours. Also, make sure your cream is very cold and don’t overbeat it. If your kitchen is hot, work quickly and pop the frosted cupcakes in the fridge to set.
Can I use a different cake mix flavor?
Absolutely! White, yellow, or vanilla cake mix all work great. If you’re using a non-strawberry mix, add a teaspoon of strawberry extract or a tablespoon of strawberry jam to the batter for extra flavor. Lemon cake mix with blueberries is another amazing combination.
Pin This Recipe!
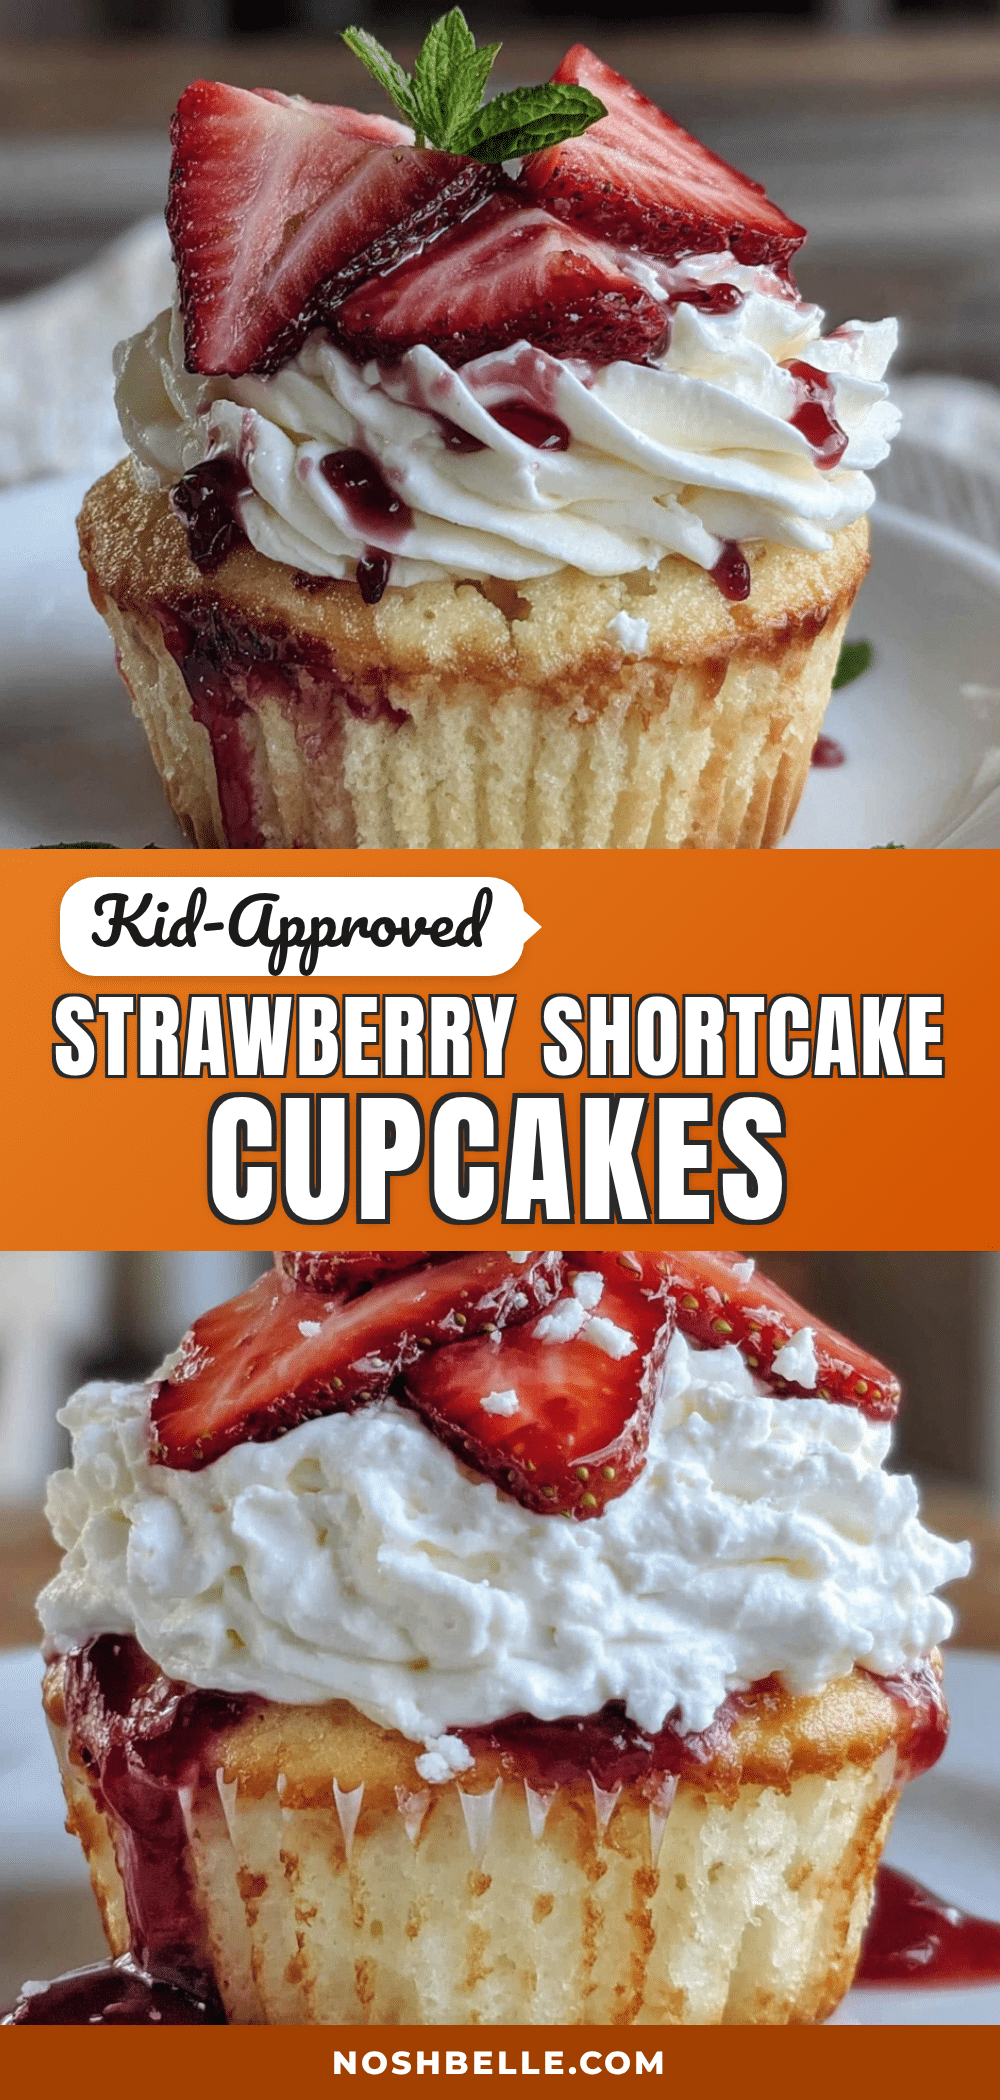
Kid-Approved Strawberry Shortcake Cupcakes (Budget-Friendly & Easy)
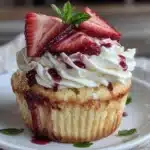
These easy strawberry shortcake cupcakes are made with a boxed cake mix, fresh strawberries, and a light whipped cream frosting. They’re budget-friendly, ready in under 30 minutes, and perfect for bake sales, parties, or any occasion.
- Prep Time: 15 minutes
- Cook Time: 20 minutes
- Total Time: 35 minutes
- Yield: 24 servings 1x
- Category: Dessert
- Cuisine: American
Ingredients
- 1 box (15.25 oz) strawberry cake mix (Duncan Hines or Betty Crocker recommended)
- 3 large eggs, room temperature
- 1/2 cup vegetable oil
- 1 cup water (or milk for richer cupcakes)
- 1 cup fresh strawberries, finely diced (about 6–8 medium berries)
- 1 tablespoon all-purpose flour (to coat strawberries)
- 2 cups heavy whipping cream, cold
- 1/2 cup powdered sugar
- 1 teaspoon vanilla extract
- 1/4 cup cream cheese, softened (optional, for stabilizing frosting)
- 12–16 fresh strawberries, halved or sliced (for garnish)
- Optional: sprinkles or powdered sugar for garnish
Instructions
- Preheat oven to 350°F (175°C). Line two 12-cup muffin pans with paper liners.
- Wash and dry strawberries. Dice into small pea-sized pieces. Toss with 1 tablespoon flour until lightly coated.
- In a large bowl, combine cake mix, eggs, vegetable oil, and water. Beat on medium speed for 2 minutes until smooth.
- Gently fold floured strawberries into batter with a rubber spatula until just distributed (8-10 strokes).
- Fill each cupcake liner about two-thirds full. Bake for 18-20 minutes, rotating pans halfway through, until a toothpick inserted in center comes out clean or with a few moist crumbs.
- Cool cupcakes in pan for 5 minutes, then transfer to a cooling rack. Cool completely before frosting.
- For frosting: In a chilled bowl, beat cold heavy cream, powdered sugar, and vanilla extract on medium-high speed until stiff peaks form (3-4 minutes). If using cream cheese, beat it first until smooth, then add cream mixture.
- Transfer frosting to a piping bag or ziplock bag with corner snipped. Pipe a generous swirl onto each cooled cupcake. Top each with a fresh strawberry half or slice. Add sprinkles or powdered sugar if desired.
Notes
For best results, use room temperature eggs and cold heavy cream. Coat strawberries in flour to prevent sinking. Do not overmix batter. Cool cupcakes completely before frosting. Frosted cupcakes keep in the refrigerator for 2-3 days. Unfrosted cupcakes can be frozen for up to 3 months.
Nutrition
- Serving Size: 1 cupcake
- Calories: 235
- Sugar: 18
- Sodium: 220
- Fat: 14
- Saturated Fat: 7
- Carbohydrates: 28
- Fiber: 1
- Protein: 3
Keywords: strawberry shortcake cupcakes, easy cupcakes, budget-friendly dessert, bake sale recipe, kid-approved dessert, strawberry dessert, whipped cream frosting