I wasn’t expecting cooking advice from the quiet man who lived three doors down, but there I was, standing in my driveway holding a bag of groceries, listening to Mr. Henderson describe exactly how to make the perfect roasted acorn squash. It was a crisp Tuesday afternoon in late October, and I’d just pulled into my driveway after a chaotic trip to the farmers market. My hands were full of kale, apples, and a few acorn squashes I’d grabbed on a whim—honestly, because they looked pretty stacked in that wooden bin. Mr. Henderson, who I’d only ever seen watering his petunias or shuffling out for the newspaper, shuffled over with a slow, deliberate step. He pointed a gnarled finger at the squash poking out of my bag and said, “You know, most people ruin those.”
I laughed, thinking he was joking. He wasn’t. He then proceeded to tell me, in the most matter-of-fact way, that his wife had taught him the trick to making acorn squash taste like something you’d actually crave—not just a sad, watery vegetable you eat because you feel like you should. He mentioned brown sugar, butter, and a tiny pinch of salt in a way that sounded almost poetic. I mean, the man was a retired accountant. The last thing I expected was a masterclass in squash from someone whose main hobby seemed to be trimming his hedges. But there I was, groceries getting heavy in my arms, completely captivated by his description of caramelized edges and a filling so good it could pass for dessert.
That night, I made his version of roasted acorn squash. Let me tell you, it was a game-changer. The squash came out tender, not mushy. The brown sugar butter melted into every nook and cranny, creating these little pockets of sticky sweetness that made me close my eyes after the first bite. Maybe you’ve been there—you find a recipe from the most unexpected source, and it becomes the one you turn to again and again. That’s this squash for me. It’s the dish I bring to Friendsgiving, the side I make when I want to impress without stress, and honestly, the thing I look forward to most about fall. Mr. Henderson moved away a few years ago, but every time I make this roasted acorn squash, I think of him standing in his driveway, sharing a little piece of his wife’s kitchen wisdom with a neighbor he barely knew.
Why You’ll Love This Recipe
This isn’t just another roasted squash recipe. After testing this method about a dozen times—yes, really—I can tell you it’s the one that works every single time. The combination of simple ingredients and a few smart techniques makes all the difference. Here is why this perfect roasted acorn squash with brown sugar butter will become your new fall favorite:
- Quick & Easy : You only need about 10 minutes of active prep time. The oven does the rest of the work. Perfect for busy weeknights when you want a comforting side without the fuss.
- Simple Ingredients : No fancy grocery trips needed. You probably already have brown sugar, butter, and salt in your kitchen. The squash itself is easy to find at any grocery store or farmers market during fall.
- Perfect for Fall Gatherings : This dish shines at Thanksgiving, Friendsgiving, or any cozy autumn dinner. It looks impressive on the table but takes almost no effort to pull off.
- Crowd-Pleaser : Even people who claim they don’t like squash end up asking for seconds. The brown sugar butter filling is that good—it turns skeptics into believers.
- Unbelievably Delicious : The texture is what gets me every time. The edges get slightly caramelized and chewy, while the center stays soft and almost custard-like. It’s comfort food in vegetable form.
What makes this recipe different from the rest? It’s the method. Most recipes tell you to just cut the squash in half and roast it with a pat of butter. That works, but it’s not great. My version uses a simple trick: you rub the cut sides with a little butter and brown sugar before roasting, then add more of the mixture halfway through. This creates layers of flavor and that gorgeous caramelized finish. I’ve tested it with different sweeteners and fats, and this combination of brown sugar and unsalted butter is the winner. It’s not just another version—it’s my best version, and I’m pretty sure Mr. Henderson would agree.
This recipe is also the kind that makes you feel good about eating your vegetables. It’s wholesome, seasonal, and satisfying in a way that a salad just can’t match. Perfect for impressing guests without stress, or turning a simple Tuesday dinner into something memorable. Honestly, it’s the side dish that steals the show.
What Ingredients You Will Need
This perfect roasted acorn squash recipe uses just a handful of simple ingredients to deliver big, bold flavor. The magic happens when the brown sugar and butter melt together, creating a sweet, sticky glaze that pairs perfectly with the squash’s natural nuttiness. Here is everything you will need:
For the Squash
- 2 medium acorn squashes (about 1.5 to 2 pounds each) — Look for squashes that feel heavy for their size and have a deep green color with some orange patches. That orange color means they’re ripe and sweet. I prefer organic when I can find them, but conventional works just fine.
- 1 tablespoon olive oil — A light coating helps the seasoning stick and promotes even browning. You can use avocado oil if you prefer.
- 1/2 teaspoon salt — I use fine sea salt. It dissolves better than kosher salt for this application. Don’t skip it—salt balances the sweetness.
- 1/4 teaspoon black pepper — Freshly ground is best. It adds a tiny bit of warmth that complements the brown sugar.
For the Brown Sugar Butter Filling
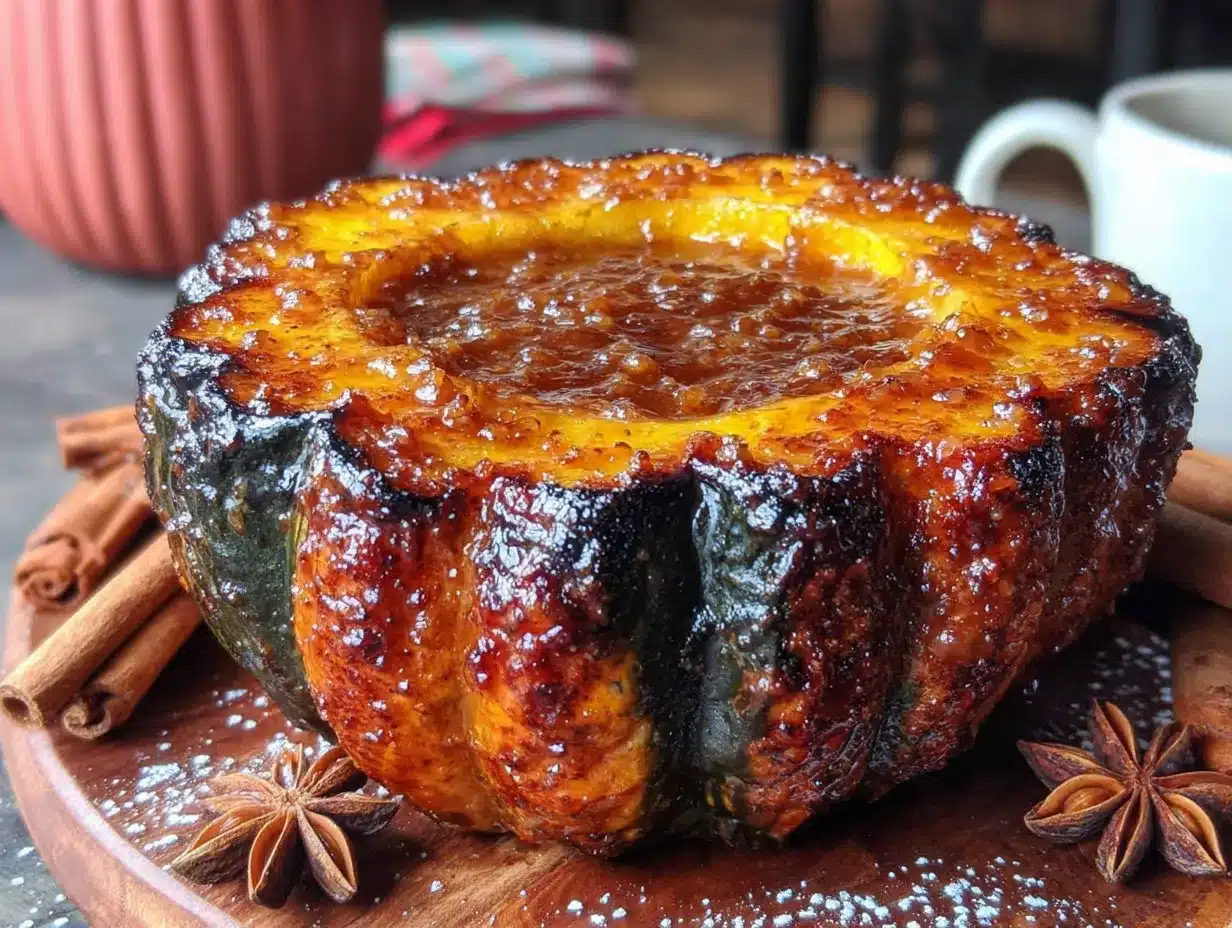
- 4 tablespoons unsalted butter, softened — I recommend using a good quality butter like Kerrygold or Plugrà. The butter flavor really shines here, so don’t use the cheap stuff. Let it sit out for 30 minutes to soften before mixing.
- 1/4 cup packed light brown sugar — Light brown sugar gives a milder molasses flavor that doesn’t overpower the squash. Dark brown sugar works too, but it will be more intense. I’ve tried both, and light brown sugar is my preference for this recipe.
- 1/2 teaspoon ground cinnamon — Adds warmth and depth. You can skip it if you’re not a cinnamon fan, but it really rounds out the flavor.
- 1/4 teaspoon ground nutmeg — Freshly grated is amazing if you have it. The pre-ground stuff works in a pinch.
- Pinch of salt — Just a tiny pinch to balance the sweetness. Trust me on this one.
Optional Garnishes
- Fresh thyme or rosemary sprigs — For a savory twist. I sometimes add a few leaves on top before serving.
- Toasted pecans or walnuts — Adds crunch and a nutty flavor that pairs beautifully with the squash.
- A drizzle of maple syrup — If you want extra sweetness, a light drizzle right before serving is lovely.
I want to mention that the quality of your brown sugar matters here. I’ve noticed that cheaper brands tend to be drier and clump more, which makes it harder to create a smooth butter mixture. I recommend using a brand like Domino or C&H. Also, if your butter is too cold, it won’t mix well with the brown sugar. Take the time to let it soften properly—it makes a real difference in how the filling spreads into the squash cavities.
For substitutions, you can use salted butter and just reduce the added salt. Coconut sugar works as a substitute for brown sugar if you’re avoiding refined sugars, though the flavor will be slightly different. And if you’re dairy-free, a good quality plant-based butter works surprisingly well here. I’ve tested it with Miyoko’s and it was delicious.
Equipment Needed
You don’t need any fancy gadgets to make this perfect roasted acorn squash. Here is what you will need:
- A sharp chef’s knife — Acorn squash are tough. A sharp, heavy knife makes cutting them in half much safer and easier. I use my 8-inch Wusthof chef’s knife. A dull knife is dangerous here—it can slip off the hard skin.
- A large cutting board — Preferably one with a non-slip bottom. You need a stable surface to cut the squash safely.
- A sturdy spoon or ice cream scoop — For scooping out the seeds and stringy pulp. An ice cream scoop works better than a regular spoon because the curved edge gets into all the nooks.
- A rimmed baking sheet — I recommend a half-sheet pan (18×13 inches). A rimmed pan is important because the brown sugar butter can bubble up and spill over. Line it with parchment paper for easier cleanup.
- A small bowl — For mixing the brown sugar butter filling.
- A pastry brush or spoon — For spreading the butter mixture onto the squash. A brush gives you more even coverage, but a spoon works just fine.
- Aluminum foil — For tenting the squash if it starts browning too quickly.
If you don’t have a pastry brush, no worries. I’ve used the back of a spoon many times and it works perfectly. Also, if you don’t have a rimmed baking sheet, you can use a large baking dish. Just make sure it has some sides to catch any drips. Trust me, you don’t want brown sugar butter dripping onto the bottom of your oven. I learned that lesson the hard way.
Preparation Method
Making this perfect roasted acorn squash is straightforward, but a few small details make all the difference. Follow these steps carefully, and you will have the best squash of your life.
- Preheat your oven to 400°F (200°C). Position the rack in the middle of the oven. Getting the temperature right is crucial—too low and the squash will steam instead of caramelizing; too high and the sugar will burn before the squash is tender.
- Prepare the squash. Wash the acorn squashes thoroughly under cold water and pat them dry. Using your sharp chef’s knife, carefully cut each squash in half from stem to tip. This takes some muscle—go slowly and use a rocking motion. Be very careful with your fingers. Once cut, use your sturdy spoon to scoop out all the seeds and stringy pulp. Discard the seeds (or save them for roasting later—they make a great snack!).
- Season the cut sides. Drizzle the cut sides of the squash halves with the olive oil. Use your fingers or a brush to rub it evenly over the entire cut surface. Season with the salt and black pepper. This step is easy to skip, but don’t. The oil helps the squash brown, and the salt brings out its natural sweetness.
- Make the brown sugar butter. In your small bowl, combine the softened unsalted butter, packed light brown sugar, ground cinnamon, ground nutmeg, and the tiny pinch of salt. Mash and stir with a fork until everything is well combined and forms a smooth, spreadable paste. It should look like a thick, sandy frosting. If your butter was cold and it’s not coming together, microwave it for 5 to 10 seconds to soften it more.
- Fill the squash cavities. Divide the brown sugar butter mixture evenly among the four squash halves. Spoon it into the cavity where the seeds were, spreading it around so it covers the bottom and a bit up the sides. Don’t worry if it looks like a lot—it will melt and spread as it roasts.
- Roast the squash. Place the squash halves cut-side up on your parchment-lined rimmed baking sheet. Make sure they are stable and not wobbling. If they wobble, you can slice a tiny bit off the bottom to create a flat surface. Roast for 35 to 45 minutes, depending on the size of your squash. Start checking at 35 minutes.
- Baste halfway through. After about 20 minutes of roasting, carefully remove the pan from the oven. Use a spoon to baste the squash with the melted brown sugar butter that has pooled in the cavities. This step is key—it ensures the flavor gets absorbed into the flesh. Return the pan to the oven.
- Check for doneness. The squash is done when the flesh is fork-tender. You should be able to easily pierce the thickest part with a fork or the tip of a knife. The edges should be caramelized and slightly browned, and the butter mixture should be bubbly and thick. If the tops are browning too quickly but the squash isn’t tender yet, loosely tent a piece of foil over the pan for the last 10 minutes of cooking.
- Rest before serving. Remove the pan from the oven and let the squash rest for 5 minutes. This allows the filling to set slightly and makes it easier to handle. The squash will be very hot, so be careful.
- Serve warm. Transfer each squash half to a serving plate. Spoon any remaining brown sugar butter from the cavities over the top. Garnish with fresh thyme, toasted pecans, or a drizzle of maple syrup if desired. Serve immediately.
A few notes from my many trials: If your squash is on the smaller side, start checking at 30 minutes. Larger squashes might need up to 50 minutes. The smell in your kitchen will be incredible—like a warm, spiced bakery. Also, don’t be alarmed if some of the butter mixture bubbles over onto the pan. That’s normal. Just scrape it up and spoon it back over the squash before serving. Waste not, want not.
Cooking Tips & Techniques
After making this perfect roasted acorn squash more times than I can count, I’ve picked up a few tricks that make the process smoother and the results more consistent. Here are my best tips:
Choose the right squash. Not all acorn squashes are created equal. Look for ones that feel heavy for their size—that means they’re dense and will be less watery. The skin should be deep green with some orange or yellow patches. Avoid squashes with soft spots or cuts. Also, smaller squashes tend to be sweeter and more tender. I usually pick ones that are about the size of a large grapefruit.
Microwave trick for easier cutting. If you struggle to cut through the hard squash, try this: pierce the squash a few times with a fork, then microwave it whole for 2 to 3 minutes. This softens the skin just enough to make cutting much easier. Let it cool for a minute before handling. This was a game-changer for me after I nearly slipped with my knife on a particularly stubborn squash.
Don’t overcrowd the pan. Make sure the squash halves have a little space between them on the baking sheet. If they’re crowded, they’ll steam instead of roast, and you won’t get that beautiful caramelization. If you’re making a double batch, use two pans and rotate them halfway through.
Watch the sugar. Brown sugar can burn quickly at high temperatures. If you notice the tops of your squash getting too dark before they’re tender, tent them with foil. I’ve had a few batches where I got distracted and ended up with burnt sugar—it’s not a good look or taste. Set a timer for 20 minutes so you remember to baste and check.
Room temperature butter is non-negotiable. I know I’ve said this before, but it’s worth repeating. Cold butter won’t mix with the brown sugar properly, and you’ll end up with clumps of butter and pockets of dry sugar. Let your butter sit out for at least 30 minutes before you start. If you forgot, cut it into small cubes and microwave for 10 seconds.
One mistake I made early on: I used to pour the butter mixture over the squash instead of spreading it into the cavity. Big mistake. The butter just ran off and pooled on the pan. Spreading it into the cavity ensures it stays in contact with the squash as it melts, infusing the flesh with flavor. Learn from my error.
Variations & Adaptations
This perfect roasted acorn squash recipe is incredibly versatile. Here are some ways to change it up based on your mood, dietary needs, or what you have on hand:
Savory Herb Version. Skip the cinnamon and nutmeg and add 1 teaspoon of fresh chopped rosemary and 1 teaspoon of fresh thyme to the brown sugar butter. The herbs add an earthy, savory note that pairs beautifully with roasted meats. I made this version for a pork roast dinner and it was a hit. You can also add a clove of minced garlic to the butter for extra depth.
Maple Pecan Twist. Replace the brown sugar with 3 tablespoons of pure maple syrup. Mix it with the softened butter and a pinch of cinnamon. After roasting, top with toasted pecans and a drizzle of extra maple syrup. This version is sweeter and feels more like a holiday treat. I’ve brought this to Thanksgiving and it disappeared faster than the mashed potatoes.
Spicy Kick. Add 1/4 teaspoon of cayenne pepper or red pepper flakes to the brown sugar butter mixture. The heat contrasts beautifully with the sweet squash. It’s unexpected but so good. I like to serve this version alongside chili or black bean tacos for a fun flavor combination.
Vegan Adaptation. Use a high-quality vegan butter stick (not the spreadable kind from a tub) and coconut sugar instead of brown sugar. Miyoko’s European Style Cultured Vegan Butter works perfectly. The texture will be slightly different, but the flavor is still amazing. I’ve tested this for a vegan friend’s dinner party and everyone loved it.
Stuffed Squash. After the initial roasting, fill the cavities with a mixture of cooked quinoa, dried cranberries, toasted walnuts, and a little crumbled feta or goat cheese. Return to the oven for 10 minutes to warm through. This turns the squash into a complete vegetarian main dish. It’s perfect for a cozy weeknight dinner.
Air Fryer Method. You can make this in an air fryer! Cut the squash in half, scoop out the seeds, and rub with oil and seasoning. Place cut-side up in the air fryer basket. Cook at 375°F (190°C) for 20 to 25 minutes, then add the brown sugar butter and cook for another 5 to 10 minutes until tender. The cooking time will vary depending on your air fryer model, so check early.
Serving & Storage Suggestions
This perfect roasted acorn squash is best served warm, right out of the oven. The contrast between the hot, tender squash and the melted brown sugar butter is pure magic. Here are my favorite ways to serve and store it:
Serving Temperature. Serve the squash within 10 to 15 minutes of coming out of the oven. It’s at its best when piping hot. If you need to hold it for a bit, keep it in a warm oven (200°F / 95°C) for up to 30 minutes. Just tent it with foil so it doesn’t dry out.
Presentation Ideas. For a beautiful presentation, place each squash half on a small plate or a large platter. Spoon the buttery juices from the pan over the top. Garnish with a sprig of fresh thyme or rosemary and a sprinkle of flaky sea salt like Maldon. The salt crystals add a nice crunch and balance the sweetness. For a more rustic look, serve the squash in a cast iron skillet right at the table.
What to Serve With It. This squash pairs beautifully with roasted chicken, pork chops, or turkey. It’s also great alongside a hearty salad or grain bowl. For a vegetarian meal, serve it with lentil soup or a wild rice pilaf. The sweetness of the squash complements savory and salty dishes perfectly. I love it with my crispy garlic chicken for a fall dinner that feels special but is surprisingly easy.
Storage Instructions. Leftover roasted squash keeps well in the refrigerator. Let it cool completely, then store it in an airtight container. It will stay good for up to 4 days. The flavors actually meld together overnight, so leftovers can be even more delicious the next day.
Reheating Methods. The best way to reheat is in the oven. Place the squash halves on a baking sheet and warm them at 350°F (175°C) for 10 to 15 minutes. You can also reheat them in the microwave, but the texture won’t be as good—the squash can become mushy. If you’re in a hurry, microwave on medium power for 1 to 2 minutes, but know that the caramelized edges will lose their crunch.
Freezing. You can freeze the roasted squash for up to 3 months. Let it cool completely, then wrap each half tightly in plastic wrap and place in a freezer bag. To reheat, thaw in the refrigerator overnight, then warm in the oven as directed above. The texture will be slightly softer after freezing, but the flavor is still wonderful.
Nutritional Information & Benefits
This perfect roasted acorn squash isn’t just delicious—it’s also packed with nutrients. Here is a rough estimate of the nutritional content per serving (one squash half with the brown sugar butter filling):
| Nutrient | Amount per Serving |
|---|---|
| Calories | 220-250 |
| Total Fat | 12g |
| Saturated Fat | 7g |
| Carbohydrates | 32g |
| Fiber | 3g |
| Sugar | 18g |
| Protein | 2g |
| Vitamin A | 45% of Daily Value |
| Vitamin C | 25% of Daily Value |
| Potassium | 15% of Daily Value |
Acorn squash is a nutritional powerhouse. It’s rich in vitamin A, which is essential for eye health and immune function. The orange flesh gets its color from beta-carotene, an antioxidant that your body converts into vitamin A. It’s also a good source of vitamin C, potassium, and fiber. The fiber helps with digestion and keeps you feeling full and satisfied.
The brown sugar and butter do add some sugar and saturated fat, but this is still a wholesome dish. You can reduce the brown sugar to 3 tablespoons if you want a less sweet version. For a lower-fat option, use only 2 tablespoons of butter and add a splash of apple cider or orange juice to the cavity instead. The squash itself is naturally sweet and doesn’t need much help to shine.
This recipe is naturally gluten-free and can be made vegan with the substitutions I mentioned earlier. It’s also nut-free if you skip the pecan garnish. Just be aware of the dairy content if you’re serving someone with a dairy allergy. Overall, this is a side dish you can feel good about serving to your family—it’s real food, made with simple ingredients, and it tastes amazing.
Conclusion
This perfect roasted acorn squash with brown sugar butter is the kind of recipe that makes you look forward to fall all year long. It’s simple enough for a busy weeknight but impressive enough for a holiday table. The combination of tender, caramelized squash and sweet, buttery filling is honestly irresistible. Every time I make it, I think back to that unexpected conversation with Mr. Henderson in my driveway. It’s funny how the best recipes often come from the most unlikely places.
I hope you give this recipe a try. Don’t be afraid to make it your own—add your favorite spices, try different garnishes, or stuff it with grains for a heartier meal. The beauty of this dish is how adaptable it is. And if you make it, I’d love to hear how it turned out. Leave a comment below and let me know if you added your own twist. Did you go the savory route? Did you load it up with toasted pecans? Share your creation with me!
If you enjoyed this recipe, please share it with a friend who loves fall cooking as much as you do. Pin it to your favorite fall recipes board, or tag me in your photos on social media. Your support means the world to me, and it helps other home cooks find this little gem of a recipe. Until next time, happy cooking—and may your kitchen always smell like brown sugar and butter.
Frequently Asked Questions
Can I use butternut squash instead of acorn squash?
Yes, you can substitute butternut squash. Cut it in half lengthwise and scoop out the seeds. The cooking time will be similar, but butternut squash is denser and may need an extra 5 to 10 minutes. The flavor is slightly sweeter and nuttier than acorn squash, which works beautifully with the brown sugar butter.
Do I need to peel the acorn squash before roasting?
No, you do not need to peel acorn squash. The skin is edible and becomes tender after roasting. In fact, leaving the skin on helps the squash hold its shape and makes it easier to handle. Some people enjoy eating the skin, while others prefer to scoop out the flesh. Either way, it’s perfectly fine to leave it on.
Can I make this recipe ahead of time?
You can prepare the squash and the brown sugar butter mixture up to a day in advance. Store the cut squash halves in the refrigerator wrapped in plastic wrap, and keep the butter mixture in a covered bowl. When you’re ready to cook, simply fill the squash and roast as directed. You may need to add 5 to 10 minutes to the cooking time if the squash is cold from the fridge.
Why is my roasted acorn squash watery?
Watery squash is usually a sign of overcrowding on the pan or roasting at too low a temperature. Make sure your oven is fully preheated to 400°F (200°C) and that the squash halves have space between them. The high heat helps evaporate excess moisture and promotes caramelization. Also, choosing squashes that feel heavy for their size can help, as lighter squashes tend to be more watery.
Can I use salted butter instead of unsalted?
Yes, you can use salted butter. Just reduce or omit the added salt in the brown sugar butter mixture. Salted butter typically contains about 1/4 teaspoon of salt per stick, so adjust accordingly. I prefer unsalted butter in this recipe because it gives me more control over the final salt level, but salted butter works perfectly well in a pinch.
Pin This Recipe!
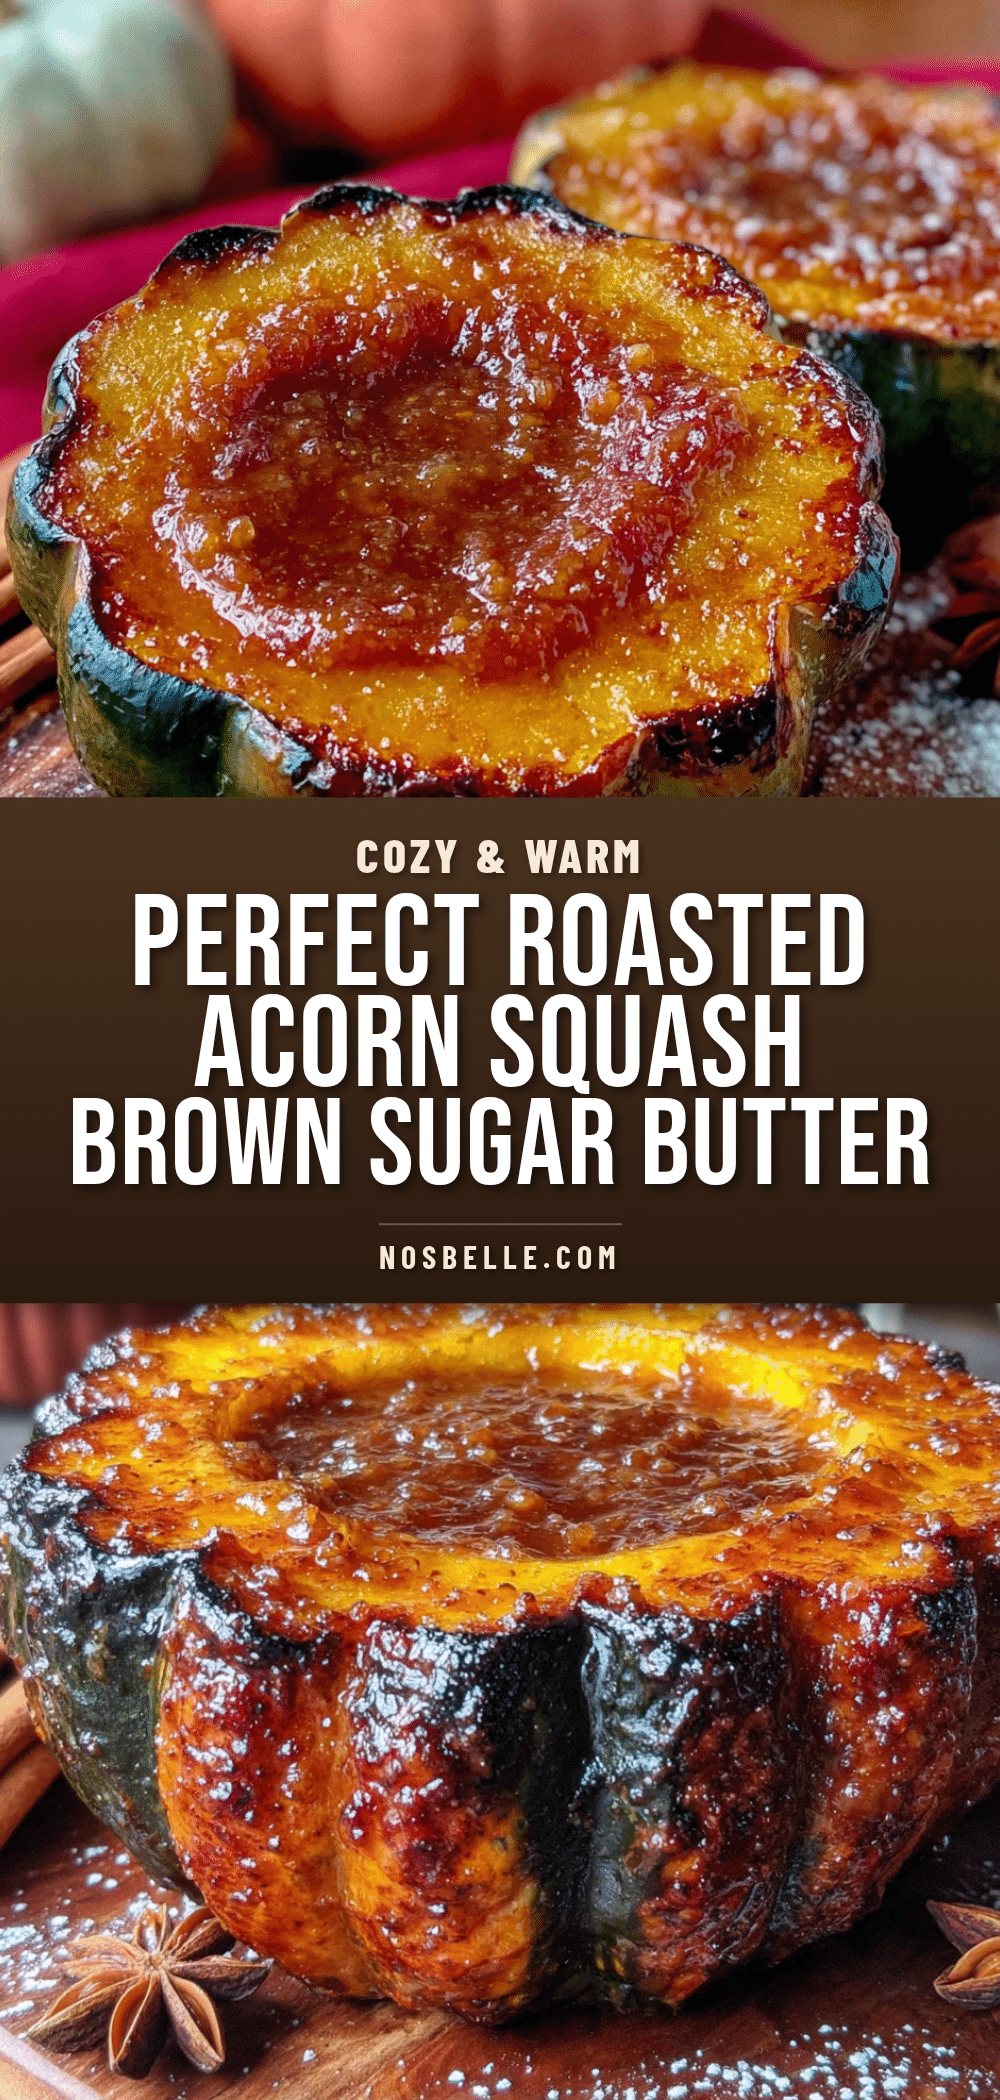
Perfect Roasted Acorn Squash with Easy Brown Sugar Butter
Tender, caramelized acorn squash halves filled with a sweet brown sugar butter mixture. This easy side dish is perfect for fall gatherings and turns squash skeptics into believers.
- Prep Time: 10 minutes
- Cook Time: 35-45 minutes
- Total Time: 45-55 minutes
- Yield: 4 servings 1x
- Category: Side Dish
- Cuisine: American
Ingredients
- 2 medium acorn squashes (about 1.5 to 2 pounds each)
- 1 tablespoon olive oil
- 1/2 teaspoon fine sea salt
- 1/4 teaspoon black pepper, freshly ground
- 4 tablespoons unsalted butter, softened
- 1/4 cup packed light brown sugar
- 1/2 teaspoon ground cinnamon
- 1/4 teaspoon ground nutmeg
- Pinch of salt
- Fresh thyme or rosemary sprigs (optional, for garnish)
- Toasted pecans or walnuts (optional, for garnish)
- Maple syrup (optional, for drizzling)
Instructions
- Preheat your oven to 400°F (200°C). Position the rack in the middle of the oven.
- Wash the acorn squashes thoroughly under cold water and pat them dry. Using a sharp chef’s knife, carefully cut each squash in half from stem to tip. Use a sturdy spoon to scoop out all the seeds and stringy pulp. Discard the seeds.
- Drizzle the cut sides of the squash halves with the olive oil. Rub it evenly over the entire cut surface. Season with the salt and black pepper.
- In a small bowl, combine the softened unsalted butter, packed light brown sugar, ground cinnamon, ground nutmeg, and a tiny pinch of salt. Mash and stir with a fork until well combined and forms a smooth, spreadable paste.
- Divide the brown sugar butter mixture evenly among the four squash halves. Spoon it into the cavity where the seeds were, spreading it around so it covers the bottom and a bit up the sides.
- Place the squash halves cut-side up on a parchment-lined rimmed baking sheet. Roast for 35 to 45 minutes, depending on the size of your squash. Start checking at 35 minutes.
- After about 20 minutes of roasting, carefully remove the pan from the oven. Use a spoon to baste the squash with the melted brown sugar butter that has pooled in the cavities. Return the pan to the oven.
- The squash is done when the flesh is fork-tender. If the tops are browning too quickly but the squash isn’t tender yet, loosely tent a piece of foil over the pan for the last 10 minutes of cooking.
- Remove the pan from the oven and let the squash rest for 5 minutes.
- Transfer each squash half to a serving plate. Spoon any remaining brown sugar butter from the cavities over the top. Garnish with fresh thyme, toasted pecans, or a drizzle of maple syrup if desired. Serve immediately.
Notes
For easier cutting, microwave the whole squash for 2-3 minutes to soften the skin. Room temperature butter is essential for a smooth filling. If the squash wobbles on the pan, slice a tiny bit off the bottom to create a flat surface. Leftovers keep in the refrigerator for up to 4 days; reheat in the oven at 350°F for 10-15 minutes.
Nutrition
- Serving Size: 1 squash half
- Calories: 220250
- Sugar: 18
- Sodium: 300
- Fat: 12
- Saturated Fat: 7
- Carbohydrates: 32
- Fiber: 3
- Protein: 2
Keywords: roasted acorn squash, brown sugar butter, fall side dish, Thanksgiving side, easy squash recipe


