This was supposed to be a traditional pumpkin cheesecake. I had the cream cheese softening, the graham crackers ready to be crushed, and my brand new springform pan sitting there, waiting to prove itself. But somewhere between answering a text from my sister and realizing I was out of granulated sugar—the kind you actually need for a classic cheesecake crust—the whole plan fell apart. I grabbed a package of Biscoff cookies I’d been hoarding for a “special occasion” and, honestly, I was already annoyed at myself for not checking the pantry first. The power went out for a second, the dog barked at nothing, and I was standing there with a bag of crushed cookies thinking, well, this is going to be a disaster.
What came out of the oven was nothing like the plan. And it was better. Way better. These bars had this ridiculous caramelized edge from the Biscoff, a creamy pumpkin swirl that didn’t get lost, and a crumbly top that made me forget I ever wanted a traditional crust. I mean, I almost threw the whole thing in the trash after I dropped the spatula on the floor mid-mixing. But I scraped it back together, baked it anyway, and let me tell you—sometimes the best recipes come from the moments you’re ready to give up. Maybe you’ve been there, staring at a half-mixed bowl of ingredients that were supposed to be something else. These Quick Biscoff Pumpkin Cheesecake Bars are proof that the wrong path can lead to the right place.
I keep making them because they’re the kind of dessert that doesn’t need a special occasion. A Tuesday night, a potluck where you forgot to sign up, a sudden craving for something cozy—they fit. And that first bite, where the spiced pumpkin meets that buttery cookie crunch, is the moment I remember that some of the best things in life are accidents.
Why You’ll Love This Recipe
Let’s be honest—weeknight desserts usually fall into two categories: something from a box or something you regret spending two hours on. These bars are neither. They’re the Goldilocks of fall baking, and here’s why they work so hard for you.
- Quick & Easy: From start to finish, you’re looking at about 45 minutes. No water baths, no chilling for hours, no complicated techniques. Just mix, layer, and bake.
- Simple Ingredients: You probably already have pumpkin puree, cream cheese, and eggs in your kitchen. The Biscoff cookies are the one “special” thing, but they’re easy to find and worth every penny.
- Perfect for Busy Weeknights: This is the dessert you can throw together while dinner is in the oven. By the time you’re done eating, these bars are cool enough to slice.
- Crowd-Pleaser: I’ve brought these to three different gatherings now, and every single time, someone asks for the recipe. Kids love the cookie crust, adults love the sophisticated pumpkin flavor.
- Unbelievably Delicious: The texture is what gets me every time—creamy, slightly dense, with a crumbly top that adds just enough crunch. The Biscoff adds this warm, spiced sweetness that pairs perfectly with the pumpkin.
What makes this recipe different from the dozens of other pumpkin cheesecake bars out there is the crust. Most recipes use graham crackers, which are fine but forgettable. The Biscoff cookies bring a caramelized, almost molasses-like depth that makes the whole dessert feel more complex. Plus, the cookie crumbs get mixed right into the filling, so every bite has that signature flavor.
This isn’t just another pumpkin dessert. It’s the one that makes you close your eyes after the first bite. It’s comfort food reimagined—faster, easier, but with the same soul-soothing satisfaction. Perfect for impressing guests without stress, or turning a simple Wednesday night into something memorable.
What Ingredients You Will Need
This recipe uses simple, wholesome ingredients to deliver bold flavor and satisfying texture without the fuss. Most of these are pantry staples, and the ones that aren’t are easy to find at any grocery store.
- Biscoff cookies (200g / about 2 cups crushed) – These are the star of the crust. I recommend the original Lotus Biscoff cookies for the best flavor. You’ll crush them finely for the crust and reserve a handful for the topping.
- Unsalted butter (6 tablespoons / 85g, melted) – Binds the crust together. Use unsalted so you can control the salt level. If you only have salted butter, just skip adding any extra salt to the crust.
- Cream cheese (16 oz / 450g, softened) – The base of the cheesecake filling. Make sure it’s at room temperature, or you’ll end up with lumps. I like Philadelphia brand for consistent results.
- Granulated sugar (1/2 cup / 100g) – Sweetens the filling without overpowering the pumpkin. You can use coconut sugar for a slightly deeper flavor, but it will change the color.
- Pumpkin puree (1 cup / 240g) – Not pumpkin pie filling. Make sure you grab 100% pure pumpkin puree. Libby’s is my go-to because it’s consistently thick and not watery.
- Large eggs (2, room temperature) – Add structure and richness. Cold eggs can seize the cream cheese mixture, so let them sit out for 15 minutes first.
- Vanilla extract (1 teaspoon) – Enhances all the warm flavors. Use real vanilla if you have it, but imitation works fine here.
- Pumpkin pie spice (1 teaspoon) – You can use store-bought or make your own with cinnamon, nutmeg, ginger, and cloves. I prefer the homemade version because I can adjust the cinnamon ratio.
- Cinnamon (1/2 teaspoon) – Adds extra warmth. I always add a little more than recipes call for because I love the flavor.
- Salt (1/4 teaspoon) – Balances the sweetness and brings out the pumpkin flavor. Don’t skip it.
Ingredient Selection Tips: When buying pumpkin puree, look for cans that feel heavy for their size—that means less water content. If your puree looks watery, drain it on a paper towel for a few minutes before using. For the Biscoff cookies, the classic ones work best, but the caramelized version adds an extra layer of sweetness if you want to experiment.
Substitution Guidance: Need a gluten-free option? Use gluten-free Biscoff cookies (they exist!) and check your pumpkin puree label. For a dairy-free version, use vegan butter and dairy-free cream cheese—just know the texture will be slightly softer. If you can’t find Biscoff, speculoos cookies are almost identical.
Equipment Needed
You don’t need a fancy kitchen to make these bars. Here’s what you’ll need:
- 8×8 inch baking pan – This is the perfect size for these bars. A 9×9 works too, but the bars will be slightly thinner and may bake faster.
- Parchment paper – Lining the pan makes lifting the bars out so much easier. Trust me, you don’t want to fight with stuck-on cheesecake.
- Mixing bowls (2-3) – One for the crust, one for the filling, and maybe one for the topping.
- Electric mixer or whisk – A hand mixer makes the filling smooth in minutes, but a strong arm and a whisk work too. I’ve done both.
- Food processor or zip-top bag – For crushing the cookies. A food processor gives you fine, even crumbs. A rolling pin over a zip-top bag works in a pinch, but expect some bigger chunks.
- Spatula – For spreading the filling evenly. A rubber spatula is best for scraping every last bit.
- Measuring cups and spoons – Precision matters in baking, even for a quick recipe.
Budget-Friendly Options: If you don’t have a food processor, don’t stress. Place the cookies in a zip-top bag, remove the air, and crush them with a rolling pin or even a heavy pan. It’s a little more work, but the rustic texture adds character. Also, a glass baking dish works just as well as a metal one—just reduce the oven temperature by 25°F to prevent over-browning.
Preparation Method
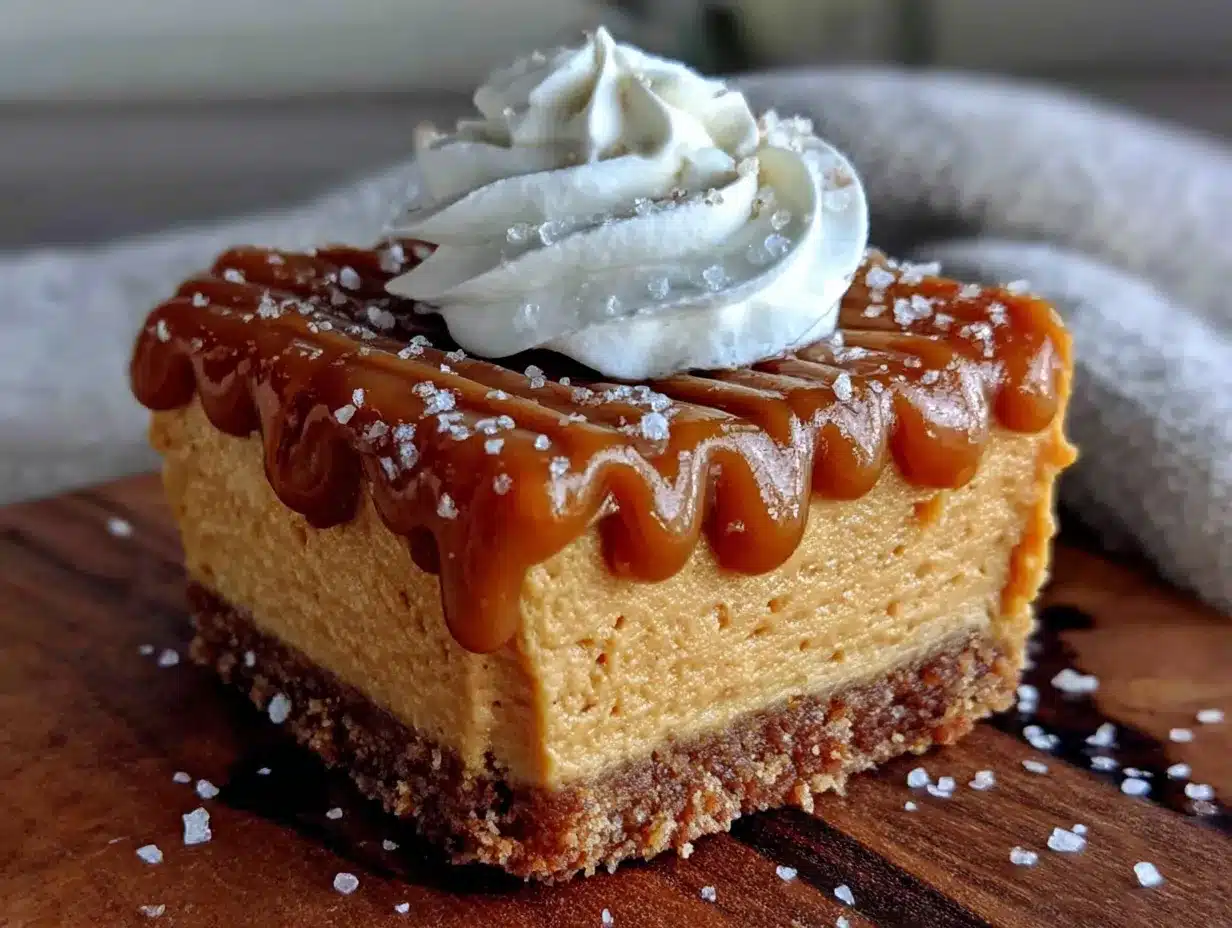
Let’s get these bars in the oven. The whole process takes about 45 minutes, and most of that is hands-off baking time.
- Preheat your oven to 350°F (175°C). Line your 8×8 baking pan with parchment paper, leaving some overhang on two sides. This creates “handles” for lifting the bars out later.
- Make the crust. Crush 150g (about 1 1/2 cups) of Biscoff cookies into fine crumbs. You want them as even as possible—no big chunks. Mix the crumbs with 6 tablespoons of melted butter until every crumb is coated. Press the mixture firmly into the bottom of your prepared pan. Use the bottom of a measuring cup to really pack it down. Bake for 8 minutes, then set aside to cool slightly.
- Start the filling. In a large bowl, beat the softened cream cheese with 1/2 cup of granulated sugar until smooth. This takes about 2 minutes with an electric mixer. Scrape down the sides and bottom of the bowl—cream cheese loves to hide there.
- Add the pumpkin and eggs. Mix in the pumpkin puree, then add the eggs one at a time, mixing on low speed after each. Over-mixing at this stage can incorporate too much air, which leads to cracks. Just mix until combined.
- Add the flavorings. Stir in the vanilla extract, pumpkin pie spice, cinnamon, and salt. Give it one final mix until everything is uniform. The batter should be smooth and slightly thick.
- Assemble the bars. Pour the filling over the pre-baked crust and spread it evenly. Take the remaining 50g (about 1/2 cup) of crushed Biscoff cookies and sprinkle them over the top. Don’t press them in—just let them sit there.
- Bake. Place the pan in the preheated oven and bake for 28-32 minutes. The edges should be set, but the center should still jiggle slightly when you shake the pan. That’s normal—it will continue to set as it cools.
- Cool completely. Let the bars cool on a wire rack for at least 30 minutes at room temperature, then transfer to the refrigerator for at least 2 hours. This step is non-negotiable if you want clean slices. The bars need to be fully chilled to firm up.
- Slice and serve. Use the parchment handles to lift the entire block out of the pan. Slice into 9 or 16 squares, depending on how generous you’re feeling. Wipe your knife clean between cuts for the neatest edges.
Sensory Cues: When the crust is ready, it should smell toasty and buttery. The filling should be thick enough to hold its shape when you spoon it, but not stiff. When you pull the bars out of the oven, the top should look slightly matte, and the edges should be just starting to pull away from the pan.
Personal Tip: I always set a timer for 28 minutes and check every 2 minutes after that. Ovens vary, and over-baked cheesecake gets dry. If the top starts browning too quickly, tent the pan loosely with foil for the last 5 minutes.
Cooking Tips & Techniques
I’ve made these bars enough times to know where things can go wrong. Here are the lessons I learned the hard way:
Room temperature ingredients matter. I know, I know—every recipe says this. But I once tried to rush it with cold cream cheese, and my filling looked like cottage cheese. Let your cream cheese and eggs sit out for at least 30 minutes before starting. If you’re in a hurry, cut the cream cheese into cubes and microwave it in 10-second bursts until it’s soft but not melted.
Don’t over-mix the filling. This is the number one mistake I made. When you beat too much air into the batter, it rises in the oven and then collapses, causing cracks. Mix just until each ingredient is incorporated, then stop. A few streaks are fine.
Press that crust firmly. A loose crust will crumble when you slice the bars. Use the bottom of a glass or a measuring cup to really compact those cookie crumbs. I press for a solid 30 seconds, making sure the corners are packed tight.
The jiggle test is your friend. Don’t wait for the center to look completely set. It should wobble like Jell-O when you gently shake the pan. If it looks firm across the top, it’s over-baked. Trust the jiggle.
Chill before slicing. I once tried to cut these after 30 minutes of cooling. It was a disaster—gooey, messy, and frustrating. Patience is the secret ingredient here. Two hours in the fridge, minimum. Overnight is even better.
Variations & Adaptations
One of the best things about this recipe is how flexible it is. Here are some variations I’ve tried and loved:
Gluten-Free Version: Use gluten-free Biscoff cookies (they’re widely available) and double-check your pumpkin puree label. Everything else is naturally gluten-free. The texture is identical to the original.
Dairy-Free Adaptation: Substitute the cream cheese with a high-quality dairy-free version like Kite Hill or Miyoko’s. Use vegan butter for the crust. The filling will be slightly softer, so chill it for an extra hour before slicing.
Extra Spiced Pumpkin: If you love warm fall flavors, add an extra 1/2 teaspoon of cinnamon and a pinch of nutmeg to the filling. I sometimes add a teaspoon of maple syrup for a deeper sweetness.
Chocolate Twist: Drizzle melted dark chocolate over the top after the bars have chilled. The bitterness of the chocolate balances the sweetness of the Biscoff beautifully.
Individual Portions: Make these in a muffin tin for grab-and-go desserts. Line 12 muffin cups with parchment strips, press the crust into each, fill with the batter, and bake for 18-20 minutes. Perfect for lunchboxes.
No-Bake Option: If you don’t want to turn on the oven, use a no-bake cheesecake filling (cream cheese, sugar, and stabilized whipped cream) and skip the egg. The crust still needs a quick bake, but you can use a no-bake crust with melted butter and crushed cookies pressed into the pan.
Serving & Storage Suggestions
These bars are versatile enough for any occasion. Here’s how to serve and store them:
Serving Temperature: Serve them cold, straight from the fridge. The texture is firm and creamy, and the flavors are more pronounced. If you prefer a softer texture, let them sit at room temperature for 10 minutes before serving.
Presentation Ideas: Dust the tops with a light sprinkle of cinnamon or powdered sugar just before serving. Add a dollop of whipped cream and a drizzle of caramel sauce for a more decadent presentation. For fall gatherings, garnish with a small cinnamon stick or a few toasted pecans.
Complementary Dishes: These bars pair beautifully with a cup of hot coffee or a spiced chai latte. For a dessert spread, serve them alongside apple crisp or a simple vanilla ice cream. They also work well on a Thanksgiving dessert table with pecan pie and pumpkin roll.
Storage Instructions: Store leftover bars in an airtight container in the refrigerator for up to 5 days. Place a piece of parchment paper between layers to prevent sticking. For longer storage, wrap individual bars in plastic wrap and place them in a freezer-safe bag. They’ll keep for up to 3 months.
Reheating Tips: These bars are best enjoyed cold, but if you want a warm dessert, microwave a single bar for 10-15 seconds. The crust will soften slightly, and the filling will become creamy. Don’t overheat, or the texture will become grainy.
Flavor Development: The flavors actually improve after a day or two in the fridge. The pumpkin and Biscoff meld together, and the spices become more pronounced. I always make these a day ahead for the best results.
Nutritional Information & Benefits
Here’s an estimated nutritional breakdown per serving (based on 9 servings):
- Calories: 380
- Total Fat: 24g
- Saturated Fat: 14g
- Cholesterol: 95mg
- Sodium: 280mg
- Total Carbohydrates: 36g
- Dietary Fiber: 2g
- Sugars: 24g
- Protein: 6g
Health Benefits: Pumpkin is packed with vitamin A, which supports eye health and immune function. It’s also rich in fiber and antioxidants. The cream cheese provides calcium and protein, while the eggs add high-quality protein and essential amino acids. The Biscoff cookies add a touch of iron and B vitamins from the wheat flour.
Dietary Considerations: This recipe is vegetarian and can be made gluten-free and dairy-free with the substitutions mentioned above. It’s not suitable for a vegan diet as written, but a vegan cream cheese alternative can work. The bars are relatively low in sugar compared to many dessert recipes, with most of the sweetness coming from the cookies and a modest amount of added sugar.
Personal Wellness Perspective: I believe in enjoying desserts without guilt. These bars are a treat, but they’re made with real, recognizable ingredients. One bar satisfies a sweet craving without sending your blood sugar on a roller coaster. Pair it with a cup of herbal tea and call it self-care.
Conclusion
These Quick Biscoff Pumpkin Cheesecake Bars are proof that the best recipes often come from happy accidents. What started as a forgotten ingredient and a moment of frustration turned into a fall dessert I genuinely look forward to making. The buttery, caramelized crust, the creamy pumpkin filling, and that crumbly top all come together in less than an hour—and that’s a win in my book.
I hope you give these a try, and I hope you make them your own. Maybe you’ll add a pinch of nutmeg, or swap the Biscoff for ginger snaps, or drizzle them with caramel. That’s the beauty of a simple recipe—it leaves room for your creativity.
When you make them, I’d love to hear how they turned out. Drop a comment below and let me know if you tried any variations, or just tell me about your own kitchen accident that turned into something amazing. And if you loved these bars, share this post with a friend who needs a quick dessert idea. Happy baking, friends—may your crusts be buttery and your slices be clean.
Frequently Asked Questions
Can I use pumpkin pie filling instead of pumpkin puree?
No, I wouldn’t recommend it. Pumpkin pie filling is already sweetened and spiced, which would throw off the balance of this recipe. Stick with 100% pure pumpkin puree for the best results.
Do I have to chill the bars for 2 hours?
Yes, this step is important. The bars need time to set so you can slice them cleanly. If you’re in a rush, pop them in the freezer for 45 minutes, but the texture won’t be as creamy.
Can I use a different cookie for the crust?
Absolutely. Graham crackers, ginger snaps, or even vanilla wafers work well. Keep in mind that the flavor will change—ginger snaps add more spice, while vanilla wafers make a milder crust.
How do I prevent cracks in the cheesecake?
Don’t over-mix the filling, and don’t over-bake it. The center should still jiggle when you pull it out. Cooling slowly also helps—let it sit in the turned-off oven with the door cracked for 10 minutes before moving it to a wire rack.
Can I freeze these bars?
Yes, they freeze beautifully. Wrap individual bars in plastic wrap, then place them in a freezer-safe bag. They’ll keep for up to 3 months. Thaw in the refrigerator overnight before serving.
Pin This Recipe!
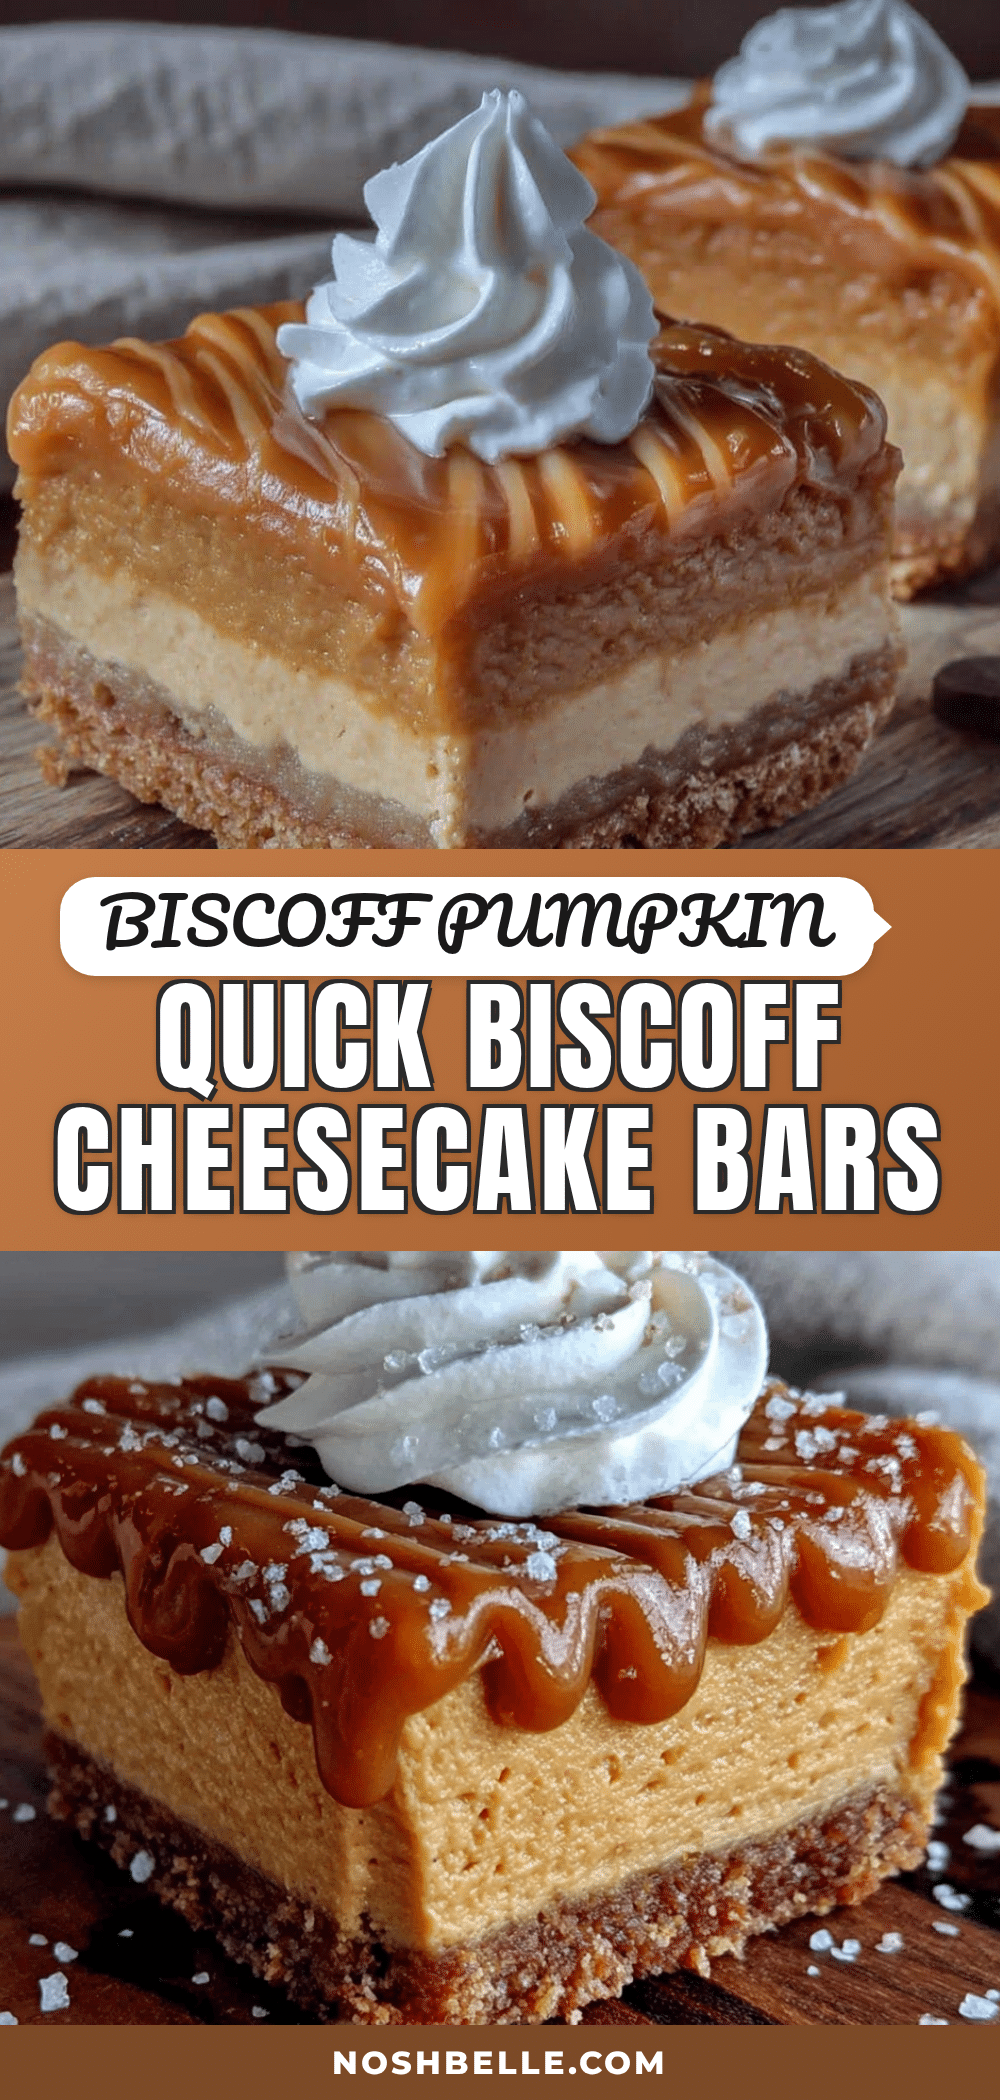
Quick Biscoff Pumpkin Cheesecake Bars: Easy Fall Dessert
These Quick Biscoff Pumpkin Cheesecake Bars are a happy accident turned into a beloved fall dessert. With a buttery Biscoff cookie crust, creamy pumpkin filling, and crumbly topping, they come together in about 45 minutes and are perfect for busy weeknights or any gathering.
- Prep Time: 15 minutes
- Cook Time: 30 minutes
- Total Time: 45 minutes
- Yield: 9 servings 1x
- Category: Dessert
- Cuisine: American
Ingredients
- 200g (about 2 cups) Biscoff cookies, crushed (150g for crust, 50g for topping)
- 6 tablespoons (85g) unsalted butter, melted
- 16 oz (450g) cream cheese, softened
- 1/2 cup (100g) granulated sugar
- 1 cup (240g) pumpkin puree (100% pure, not pie filling)
- 2 large eggs, room temperature
- 1 teaspoon vanilla extract
- 1 teaspoon pumpkin pie spice
- 1/2 teaspoon cinnamon
- 1/4 teaspoon salt
Instructions
- Preheat your oven to 350°F (175°C). Line an 8×8 inch baking pan with parchment paper, leaving overhang on two sides.
- Make the crust: Crush 150g (about 1 1/2 cups) of Biscoff cookies into fine crumbs. Mix with 6 tablespoons melted butter until coated. Press firmly into the bottom of the prepared pan. Bake for 8 minutes, then set aside to cool slightly.
- Start the filling: In a large bowl, beat the softened cream cheese with 1/2 cup granulated sugar until smooth (about 2 minutes with an electric mixer). Scrape down the sides.
- Add the pumpkin and eggs: Mix in the pumpkin puree, then add the eggs one at a time, mixing on low speed after each until just combined.
- Add the flavorings: Stir in the vanilla extract, pumpkin pie spice, cinnamon, and salt until uniform.
- Assemble the bars: Pour the filling over the pre-baked crust and spread evenly. Sprinkle the remaining 50g (about 1/2 cup) of crushed Biscoff cookies over the top.
- Bake for 28-32 minutes. The edges should be set, but the center should still jiggle slightly.
- Cool completely on a wire rack for 30 minutes at room temperature, then refrigerate for at least 2 hours.
- Slice and serve: Use the parchment handles to lift the bars out. Slice into 9 or 16 squares. Wipe the knife clean between cuts for neat edges.
Notes
Room temperature ingredients are crucial for a smooth filling. Don’t over-mix the filling to avoid cracks. Press the crust firmly for clean slices. The jiggle test is key: the center should wobble like Jell-O when done. Chill for at least 2 hours before slicing for best results. For gluten-free, use gluten-free Biscoff cookies. For dairy-free, use vegan butter and dairy-free cream cheese.
Nutrition
- Serving Size: 1 bar (based on 9 se
- Calories: 380
- Sugar: 24
- Sodium: 280
- Fat: 24
- Saturated Fat: 14
- Carbohydrates: 36
- Fiber: 2
- Protein: 6
Keywords: pumpkin cheesecake bars, Biscoff, fall dessert, easy dessert, quick dessert, pumpkin dessert, cheesecake bars


