My daughter’s Halloween party was in three hours and I’d completely forgotten. Everyone else would be bringing those elaborate cupcake graveyards with the crumbled Oreo dirt and little tombstone cookies. I had a bag of pretzel rods, a block of white almond bark, and a vague sense of panic. Honestly, I was this close to just taping a spider ring to a juice box and calling it a day.
Then I spotted the bag of slivered almonds in the pantry. And it hit me—those little almond slivers look exactly like fingernails. I mean, creepy, yellowed, witchy fingernails. Suddenly I had a plan. I melted the white chocolate, dipped the pretzels, and started sticking almonds on the ends. By the time the chocolate set, I had a tray of the most delightfully gross-looking snacks I’d ever made. My hands were a mess, I had chocolate in my hair, and I was laughing like a maniac. It was perfect.
These Spooky White Chocolate Witch Finger Pretzel Rods ended up being the hit of the party. The kids thought they were hilarious, the adults couldn’t stop snacking on them, and I spent the whole night pretending I’d planned it that way. Maybe you’ve been there—scrambling at the last minute, hoping for a miracle. This is that miracle. It’s the kind of recipe that saves you when you’re out of time but still want to show up with something that makes people say, “Wait, you made those?”
Why You’ll Love This Recipe
Let’s be real for a second. Halloween treats can be a huge pain. Between the fondant, the food coloring, and the three-day decorating marathons, it’s easy to get overwhelmed. These witch finger pretzel rods are the opposite of that. They’re the lazy genius’s Halloween hack—and I mean that as the highest compliment.
- Quick & Easy: From start to finish, you’re looking at about 20 minutes of active time. The hardest part is waiting for the chocolate to set.
- Simple Ingredients: You need exactly four things: pretzel rods, white chocolate or almond bark, slivered almonds, and green food coloring. That’s it.
- Perfect for Halloween: Whether it’s a classroom party, a spooky movie night, or a trunk-or-treat event, these fit right in. They’re creepy without being actually scary.
- Crowd-Pleaser: I’ve made these for three different Halloween events now, and they always disappear first. Kids love the gross factor, adults love the salty-sweet combo.
- Unbelievably Delicious: The crunch of the pretzel, the sweetness of the white chocolate, and the nutty finish from the almond—it’s a texture party in your mouth. And honestly, it’s way better than it has any right to be for something so simple.
What makes this recipe different from every other Halloween dessert out there is the balance. It’s not just a sugar bomb. The salt from the pretzel cuts through the sweetness, and the almond adds that savory note that keeps you reaching for another one. I’ve tested this with different chocolates, different pretzel shapes, and even different nuts. This version is the winner. It’s the one that made my neighbor, who’s a professional baker, ask for the recipe. That’s the kind of energy we’re going for here.
What Ingredients You Will Need
This recipe uses simple, pantry-friendly ingredients to deliver maximum Halloween fun with minimum effort. You probably already have most of these in your kitchen, which is exactly the point. Here’s what you’ll need:
For the Witch Fingers
- Pretzel rods – 1 standard bag (about 12-16 rods). Look for thick, straight rods, not the thin twisty ones. I prefer Snyder’s of Hanover for their sturdy texture, but any brand works.
- White chocolate melting wafers or almond bark – 12 ounces. Almond bark is more stable for dipping and sets up shinier, but high-quality white chocolate chips work too. Avoid white chocolate morsels with stabilizers—they don’t melt as smoothly. Ghirardelli white chocolate melting wafers are my go-to.
- Slivered almonds – About ½ cup. These become the fingernails. Look for raw, unroasted slivered almonds for the most natural “nail” color. If they’re roasted, they’ll be darker and less creepy.
- Green gel food coloring – A few drops. Gel coloring is better than liquid because it doesn’t thin out the chocolate. I use Wilton brand green gel. You want a sickly, witchy green, not a bright neon.
Optional Decorations
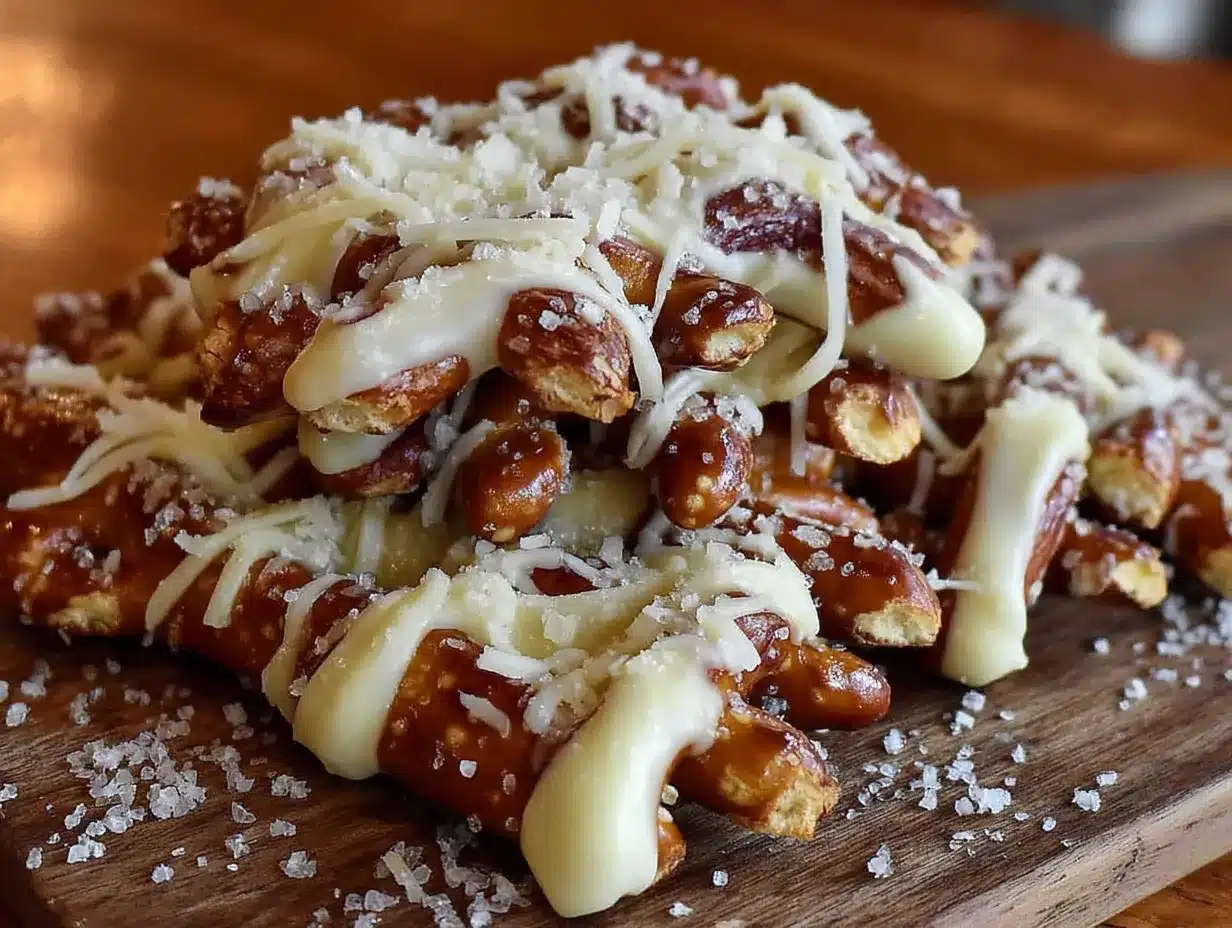
- Red gel food coloring – For adding “blood” drips at the base of the fingernail. Totally optional, but it ups the gross factor significantly.
- Edible glitter or sanding sugar – For a magical, sparkly witch vibe. I’ve used black sanding sugar for a dirt effect before.
- Coconut oil – 1 teaspoon, if needed, to thin the melted chocolate for smoother dipping.
A quick note on ingredient selection: Don’t skip the gel food coloring. Liquid food coloring will seize your chocolate and turn it into a grainy, unusable mess. I learned this the hard way during a test batch, and let me tell you, throwing away a whole bowl of chocolate is heartbreaking. Stick with gel or powdered coloring for best results.
Equipment Needed
You don’t need a fancy kitchen to pull these off. Here’s what you’ll need:
- Microwave-safe bowl – For melting the chocolate. Glass or ceramic works best.
- Parchment paper or silicone baking mat – For setting the dipped pretzels. Wax paper works in a pinch, but parchment is less likely to stick.
- Baking sheet – To hold the parchment paper and give you a stable surface for setting.
- Small offset spatula or butter knife – For spreading chocolate if needed, though dipping is easier.
- Tongs or a fork – For dipping the pretzels without getting your fingers covered in chocolate. I prefer tongs for better control.
- Toothpick – For creating texture lines on the chocolate to make it look more like wrinkly witch skin.
- Small piping bag or zip-top bag – For drizzling red “blood” if you’re going that route.
If you don’t have a microwave, you can melt the chocolate using a double boiler on the stovetop. Just be careful not to let any water get into the chocolate, or it will seize up. I’ve ruined more than one batch this way. Also, a silicone baking mat is worth the investment—it makes cleanup so much easier, and nothing sticks to it.
Preparation Method
Alright, let’s make some witch fingers. This is where the magic happens. Follow these steps closely, and you’ll have a tray of creepy, delicious snacks in no time.
- Prep your workspace. Line a baking sheet with parchment paper or a silicone mat. Make sure it fits in your refrigerator. You’ll need fridge space later, so clear a shelf now.
- Melt the white chocolate. Place the white chocolate melting wafers or chopped almond bark in a microwave-safe bowl. Microwave in 30-second intervals, stirring thoroughly after each interval. It usually takes about 2-3 intervals total. Stop when the chocolate is about 80% melted—the residual heat will finish the job. Overheating white chocolate turns it into a grainy, clumpy disaster, so be patient.
- Add the green color. Once the chocolate is smooth and fully melted, add 2-3 drops of green gel food coloring. Stir until the color is evenly distributed. You want a pale, sickly green—not so dark that it looks like a crayon. Add more drops one at a time if needed. Remember, the color will lighten slightly as it sets.
- Dip the pretzels. Hold a pretzel rod by one end and dip it into the melted green chocolate. Twist and turn to coat about three-quarters of the pretzel. Let the excess drip back into the bowl. You want a thick, even coating, but not so thick that it pools at the bottom. Place the dipped pretzel on the prepared baking sheet. Repeat with all pretzels.
- Create the witchy texture. Before the chocolate sets, use a toothpick to drag horizontal lines across the dipped portion of each pretzel. This creates the wrinkly, aged look of a witch’s finger. Don’t overdo it—three or four lines per pretzel is plenty. You can also gently pinch the chocolate near the tip to create a knobby knuckle effect.
- Attach the fingernails. While the chocolate is still wet, press a slivered almond onto the tip of each pretzel. The pointed end of the almond should face outward, like a fingernail growing from the finger. Press gently so it sticks, but don’t push it all the way into the chocolate—you want it to stand out. If the chocolate has started to set, you can dab a tiny bit of fresh melted chocolate on the pretzel tip first.
- Add the “blood” (optional). If you want extra creepy points, mix a drop of red gel food coloring with a teaspoon of melted white chocolate (or just use store-bought red candy melts). Transfer to a small piping bag or a zip-top bag with the tip snipped off. Pipe a tiny red drip at the base of each almond fingernail. It looks like the witch just cut herself—gross and perfect.
- Chill to set. Place the baking sheet in the refrigerator for 15-20 minutes, or until the chocolate is completely firm. Don’t rush this step. If the chocolate isn’t fully set, the almonds will slide off when you try to move them.
- Finishing touches. Once set, you can sprinkle a little black sanding sugar or edible glitter over the fingers for a magical, witchy vibe. Or leave them plain—they’re creepy enough as is.
A few things I’ve learned the hard way: Don’t skip the toothpick texture lines. Without them, the pretzels just look like green chocolate sticks. The lines make them read as “fingers” immediately. Also, work in batches if you’re making a large quantity. The chocolate can start to set in the bowl, and you’ll need to reheat it gently. And for the love of all things spooky, don’t let kids help with the blood step unless you want green and red chocolate everywhere. Trust me.
Cooking Tips & Techniques
I’ve made these witch finger pretzels more times than I care to admit, and I’ve made every mistake in the book. Here’s what I’ve learned so you don’t have to repeat my failures.
The chocolate matters. I tried this with regular white chocolate chips once, and it was a disaster. They don’t melt smoothly because of the stabilizers. Almond bark or melting wafers are your friends here. They set up harder and shinier, which makes the final product look more polished.
Temperature control is everything. If your kitchen is warm, the chocolate will take forever to set. Work in a cool room, and pop the tray in the fridge as soon as you’re done. On the flip side, if your chocolate gets too thick while you’re working, add a teaspoon of coconut oil and stir. It’ll loosen right up.
Don’t overcrowd the tray. Leave space between each pretzel rod so they don’t stick together. I made this mistake once and ended up with a giant pretzel blob that looked more like a swamp monster than a witch finger. Still delicious, but not very photogenic.
The almond placement trick. If you’re having trouble getting the almonds to stay put, dip the tip of the pretzel in the chocolate first, then attach the almond. Let that set for a minute before dipping the rest of the pretzel. It creates a stable base for the fingernail.
Multitasking strategy. While the chocolate is melting, line your baking sheet and count out your pretzels and almonds. Have everything within arm’s reach. Once you start dipping, you won’t want to stop and search for supplies.
My biggest failure? I once used liquid green food coloring because I was out of gel. The chocolate seized up into a grainy, lumpy mess. I tried to save it by adding more oil, but it was too late. I ended up throwing the whole batch away and starting over. Learn from my pain—gel only.
Variations & Adaptations
One of the best things about this recipe is how customizable it is. Here are some variations I’ve tried and loved:
Monster Mash Version
Skip the green coloring and leave the white chocolate plain. Use mini chocolate chips for warts instead of almond fingernails. Press two candy eyes on the top for a monster face. My nephew’s class went nuts for these.
Vampire Bite Variation
After the chocolate sets, use a small knife to chip off a tiny piece of the almond “fingernail” and pipe a red chocolate drip underneath. It looks like the witch finger has been bitten by a vampire. Perfect for a vampire-themed party.
Gluten-Free Option
Use gluten-free pretzel rods. They’re available at most grocery stores now, and they work exactly the same way. Just double-check that your white chocolate is also certified gluten-free if that’s a concern.
Dairy-Free Adaptation
Use dairy-free white chocolate and dairy-free pretzels. There are some great plant-based white chocolate bars out there now. I’ve used Enjoy Life brand with good results.
Spider Web Design
Instead of making witch fingers, dip the pretzels in white chocolate and drizzle melted dark chocolate in a spider web pattern. Let it set, and you’ve got spooky spider web pretzels. It’s a fun alternative if you’re making a variety of treats.
I personally love the vampire bite version. I made it for a Halloween party last year, and people couldn’t stop talking about the “wound” on the finger. It’s a little extra work, but the reaction is worth it.
Serving & Storage Suggestions
These witch finger pretzels are best served at room temperature. The chocolate stays firm but not rock hard, and the pretzel retains its crunch. Here’s how to serve and store them:
Presentation Ideas
- Arrange them upright in a small vase or jar, like a bouquet of witch fingers. It’s creepy and hilarious.
- Lay them on a platter with a spooky cheesecloth “cobweb” draped underneath.
- Stand them in a small pumpkin or hollowed-out gourd for a festive display.
- Bundle a few in a cellophane bag with a twist tie for party favors.
Storage Instructions
Store the finished pretzels in an airtight container at room temperature for up to 5 days. If your kitchen is warm, the refrigerator is fine too—just let them come to room temperature before serving to avoid condensation. Do not freeze them. The pretzel will lose its crunch, and the chocolate can develop a white bloom.
Reheating
You shouldn’t need to reheat these, but if the chocolate has softened, a quick 5-minute chill in the fridge will firm them back up.
A note on flavor development: These are actually better the next day. The chocolate sets up fully, and the salt from the pretzel melds with the sweetness. If you can resist eating them all immediately, give them a day in the fridge. You won’t regret it.
Nutritional Information & Benefits
Let’s be honest—these are a treat, not a health food. But here’s the breakdown if you’re curious:
| Nutrient | Per Pretzel Rod (approx.) |
|---|---|
| Calories | 180 |
| Total Fat | 9g |
| Saturated Fat | 5g |
| Carbohydrates | 22g |
| Sugar | 14g |
| Protein | 3g |
| Sodium | 290mg |
On the plus side, almonds are a good source of vitamin E and healthy fats. White chocolate contains calcium from the milk solids. And pretzels are low in fat compared to other snack options. But really, these are about fun, not fitness.
Dietary considerations: Contains dairy, gluten, and tree nuts. For a nut-free version, use a sunflower seed or pumpkin seed sliver instead of almonds. For a dairy-free version, use dairy-free white chocolate. Always check labels if you’re serving people with allergies.
Conclusion
These Spooky White Chocolate Witch Finger Pretzel Rods are the Halloween recipe you didn’t know you needed. They’re quick enough for a last-minute party, simple enough for kids to help with, and creepy enough to impress even the most jaded Halloween fan. The salty-sweet crunch is addictive, the presentation is hilarious, and the whole thing comes together with ingredients you probably already have.
I love this recipe because it reminds me that you don’t need to be a professional baker to create something memorable. Sometimes the best ideas come from panic and a half-empty pantry. So go ahead—make a batch for your next Halloween gathering. Customize them with different colors, different toppings, different vibes. Make them your own. And when someone asks where you got the idea, just smile and say you have your sources.
If you try these, I’d love to hear about it. Drop a comment below and tell me how they turned out, or share a photo on Pinterest. Did you add blood? Skip the green? Make a monster version? I want to see your creepy creations. Happy Halloween, and happy snacking!
Frequently Asked Questions
Can I use milk chocolate instead of white chocolate?
Absolutely. The green color won’t show up on dark chocolate, but you can skip the coloring and still make creepy witch fingers. The almond fingernails will stand out against the dark background. It’s a different look, but equally delicious.
How far in advance can I make these?
You can make them up to 5 days ahead. Store them in an airtight container at room temperature or in the fridge. Just don’t freeze them—the pretzel will get soggy when it thaws.
My chocolate seized up. Can I fix it?
Sometimes. Add a teaspoon of coconut oil or vegetable shortening and stir vigorously. If the chocolate smooths out, you’re good. If it stays grainy, you’ll need to start over. This is why I always buy extra chocolate—just in case.
Can I make these without a microwave?
Yes. Use a double boiler on the stovetop. Fill a small saucepan with an inch of water, bring it to a simmer, and place a heatproof bowl on top. Make sure the bowl doesn’t touch the water. Stir the chocolate until melted, then proceed with the recipe.
What if I don’t have pretzel rods?
You can use thick pretzel sticks or even large pretzel twists. Just break the twists into finger-sized pieces. The look won’t be as uniform, but the taste will be the same. I’ve even used regular pretzel sticks for a mini version—perfect for kids’ parties.
Pin This Recipe!

Spooky White Chocolate Witch Finger Pretzel Rods

These spooky witch finger pretzel rods are a quick and easy Halloween treat made with pretzel rods, white chocolate, and slivered almonds for fingernails. They’re creepy, delicious, and perfect for last-minute parties.
- Prep Time: 20 minutes
- Cook Time: 0 minutes
- Total Time: 40 minutes (including chilling)
- Yield: 12-16 servings 1x
- Category: Dessert
- Cuisine: American
Ingredients
- 1 standard bag (about 12-16) pretzel rods
- 12 ounces white chocolate melting wafers or almond bark
- ½ cup slivered almonds (raw, unroasted)
- 2–3 drops green gel food coloring
- 1 drop red gel food coloring (optional, for ‘blood’)
- 1 teaspoon coconut oil (optional, to thin chocolate)
- Black sanding sugar or edible glitter (optional, for decoration)
Instructions
- Prep your workspace: Line a baking sheet with parchment paper or a silicone mat. Make sure it fits in your refrigerator.
- Melt the white chocolate: Place the white chocolate melting wafers or chopped almond bark in a microwave-safe bowl. Microwave in 30-second intervals, stirring thoroughly after each interval, until about 80% melted. Let residual heat finish melting.
- Add the green color: Once smooth, add 2-3 drops of green gel food coloring. Stir until evenly distributed. Aim for a pale, sickly green.
- Dip the pretzels: Hold a pretzel rod by one end and dip it into the melted green chocolate, coating about three-quarters of the pretzel. Let excess drip off, then place on the prepared baking sheet. Repeat with all pretzels.
- Create the witchy texture: Before the chocolate sets, use a toothpick to drag horizontal lines across the dipped portion of each pretzel to create a wrinkly look. Optionally, gently pinch near the tip for a knobby knuckle effect.
- Attach the fingernails: While the chocolate is still wet, press a slivered almond onto the tip of each pretzel, pointed end outward. Press gently to adhere.
- Add the ‘blood’ (optional): Mix a drop of red gel food coloring with a teaspoon of melted white chocolate. Transfer to a small piping bag or zip-top bag with the tip snipped off. Pipe a tiny red drip at the base of each almond fingernail.
- Chill to set: Place the baking sheet in the refrigerator for 15-20 minutes, or until the chocolate is completely firm.
- Finishing touches: Once set, optionally sprinkle with black sanding sugar or edible glitter. Serve at room temperature.
Notes
Use gel food coloring, not liquid, to prevent chocolate from seizing. Work in a cool room for best results. For a nut-free version, use sunflower seed or pumpkin seed slivers instead of almonds. Store in an airtight container at room temperature for up to 5 days; do not freeze.
Nutrition
- Serving Size: 1 pretzel rod
- Calories: 180
- Sugar: 14
- Sodium: 290
- Fat: 9
- Saturated Fat: 5
- Carbohydrates: 22
- Fiber: 1
- Protein: 3
Keywords: Halloween treats, witch finger pretzels, white chocolate pretzels, spooky snacks, easy Halloween recipe, last-minute Halloween, pretzel rods, white chocolate, almond fingernails