This was supposed to be a batch of perfectly round, iced sugar cookies for a Halloween party. I had the royal icing ready, the sprinkles lined up, and a vision of neat little ghost faces. But somewhere between answering the door for a package and realizing my butter had been sitting out too long, things went sideways. I grabbed the almond extract instead of vanilla—a full teaspoon before I even noticed. The dough felt too soft, the kitchen was too warm, and I was already ten minutes behind schedule. In a moment of pure frustration, I rolled a piece of dough into a long, uneven log just to get it in the fridge faster. And that’s when it hit me. That sad, pale log looked exactly like a witch’s finger. I shaped a knuckle, pressed a sliced almond on top for a nail, and stuck them in the oven with zero expectations. What came out was nothing like the plan—and honestly, way better. They were creepy, buttery, and absolutely perfect for Halloween. Maybe you’ve had one of those kitchen disasters that turned into a happy discovery. This is mine, and I’ve been making them every October since.
Why You’ll Love This Recipe
These Spooky Witch Finger Sugar Cookies are the kind of recipe that makes people stop, stare, and then laugh out loud. They look genuinely creepy, but they taste like a classic, buttery sugar cookie with a hint of almond. I’ve tested this dough at least a dozen times to get the texture just right—firm enough to hold its shape, but soft enough to melt in your mouth. Here’s why this recipe works so well:
- Quick & Easy: From mixing to baking, you’re looking at about 45 minutes total. The dough chills for just 20 minutes, so no waiting around all day.
- Simple Ingredients: You probably have everything in your pantry right now. Flour, sugar, butter, eggs, and a little almond extract for that eerie flavor.
- Perfect for Halloween Parties: These cookies are the life of the party. Kids love them, adults can’t stop grabbing them, and they look incredible on a dessert table.
- Crowd-Pleaser: I’ve brought these to potlucks, school events, and neighbor gatherings. They always disappear first, and people ask for the recipe every single time.
- Unbelievably Delicious: The combination of buttery cookie and crunchy almond nail is next-level. It’s comfort food with a spooky twist.
What makes this recipe different from all the others? It’s the almond extract. That one accidental swap gave these cookies a subtle, almost marzipan-like flavor that pairs perfectly with the buttery base. Plus, the shaping technique is foolproof—even if your fingers look lumpy or uneven, they’ll look more realistic. This recipe isn’t just good; it’s the kind that makes you close your eyes after the first bite. It’s Halloween fun reimagined—creepy, delicious, and completely stress-free.
What Ingredients You Will Need
This recipe uses simple, everyday ingredients to create cookies that are both spooky and scrumptious. Most of these are pantry staples, which makes this a last-minute Halloween win. Here’s what you’ll need:
For the Cookie Dough:
- 1 cup (226g) unsalted butter, softened (I use Land O’Lakes for consistent results)
- 1 cup (200g) granulated sugar
- 1 large egg, room temperature
- 1 teaspoon almond extract (this is the secret to the flavor!)
- 1/2 teaspoon vanilla extract
- 2 1/2 cups (312g) all-purpose flour
- 1/2 teaspoon baking powder
- 1/4 teaspoon salt
For the Fingers:
- About 30 whole almonds (sliced almonds also work, but whole ones look more like fingernails)
- Red food coloring or raspberry jam (for that bloody, creepy knuckle effect)
- A small amount of cocoa powder or cinnamon (for dusting, to give them an earthy, aged look)
Ingredient Notes & Substitutions:
- Butter: Make sure it’s truly softened, not melted. If you’re in a hurry, cut it into small cubes and let it sit for 15 minutes.
- Almond Extract: Don’t skip this! It gives the cookies that signature flavor. If you’re allergic to nuts, use 1 1/2 teaspoons of vanilla extract instead.
- Flour: All-purpose is best for structure. For a gluten-free version, use a 1:1 gluten-free baking flour blend—I’ve tested it with King Arthur’s measure-for-measure flour and it worked great.
- Almonds: You can use sliced almonds or slivered almonds for the nails. I prefer whole almonds because they look more like real fingernails, but any almond shape works.
- Red Coloring: Gel food coloring works best because it’s concentrated. Raspberry jam gives a more natural, gory look if you prefer that.
Equipment Needed
You don’t need any fancy tools to make these cookies, which is part of their charm. Here’s what you’ll need:
- Mixing bowls: One large and one medium. I use glass bowls because they don’t hold onto odors.
- Electric hand mixer or stand mixer: A hand mixer works perfectly. You can mix by hand, but it takes some elbow grease to cream the butter and sugar.
- Baking sheets: Two standard half-sheet pans. Line them with parchment paper for easy cleanup.
- Parchment paper: Non-negotiable for preventing sticking and browning the bottoms evenly.
- Sharp knife or bench scraper: For cutting the dough into finger-sized pieces. A bench scraper is my favorite because it doesn’t stick.
- Small pastry brush: For applying the red coloring or jam. A clean, unused paintbrush works in a pinch.
- Wire cooling rack: Essential for cooling the cookies without them getting soggy on the bottom.
If you don’t have a stand mixer, don’t worry. I’ve made these cookies with just a wooden spoon and a bowl, and they turned out perfectly. The only tool I really recommend splurging on is good parchment paper—the cheap stuff can stick and ruin the knuckle details.
Preparation Method
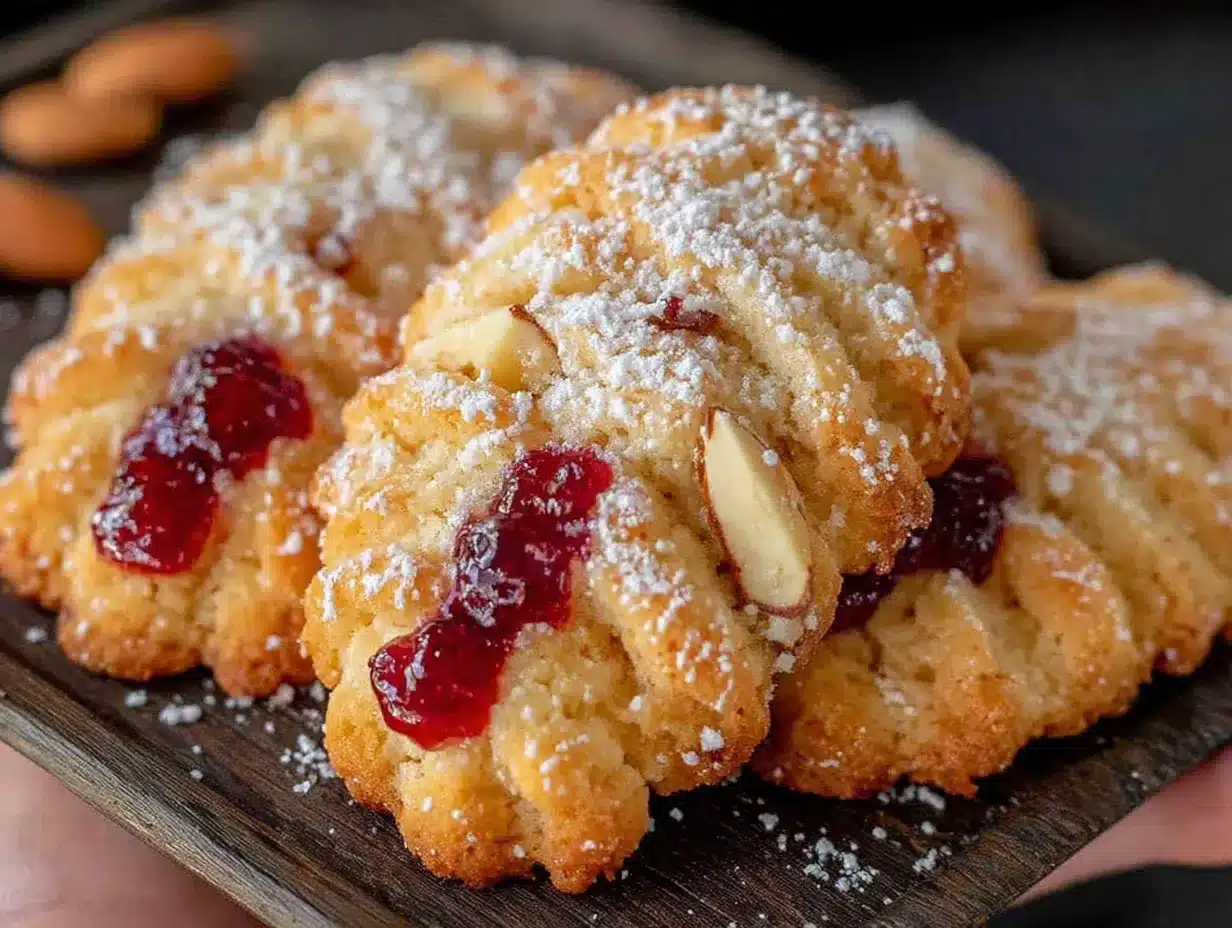
Here’s the step-by-step process for making these spooky fingers. I’ve included all the little details I wish someone had told me the first time.
- Cream the butter and sugar: In a large mixing bowl, beat the softened butter and granulated sugar together until light and fluffy, about 2-3 minutes. You want the mixture to look pale and airy. Scrape down the sides of the bowl once or twice.
- Add the wet ingredients: Beat in the egg, almond extract, and vanilla extract until fully combined. The mixture might look slightly curdled at this point—don’t panic, that’s normal. It will come together once you add the flour.
- Mix the dry ingredients: In a separate medium bowl, whisk together the all-purpose flour, baking powder, and salt. This ensures the baking powder is evenly distributed so your cookies rise uniformly.
- Combine wet and dry: Gradually add the dry ingredients to the wet mixture, mixing on low speed until a soft dough forms. Be careful not to overmix—stop as soon as you don’t see any more streaks of flour. Overmixing can make the cookies tough.
- Chill the dough: Cover the bowl with plastic wrap and refrigerate for at least 20 minutes. This step is crucial. Chilled dough is much easier to shape into fingers without it sticking to your hands. If you skip this, your fingers will look like blobs.
- Preheat your oven: While the dough chills, preheat your oven to 350°F (175°C). Line two baking sheets with parchment paper.
- Shape the fingers: Scoop out a heaping tablespoon of dough (about 1.5 ounces). Roll it into a log about 3 inches long and 3/4 inch thick. One end should be slightly thinner (the fingertip) and the other end slightly thicker (where it would connect to the hand). Place it on the prepared baking sheet.
- Create the knuckles: Using the back of a knife or a bench scraper, gently press 2-3 horizontal lines into the dough log to create knuckle creases. Don’t press too hard—you want them to remain visible after baking. If the dough cracks, just pinch it back together.
- Add the fingernail: Press a whole almond firmly into the thinner end of the finger. The almond should be pointing outward, like a real nail. Make sure it’s pressed in enough that it won’t fall off during baking.
- Shape the remaining fingers: Repeat steps 7-9 with the rest of the dough, spacing the fingers about 2 inches apart on the baking sheets. You should get about 30 cookies.
- Bake: Bake for 10-12 minutes, or until the edges are just barely golden. The centers should still look slightly soft. They will firm up as they cool. Overbaking makes them dry and hard.
- Cool and decorate: Let the cookies cool on the baking sheet for 5 minutes, then transfer them to a wire cooling rack. While they’re still warm, use a small pastry brush to dab a tiny bit of red food coloring or raspberry jam at the base of the almond nail (the cuticle area). Sprinkle a pinch of cocoa powder or cinnamon over the cookies to give them an earthy, aged look.
- Serve or store: Let the cookies cool completely before serving or storing. The red jam will set as they cool, creating a bloody cuticle effect.
Sensory Cue: When you press the knuckle lines, you should feel the dough give slightly but not crack. After baking, the cookies should smell buttery and almond-sweet, with a faint cinnamon note from the dusting.
Cooking Tips & Techniques
I’ve made these cookies every Halloween for the last five years, and I’ve learned a few things the hard way. Here are my best tips to make sure your witch fingers turn out perfectly spooky.
Keep the dough cold: If your dough starts to feel sticky or soft while you’re shaping the fingers, pop it back in the fridge for 10 minutes. Warm dough loses its shape and your fingers will spread into flat blobs. I keep half the dough in the fridge while I work with the other half.
Don’t overwork the dough: When you’re rolling the fingers, handle the dough as little as possible. The heat from your hands can melt the butter, making the cookies greasy. If you notice the dough getting oily, stop and chill it again.
Make the knuckles look real: Use a chopstick or the end of a wooden spoon to press the knuckle lines if a knife feels too sharp. The round edge creates a more natural indent. Also, press the lines at a slight angle—real knuckles aren’t perfectly straight.
Almond placement matters: Press the almond in at a slight downward angle, as if the nail is growing out of the finger. If you press it straight in, it looks like a weird hat. Also, make sure the pointed end of the almond faces outward.
My biggest failure: One year, I forgot to chill the dough and my fingers spread so much they looked like fat little sausages. I tried to reshape them after baking, but they just crumbled. Lesson learned—never skip the chill step.
Timing strategy: I like to make the dough the night before and let it chill overnight. This makes the shaping session the next day super quick and stress-free. Plus, the flavors meld together even more.
Variations & Adaptations
These witch finger cookies are incredibly versatile. Here are a few ways to change them up based on your dietary needs or flavor preferences.
Gluten-Free Version: Swap the all-purpose flour with a 1:1 gluten-free baking flour blend. I’ve tested this with Bob’s Red Mill and King Arthur, and both worked well. Add an extra tablespoon of flour if the dough feels too sticky.
Vegan Option: Use vegan butter (like Earth Balance) and a flax egg (1 tablespoon ground flaxseed mixed with 3 tablespoons water, let sit for 5 minutes). The cookies will be slightly less tender, but they still taste great. Use maple syrup instead of the egg wash if you want a shinier finish.
Chocolate Witch Fingers: Replace 1/4 cup of the flour with unsweetened cocoa powder. This gives the fingers a darker, earthier look that’s even creepier. The chocolate flavor pairs beautifully with the almond extract.
Bloody Variation: For extra gore, dip the tips of the baked fingers in red icing or strawberry syrup after they cool. It makes them look like freshly severed digits—perfect for a haunted house party.
Peanut Butter Fingers: Replace half the butter with creamy peanut butter. Skip the almond extract and use vanilla instead. The peanut butter gives the cookies a savory, salty edge that balances the sweet almond nail.
I personally love the chocolate variation. One year, I made a batch of chocolate fingers and a batch of regular ones, and the chocolate ones disappeared first. The dark color hides any imperfections in the shaping, too.
Serving & Storage Suggestions
These cookies are best served at room temperature, which makes them perfect for parties. Arrange them on a black or dark purple platter to make the red cuticles pop. For an extra creepy touch, scatter a few fake spider webs or plastic spiders around the plate.
What to serve with them: These pair wonderfully with a warm cup of apple cider, hot chocolate, or a pumpkin spice latte. For a savory balance, serve them alongside a cheese board with sharp cheddar and apple slices. The sweet-savory combo is amazing.
Storage Instructions: Store the cookies in an airtight container at room temperature for up to 5 days. Place a sheet of parchment paper between layers to prevent them from sticking together. Do not refrigerate them—the fridge will dry them out and make them hard.
Freezing: You can freeze the unbaked shaped fingers on a baking sheet for 1 hour, then transfer them to a freezer-safe bag. Bake them directly from frozen, adding 2-3 minutes to the bake time. I do this every year so I can bake fresh cookies in minutes when guests show up unexpectedly.
Flavor development: These cookies actually taste better the day after baking. The almond flavor mellows and blends with the butter, creating a more rounded taste. So don’t be afraid to make them a day ahead.
Nutritional Information & Benefits
Here’s an estimated nutritional breakdown per cookie (based on 30 cookies):
- Calories: 145
- Fat: 8g
- Saturated Fat: 5g
- Carbohydrates: 17g
- Sugar: 8g
- Protein: 2g
- Fiber: 0.5g
Health Highlights: Almonds are a great source of vitamin E and healthy fats, which support skin health and brain function. The butter provides vitamin A, which is essential for eye health. While these are definitely a treat, using real ingredients means you’re avoiding the preservatives and artificial flavors found in store-bought cookies.
Dietary Considerations: This recipe contains gluten, dairy, eggs, and almonds. For a nut-free version, use a sunflower seed or pumpkin seed in place of the almond nail. For a lower-sugar option, reduce the granulated sugar to 3/4 cup—the cookies will be slightly less tender but still delicious.
I personally love that these cookies feel indulgent without being overly processed. They’re the kind of treat you can feel good about sharing with your family, knowing exactly what went into them.
Conclusion
These Spooky Witch Finger Sugar Cookies are proof that sometimes the best recipes come from happy accidents. That moment of frustration in my kitchen turned into a Halloween tradition that my family and friends look forward to every year. They’re creepy, they’re buttery, and they’re ridiculously fun to make. Whether you’re hosting a costume party, bringing treats to a school event, or just want to surprise your kids with something spooky, this recipe delivers every time.
Don’t be afraid to customize them—make them chocolate, add extra red jam, or shape the fingers a little chunkier. The beauty of this recipe is that imperfections make them look more realistic. I’d love to hear how yours turn out! Drop a comment below with your spooky creations, share a photo on Pinterest, or tag me in your Instagram stories. Let’s make this Halloween the creepiest (and tastiest) one yet.
Frequently Asked Questions
Can I make these cookies ahead of time?
Absolutely! You can make the dough up to 3 days in advance and keep it in the fridge. You can also freeze the shaped, unbaked fingers for up to 3 months. Bake them straight from frozen, adding a couple of extra minutes to the bake time.
Why did my cookies spread too much?
This usually happens when the dough is too warm. Make sure your butter is softened, not melted, and chill the dough for at least 20 minutes before shaping. If your kitchen is warm, chill the shaped fingers for 10 minutes before baking.
Can I use something other than almonds for the nails?
Yes! You can use sliced almonds, sunflower seeds, or even small pieces of white chocolate. For a truly creepy look, try using blanched almond slivers—they look like pale, jagged nails.
How do I get the red color to look like blood?
Use a concentrated gel food coloring in red or burgundy. Apply it with a small brush right at the base of the almond after baking. For a more realistic effect, mix a drop of brown food coloring with the red to create a darker, dried-blood shade.
Can I make these cookies nut-free?
Yes! Simply omit the almond extract and use vanilla extract instead. For the fingernails, use a pumpkin seed, a small piece of dried apple, or a sliver of white chocolate. The flavor will be slightly different, but they’ll still be delicious and spooky.
Pin This Recipe!

Spooky Witch Finger Sugar Cookies: Best Easy Halloween Recipe

These Spooky Witch Finger Sugar Cookies are the kind of recipe that makes people stop, stare, and then laugh out loud. They look genuinely creepy, but they taste like a classic, buttery sugar cookie with a hint of almond.
- Prep Time: 20 minutes
- Cook Time: 10-12 minutes
- Total Time: 45 minutes
- Yield: 30 cookies 1x
- Category: Dessert
- Cuisine: American
Ingredients
- 1 cup (226g) unsalted butter, softened
- 1 cup (200g) granulated sugar
- 1 large egg, room temperature
- 1 teaspoon almond extract
- 1/2 teaspoon vanilla extract
- 2 1/2 cups (312g) all-purpose flour
- 1/2 teaspoon baking powder
- 1/4 teaspoon salt
- About 30 whole almonds
- Red food coloring or raspberry jam
- A small amount of cocoa powder or cinnamon
Instructions
- Cream the butter and sugar: In a large mixing bowl, beat the softened butter and granulated sugar together until light and fluffy, about 2-3 minutes. Scrape down the sides of the bowl once or twice.
- Add the wet ingredients: Beat in the egg, almond extract, and vanilla extract until fully combined. The mixture might look slightly curdled at this point—don’t panic, that’s normal.
- Mix the dry ingredients: In a separate medium bowl, whisk together the all-purpose flour, baking powder, and salt.
- Combine wet and dry: Gradually add the dry ingredients to the wet mixture, mixing on low speed until a soft dough forms. Be careful not to overmix.
- Chill the dough: Cover the bowl with plastic wrap and refrigerate for at least 20 minutes.
- Preheat your oven: While the dough chills, preheat your oven to 350°F (175°C). Line two baking sheets with parchment paper.
- Shape the fingers: Scoop out a heaping tablespoon of dough (about 1.5 ounces). Roll it into a log about 3 inches long and 3/4 inch thick. One end should be slightly thinner (the fingertip) and the other end slightly thicker. Place it on the prepared baking sheet.
- Create the knuckles: Using the back of a knife or a bench scraper, gently press 2-3 horizontal lines into the dough log to create knuckle creases. Don’t press too hard.
- Add the fingernail: Press a whole almond firmly into the thinner end of the finger. The almond should be pointing outward, like a real nail.
- Shape the remaining fingers: Repeat steps 7-9 with the rest of the dough, spacing the fingers about 2 inches apart on the baking sheets. You should get about 30 cookies.
- Bake: Bake for 10-12 minutes, or until the edges are just barely golden. The centers should still look slightly soft.
- Cool and decorate: Let the cookies cool on the baking sheet for 5 minutes, then transfer them to a wire cooling rack. While they’re still warm, use a small pastry brush to dab a tiny bit of red food coloring or raspberry jam at the base of the almond nail. Sprinkle a pinch of cocoa powder or cinnamon over the cookies.
- Serve or store: Let the cookies cool completely before serving or storing.
Notes
Keep the dough cold to prevent spreading. Don’t overwork the dough. Use a chopstick for knuckle lines if a knife feels too sharp. Press the almond in at a slight downward angle. Make the dough the night before for easier shaping.
Nutrition
- Serving Size: 1 cookie
- Calories: 145
- Sugar: 8
- Sodium: 45
- Fat: 8
- Saturated Fat: 5
- Carbohydrates: 17
- Fiber: 0.5
- Protein: 2
Keywords: Halloween cookies, witch finger cookies, sugar cookies, spooky cookies, easy Halloween recipe