I wasn’t expecting to get cake-baking advice from my accountant, but there I was, knee-deep in tax receipts, listening to Mr. Henderson describe exactly how to make the perfect birthday cake. He was sorting through my deductions—a mess of coffee-stained envelopes and forgotten receipts—when he just started talking about butter. “You’re using the wrong kind,” he said, not looking up from his calculator. “For a real celebration cake, you need European-style butter. It has less water, more fat. Your guests will taste the difference.” I blinked at him. This was the same man who wore a tie with little fish on it to every meeting. But honestly? He was absolutely right.
That conversation changed how I bake for every single birthday party I’ve hosted since. That classic birthday cake—the one with the tender crumb, the silky frosting, the kind that makes people close their eyes when they take a bite—it all starts with that one simple swap. I mean, who knew the secret to the ultimate party cake was hiding in a tax accountant’s filing cabinet?
Over the years, I’ve tweaked and tested and messed up plenty of batches. I’ve had frosting that slid right off the cake (too warm), cakes that came out dry (overbaked by just two minutes), and one memorable disaster where I forgot the baking powder entirely. That cake was flat as a pancake. My friends still bring it up. But through all those failures, I kept coming back to this recipe. It’s the one I trust when I need to feed a crowd, when I want to impress without stress, and when I want that nostalgic, perfect slice of childhood. You know that feeling when the cake is so good, nobody talks for a minute? That’s this cake.
Why You’ll Love This Recipe
Let me tell you why this isn’t just another birthday cake recipe. After years of testing—and I mean years—I’ve landed on a version that’s foolproof for hosts. I’ve brought this to potlucks, served it at my own birthday dinners, and even baked it for a neighbor’s 80th surprise party. It never fails.
- Foolproof for Crowds: This recipe scales beautifully. Need to feed twenty people? Double it. Need a smaller 6-inch layer for a cozy gathering? Halve it. The ratios hold up every time.
- Simple Pantry Ingredients: No weird extracts or hard-to-find flours. Butter, sugar, eggs, flour, milk, vanilla—you probably have most of it already. The only special thing is the European butter, and honestly, it’s worth the extra dollar.
- Perfect for Hosting: This cake is designed to be made ahead. You can bake the layers the night before, wrap them well, and frost them the next day. That means less stress when your guests arrive.
- Always Gets Raves: I’ve served this to kids, grandparents, picky eaters, and serious foodies. Every single time, someone asks for the recipe. It’s that good.
- That Unforgettable Texture: The crumb is tender but sturdy enough to hold up to a thick layer of frosting. It’s not dry, not dense—just perfectly moist. The kind of cake that makes you go back for seconds.
What makes this different from every other classic birthday cake out there? It’s the technique. I use a reverse-creaming method that gives the cake an incredibly fine, velvety crumb. It’s a little trick I picked up from a pastry chef friend, and it makes all the difference. Plus, the frosting is a cooked flour frosting (sometimes called ermine frosting) that’s lighter than buttercream but just as rich. It’s the frosting your grandmother used to make, and it pairs perfectly with the tender cake. This isn’t just another version—it’s the best version I’ve ever made.
This recipe is the kind that makes you close your eyes after the first bite. It’s comfort food reimagined—familiar, but somehow better than you remembered. Perfect for impressing your guests without spending all day in the kitchen.
What Ingredients You Will Need
This recipe uses simple, wholesome ingredients to deliver that classic birthday cake flavor and texture. Most of these are pantry staples, but a few key choices make all the difference when you’re hosting a crowd.
For the Cake
- Unsalted butter, softened – 1 cup (2 sticks or 226 grams). I strongly recommend European-style butter like Kerrygold or Plugrà for the best flavor and texture. It has a higher fat content, which means a more tender crumb. Let it sit out for at least an hour before you start.
- Granulated sugar – 2 cups (400 grams). Regular white sugar works perfectly here. Don’t substitute with a finer sugar; the granulated texture helps with the creaming process.
- Large eggs, room temperature – 4 whole eggs. Room temperature eggs emulsify into the batter much better than cold ones. If you forget to take them out, place them in a bowl of warm water for 5 minutes.
- All-purpose flour – 3 cups (360 grams). Spoon and level your flour—don’t scoop directly from the bag, or you’ll end up with a dry cake.
- Baking powder – 2 teaspoons. Make sure it’s fresh! Old baking powder won’t give your cake the lift it needs.
- Baking soda – ½ teaspoon. This helps with browning and tenderness.
- Salt – 1 teaspoon. Use fine sea salt or table salt. It balances the sweetness.
- Whole milk, room temperature – 1 cup (240 ml). Whole milk gives the richest crumb. You can use 2%, but avoid skim milk—it will make the cake drier.
- Pure vanilla extract – 2 teaspoons. I prefer Nielsen-Massey or simply a good store brand. Avoid imitation vanilla if you can; the real stuff makes a noticeable difference in a simple cake like this.
- Vegetable oil – ¼ cup (60 ml). This is my secret ingredient for extra moisture. It keeps the cake soft for days.
For the Ermine Frosting
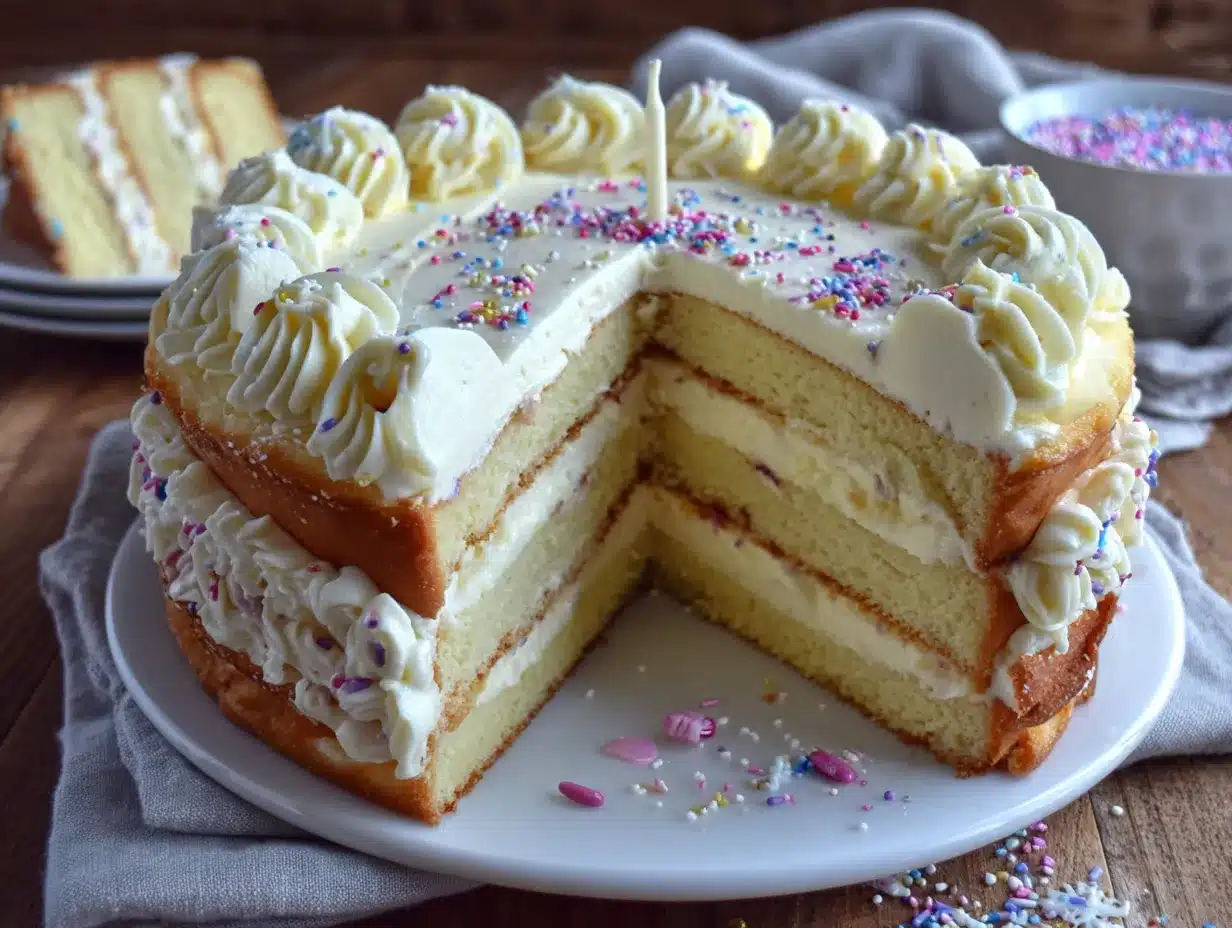
- Whole milk – 1½ cups (360 ml). Again, whole milk is best for a rich, stable frosting.
- All-purpose flour – 5 tablespoons (40 grams). This thickens the milk base.
- Granulated sugar – 1½ cups (300 grams).
- Unsalted butter, softened – 1½ cups (3 sticks or 340 grams). European-style butter works beautifully here too.
- Pure vanilla extract – 2 teaspoons.
- Pinch of salt – Just a tiny pinch to cut the sweetness.
Substitution Guidance
If you’re hosting someone with dietary restrictions, here are a few swaps that work. For a dairy-free version, you can use a high-quality plant-based butter (like Miyoko’s) and oat milk. The texture will be slightly different, but still delicious. For a gluten-free option, use a 1:1 gluten-free baking flour blend. I’ve had good luck with Bob’s Red Mill. Just be aware the crumb will be a bit more delicate.
Equipment Needed
You don’t need a professional bakery setup to pull off this cake. Here’s what I use in my own kitchen.
- Two 9-inch round cake pans – I prefer light-colored metal pans. Dark pans can cause the edges to brown too quickly. If you only have one pan, you can bake the layers one at a time—just let the pan cool completely between batches.
- Parchment paper – Cut circles to line the bottom of your pans. This is non-negotiable for easy release.
- Stand mixer or hand mixer – A stand mixer makes the reverse-creaming method easier, but a hand mixer works perfectly fine. You’ll just need to cream the butter and sugar a little longer by hand.
- Large mixing bowls – You’ll need at least two: one for dry ingredients and one for the wet.
- Whisk and rubber spatula – A good spatula is your best friend for scraping down the bowl and folding in ingredients.
- Cooling rack – Wire racks allow air to circulate around the cakes, preventing soggy bottoms.
- Offset spatula – This makes frosting the cake so much easier. You can get a decent one for under $10.
- Cake stand or serving plate – Pick something sturdy. A heavy cake stand won’t wobble when you’re frosting.
I’ve used cheap dollar-store pans before, and honestly, they work fine. The key is to prep them well—grease them thoroughly and line with parchment. My favorite budget-friendly tip? Buy a set of three 9-inch pans from a restaurant supply store. They’re inexpensive and last forever.
Preparation Method
Let me walk you through this step by step. I’ve added all the little cues I wish someone had told me when I first started baking layer cakes.
- Preheat your oven to 350°F (175°C). Position a rack in the center of the oven. While it’s heating, grease two 9-inch round cake pans with butter or non-stick spray. Line the bottoms with parchment paper circles, then grease the parchment too. Dust the pans lightly with flour, tapping out the excess.
- Whisk the dry ingredients together. In a large bowl, combine 3 cups (360g) all-purpose flour, 2 teaspoons baking powder, ½ teaspoon baking soda, and 1 teaspoon salt. Whisk for about 20 seconds to aerate and distribute everything evenly. Set this aside.
- Start the reverse-creaming method. In the bowl of your stand mixer (or a large bowl if using a hand mixer), add the 1 cup (226g) softened butter and 2 cups (400g) granulated sugar. Beat on medium speed for 2-3 minutes until light and fluffy. The mixture should look pale and feel smooth when you rub a bit between your fingers. Scrape down the sides of the bowl with your spatula.
- Add the eggs one at a time. Crack each egg into a small bowl first (no shells in the batter, please!). Add them one by one, beating on medium speed after each addition until fully incorporated. The batter might look a little curdled at this point—that’s normal. Don’t panic. Add the 2 teaspoons vanilla extract and beat once more.
- Alternate adding dry ingredients and milk. With the mixer on low speed, add about one-third of the flour mixture. Mix until just combined—a few streaks of flour are okay. Then add half of the 1 cup (240ml) room-temperature milk. Mix again. Repeat with another third of flour, the remaining milk, and finally the last third of flour. Stop mixing as soon as the last streaks of flour disappear. Overmixing will make the cake tough.
- Fold in the oil. Pour the ¼ cup (60ml) vegetable oil over the batter. Use your rubber spatula to fold it in gently. You want it fully incorporated, but don’t stir vigorously. This extra fat is what keeps the cake moist for days.
- Divide the batter evenly. Pour the batter into your prepared pans. I like to use a kitchen scale to make sure each pan gets exactly the same amount—about 680 grams per pan if you’re measuring. Smooth the tops with your spatula.
- Bake for 30-35 minutes. Place the pans in the oven, side by side. Bake until the tops are golden brown and a toothpick inserted into the center comes out clean or with a few moist crumbs. The cakes should start pulling away from the sides of the pans slightly. Rotate the pans halfway through baking if your oven has hot spots.
- Cool in the pans for 10 minutes. Set the pans on a wire rack. Let them rest for exactly 10 minutes. Then run a thin knife around the edges to loosen the cakes. Invert them onto the rack, peel off the parchment, and let them cool completely. This takes about 1-2 hours. Don’t even think about frosting a warm cake—it’ll be a disaster.
- Make the ermine frosting. While the cakes cool, whisk together 1½ cups (360ml) milk and 5 tablespoons (40g) flour in a medium saucepan. Cook over medium heat, whisking constantly, until the mixture thickens into a pudding-like paste. This takes about 5-7 minutes. It will look lumpy at first, then smooth out. Remove from heat and stir in the 2 teaspoons vanilla and a pinch of salt. Let this cool completely to room temperature. You can speed this up by spreading it on a plate and popping it in the fridge for 20 minutes.
- Beat the butter and sugar. In your stand mixer, beat the 1½ cups (340g) softened butter and 1½ cups (300g) sugar on medium-high speed until very light and fluffy, about 5 minutes. It should look pale and almost doubled in volume.
- Add the cooled milk paste. With the mixer on medium speed, add the cooled milk-flour mixture one spoonful at a time. Beat until the frosting is smooth, silky, and spreadable. It might look a little curdled at first, but keep beating—it will come together. Scrape the bowl well.
- Assemble the cake. Place one cooled cake layer on your serving plate. Spread about 1 cup of frosting evenly over the top. Place the second layer on top, flat side up. Apply a thin crumb coat (a thin layer of frosting all over the cake) and refrigerate for 20 minutes. Then apply the final, thicker layer of frosting. Use your offset spatula to make swirls or smooth it out—whatever you prefer.
- Decorate and serve. Add sprinkles, fresh berries, or candles. Let the cake sit at room temperature for about 30 minutes before serving for the best texture.
Cooking Tips & Techniques
Over the years, I’ve made every mistake in the book. Here are the lessons I learned the hard way, so you don’t have to.
Room temperature ingredients matter. I know it’s tempting to use cold eggs and milk straight from the fridge, but trust me on this. Cold ingredients don’t emulsify properly, which leads to a dense, heavy cake. Set everything out an hour before you start. If you forget, place the eggs in a bowl of warm water for 5 minutes and microwave the milk for 15 seconds.
Don’t overmix the batter. This is the number one mistake I see. When you overmix, you develop the gluten in the flour, which makes the cake tough and rubbery. Mix just until the flour disappears. A few small lumps are totally fine—they’ll bake out.
Use a kitchen scale for accuracy. I resisted this for years, but honestly, it’s a game-changer. Measuring flour by volume can vary by as much as 20-30 grams depending on how you scoop. A scale ensures consistent results every time. It’s especially important when you’re baking for a crowd and need the cake to turn out perfectly.
Let the frosting cool completely. I once tried to rush the ermine frosting and added the milk paste while it was still warm. The butter melted, and I ended up with a soupy mess. Patience is key here. Spread the cooked milk paste on a plate and pop it in the fridge for 20 minutes if you’re short on time.
Crumb coat is your friend. I used to skip the crumb coat because I was impatient. Then I’d end up with frosting full of cake crumbs, and my cake looked messy. A thin crumb coat seals in the crumbs, and after a quick chill in the fridge, your final layer of frosting will be smooth and beautiful.
Multitask wisely. While the cakes are baking, wash your dishes and prep your frosting ingredients. While the cakes are cooling, make the milk paste for the frosting. This way, you’re not scrambling at the end.
Variations & Adaptations
This classic birthday cake is a fantastic base for all kinds of creative twists. Here are a few of my favorites.
Chocolate Birthday Cake: Replace ½ cup (60g) of the all-purpose flour with ½ cup (50g) of unsweetened cocoa powder. Sift it together with the other dry ingredients. You’ll get a rich, chocolatey cake that pairs perfectly with the ermine frosting. I’ve made this for chocolate lovers, and it disappears fast.
Lemon Berry Version: Add the zest of two lemons to the butter and sugar when creaming. Swap the vanilla extract for lemon extract. For the filling, fold 1 cup of fresh or frozen blueberries into the frosting before spreading. The tartness of the berries cuts through the sweetness beautifully. This is my go-to for summer birthday parties.
Gluten-Free Adaptation: Use a 1:1 gluten-free baking flour blend. I’ve had success with Bob’s Red Mill and King Arthur’s measure-for-measure blends. The batter will be slightly thicker, and the cake might be a bit more delicate, so handle it gently when removing from the pan. It’s still delicious and nobody will know it’s gluten-free.
Dairy-Free Version: Substitute the butter with a high-quality plant-based butter (Miyoko’s is my favorite). Use oat milk or full-fat coconut milk instead of whole milk. The texture will be slightly different—a little less tender—but the flavor is still fantastic. I’ve served this to dairy-free guests, and they were thrilled.
Funfetti Twist: Fold ½ cup of rainbow sprinkles into the batter right before dividing it into the pans. This turns the cake into a classic funfetti birthday cake. Kids absolutely love it. Just make sure you use sprinkles that are designed for baking—some decorative sprinkles bleed their color into the batter.
Serving & Storage Suggestions
When you’re hosting a party, presentation and timing are everything. Here’s how to serve this cake like a pro.
Serving Temperature: Serve the cake at room temperature. Cold cake tastes dense and the frosting becomes stiff. Let it sit out for about 30-45 minutes before slicing. The texture will be tender, the frosting will be silky, and the flavors will be more pronounced.
Presentation Tips: Place the cake on a beautiful cake stand. I like to add a ring of fresh berries around the base and a few sprigs of mint on top. It looks impressive with almost no extra effort. If you’re feeling fancy, you can pipe rosettes around the top edge using a star tip.
What to Serve Alongside: A scoop of vanilla ice cream is a classic pairing. The cold, creamy ice cream contrasts beautifully with the tender cake. For a more sophisticated touch, serve with a dollop of lightly sweetened whipped cream and a drizzle of raspberry coulis. If you’re serving at a brunch, a cup of strong coffee or a glass of cold milk is perfect.
Storage Instructions: Store leftover cake in an airtight container at room temperature for up to 2 days. If your kitchen is warm, you can refrigerate it, but let slices come to room temperature before serving. For longer storage, you can freeze the unfrosted cake layers. Wrap each layer tightly in plastic wrap, then in aluminum foil. Freeze for up to 3 months. Thaw overnight in the refrigerator before frosting.
Reheating Tips: If you’re serving leftover slices, you can warm them in the microwave for about 10-15 seconds. This softens the cake and makes it taste almost freshly baked. Just don’t overdo it, or the frosting will melt.
How Flavors Develop: This cake actually tastes better the next day. The flavors meld together, and the crumb becomes even more moist. That’s why I love baking it a day ahead. It’s one less thing to worry about on party day.
Nutritional Information & Benefits
I’m not going to pretend this is health food—it’s a birthday cake, after all. But here’s a rough idea of what you’re working with, along with a few redeeming qualities.
Estimated Nutritional Values (per slice, based on 12 servings):
- Calories: 520
- Fat: 28g
- Saturated Fat: 17g
- Carbohydrates: 65g
- Sugar: 42g
- Protein: 6g
- Fiber: 1g
Health Benefits of Key Ingredients: The eggs provide high-quality protein and essential vitamins like B12 and D. Butter contains fat-soluble vitamins A, D, E, and K. And if you’re using fresh berries as a garnish, you’re getting a nice dose of antioxidants. It’s not a superfood, but it’s not empty calories either.
Dietary Considerations: This recipe contains gluten, dairy, and eggs. For those with allergies, check the variations section above for suitable substitutions. If you’re watching your sugar intake, you can reduce the sugar in the cake by ¼ cup without affecting the texture too much. The frosting is harder to adjust, but you can use a sugar substitute like monk fruit sweetener—just be aware the texture will be slightly different.
Potential Allergens: Wheat (gluten), dairy (milk, butter), eggs. Always check your ingredient labels if you’re serving guests with severe allergies.
My personal perspective? This cake is a celebration. It’s meant to be enjoyed in moderation, shared with loved ones, and savored. I’d rather have one slice of this incredible cake than a whole box of store-bought cupcakes. Quality over quantity, always.
FAQs
Can I make this cake ahead of time?
Absolutely. You can bake the cake layers up to 2 days in advance. Wrap them tightly in plastic wrap and store them at room temperature. You can also freeze the unfrosted layers for up to 3 months. Just thaw them in the fridge overnight before frosting.
Why did my cake sink in the middle?
This usually happens when the oven door is opened too early, or if the baking powder is old. Make sure your oven is fully preheated, and resist the urge to peek for the first 25 minutes. Also, check that your baking powder is fresh—it should fizz when you drop it in water.
Can I use a different frosting?
Of course. While I love ermine frosting for its silky texture and not-too-sweet flavor, you can absolutely use classic American buttercream or cream cheese frosting. If you use buttercream, reduce the sugar slightly so it doesn’t overpower the cake.
How do I get clean slices?
Use a long, sharp knife. Run it under hot water, wipe it dry, then make your cut. Wipe the blade clean between each slice. This gives you those beautiful, bakery-style slices with no smeared frosting.
Can I make this as a sheet cake instead?
Yes. Pour the batter into a greased 9×13-inch pan and bake for 35-40 minutes. The baking time will be a bit longer since the batter is in one pan. Check for doneness with a toothpick. You can frost it right in the pan for a casual, no-fuss presentation.
Conclusion
Look, I know there are a million birthday cake recipes out there. But this one? This is the one I keep coming back to. It’s the cake I make for my own birthday, the one I bring to potlucks, the one that gets the most compliments. It’s reliable, it’s delicious, and it makes people happy.
I hope you give it a try. And don’t be afraid to make it your own—add your favorite sprinkles, swap in some lemon zest, or pile on the fresh berries. The best recipes are the ones that become part of your own story. Maybe next time you’re at your accountant’s office, you’ll have a cake story to share.
If you make this cake, I’d love to hear about it. Leave a comment below and tell me how it turned out. Did you add a twist? Did your guests love it? Share a photo on Pinterest and tag me—I want to see your celebration cake in all its glory. Happy baking, friend!
Pin This Recipe!
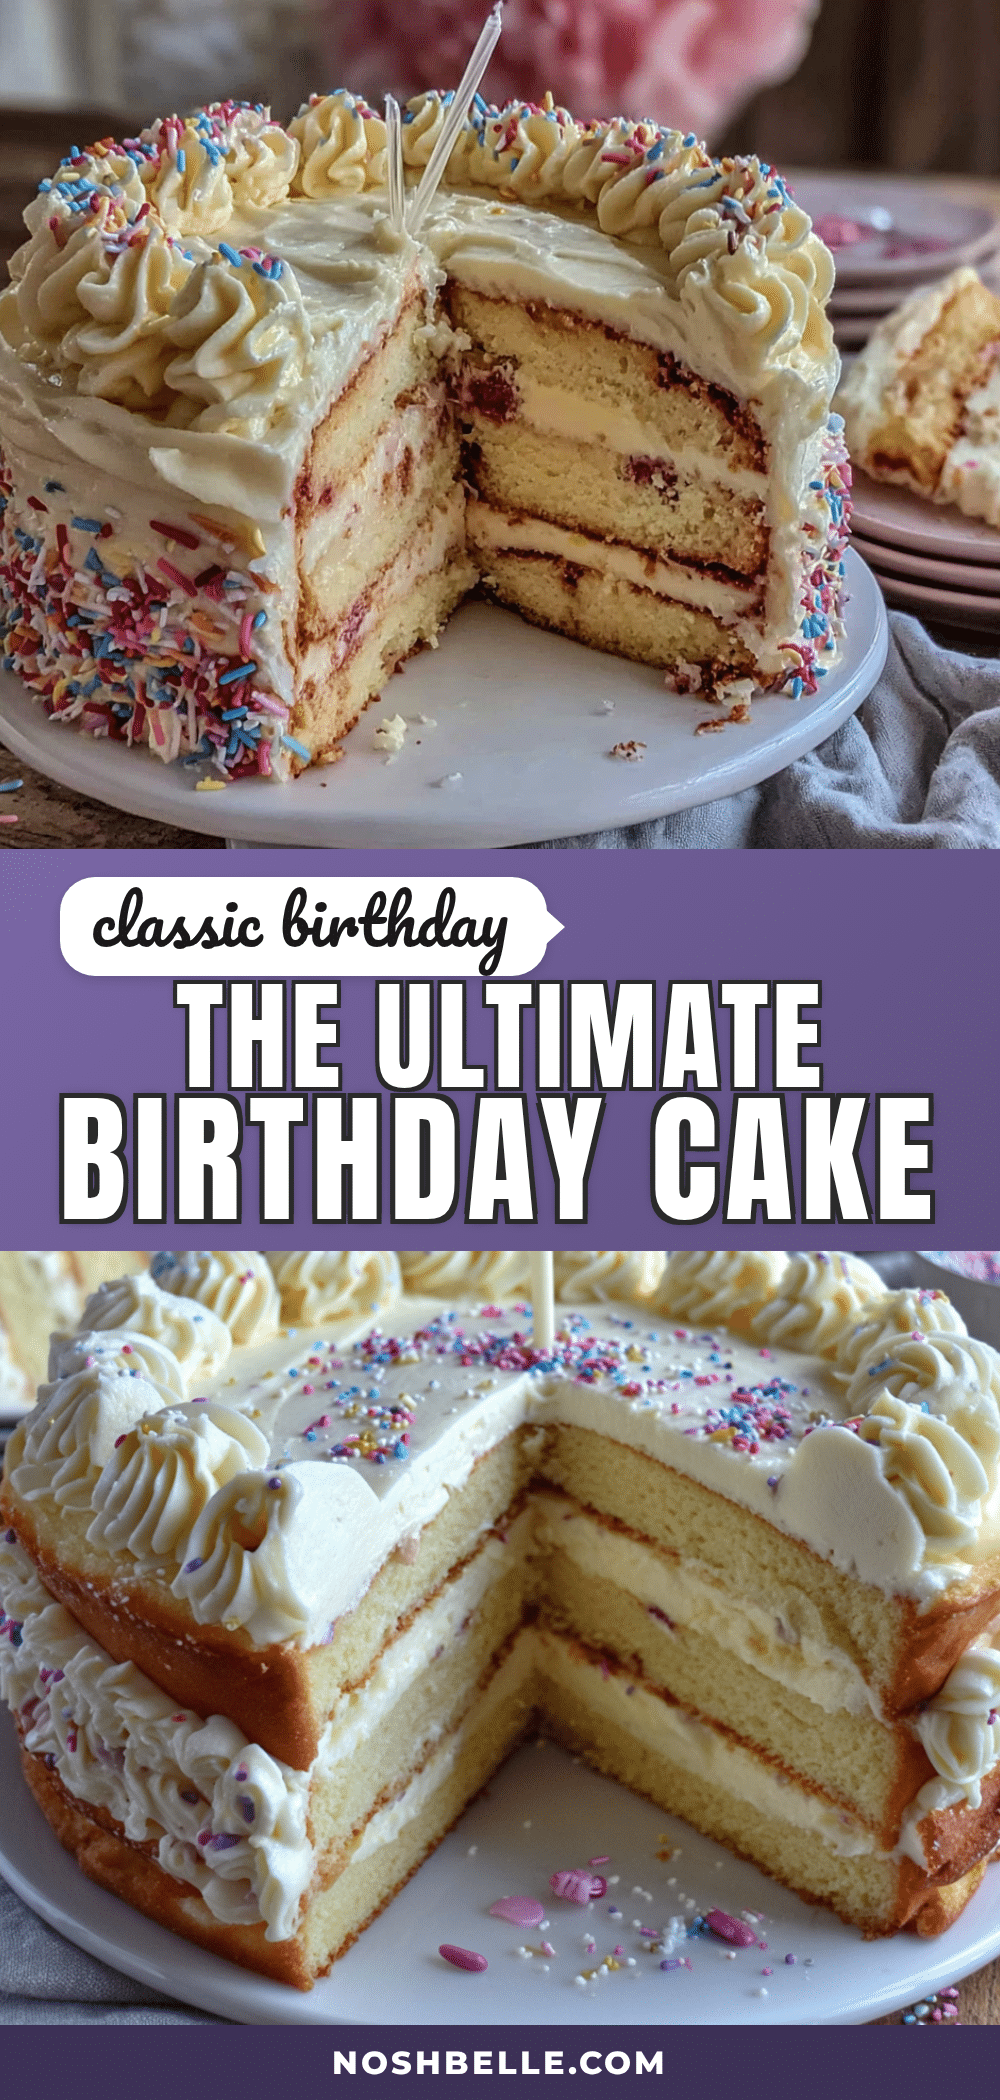
Ultimate Classic Birthday Cake: Easy Party Recipe
This foolproof birthday cake features a tender crumb and silky ermine frosting, perfect for any celebration. Made with simple ingredients and a reverse-creaming technique, it’s a crowd-pleaser that can be made ahead.
- Prep Time: 30 minutes
- Cook Time: 35 minutes
- Total Time: 1 hour 5 minutes
- Yield: 12 servings 1x
- Category: Dessert
- Cuisine: American
Ingredients
- 1 cup (2 sticks or 226g) unsalted butter, softened (European-style recommended)
- 2 cups (400g) granulated sugar
- 4 large eggs, room temperature
- 3 cups (360g) all-purpose flour
- 2 teaspoons baking powder
- ½ teaspoon baking soda
- 1 teaspoon fine sea salt
- 1 cup (240ml) whole milk, room temperature
- 2 teaspoons pure vanilla extract
- ¼ cup (60ml) vegetable oil
- 1½ cups (360ml) whole milk (for frosting)
- 5 tablespoons (40g) all-purpose flour (for frosting)
- 1½ cups (300g) granulated sugar (for frosting)
- 1½ cups (3 sticks or 340g) unsalted butter, softened (for frosting)
- 2 teaspoons pure vanilla extract (for frosting)
- Pinch of salt (for frosting)
Instructions
- Preheat oven to 350°F (175°C). Grease two 9-inch round cake pans, line bottoms with parchment, grease parchment, and dust with flour.
- In a large bowl, whisk together 3 cups flour, 2 tsp baking powder, ½ tsp baking soda, and 1 tsp salt.
- In a stand mixer bowl, beat 1 cup softened butter and 2 cups sugar on medium speed until light and fluffy, about 2-3 minutes.
- Add eggs one at a time, beating well after each. Mix in 2 tsp vanilla.
- On low speed, add dry ingredients and milk alternately: ⅓ flour, ½ milk, ⅓ flour, remaining milk, then remaining flour. Mix until just combined.
- Fold in ¼ cup vegetable oil with a rubber spatula until incorporated.
- Divide batter evenly between prepared pans (about 680g each). Smooth tops.
- Bake for 30-35 minutes until golden and a toothpick inserted in center comes out clean. Cool in pans 10 minutes, then invert onto wire rack to cool completely.
- For frosting: In a saucepan, whisk 1½ cups milk and 5 tbsp flour. Cook over medium heat, whisking constantly, until thickened (5-7 minutes). Remove from heat, stir in 2 tsp vanilla and a pinch of salt. Cool completely.
- In a stand mixer, beat 1½ cups softened butter and 1½ cups sugar on medium-high until light and fluffy, about 5 minutes.
- Add cooled milk paste one spoonful at a time, beating until smooth and spreadable.
- Place one cake layer on serving plate. Spread about 1 cup frosting on top. Add second layer. Apply thin crumb coat, refrigerate 20 minutes, then apply final frosting layer.
- Decorate as desired. Let cake sit at room temperature 30 minutes before serving.
Notes
Use European-style butter for best flavor. Room temperature ingredients are crucial. Do not overmix batter. Let frosting cool completely before adding to butter. Crumb coat helps achieve a smooth finish. Cake tastes even better the next day.
Nutrition
- Serving Size: 1 slice
- Calories: 520
- Sugar: 42
- Sodium: 320
- Fat: 28
- Saturated Fat: 17
- Carbohydrates: 65
- Fiber: 1
- Protein: 6
Keywords: birthday cake, classic cake, party cake, ermine frosting, layer cake, celebration cake


