My sister claimed she hated pumpkin desserts for fifteen years. Fifteen years of pumpkin pie at Thanksgiving sliding untouched across the table to her. Fifteen years of pumpkin muffins cooling on the counter while she reached for the banana ones instead. Then last October, I made this dump cake “just for myself” on a random Tuesday and found her standing at the kitchen counter at 11pm, fork in hand, eating straight from the pan. She didn’t even try to pretend she wasn’t doing it. “This doesn’t count,” she said with her mouth full. “This is different.”
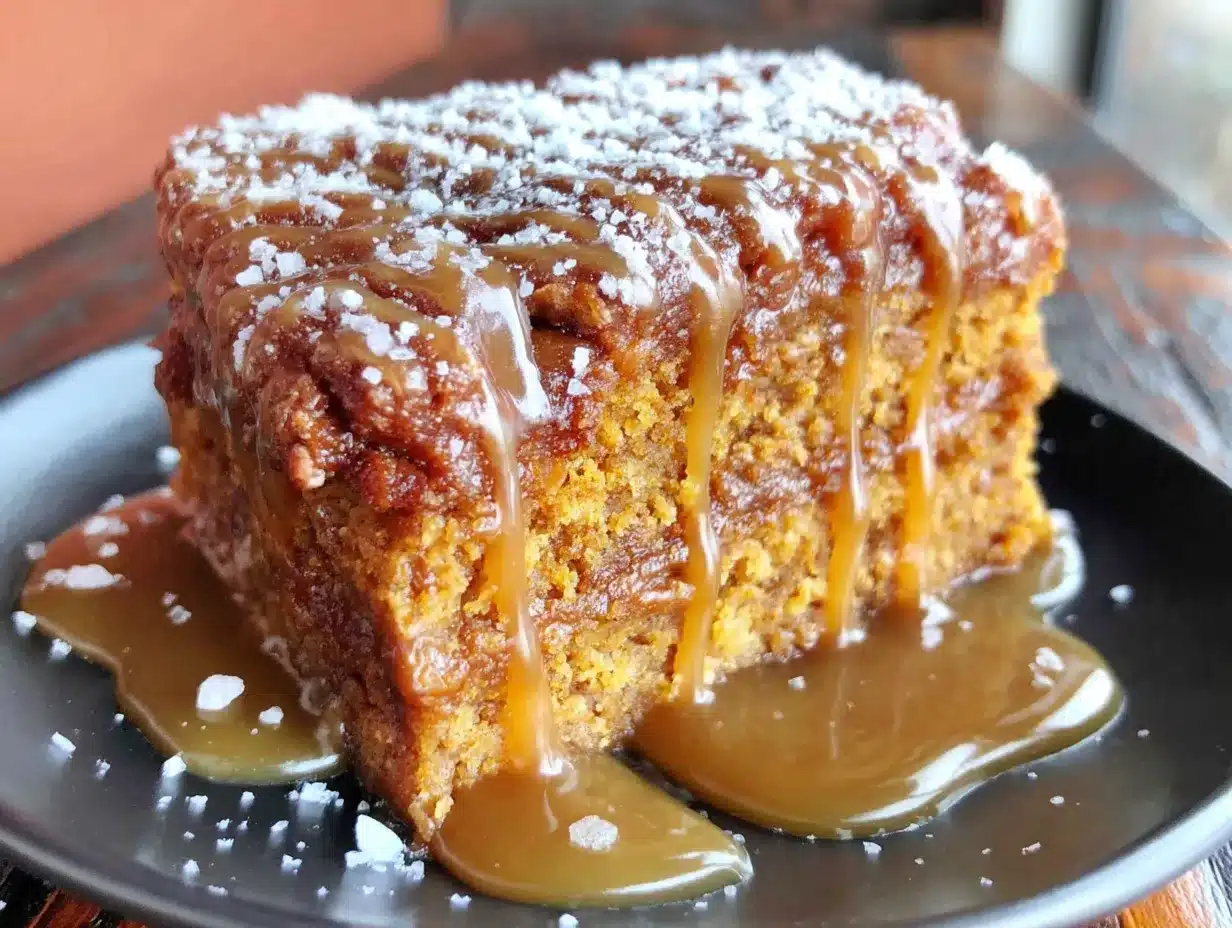
And she was right, honestly. This salted caramel pumpkin dump cake is different. It’s not trying to be a fancy layered cake or a complicated pastry. It’s the kind of dessert that happens when you stop caring about perfection and start caring about flavor. The kind where you dump everything in a pan, let the oven do the heavy lifting, and end up with something that makes people close their eyes after the first bite. I mean, there’s something almost magical about how a box of cake mix and a can of pumpkin can turn into this golden, bubbly, caramel-swirled situation.
I remember that night clearly because I’d had a rough day at work. I just wanted something sweet without having to wash a million dishes. The power of this recipe is that it delivers that deep, cozy fall feeling without the fuss. Maybe you’ve been there too—wanting the taste of a homemade dessert but running low on energy and patience. This cake was born for those moments. It stayed with me because it proved that simple doesn’t mean boring, and that sometimes the best recipes come from just throwing things together and hoping for the best.
Why You’ll Love This Recipe
Let me tell you why this salted caramel pumpkin dump cake has become my most-requested fall dessert. It’s not fancy, it’s not complicated, but it delivers every single time.
- Quick & Easy: Comes together in under 10 minutes of prep time. No mixer needed, no creaming butter and sugar, no rolling out dough. Just dump, layer, and bake.
- Simple Ingredients: You probably have most of these in your pantry right now. A box of yellow cake mix, canned pumpkin, evaporated milk—nothing weird or hard to find.
- Perfect for Fall Gatherings: This is the dessert you bring to Friendsgiving, potlucks, and family dinners. It feeds a crowd and everyone wants the recipe.
- Crowd-Pleaser: Even people who “don’t like pumpkin” (like my sister) end up going back for seconds. The salted caramel balances everything perfectly.
- Unbelievably Delicious: The top gets golden and slightly crisp while the bottom stays soft and pudding-like. It’s like a cake and a custard had a beautiful baby.
What makes this version different from other pumpkin dump cakes is the salted caramel. Most recipes just dump cake mix on top and call it a day. But I add a layer of homemade-style salted caramel sauce that sinks into the pumpkin filling as it bakes, creating these little pockets of gooey, buttery sweetness throughout. The flaky sea salt on top isn’t just for looks—it cuts through the sweetness and makes every bite more interesting.
This recipe isn’t just good—it’s the kind that makes you close your eyes after the first bite. It’s comfort food reimagined for busy people who still want something special. Perfect for impressing guests without stress, or turning a simple Tuesday night into something memorable.
What Ingredients You Will Need
This recipe uses simple, pantry-friendly ingredients to deliver that rich fall flavor without any complicated shopping trips. Most of these are staples you might already have on hand, especially if you’re a fan of fall baking.
For the Pumpkin Layer
- 1 can (15 oz) pumpkin puree (not pumpkin pie filling—make sure it’s 100% pure pumpkin. I prefer Libby’s for consistent texture)
- 1 can (12 oz) evaporated milk (this adds richness without making things too heavy. You can use full-fat or low-fat)
- 3 large eggs, room temperature (room temperature eggs blend more smoothly into the filling)
- 1 cup granulated sugar (adds sweetness and helps the filling set properly)
- 1 teaspoon vanilla extract (pure vanilla is best, but imitation works fine too)
- 2 teaspoons pumpkin pie spice (store-bought is fine, or make your own with cinnamon, nutmeg, ginger, and cloves)
- 1/2 teaspoon salt (enhances all the warm spices and balances the sweetness)
For the Cake Layer
- 1 box (15.25 oz) yellow cake mix (Duncan Hines or Betty Crocker both work great. Don’t use a “super moist” or “extra moist” variety—the texture gets weird)
- 1 cup unsalted butter, melted (salted butter works too, just reduce the added salt slightly. I use Land O’Lakes)
For the Salted Caramel Swirl & Topping
- 1/2 cup salted caramel sauce (store-bought is totally fine—I like Stonewall Kitchen or Trader Joe’s. Or use homemade if you’re feeling ambitious)
- 1 teaspoon flaky sea salt (like Maldon or Fleur de Sel. Don’t use regular table salt here—it’s too intense and doesn’t give that nice crunchy pop)
Optional Add-Ins
- 1/2 cup chopped pecans or walnuts (adds nice crunch on top. Toast them first for more flavor)
- 1/2 cup chocolate chips (white chocolate or semi-sweet both work surprisingly well with pumpkin)
If you’re dairy-free, you can substitute the evaporated milk with canned coconut milk (full-fat) and use a plant-based butter alternative. The texture will be slightly different but still delicious. For a gluten-free version, use a gluten-free yellow cake mix—just make sure it’s the same weight (15.25 oz).
Equipment Needed
The beauty of a dump cake is that you don’t need much equipment. Here’s what you’ll need:
- 9×13-inch baking dish (glass or ceramic works best. Metal pans can work but might cook faster, so check a few minutes early)
- Large mixing bowl (for whisking the pumpkin filling)
- Whisk (a fork works in a pinch, but a whisk makes the filling smoother)
- Measuring cups and spoons (for accuracy, especially with the spices)
- Small saucepan or microwave-safe bowl (for melting butter if you’re not using pre-melted)
- Rubber spatula (for scraping every last bit of filling into the pan)
- Cooling rack (optional but helpful for even cooling)
I’ve made this in a disposable aluminum pan for potlucks and it works perfectly. Just keep an eye on the baking time since metal conducts heat differently. If you don’t have a whisk, honestly, a fork does the job—just whisk a little longer to break up any lumps. My grandma used to make dump cakes in a cast iron skillet, and while I haven’t tried it with this specific recipe, I bet it would add a nice crispy edge.
Preparation Method
Preheat your oven to 350°F (175°C). Grease your 9×13-inch baking dish lightly with butter or non-stick spray. This step matters—even with all that butter, the caramel can stick to ungreased pans.
- Make the pumpkin filling: In your large mixing bowl, whisk together the pumpkin puree, evaporated milk, eggs, granulated sugar, vanilla extract, pumpkin pie spice, and salt. Whisk until smooth and fully combined. The mixture should be a beautiful deep orange color with no streaks of egg white. This takes about 1-2 minutes of steady whisking. Don’t over-whisk though—you’re not making whipped cream here.
- Pour into the baking dish: Pour the pumpkin mixture into your greased 9×13-inch dish. Spread it evenly with your spatula. It should be about 1/2 to 3/4 inch deep. Give the dish a gentle shake to level it out if needed.
- Drizzle the caramel: Drizzle 1/3 cup of your salted caramel sauce evenly over the pumpkin filling. Don’t stir it in—just let it sit on top. It will sink and swirl naturally as the cake bakes. This is where the magic happens, trust me.
- Add the cake mix: Sprinkle the entire box of yellow cake mix evenly over the pumpkin and caramel layer. Don’t stir it in. Seriously, don’t stir. The whole point of a dump cake is that the dry cake mix sits on top and creates that wonderful crust. Use your fingers or a fork to break up any clumps as you sprinkle.
- Pour the melted butter: Drizzle the melted butter evenly over the dry cake mix. Try to cover as much of the surface as possible. Some spots will get more butter than others, and that’s okay—it creates those lovely crispy and soft patches. Don’t stir the butter in either. Just let it sit on top.
- Top with remaining caramel and salt: Drizzle the remaining caramel sauce over the buttered cake mix layer. Then sprinkle the flaky sea salt evenly over the top. If you’re adding nuts or chocolate chips, sprinkle them on now too.
- Bake: Place the dish in your preheated oven and bake for 45-50 minutes. The top should be golden brown and the edges should be bubbly. The center might still look a little jiggly—that’s fine. A toothpick inserted into the center should come out with moist crumbs, not wet batter. If the top is browning too quickly (after about 30 minutes), tent loosely with aluminum foil.
- Cool: Let the cake cool in the pan on a wire rack for at least 20-30 minutes before serving. This is crucial—the filling needs time to set up. If you serve it too soon, it will be soupy. I know it’s hard to wait, but trust the process.
- Serve: Scoop into bowls or onto plates. The cake layer will be on top and the pumpkin filling underneath. It’s meant to be served warm, not hot. A scoop of vanilla ice cream or a dollop of whipped cream takes it over the top.
A quick note: if you notice the caramel sinking too much or the cake mix staying too dry on top, your butter distribution might have been uneven. Next time, try drizzling the butter more slowly and deliberately. Every oven runs a little differently, so get to know yours. My oven runs hot, so I start checking at 40 minutes.
Cooking Tips & Techniques
After making this salted caramel pumpkin dump cake about a dozen times (not exaggerating), I’ve learned a few things the hard way. Let me save you some trouble.
Don’t overthink the layering. The biggest mistake people make is wanting to stir everything together. I get it—it feels wrong to leave dry cake mix sitting on top of liquid. But that’s exactly what creates the magic. The butter melts into the cake mix, which absorbs the moisture from the pumpkin filling below, creating a golden, slightly crisp crust with a soft, almost pudding-like center. If you stir it, you’ll end up with a dense, pasty mess.
Room temperature ingredients matter. I learned this the hard way when I used cold eggs straight from the fridge. The filling was lumpy and took forever to whisk smooth. Let your eggs sit on the counter for 30 minutes before starting. Same goes for the pumpkin puree—it blends more easily when it’s not fridge-cold.
Watch your oven like a hawk. I burned my first attempt because I got distracted folding laundry. The edges were black and the center was still raw. Set a timer and check at 40 minutes. Every oven is different, and the difference between perfect and overdone can be just 5 minutes. If the top is getting too dark but the center isn’t set, cover with foil and keep baking.
Let it rest. I cannot stress this enough. The first time I made this, I served it after 10 minutes and it was a soupy disaster. Delicious, but soupy. The filling needs time to firm up as it cools. 30 minutes is the minimum. An hour is better. Overnight in the fridge is actually amazing—the flavors meld together and the texture becomes almost cheesecake-like.
Use good caramel. This is not the time for the cheap stuff in the ice cream topping aisle. Get a quality jarred caramel sauce—the kind that lists cream and butter as ingredients, not high fructose corn syrup. The flavor difference is night and day. Or make your own if you’re feeling fancy. Homemade caramel takes this to another level entirely.
Variations & Adaptations
One of the best things about this dump cake is how flexible it is. Here are some variations I’ve tried and loved:
Pumpkin Chocolate Chip Dump Cake: Sprinkle 1 cup of semi-sweet or white chocolate chips over the cake mix before adding the butter. The chocolate melts into little pockets of richness throughout. I made this for a Halloween party and it disappeared in 20 minutes.
Gluten-Free Version: Use a gluten-free yellow cake mix. I’ve tested this with King Arthur Flour’s gluten-free yellow cake mix and it worked beautifully. The texture is slightly more crumbly on top but still delicious. Just make sure your caramel sauce is also gluten-free—some brands use wheat as a thickener.
Dairy-Free Version: Substitute the evaporated milk with full-fat canned coconut milk. Use a plant-based butter alternative (I like Miyoko’s for baking). The coconut flavor is subtle and actually complements the pumpkin nicely. The texture will be slightly less rich but still creamy and satisfying.
Spice It Up: Add 1/4 teaspoon of cayenne pepper or chipotle powder to the pumpkin filling. The heat pairs beautifully with the sweet caramel and warm pumpkin spices. I tried this on a whim and now it’s my secret weapon for adult gatherings.
Nutty Caramel Crunch: Add 1/2 cup of chopped pecans or walnuts to the top layer before baking. Toast them first in a dry pan for 3-4 minutes until fragrant. The crunch adds wonderful texture contrast against the soft filling.
Apple Pumpkin Dump Cake: Layer 2 cups of diced peeled apples (Granny Smith or Honeycrisp work well) on the bottom of the pan before adding the pumpkin filling. The apples soften and create little fruity pockets throughout. This is amazing for Thanksgiving.
Serving & Storage Suggestions
This dump cake is best served warm, but not hot. Let it rest for at least 30 minutes after baking before digging in. The texture is at its peak when it’s just barely warm—the filling is soft and custard-like, and the top is still slightly crisp.
How to serve: Scoop into shallow bowls or onto plates. A generous scoop of vanilla bean ice cream is the classic pairing—the cold creaminess balances the warm spiced cake perfectly. Whipped cream works too, especially if you add a pinch of cinnamon to it. For an extra indulgent touch, drizzle more caramel sauce on top and add another sprinkle of flaky salt.
What to serve with it: This cake is rich enough to stand alone, but it pairs beautifully with a cup of hot coffee or spiced apple cider. If you’re serving it for dessert after a big meal, keep portions modest—a little goes a long way. It also works surprisingly well as a brunch dish alongside bacon and eggs. Don’t knock it till you try it.
Storage: Cover the pan tightly with foil or plastic wrap and store in the refrigerator for up to 5 days. The flavors actually get better after a day or two as everything melds together. The texture changes slightly—the top softens and the filling firms up almost like a pumpkin cheesecake. Honestly, I sometimes prefer it cold straight from the fridge the next day.
Reheating: To reheat individual portions, microwave for 20-30 seconds. For the whole pan, cover with foil and warm in a 300°F oven for 10-15 minutes. If you’re reheating from frozen, thaw overnight in the fridge first, then warm in the oven.
Freezing: This dump cake freezes beautifully. Let it cool completely, then wrap the entire pan (or individual portions) tightly in plastic wrap, then foil. Freeze for up to 3 months. Thaw overnight in the refrigerator before reheating. I often make two pans at once—one for now, one for later.
Nutritional Information & Benefits
Let’s be real—this is a dessert, not a health food. But here’s the nutritional breakdown for one serving (based on 12 servings):
| Nutrient | Amount Per Serving |
|---|---|
| Calories | 385 |
| Total Fat | 18g |
| Saturated Fat | 11g |
| Cholesterol | 85mg |
| Sodium | 420mg |
| Total Carbohydrates | 52g |
| Dietary Fiber | 2g |
| Sugars | 36g |
| Protein | 5g |
| Vitamin A | 130% DV |
| Calcium | 15% DV |
The good news: pumpkin is packed with Vitamin A (over 100% of your daily needs per serving), which supports eye health and immune function. It’s also a good source of fiber and potassium. The eggs provide protein and healthy fats. The caramel and cake mix? Well, they provide happiness, and that counts for something too.
If you’re watching your sugar intake, you can reduce the granulated sugar in the filling to 3/4 cup without sacrificing too much texture. For a lower-fat version, use low-fat evaporated milk and reduce the butter to 3/4 cup. The top won’t be as crispy, but it’ll still taste great.
This recipe contains gluten, dairy, and eggs. For allergies, see the variations section above for substitutions.
Conclusion
This salted caramel pumpkin dump cake is proof that you don’t need fancy techniques or complicated ingredients to make something truly special. It’s the dessert I turn to when I want to impress without stress, when I need a taste of fall without spending all day in the kitchen, and when I want to remind myself that simple can be spectacular.
I love this recipe because it’s forgiving. Mess up the layering? It’ll still taste amazing. Use a different brand of cake mix? No problem. Forget to add the salt? Just sprinkle it on after baking. It’s the kind of recipe that builds confidence in the kitchen, even for beginner bakers.
So go ahead and make this your own. Add extra caramel if you’re feeling indulgent. Throw in some chocolate chips. Skip the nuts if that’s not your thing. The beauty of a dump cake is that it’s hard to ruin and easy to love. I’d love to hear how yours turns out—drop a comment below and let me know what variations you tried. And if you make it for a gathering, prepare for everyone to ask for the recipe. Maybe even your sister who “doesn’t like pumpkin.”
Frequently Asked Questions
Can I use pumpkin pie filling instead of pumpkin puree?
No, don’t do that. Pumpkin pie filling is already sweetened and spiced, so it would throw off the entire balance of the recipe. Stick with 100% pure pumpkin puree. The difference is important—pumpkin pie filling has added sugar and spices, and it’s usually thicker. Using it would make your filling overly sweet and the texture would be off.
Why is my dump cake soupy in the middle?
This usually happens for one of two reasons: either you didn’t bake it long enough, or you didn’t let it cool long enough before serving. The filling needs time to set as it cools. Make sure your oven is actually at 350°F (oven thermostats can be inaccurate), and give the cake a full 30 minutes of resting time after baking. If it’s still soupy after that, pop it back in the oven for another 5-10 minutes.
Can I make this ahead of time?
Absolutely. You can assemble the entire dump cake (up to step 6) and refrigerate it unbaked for up to 24 hours. When you’re ready to bake, add about 5-10 minutes to the baking time since you’re starting from cold. Or bake it fully, let it cool, and reheat when ready to serve. The flavors actually get better overnight.
Can I use a different flavor of cake mix?
Yes! Spice cake mix is amazing with pumpkin—it adds even more warm fall flavor. Butter pecan cake mix works beautifully too, especially if you’re adding nuts. White cake mix is a good neutral option. Just avoid chocolate cake mix unless you’re going for a very specific flavor combination (I’ve tried it, and it’s okay but not my favorite).
How do I know when the dump cake is done?
The top should be golden brown and the edges should be bubbly. The center might still look slightly jiggly, but it shouldn’t be liquid. A toothpick inserted into the center should come out with moist crumbs, not wet batter. If the top is browning too fast (after about 30 minutes), cover loosely with foil and continue baking. Trust your eyes and your toothpick more than the timer.
Pin This Recipe!
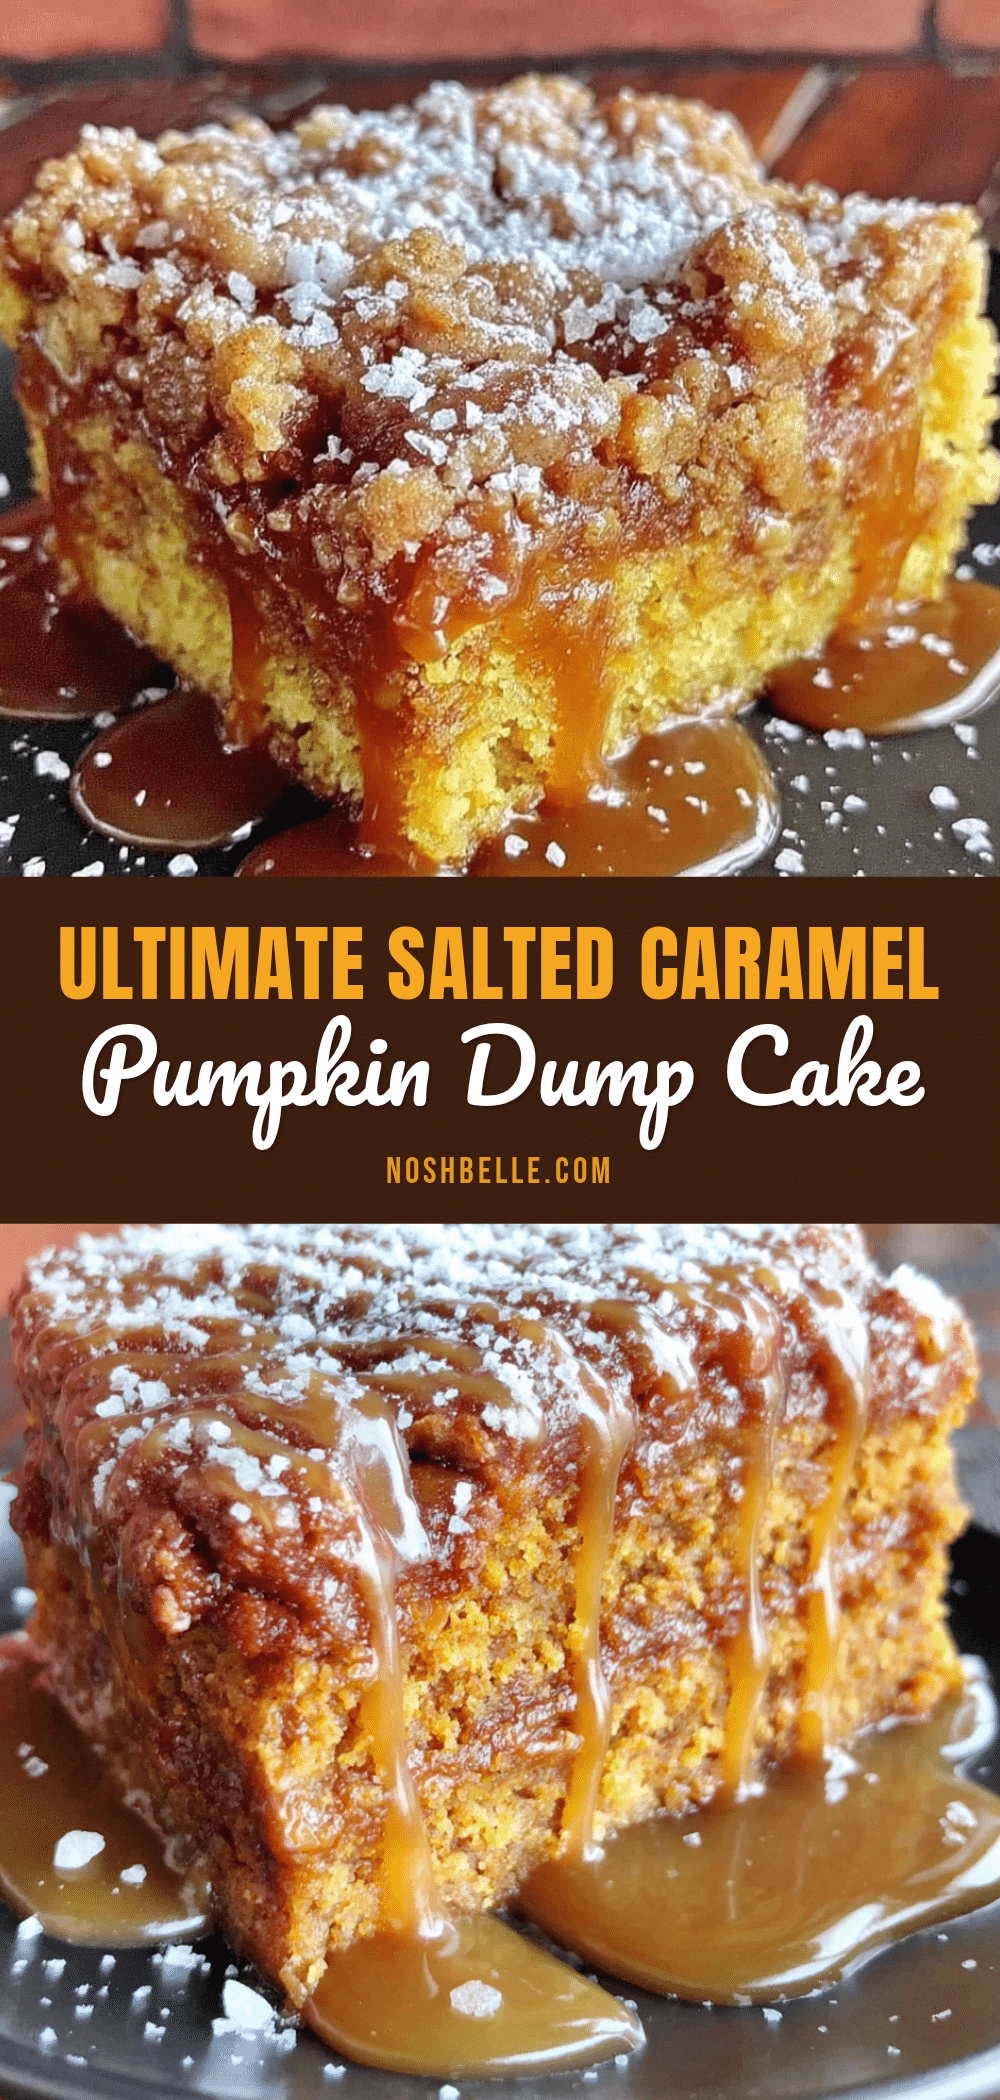
Ultimate Salted Caramel Pumpkin Dump Cake: Easy Fall Dessert
This salted caramel pumpkin dump cake is a simple, no-fuss dessert that delivers deep fall flavor. With a golden, slightly crisp top and a soft, pudding-like pumpkin filling swirled with gooey salted caramel, it’s a crowd-pleaser that even pumpkin skeptics love.
- Prep Time: 10 minutes
- Cook Time: 45 minutes
- Total Time: 55 minutes
- Yield: 12 servings 1x
- Category: Dessert
- Cuisine: American
Ingredients
- 1 can (15 oz) pumpkin puree (not pumpkin pie filling)
- 1 can (12 oz) evaporated milk
- 3 large eggs, room temperature
- 1 cup granulated sugar
- 1 teaspoon vanilla extract
- 2 teaspoons pumpkin pie spice
- 1/2 teaspoon salt
- 1 box (15.25 oz) yellow cake mix (not super moist or extra moist variety)
- 1 cup unsalted butter, melted
- 1/2 cup salted caramel sauce
- 1 teaspoon flaky sea salt
- 1/2 cup chopped pecans or walnuts (optional)
- 1/2 cup chocolate chips (optional)
Instructions
- Preheat oven to 350°F (175°C). Grease a 9×13-inch baking dish lightly with butter or non-stick spray.
- In a large mixing bowl, whisk together pumpkin puree, evaporated milk, eggs, granulated sugar, vanilla extract, pumpkin pie spice, and salt until smooth and fully combined (about 1-2 minutes).
- Pour the pumpkin mixture into the prepared baking dish and spread evenly with a spatula.
- Drizzle 1/3 cup of the salted caramel sauce evenly over the pumpkin filling. Do not stir.
- Sprinkle the entire box of yellow cake mix evenly over the pumpkin and caramel layer. Do not stir. Break up any clumps with your fingers or a fork.
- Drizzle the melted butter evenly over the dry cake mix. Do not stir.
- Drizzle the remaining caramel sauce over the buttered cake mix layer, then sprinkle the flaky sea salt evenly on top. If using nuts or chocolate chips, sprinkle them on now.
- Bake for 45-50 minutes, until the top is golden brown and the edges are bubbly. The center may still look slightly jiggly. If the top browns too quickly (after about 30 minutes), tent loosely with aluminum foil.
- Let the cake cool in the pan on a wire rack for at least 20-30 minutes before serving. The filling needs time to set.
- Serve warm, scooped into bowls or onto plates. Top with vanilla ice cream or whipped cream if desired.
Notes
Don’t stir the layers—the dry cake mix on top creates a golden crust. Room temperature ingredients blend more smoothly. Let the cake rest for at least 30 minutes after baking to allow the filling to set. For best results, use a quality caramel sauce with cream and butter. Store leftovers covered in the refrigerator for up to 5 days; reheat individual portions in the microwave for 20-30 seconds.
Nutrition
- Serving Size: 1 serving
- Calories: 385
- Sugar: 36
- Sodium: 420
- Fat: 18
- Saturated Fat: 11
- Carbohydrates: 52
- Fiber: 2
- Protein: 5
Keywords: pumpkin dump cake, salted caramel pumpkin cake, easy fall dessert, pumpkin dessert, dump cake recipe