There used to be a tiny pizzeria on a side street in Portland called Frankie’s Flatbread that made the most incredible stuffed breadsticks for Halloween. When they closed their doors three years ago—just packed up and vanished one November morning—I actually felt a little pang of grief. I mean, it sounds dramatic for a breadstick, but these were different. They were wrapped like mummies, with little cheese eyes peeking out, and the dough had this perfect flaky-meets-crispy thing happening. I tried recreating them at least eight times before I gave up. Then last October, standing in my kitchen at 10 PM with a pack of hot dogs and some crescent roll dough I’d grabbed on a whim, it clicked. These easy mummy hot dogs with cheese wrap aren’t exactly the same—honestly, they might be better.
The first batch came out looking like a crime scene. Too much dough, not enough wrapping strategy, and the cheese eyes kept sliding off. But that second attempt? My kids actually gasped when they saw the tray. There’s something about the way the dough wraps around the hot dog, leaving those little gaps for the cheese to peek through, that feels like magic. You know that feeling when you finally crack a recipe you’ve been chasing? That’s this. And the best part? It takes maybe fifteen minutes from start to finish. Maybe you’ve been looking for that one Halloween dish that looks impressive but doesn’t make you want to pull your hair out—this is it.
Why You’ll Love This Recipe
Let me tell you, I’ve tested this easy mummy hot dogs recipe more times than I care to admit. Some batches were beautiful. Some looked like hot dog horror shows. But every single time, they disappeared off the plate in minutes. Here’s why this version wins:
- Quick & Easy: Comes together in under 20 minutes, perfect for Halloween parties or last-minute spooky snacks when you realize the party starts in an hour.
- Simple Ingredients: No fancy grocery trips needed—hot dogs, crescent roll dough, cheese sticks, and a little mustard. That’s it.
- Perfect for Halloween: Great for classroom parties, potlucks, movie nights, or just surprising your family on October 31st.
- Crowd-Pleaser: Kids go absolutely wild for these, and adults sneak them when nobody’s looking (I’ve caught my husband doing this).
- Unbelievably Delicious: The combination of flaky, buttery dough wrapped around a juicy hot dog with melty cheese peeking through? It’s next-level comfort food.
What makes this version different from all the others? It’s the cheese wrap technique. Instead of just sticking cheese slices inside, I wrap the cheese around the hot dog before adding the dough strips. This creates those perfect little cheese eyes that actually stay put during baking. No sliding, no melting into a puddle—just beautiful, spooky mummy faces every time. And the dough wraps at an angle, just loose enough to let the cheese peek through naturally.
This isn’t just another Halloween snack recipe. It’s the kind that makes you close your eyes after the first bite. It’s comfort food reimagined—fast, fun, but with the same soul-soothing satisfaction. Perfect for impressing guests without stress, or turning a simple weeknight into something memorable.
What Ingredients You Will Need
This easy mummy hot dogs recipe uses simple, everyday ingredients to deliver big flavor and fun presentation without the fuss. Most of these are probably already in your fridge and pantry, which makes this perfect for those “I need something for the Halloween party tomorrow” moments.
- 8 hot dogs (I prefer beef hot dogs for better flavor—Hebrew National or Oscar Mayer work great; turkey or chicken hot dogs also work well)
- 1 can (8 oz) refrigerated crescent roll dough (Pillsbury is my go-to; the sheets version works best since you don’t have to separate perforated triangles)
- 4 string cheese sticks (Mozzarella sticks work perfectly; look for ones that pull apart easily for the best cheese eyes)
- Mustard (Yellow mustard gives the best color contrast for decorating; you can also use ketchup or sriracha for different looks)
- Optional: Cooking spray or melted butter (For brushing on top to get that golden-brown finish)
- Optional: Everything bagel seasoning or sesame seeds (For extra texture on the dough if you’re feeling fancy)
Ingredient Selection Tips: For the best texture, look for hot dogs that are all-beef or at least high-quality—cheaper hot dogs tend to shrink more during baking, which can mess up your mummy wrap. The crescent roll dough should be cold when you work with it; if it gets too warm, it becomes sticky and hard to cut into clean strips. I recommend Pillsbury crescent dough sheets specifically because they don’t have perforations, which makes cutting uniform strips much easier. If you can only find the perforated version, just pinch those seams together before cutting.
Substitution Guidance: For a gluten-free version, use gluten-free crescent roll dough (it’s available at most major grocery stores now) or gluten-free puff pastry sheets. For dairy-free, skip the cheese sticks or use dairy-free cheese alternatives—though I’ll warn you, the melt factor changes a bit. You can also use turkey or chicken hot dogs for a lighter option, or even vegetarian hot dogs for a plant-based version. The technique stays exactly the same.
Equipment Needed
You don’t need anything fancy for these easy mummy hot dogs. Here’s what I use every time:
- Baking sheet (A standard half-sheet pan works perfectly; line it with parchment paper for easy cleanup)
- Sharp knife or pizza cutter (For cutting the dough into strips—a pizza cutter makes this so much faster)
- Cutting board (For working with the dough; keep it clean and dry)
- Small bowl (For the mustard you’ll use to dot the eyes)
- Pastry brush (Optional but nice for brushing butter on top; you can also just use your fingers)
- Parchment paper (Prevents sticking and makes cleanup a breeze)
- Toothpicks (For securing any loose dough ends if needed—I learned this the hard way)
If you don’t have a pizza cutter, a sharp knife works just fine. I actually used a butter knife my first few times and it was a mess—get something sharp. And if you don’t have parchment paper, you can grease the baking sheet with cooking spray, but honestly, parchment is worth it for the cleanup alone.
Preparation Method
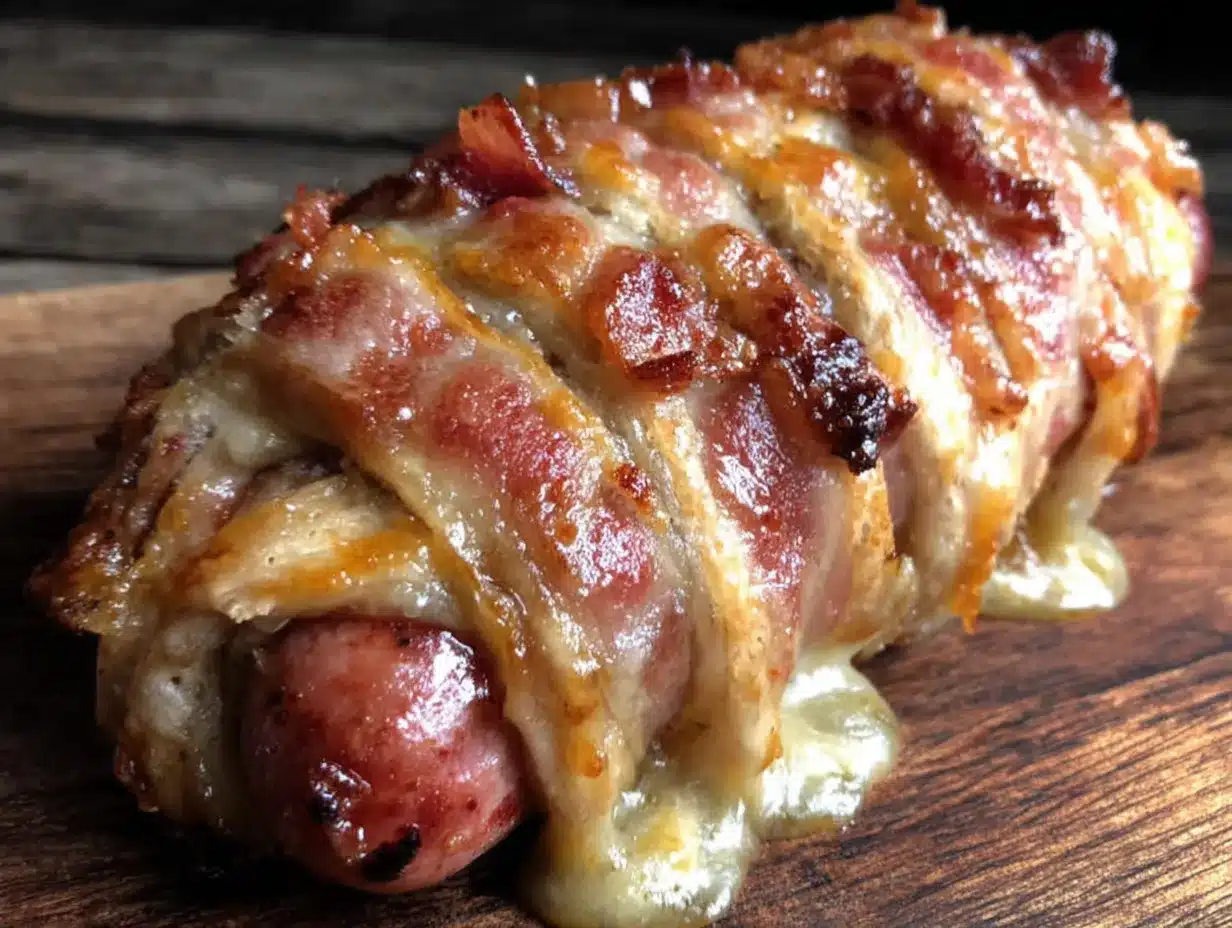
Let me walk you through how to make these easy mummy hot dogs step by step. I’ve included every little detail I wish someone had told me the first time.
- Preheat your oven to 375°F (190°C). Line a baking sheet with parchment paper. This gives you time to prep while it heats up. Trust me, you want it fully preheated before these go in.
- Prepare the cheese. Take your 4 string cheese sticks and cut each one in half crosswise, so you have 8 short pieces. Then cut each half lengthwise into 4 thin strips. You should end up with 32 thin cheese strips total—that’s 4 strips per mummy hot dog. Set these aside on a plate. If the cheese gets too warm, it becomes harder to work with, so keep it refrigerated until you’re ready.
- Unroll the crescent dough. Open the can carefully—I always jump when it pops. Unroll the dough onto your cutting board. If you’re using the sheet version, you’ll have one large rectangle. If you’re using the perforated triangle version, pinch all the seams together to form a solid sheet. Either way, you want a smooth, even piece of dough.
- Cut the dough into strips. Using your pizza cutter or sharp knife, cut the dough crosswise into 24 thin strips, about 1/2 inch wide each. You’ll use 3 strips per mummy hot dog. The strips don’t have to be perfectly uniform—actually, slightly uneven strips give the mummies a more authentic, wrapped look. Don’t stress about perfection here.
- Wrap the cheese around each hot dog. Take one hot dog and place 4 thin cheese strips along its length, spacing them evenly. The cheese should wrap around the hot dog like little bandages. Press gently so the cheese sticks to the hot dog surface. This is the secret step—wrapping the cheese first keeps it from sliding off during baking.
- Wrap the dough strips. Take 3 dough strips and wrap them around the hot dog at an angle, leaving small gaps between each wrap. You want about 1/4 inch of space between the strips so the cheese can peek through. Start at one end and work your way to the other. Leave about 1/2 inch of the hot dog exposed at each end—those will become the mummy’s head and feet. Tuck the ends of the dough strips underneath the hot dog to secure them. If any strip feels loose, use a toothpick to hold it in place.
- Place on the baking sheet. Arrange the wrapped mummy hot dogs on the prepared baking sheet, leaving about 1 inch of space between each one. They won’t spread much, but you want air to circulate for even browning.
- Brush with butter (optional but recommended). If you want that gorgeous golden-brown finish, melt a tablespoon of butter and brush it over the dough strips. This gives them a beautiful sheen and helps them crisp up perfectly. You can skip this step, but honestly, it makes a difference.
- Bake for 12-15 minutes. Bake at 375°F (190°C) until the dough is golden brown and the cheese is bubbly and slightly browned in spots. The hot dogs should be heated through. Start checking at 12 minutes—ovens vary, and you don’t want burned dough. The kitchen will smell incredible, by the way.
- Add the eyes. Remove from the oven and let cool for 2-3 minutes—the cheese will be molten hot and can burn you. Using a toothpick or small spoon, dot two small mustard dots on the exposed hot dog at one end to create mummy eyes. You can also use ketchup or sriracha for different colored eyes. Get creative here!
- Serve immediately. These are best eaten warm, right after baking. The cheese is perfectly melty, the dough is flaky, and the hot dog is juicy. Arrange them on a platter and watch them disappear.
Troubleshooting Tip: If your dough strips keep breaking, they’re probably too warm. Pop the cut strips in the fridge for 5 minutes before wrapping. And if the cheese leaks out during baking (it happens sometimes), don’t worry—it just adds to the spooky, mummy-like appearance!
Cooking Tips & Techniques
After making these easy mummy hot dogs more times than I can count, I’ve picked up a few tricks that make a real difference. Let me share what I’ve learned the hard way.
The cheese wrapping order matters. I used to just lay the cheese strips on top of the dough, but they always slid off during baking. Wrapping the cheese directly around the hot dog first, then adding the dough on top, keeps everything in place. The cheese melts into the hot dog instead of pooling on the baking sheet.
Don’t overwrap the dough. I know it’s tempting to use more strips to make them look more “mummy-like,” but three strips per hot dog is the sweet spot. Too much dough and the hot dog gets lost—you end up eating a bread roll with a tiny hot dog inside. Too little and it doesn’t look wrapped at all. Three strips, spaced about 1/4 inch apart, gives you that perfect mummy look.
Watch the oven like a hawk. I learned this lesson when I walked away for “just a minute” and came back to slightly burnt mummies. Crescent roll dough goes from golden to burned very quickly. Set a timer for 10 minutes, check, then decide if you need more time. Every oven runs differently—my friend’s oven takes 14 minutes, mine takes exactly 12.
Cold dough is your friend. If your kitchen is warm, the dough will get sticky and hard to work with. I keep the dough in the fridge until the last possible moment, and if it starts feeling tacky while I’m cutting strips, I pop it back in the fridge for 5 minutes. Cold dough cuts cleaner and wraps more neatly.
One common mistake I see people make is using too much cheese. I know, it sounds impossible, but thick cheese strips don’t melt evenly and can make the dough soggy. Those thin strips I mentioned? They’re perfect. They melt just enough to peek through the gaps without overwhelming the hot dog.
Variations & Adaptations
One of the best things about this easy mummy hot dogs recipe is how customizable it is. I’ve tried quite a few variations, and here are my favorites:
The Spicy Mummy: Before wrapping, brush the hot dogs with sriracha or your favorite hot sauce. Use pepper jack cheese sticks instead of mozzarella. The heat pairs surprisingly well with the buttery dough, and the red cheese eyes look extra spooky. My husband requests this version every year now.
The Breakfast Mummy: Swap the hot dogs for breakfast sausages (the fully cooked links work best) and use cheddar cheese sticks. Serve them with maple syrup for dipping. I made these for a Halloween morning breakfast once, and now my kids expect them every year. The sweet-and-savory combo is unexpected but so good.
The Veggie Mummy: Use vegetarian hot dogs or even pre-cooked carrot “hot dogs” (carrots marinated in a smoky soy sauce mixture). The technique is exactly the same, and they’re surprisingly convincing. I made these for a friend’s Halloween party where half the guests were vegetarian, and nobody felt left out.
The Gluten-Free Mummy: Gluten-free crescent roll dough has come a long way. I’ve tested this with both the Pillsbury gluten-free version and a homemade gluten-free puff pastry. Both work, but the puff pastry gives a flakier result. Just make sure to roll it thin enough that it cooks through properly.
The Air Fryer Mummy: If you want an even faster version, these work beautifully in the air fryer. Cook at 350°F (175°C) for 8-10 minutes, flipping halfway through. The dough gets extra crispy, and the cheese gets perfectly bubbly. Just don’t overcrowd the basket—work in batches if needed.
Serving & Storage Suggestions
These easy mummy hot dogs are best served warm, right after baking. The cheese is perfectly melty, the dough is flaky and golden, and the hot dog is juicy. I like to arrange them on a large platter with the mustard eyes facing up, maybe with a few spooky decorations around them—fake spiderwebs, plastic spiders, that sort of thing. For dipping, set out small bowls of ketchup, mustard, and ranch dressing. Kids love the dipping aspect, and it makes the whole thing feel like more of an event.
If you’re serving these at a party, you can keep them warm in a low oven (200°F or 95°C) for up to 30 minutes. Just place them on a baking sheet and pop them in. They’ll stay crispy and the cheese will stay melty. I’ve done this for Halloween parties where guests are grazing over an hour or two, and they hold up really well.
Storage: Leftover mummy hot dogs (if you somehow have any) can be stored in an airtight container in the refrigerator for up to 3 days. The dough will soften slightly, but they’re still delicious. To reheat, pop them in the oven at 350°F (175°C) for 5-7 minutes, or in the air fryer at 325°F (160°C) for 3-4 minutes. The microwave works in a pinch, but the dough will get soggy, so I don’t recommend it.
Freezer Instructions: You can freeze these before baking! Assemble the mummy hot dogs, place them on a baking sheet, and freeze until solid. Then transfer to a freezer bag. When you’re ready to bake, add 3-5 minutes to the baking time—no need to thaw. This is a lifesaver for Halloween parties when you want to prep ahead.
One thing I’ve noticed: the flavors actually meld together a bit if you let them sit for 10-15 minutes after baking. The cheese sets slightly, and the mustard eyes soak into the hot dog just a little. Some people prefer them this way. I like them both ways, honestly—fresh and hot, or slightly cooled and settled. They’re great either way.
Nutritional Information & Benefits
Let’s be real—these are a treat, not a health food. But here’s the nutritional breakdown per serving (one mummy hot dog) based on standard ingredients:
- Calories: Approximately 280-320 calories per mummy hot dog
- Protein: 12-14 grams (from the hot dog and cheese)
- Carbohydrates: 18-22 grams (mostly from the crescent roll dough)
- Fat: 18-22 grams (varies based on hot dog and cheese type)
- Sodium: 700-900 mg (hot dogs are naturally high in sodium)
Healthier Swaps: If you’re watching your intake, use turkey or chicken hot dogs (cuts calories and fat by about 30%), low-fat cheese sticks, and reduced-fat crescent roll dough. You can also skip the butter brushing to save a few calories. I’ve tested all these swaps, and the recipe still works beautifully—the texture changes slightly, but the fun factor stays the same.
Dietary Considerations: These are not gluten-free unless you use gluten-free dough, and they’re not dairy-free unless you use dairy-free cheese. They are, however, nut-free and egg-free (assuming your hot dogs and dough don’t contain these allergens—always check labels). For a lower-carb option, you can skip the dough entirely and just wrap the hot dogs in cheese strips, then bake until the cheese is crispy. It’s a different experience, but still delicious.
My perspective? These are a once-a-year Halloween treat, and I don’t stress about the numbers. Food is about joy and connection, and watching my kids’ faces light up when they see these mummy hot dogs on the table? That’s worth every calorie.
Conclusion
These easy mummy hot dogs with cheese wrap are everything I wanted that Frankie’s breadstick to be—fun, delicious, and surprisingly simple. After all those failed attempts, I finally cracked the code, and honestly, it’s almost embarrassing how easy it is. Three ingredients. Twenty minutes. And you’ve got a Halloween snack that looks like you spent hours on it.
What I love most about this recipe is how it brings people together. There’s something about food that looks like little mummies that makes everyone smile. Kids forget to be picky. Adults forget to be stressed. For a few minutes, everyone’s just enjoying a silly, delicious snack. And isn’t that what Halloween is really about?
I’d love to hear how yours turn out! Did you try any fun variations? Did your kids help with the wrapping? Drop a comment below and let me know—I read every single one, and I love seeing your photos. And if you’re looking for more spooky but simple recipes, don’t miss our spiderweb dip recipe or these ghost banana pops for a healthier Halloween option. Happy Halloween, and happy cooking!
Frequently Asked Questions
Can I make these mummy hot dogs ahead of time?
Absolutely! You can assemble them up to 24 hours ahead, keep them covered in the refrigerator, and bake them just before serving. You can also freeze them unbaked for up to 3 months.
What if I don’t have crescent roll dough?
No problem! You can use puff pastry sheets (cut into thin strips), refrigerated pizza dough, or even homemade pie crust. Just adjust the baking time as needed—puff pastry takes about the same time, but thicker doughs may need an extra 2-3 minutes.
Can I use different types of cheese?
Yes! Cheddar, provolone, pepper jack, or even cream cheese all work. Just make sure to cut them into thin strips so they melt properly. Harder cheeses like cheddar may not stretch as much as mozzarella, but they still taste great.
How do I keep the dough from unraveling during baking?
Make sure to tuck the ends of the dough strips underneath the hot dog before baking. You can also use a toothpick to secure any loose ends—just remember to remove them before serving! Chilling the assembled mummies for 10 minutes in the fridge also helps the dough hold its shape.
Can I make these in an air fryer instead of an oven?
Yes! Air fry at 350°F (175°C) for 8-10 minutes, flipping halfway through. The dough gets extra crispy and golden. Just don’t overcrowd the basket—work in batches if needed for the best results.
Pin This Recipe!
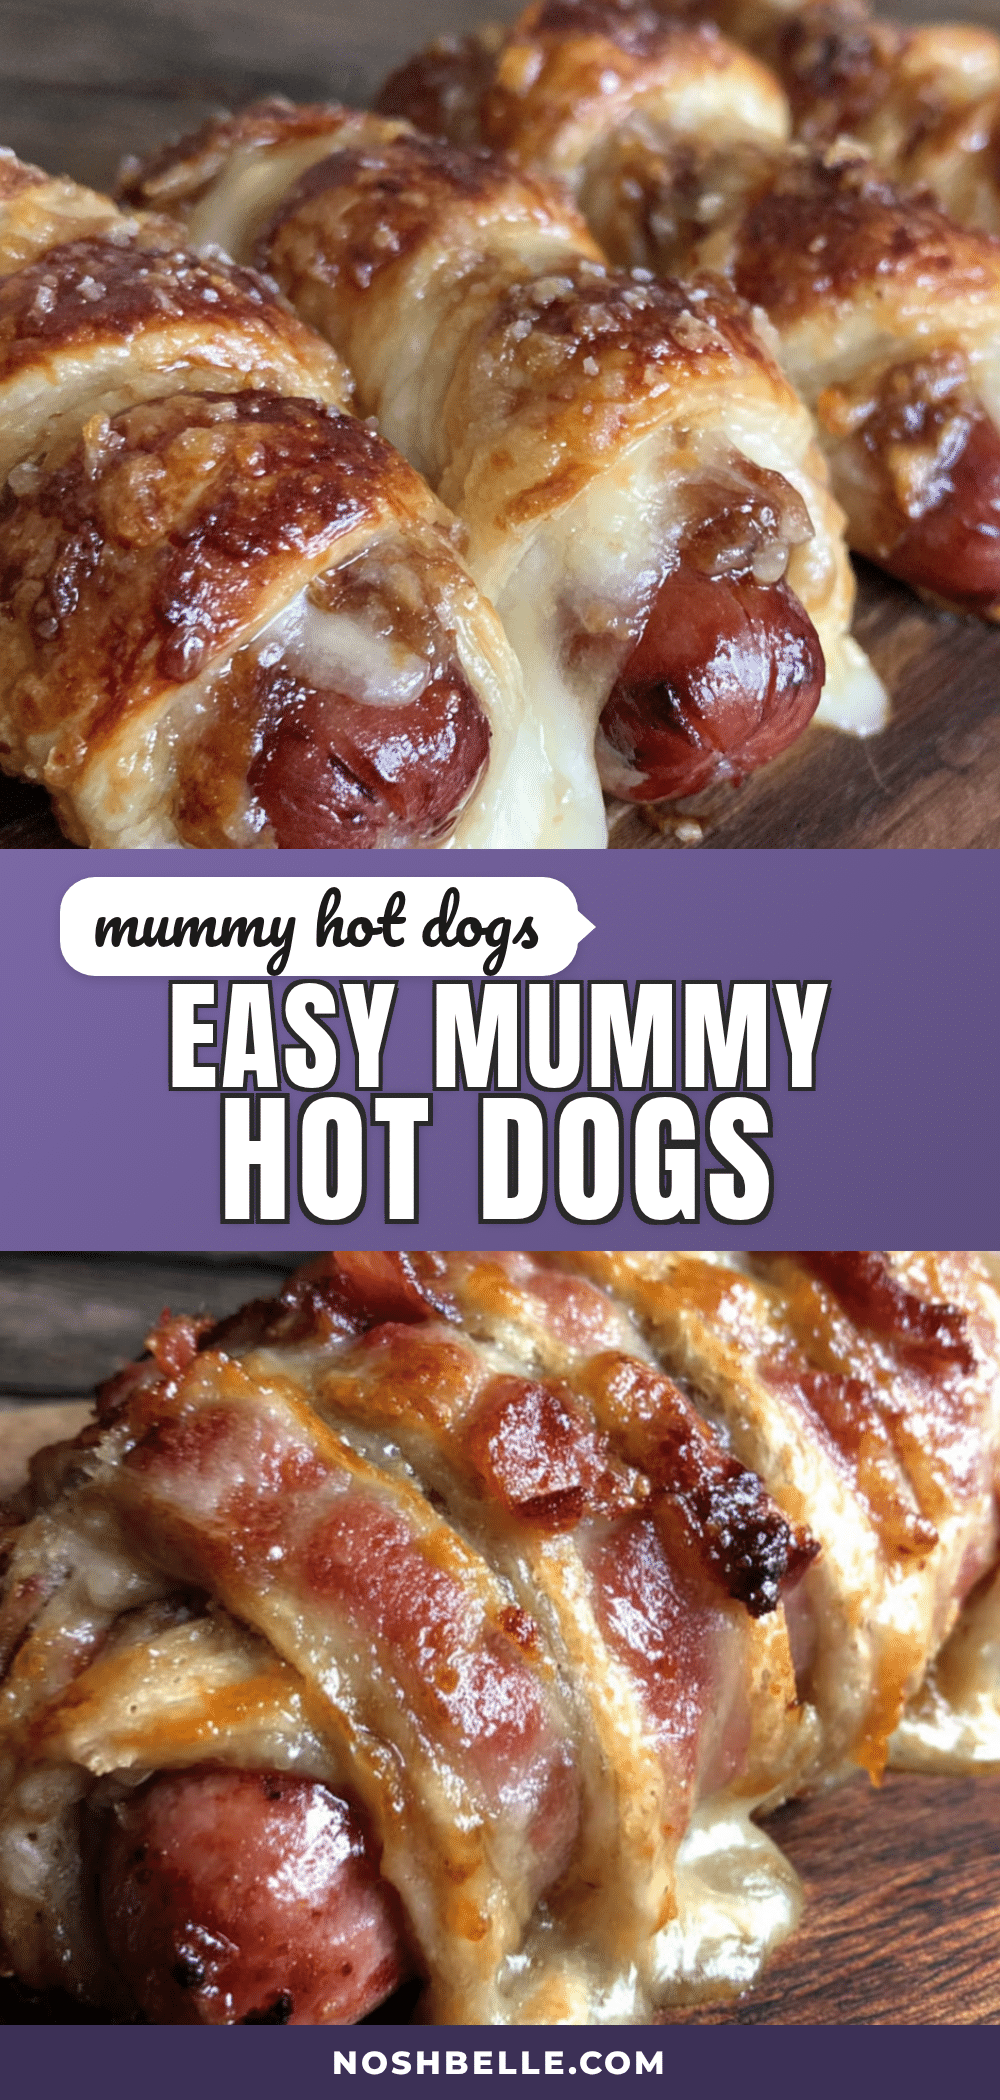
Easy Mummy Hot Dogs: Best Cheesy Wrap for Halloween
These easy mummy hot dogs with cheese wrap are a fun, delicious, and surprisingly simple Halloween snack. Made with just hot dogs, crescent roll dough, and cheese sticks, they come together in under 20 minutes and are perfect for parties or a spooky weeknight treat.
- Prep Time: 10 minutes
- Cook Time: 12-15 minutes
- Total Time: 22-25 minutes
- Yield: 8 servings 1x
- Category: Appetizer
- Cuisine: American
Ingredients
- 8 hot dogs (beef, turkey, or chicken)
- 1 can (8 oz) refrigerated crescent roll dough (Pillsbury sheets recommended)
- 4 string cheese sticks (mozzarella)
- Mustard (yellow, for decorating)
- Optional: Cooking spray or melted butter (for brushing)
- Optional: Everything bagel seasoning or sesame seeds
Instructions
- Preheat oven to 375°F (190°C). Line a baking sheet with parchment paper.
- Cut each string cheese stick in half crosswise, then cut each half lengthwise into 4 thin strips (32 strips total). Set aside.
- Unroll crescent dough onto a cutting board. If using perforated triangles, pinch seams together to form a solid sheet.
- Cut dough crosswise into 24 thin strips, about 1/2 inch wide each.
- Wrap 4 thin cheese strips around each hot dog, spacing them evenly along the length.
- Wrap 3 dough strips around each hot dog at an angle, leaving small gaps (about 1/4 inch) for cheese to peek through. Leave about 1/2 inch of hot dog exposed at each end. Tuck ends of dough strips underneath.
- Place wrapped mummy hot dogs on prepared baking sheet, about 1 inch apart.
- Optional: Brush dough with melted butter for golden finish.
- Bake for 12-15 minutes, until dough is golden brown and cheese is bubbly.
- Let cool 2-3 minutes, then dot two small mustard dots on exposed hot dog at one end for eyes.
- Serve immediately.
Notes
For best results, keep dough cold until ready to use. If dough strips break, chill them for 5 minutes. For air fryer: cook at 350°F (175°C) for 8-10 minutes, flipping halfway. Can be assembled up to 24 hours ahead and refrigerated, or frozen unbaked for up to 3 months.
Nutrition
- Serving Size: 1 mummy hot dog
- Calories: 300
- Sugar: 4
- Sodium: 800
- Fat: 20
- Saturated Fat: 8
- Carbohydrates: 20
- Protein: 13
Keywords: mummy hot dogs, Halloween snack, easy appetizer, crescent roll hot dogs, cheesy hot dogs, spooky food, kid-friendly Halloween


