My neighbor Sarah wasn’t trying to impress anyone that October afternoon. I’d stopped by to borrow a ladder—ours had mysteriously vanished during a garage cleanup—and the smell of warm sugar and vanilla hit me before I even made it past her front door. She was standing in her kitchen with flour on her nose, three kids under the age of seven gathered around the counter like it was the most exciting place on earth, and she was just… making cookies. No big deal. No special occasion. Just a Tuesday.
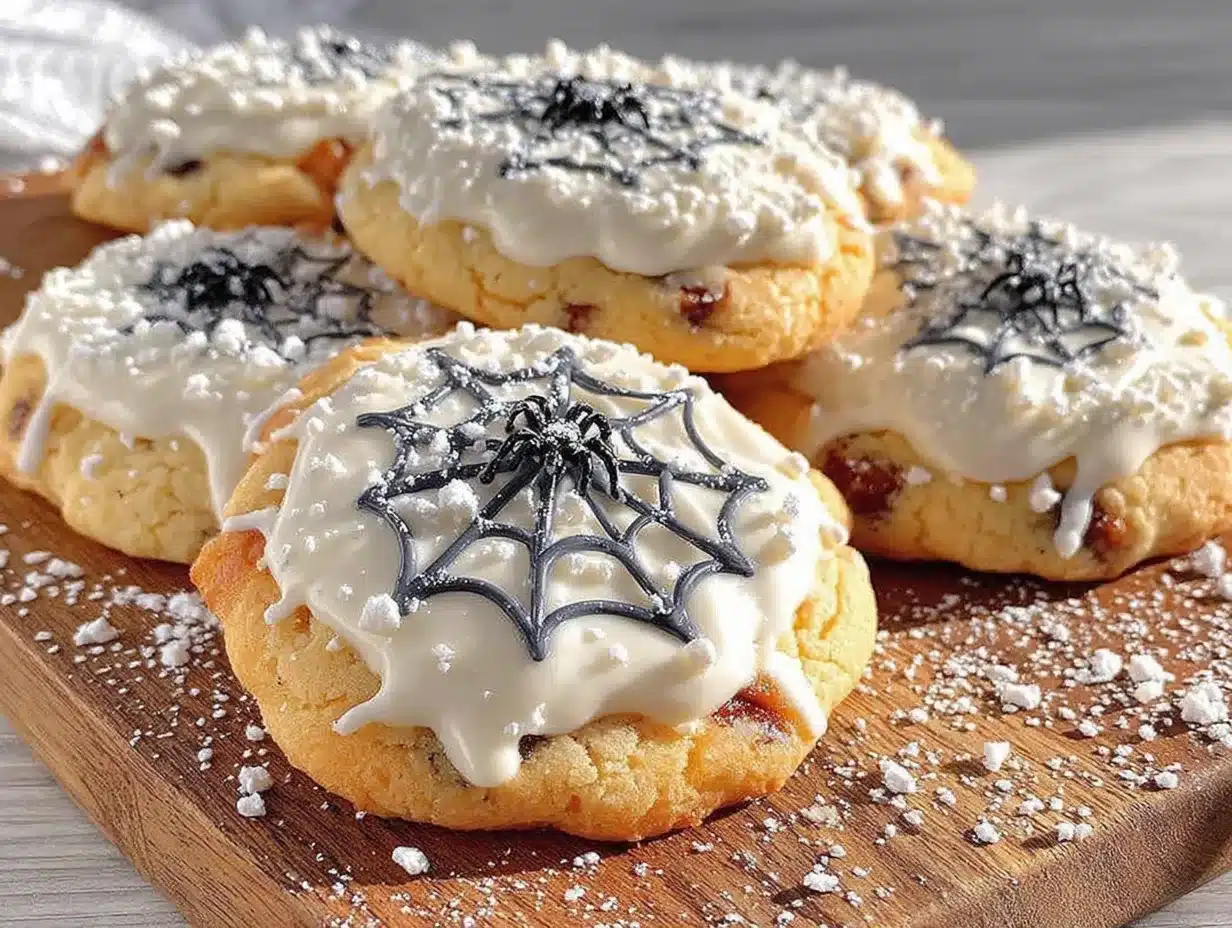
“Oh, these?” she said when I asked what smelled so good. “Just some spider web cookies. The kids wanted to do something for Halloween.” She shrugged like it was nothing. But let me tell you—I stood there watching her pipe that chocolate icing in careful spirals while her daughter narrated the entire process, and I knew I was witnessing something special. The cookies themselves were soft and buttery, the kind that practically melt in your mouth, and the spider web design was so clever I couldn’t believe I’d never thought of it myself.
Honestly, I’ve made a lot of Halloween treats over the years. Some have been spectacular failures—remember the year I tried to make homemade marshmallow ghosts and ended up with sticky goo everywhere? Yeah, that was a mess. But these spider web cookies? They’re the real deal. Easy enough for little hands to help with, impressive enough to steal the show at any Halloween party, and made with ingredients you probably already have in your pantry. Maybe you’ve been there—scrolling through complicated Halloween recipes, feeling overwhelmed before you even start. Trust me, these cookies are different. They’re the kind of recipe that makes you look like a hero without actually having to work that hard.
I’ve been making them every October since that day, and they never fail to bring smiles. There’s something about watching that spider web pattern come together that feels almost magical. And the best part? The kids genuinely help. Not the kind of help where you’re secretly redoing everything after they go to bed. Real help. That’s the kind of recipe worth keeping around.
Why You’ll Love This Recipe
Let me tell you why these spider web cookies have become my go-to Halloween treat year after year. I’ve tested this recipe at least a dozen times—with my own kids, with neighbor kids, even with a group of skeptical adults at a Halloween potluck—and every single time, the reaction is the same. People light up.
- Quick & Easy: These cookies come together in under 30 minutes, start to finish. No chilling dough overnight, no complicated techniques. Just mix, bake, and decorate. Perfect for busy weeknights when the kids suddenly announce they need Halloween treats for tomorrow’s school party.
- Simple Ingredients: You probably have everything in your kitchen right now. Butter, sugar, flour, vanilla, cocoa powder, and powdered sugar. No specialty baking supplies required. I mean it—I’ve made these with basic pantry staples more times than I can count.
- Perfect for Halloween: Whether you’re hosting a costume party, sending treats to school, or just wanting to make October a little more fun, these cookies deliver. They’re festive without being fussy, and the spider web design is instantly recognizable.
- Crowd-Pleaser: I’ve yet to meet a kid who doesn’t love these. And adults? They go crazy for them too. Something about the combination of soft sugar cookie and rich chocolate icing just hits different.
- Unbelievably Delicious: The texture is what gets me every time. Soft and tender with slightly crisp edges, topped with that glossy chocolate web. It’s comfort food in cookie form.
What makes this recipe different from all the other Halloween cookies out there? It’s the technique. Instead of trying to pipe perfect webs freehand, we use a simple method that makes the design foolproof. The icing consistency is key—too thin and it runs everywhere, too thick and it won’t spread. I’ve nailed down the exact ratio so you don’t have to guess.
These cookies aren’t just good—they’re the kind that makes you close your eyes after the first bite. It’s Halloween fun reimagined: simpler, faster, but with the same soul-soothing satisfaction. Perfect for making memories with your kids without the stress of a complicated project.
What Ingredients You Will Need
This recipe uses simple, wholesome ingredients to deliver bold flavor and satisfying texture without the fuss. Everything is easy to find at your local grocery store, and most items are probably already in your pantry.
For the Cookie Base
- 1 cup (226g) unsalted butter, softened – I prefer using Land O’Lakes for consistent results. Make sure it’s truly softened to room temperature, not melted. (This creates the perfect tender crumb.)
- 1 cup (200g) granulated sugar – Regular white sugar works perfectly. For a slightly deeper flavor, you can substitute half with light brown sugar.
- 1 large egg, room temperature – Cold eggs can make the dough seize up. Let yours sit on the counter for 30 minutes before starting.
- 2 teaspoons vanilla extract – Pure vanilla makes a difference here. I’ve tried imitation in a pinch, and it’s fine, but pure vanilla gives that warm, aromatic quality.
- 2 ½ cups (312g) all-purpose flour – Spoon and level your flour for accurate measuring. Scooping directly from the bag packs in too much and makes cookies dense.
- ½ teaspoon baking powder – Helps the cookies spread just enough without puffing up too much.
- ¼ teaspoon salt – Don’t skip this. Salt balances the sweetness and enhances the vanilla flavor.
For the Spider Web Icing
- 1 cup (120g) powdered sugar – Sift it if it’s lumpy. Trust me on this one—lumpy icing is frustrating to work with.
- 2 tablespoons unsweetened cocoa powder – I use Hershey’s, but any brand works. Dutch-process cocoa gives a darker, richer color if you have it.
- 2-3 tablespoons milk – Whole milk works best, but any milk you have on hand will do. Add it slowly—you might not need all of it.
- ½ teaspoon vanilla extract – Just a touch to round out the chocolate flavor.
Ingredient Tips and Substitutions
If you need a dairy-free version, use plant-based butter and oat milk. The texture will be slightly different but still delicious. For a gluten-free option, swap the all-purpose flour with a 1:1 gluten-free baking blend. I’ve tested this with Bob’s Red Mill and King Arthur Measure for Measure, and both worked beautifully.
One thing I learned the hard way: don’t use margarine. It has a higher water content that makes cookies spread too thin and turn out greasy. Stick with real butter for the best results.
Equipment Needed
The beauty of this recipe is that you don’t need fancy equipment. Here’s what you’ll actually use:
- Large mixing bowl – Any bowl works. I use a glass one so I can see if the butter and sugar are properly creamed.
- Electric hand mixer or stand mixer – You can cream butter and sugar by hand with a wooden spoon, but it takes some elbow grease. A mixer makes it much easier.
- Baking sheets – Two standard half-sheet pans work perfectly. No need to grease them—we’ll use parchment paper.
- Parchment paper – Non-negotiable for easy cleanup and preventing sticking. I buy the pre-cut sheets for convenience.
- Wire cooling rack – Essential for cooling cookies evenly. If you don’t have one, you can cool them on the baking sheet, but they’ll take longer and might get soggy on the bottom.
- Small piping bag or zip-top bag – For the spider web design. A zip-top bag with a tiny corner snipped off works just as well as a fancy piping bag.
- Round cookie cutter (2-inch) – Or use a drinking glass with a similar diameter. I actually prefer using a glass because it’s what I had the first time I made these.
- Toothpick or skewer – For creating the web effect. A toothpick is perfect for this.
I’ll be honest—I’ve made these cookies with a fork instead of a mixer when my hand mixer broke halfway through. It worked, but my arm was sore afterward. Spend the few extra minutes using a mixer if you can.
Preparation Method
Let’s get to the fun part. I’ve broken this down into clear steps so even beginner bakers can follow along without stress.
Step 1: Preheat and Prepare
Preheat your oven to 350°F (175°C). Line two baking sheets with parchment paper. This might seem obvious, but I’ve forgotten to preheat the oven before and ended up with dough sitting out way too long. Set a timer so you don’t forget.
Step 2: Cream Butter and Sugar
In your large mixing bowl, beat the softened butter and granulated sugar together until light and fluffy. This takes about 3-4 minutes with a hand mixer on medium speed. You’re looking for a pale yellow color and a texture that looks like creamy sand. Scrape down the sides of the bowl halfway through.
Here’s a tip I learned from many batches: if your butter is still too cold, it won’t cream properly. If it’s too soft (almost melted), your cookies will spread into flat puddles. The sweet spot is when you can press your finger into the butter and it leaves an indent without sliding around.
Step 3: Add Egg and Vanilla
Add the room-temperature egg and vanilla extract to the butter mixture. Beat on medium speed until fully combined, about 30 seconds. The mixture might look slightly curdled at this point—don’t panic. That’s normal. It will come together once you add the flour.
Step 4: Mix Dry Ingredients
In a separate bowl, whisk together the flour, baking powder, and salt. This ensures the baking powder is evenly distributed so you don’t get one cookie that puffs up like a balloon while another stays flat.
Step 5: Combine Wet and Dry
Gradually add the dry ingredients to the wet mixture, mixing on low speed. I add about a third at a time, mixing just until the flour disappears. Overmixing at this stage develops gluten and makes cookies tough. Stop as soon as you don’t see any more white streaks.
The dough should be soft but not sticky. If it feels too sticky to handle, add an extra tablespoon of flour. If it’s crumbly, add a teaspoon of milk.
Step 6: Roll and Cut
Lightly flour your work surface. Roll the dough out to about ¼-inch thickness. I use a rolling pin with removable rings for consistent thickness, but a regular rolling pin works fine—just eyeball it. Cut out rounds with your 2-inch cookie cutter or glass and place them on the prepared baking sheets, spacing them about 2 inches apart.
Gather the scraps, gently press them together, and reroll. Don’t knead the scraps too much or the cookies will be tough. Just press them together gently and roll once more.
Step 7: Bake
Bake for 8-10 minutes, or until the edges are just barely golden. The centers should still look slightly pale and soft. This is important—overbaked cookies will be dry and crumbly. I always check at the 8-minute mark and add time in 30-second increments if needed.
Let the cookies cool on the baking sheet for 5 minutes before transferring them to a wire cooling rack. They need this time to set up—moving them too early can cause them to break.
Step 8: Make the Icing
While the cookies cool, make the spider web icing. In a small bowl, whisk together the powdered sugar and cocoa powder. Add 2 tablespoons of milk and the vanilla extract. Stir until smooth. You’re looking for a consistency similar to thick glue—it should flow slowly off a spoon but hold its shape briefly. Add the extra tablespoon of milk if it’s too thick.
Step 9: Create the Spider Web Design
Once the cookies are completely cool (this is crucial—warm cookies will melt the icing), spoon the chocolate icing into your piping bag or zip-top bag. Snip off a tiny corner—smaller than you think you need. You can always make the hole bigger, but you can’t undo a cut that’s too large.
Pipe a small circle of icing in the center of each cookie. Then pipe a spiral starting from the center and working outward, like a snail shell. Don’t worry if it’s not perfect—the web effect will hide imperfections.
Here’s the magic part: while the icing is still wet, use a toothpick to drag lines from the center outward, like spokes on a wheel. Then drag lines from the outer edge inward between each spoke. This creates the classic spider web pattern. Wipe the toothpick clean between each cookie for the cleanest lines.
Step 10: Let the Icing Set
Let the decorated cookies sit at room temperature for about 30 minutes until the icing is firm to the touch. If you’re in a hurry, you can pop them in the refrigerator for 15 minutes.
Cooking Tips & Techniques
After making these cookies more times than I can count, I’ve collected some hard-won wisdom. Let me share the lessons I learned the hard way so you don’t have to.
Don’t overbake. This is the number one mistake I see. The cookies might look underdone when you pull them out, but they continue cooking on the hot baking sheet. I ruined my first two batches by leaving them in the oven until they were golden brown all over. They turned into crunchy discs instead of soft cookies. Pull them when the edges are just barely colored.
Chill the dough if needed. If your kitchen is warm or your butter got too soft, the dough might be sticky and difficult to roll. Pop it in the refrigerator for 20-30 minutes. This makes rolling and cutting much easier. I’ve done this many times when baking on a hot summer day.
Test the icing consistency first. Before decorating all your cookies, test the icing on one cookie. If it runs off the edges, add more powdered sugar. If it’s too stiff to pipe smoothly, add a few drops of milk. Getting this right makes the difference between beautiful webs and messy blobs.
Work in batches. Don’t try to decorate all 24 cookies at once. The icing will start to set while you’re working, and your last cookies won’t look as good as your first. Decorate 6-8 cookies at a time, then take a break if you need to.
Keep the toothpick clean. I learned this one after dragging chocolate across a cookie and ruining the design. Wipe your toothpick on a paper towel between each cookie. It takes two seconds and makes a huge difference.
Variations & Adaptations
One of the best things about this recipe is how versatile it is. Here are some ways to make it your own.
Chocolate Cookie Base: Want an even more decadent treat? Replace ¼ cup of the flour with ¼ cup of cocoa powder. You’ll get a dark chocolate cookie that looks amazing with the white icing. I tried this for a Halloween party and everyone thought I’d bought them from a bakery.
White Chocolate Webs: Instead of chocolate icing, use white chocolate melted with a teaspoon of coconut oil. The white webs against the golden cookie look like real spider silk. My daughter insists this is the only way to make them now.
Gluten-Free Version: Swap the all-purpose flour with a 1:1 gluten-free baking blend. I’ve tested this with King Arthur Measure for Measure, and the texture is remarkably close to the original. Add an extra tablespoon of milk to the dough since gluten-free flours tend to absorb more liquid.
Spider Addition: For extra fun, place a small candy spider on each cookie while the icing is still wet. You can find plastic spider rings at party stores, or use chocolate-covered raisins for edible spiders. My kids go crazy for this version.
Natural Coloring: If you want colored webs for a different holiday, use beet powder for pink or matcha for green. The technique stays the same, just swap the cocoa powder. I made pink webs for Valentine’s Day and they were a huge hit.
Serving & Storage Suggestions
These cookies are best served at room temperature. The cookie should be soft and tender, and the icing should be firm but not hard. If you’ve refrigerated them, let them sit out for 10-15 minutes before serving.
For a Halloween party display, arrange the cookies on a platter lined with orange or black napkins. Add a few plastic spiders for decoration. Kids love reaching for the cookies that look like they might have a spider on them.
These cookies pair beautifully with a glass of cold milk or a warm cup of apple cider. For an adult gathering, they’re lovely with coffee or a glass of bourbon—the sweetness balances the bitterness beautifully.
Storage: Store the decorated cookies in an airtight container at room temperature for up to 5 days. Layer them between sheets of parchment paper to prevent the icing from sticking. I use a glass cookie jar on the counter, and they’re usually gone within two days.
Freezing: You can freeze the undecorated cookies for up to 3 months. Bake and cool them completely, then place them in a single layer in a freezer-safe container with parchment between layers. When you’re ready to serve, thaw them at room temperature, then decorate. The icing is best applied fresh.
One thing I love about these cookies is that the flavors actually improve after a day. The cookies soften slightly and the icing sets perfectly. If you can resist eating them all immediately, they’re even better on day two.
Nutritional Information & Benefits
Let’s be real—these are cookies, not health food. But here’s what you’re looking at per cookie (based on 24 cookies):
- Calories: Approximately 150
- Total Fat: 8g
- Saturated Fat: 5g
- Carbohydrates: 19g
- Sugar: 11g
- Protein: 2g
- Sodium: 55mg
While these aren’t something you’d eat every day, they’re made with real ingredients—butter, flour, eggs—rather than processed mixes. The cocoa powder in the icing provides a small amount of antioxidants, and the cookies are free from artificial colors and preservatives.
For those with dietary concerns, this recipe contains gluten, dairy, and eggs. I’ve included gluten-free and dairy-free variations above. The cookies are nut-free as written, making them safe for school parties where nut allergies are a concern.
My philosophy? Treats like these are about joy and connection, not nutrition. One cookie with your kids after school won’t derail anyone’s health. It’s about the memories you’re making together.
Conclusion
These spider web cookies have become more than just a Halloween recipe in my house. They’re a tradition now—the thing my kids ask about as soon as October hits. Every year, we make them together, and every year, I watch their little faces light up when they pipe that first web design and see it actually work.
That’s the thing about simple recipes. They don’t just feed you—they create moments. The flour on the counter, the laughter when someone’s spider web turns out lopsided, the pride in a job well done. These are the memories that stick.
I hope you’ll try these cookies with your family. Don’t stress about making them perfect—the slightly imperfect ones have the most character. Let the kids help, even if it gets messy. That’s the whole point.
When you make them, I’d love to hear how they turned out. Drop a comment below and tell me about your spider web creations. Did your kids love them? Did you add your own twist? Share a photo on Pinterest and tag me—I can’t wait to see your beautiful webs.
Happy Halloween, and happy baking!
Frequently Asked Questions
Can I make the dough ahead of time?
Absolutely. You can prepare the dough up to 3 days in advance and keep it wrapped in plastic wrap in the refrigerator. Let it sit at room temperature for about 15 minutes before rolling so it’s soft enough to work with.
Why did my cookies spread too much?
This usually happens when the butter is too soft or the dough wasn’t chilled. Next time, make sure your butter is softened but not melted, and chill the dough for 20 minutes if your kitchen is warm. Also check that you measured your flour correctly—too little flour causes spreading.
Can I use store-bought cookie dough?
You can, but the texture won’t be the same. Homemade dough gives you that soft, buttery texture that makes these cookies special. If you’re short on time, though, refrigerated sugar cookie dough works in a pinch. Just follow the package directions for baking.
How do I get the icing the right consistency?
The icing should be thick enough to hold its shape when piped but thin enough to spread slightly when you drag the toothpick through it. If it’s too thick, add milk one drop at a time. If it’s too thin, add more powdered sugar. Test on one cookie before doing all of them.
Can I freeze the decorated cookies?
I don’t recommend freezing decorated cookies because the icing can become sticky when thawed. Freeze the undecorated cookies instead, then thaw and decorate them fresh. The icing only takes a few minutes to make, and the results are much better.
Pin This Recipe!

Easy Spider Web Cookies – Best Kid-Friendly Halloween Treat

Soft and buttery sugar cookies topped with a clever chocolate spider web design. This easy Halloween treat comes together in under 30 minutes with simple pantry ingredients, making it perfect for baking with kids.
- Prep Time: 15 minutes
- Cook Time: 10 minutes
- Total Time: 25 minutes
- Yield: 24 cookies 1x
- Category: Dessert
- Cuisine: American
Ingredients
- 1 cup (226g) unsalted butter, softened
- 1 cup (200g) granulated sugar
- 1 large egg, room temperature
- 2 teaspoons vanilla extract
- 2 ½ cups (312g) all-purpose flour
- ½ teaspoon baking powder
- ¼ teaspoon salt
- 1 cup (120g) powdered sugar
- 2 tablespoons unsweetened cocoa powder
- 2–3 tablespoons milk
- ½ teaspoon vanilla extract
Instructions
- Preheat oven to 350°F (175°C). Line two baking sheets with parchment paper.
- In a large mixing bowl, beat softened butter and granulated sugar together until light and fluffy, about 3-4 minutes on medium speed.
- Add room-temperature egg and vanilla extract; beat until fully combined, about 30 seconds.
- In a separate bowl, whisk together flour, baking powder, and salt.
- Gradually add dry ingredients to wet mixture, mixing on low speed until just combined. Do not overmix.
- Lightly flour a work surface. Roll dough to ¼-inch thickness. Cut into rounds with a 2-inch cookie cutter or glass. Place on prepared baking sheets, spacing 2 inches apart.
- Bake for 8-10 minutes, until edges are just barely golden. Centers should still look pale and soft.
- Let cookies cool on baking sheet for 5 minutes, then transfer to a wire cooling rack to cool completely.
- For icing: In a small bowl, whisk together powdered sugar and cocoa powder. Add 2 tablespoons milk and vanilla extract; stir until smooth. Add remaining milk if needed to reach thick glue consistency.
- Spoon icing into a piping bag or zip-top bag. Snip a tiny corner. Pipe a small circle in the center of each cookie, then pipe a spiral outward.
- While icing is still wet, use a toothpick to drag lines from center outward (like spokes), then from outer edge inward between spokes to create a web pattern. Wipe toothpick clean between cookies.
- Let decorated cookies sit at room temperature for about 30 minutes until icing is firm.
Notes
Don’t overbake; cookies continue cooking on hot sheet. Chill dough if sticky. Test icing consistency on one cookie first. Keep toothpick clean between cookies for best web design. Cookies can be stored in an airtight container at room temperature for up to 5 days. Undecorated cookies can be frozen for up to 3 months.
Nutrition
- Serving Size: 1 cookie
- Calories: 150
- Sugar: 11
- Sodium: 55
- Fat: 8
- Saturated Fat: 5
- Carbohydrates: 19
- Protein: 2
Keywords: Halloween cookies, spider web cookies, sugar cookies, kid-friendly, easy Halloween treat, chocolate icing


