I was standing in line at the hardware store last October, holding a bag of lightbulbs and trying to remember if I needed caulk, when the woman behind me—a retired schoolteacher named Marge with a tape measure around her neck—started talking about her Halloween party. Not the decorations or the costumes, but the food. Specifically, the fact that she was tired of making the same old creepy cupcakes and wanted something that looked impressive without requiring her to stand in the kitchen for hours. “I just want to enjoy my own party,” she said, and I felt that in my bones. She pulled a crumpled receipt from her pocket and started describing this board she’d thrown together last year—candy corn, cheese, crackers, a few creepy-crawly touches—and how her guests couldn’t stop talking about it. I honestly wasn’t expecting party planning advice from a woman holding a caulk gun, but there I was, scribbling notes on the back of my grocery list. Let me tell you, that conversation changed my Halloween hosting forever.
That’s how this Quick Halloween Charcuterie Board came into my life. It’s not fancy or fussy, and it doesn’t require any special equipment or culinary training. It’s just a really smart way to feed a crowd during the spookiest season of the year. The candy corn adds that nostalgic Halloween touch, while the cheese and crackers keep things satisfying enough that nobody leaves hungry. I’ve made this board for trick-or-treat gatherings, Halloween movie marathons, and even a work potluck where someone asked if I catered on the side. (I don’t, but I was flattered.) Maybe you’ve been there—staring at a pile of Halloween candy and wondering how to make it look intentional instead of just dumped in a bowl. That’s exactly why this recipe works.
The best part? It comes together in about fifteen minutes. No baking, no fancy knife work, no stress. You just arrange things on a board and let the colors do the heavy lifting. The orange and black theme practically decorates itself. I’ve been making this board for three Halloweens now, and every time I set it out, I think of Marge in that hardware store line. Some of the best recipes come from the most unexpected places, and this one proves that you don’t need a complicated dish to make a lasting impression.
Why You’ll Love This Recipe
This isn’t just another charcuterie board—it’s the one that saves your Halloween hosting sanity. After testing this board at multiple gatherings (and eating my fair share of test runs, honestly), I can tell you exactly why it works so well for busy people who just want to enjoy the holiday without spending all day in the kitchen.
- Comes Together in 15 Minutes: No cooking, no baking, no complicated steps. You can throw this together while the doorbell rings for trick-or-treaters. I’ve done it with a baby on my hip and a toddler asking for candy at the same time—if that’s not a testimonial, I don’t know what is.
- Simple Ingredients: Most of these items are available at any grocery store, and you probably already have some of them in your pantry. Candy corn shows up everywhere in October, and the cheese options are standard grocery store finds. No special trips to fancy markets required.
- Perfect for Halloween Gatherings: Whether you’re hosting a party, having friends over for a scary movie, or just want something fun for your family on Halloween night, this board fits the occasion. It’s festive without being fussy.
- Crowd-Pleaser: Kids love the candy corn and sweet touches. Adults appreciate the savory cheese and cracker options. Everyone wins. I’ve watched people hover around this board for an entire evening, coming back for “just one more piece” of cheese.
- Visually Stunning with Zero Effort: The orange and black color scheme does all the decorating work for you. Arrange everything on a board, add a few spooky touches, and it looks like you spent way more time than you actually did.
What makes this board different from other Halloween snack boards is the balance. Most Halloween boards lean heavily on candy and sweets, leaving guests with a sugar crash and a stomach ache. This one pairs the nostalgic sweetness of candy corn with real, satisfying cheese and protein-rich meats. The crackers add crunch, the fruit adds freshness, and the overall effect is a board that feels indulgent but actually keeps people full. It’s comfort food for Halloween—faster, easier, and way more fun than a traditional dinner spread.
Honestly, this recipe is the kind that makes you close your eyes after the first bite. Not because the flavors are complicated or surprising, but because it just feels right. The creamy cheese against the crunchy candy corn, the saltiness of the crackers balancing the sweetness—it’s simple, but it works. And isn’t that what we all want on a busy Halloween night?
What Ingredients You Will Need
This recipe uses simple, accessible ingredients that come together to create a visually striking and satisfying Halloween snack board. The key is choosing items that offer variety in texture, flavor, and color while keeping the shopping list manageable. Here’s what you’ll need:
The Cheese Selection
- Sharp Cheddar Cheese: 8 ounces, sliced into cubes or triangles. The orange color fits the Halloween theme perfectly, and the sharp flavor stands up well to the sweetness of the candy corn. I prefer Tillamook or Cabot for consistent quality, but any good sharp cheddar works.
- Smoked Gouda: 6 ounces, sliced. The smoky flavor adds depth to the board and pairs surprisingly well with the candy corn’s sweetness. Look for a wedge with a nice brown rind for visual contrast.
- Brie: One small wheel (about 8 ounces). The creamy texture provides a nice contrast to the firmer cheeses and crunchy crackers. Leave it at room temperature for about 30 minutes before serving for the best spreadable consistency.
- Pepper Jack Cheese: 6 ounces, sliced into thin strips or small cubes. The little flecks of red and green pepper add a subtle spicy kick and a pop of color that works with the Halloween theme.
The Meats
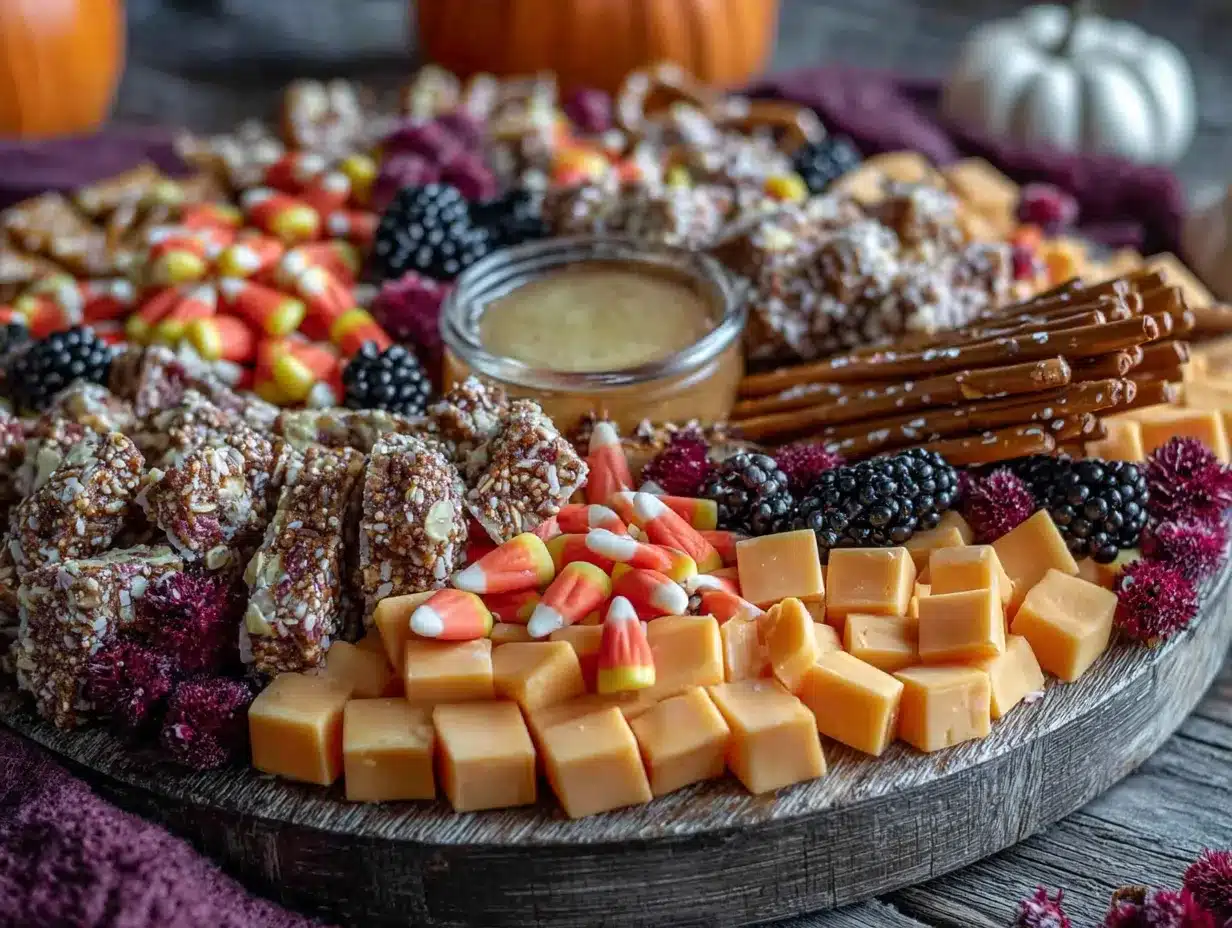
- Salami: 4 ounces, sliced thin. Genoa salami works great. Fold the slices into quarters or roll them into little cylinders for visual interest. The saltiness balances the sweet elements on the board.
- Prosciutto: 3 ounces, thinly sliced. Drape the slices loosely on the board for an elegant look. The delicate texture adds variety to the meat options.
The Candy and Sweet Elements
- Candy Corn: 1 cup. This is the star of the Halloween show. The classic tri-color kernels add that nostalgic Halloween feel that adults and kids both recognize. Brach’s is the most widely available brand, but store brands work just fine.
- Chocolate-Covered Pretzels: 1 cup. The salty-sweet combination is irresistible, and the dark chocolate color fits the Halloween palette. Look for orange or black sprinkles on top if you can find them.
- Marshmallows: 1 cup. Ghost-shaped marshmallows are perfect if you can find them, but regular marshmallows work too. They add a soft, pillowy texture to the board.
The Crackers and Crunch
- Wheat Crackers: 1 cup. The sturdy texture holds up well to cheese and spreads. I like Wheat Thins or a similar brand for their slightly sweet, nutty flavor.
- Pretzel Sticks: 1 cup. These add height and crunch to the board. Plus, they look a bit like little witch fingers, which is perfect for Halloween.
- Baguette Slices: 1 cup, toasted lightly. If you want to get a little fancier, thin slices of toasted baguette add a rustic touch and provide a sturdy base for cheese.
The Fruits and Accents
- Red Grapes: 1 cup, washed and separated into small clusters. The deep purple-red color adds richness to the board, and the sweetness pairs well with cheese.
- Dried Apricots: ½ cup. Their orange color reinforces the Halloween theme, and the chewy texture adds variety.
- Black Olives: ½ cup. The black color is perfect for Halloween, and the briny flavor provides a nice contrast to the sweeter elements. Look for kalamata or castelvetrano olives.
- Fresh Rosemary Sprigs: A few sprigs for garnish. They look like little evergreen trees and add a fresh, herbal scent to the board.
Spooky Decorations (Optional But Fun)
- Plastic Spider Rings: Tuck a few around the board for a creepy touch. Make sure to warn guests they’re not edible!
- Edible Eyes: Those little candy eyes you find in the baking aisle. Scatter a few on the cheese or marshmallows for a fun effect.
- Orange and Black Sprinkles: A light dusting over the candy corn or marshmallows adds extra festive flair.
When selecting your ingredients, look for cheese that’s firm and well-wrapped, with no signs of drying or mold. For the candy corn, check the expiration date—stale candy corn is hard and less enjoyable. If you’re making this board ahead of time, keep the cheese wrapped in the refrigerator and add it to the board just before serving.
Equipment Needed
You don’t need fancy equipment for this board, which is part of its charm. Here’s what you’ll need:
- A Large Board or Platter: A wooden cutting board, a marble slab, a large ceramic platter, or even a baking sheet lined with parchment paper works. I use a 16×12-inch wooden board that I picked up at a home goods store for about $15. It’s got some knife marks and character, which adds to the rustic feel.
- Small Bowls or Ramekins: You’ll need two or three small bowls for items like olives, candy corn, or spreads. I use small ceramic ramekins that cost about a dollar each at a kitchen supply store. They keep loose items contained and add visual structure to the board.
- Cheese Knives: At least two small knives for cutting cheese. One for the soft brie and one for the firmer cheddar. If you don’t have cheese knives, a regular butter knife and a paring knife work fine.
- Small Spoons or Tongs: For serving olives and other loose items. I use a pair of small cocktail tongs that I found at a thrift store for fifty cents.
- Parchment Paper (Optional): If you’re using a board that isn’t food-safe or you want easy cleanup, line the board with parchment paper. It also adds a rustic, bakery-style look.
- Toothpicks or Small Skewers: These make it easy for guests to grab cheese and fruit without touching everything. I like the ones with little Halloween-themed toppers if I can find them.
Honestly, you could put this board together on a clean cookie sheet if that’s all you have. The equipment doesn’t matter as much as the arrangement. I’ve made this board on a plastic cutting board at a friend’s house when I forgot to bring my own, and it still looked great. Don’t overthink the equipment—just use what you have.
Preparation Method
This board comes together in about 15 minutes of active time. Here’s how to do it step by step:
- Prepare Your Board or Platter (2 minutes): Start with a clean, dry surface. If you’re using a wooden board, give it a quick wipe with a damp cloth. Place your small bowls or ramekins on the board first—these will hold the loose items like olives and candy corn. Position them slightly off-center for a more natural, less symmetrical look. I usually put one bowl near the top left corner and one near the bottom right corner.
- Place the Cheese (3 minutes): Arrange the cheese wedges and cubes around the board, leaving space between them. Place the brie wheel in a prominent position since it’s a visual anchor. Cut the cheddar into cubes and arrange them in a small cluster. Slice the smoked gouda into thin triangles and fan them out. Cut the pepper jack into small strips and place them near the cheddar. Space the cheeses out so guests can easily reach them without crossing over other items. Pro tip: If you want the brie to be perfectly spreadable, take it out of the refrigerator about 30 minutes before you start assembling the board.
- Add the Meats (2 minutes): Fold the salami slices into quarters and arrange them in a small pile near one of the cheeses. Drape the prosciutto slices loosely, letting them form gentle waves on the board. Don’t press them flat—the folds and curves add visual interest. Place the meats near the crackers so guests can easily pair them.
- Arrange the Crackers and Bread (2 minutes): Scatter the wheat crackers around the board, placing some near each cheese variety. Stand the pretzel sticks upright in small clusters—they look like little witch fingers and add height to the board. If you’re using baguette slices, arrange them in a neat row or a small fan pattern near the brie. Leave some open space on the board for the other elements.
- Add the Fruits and Accents (2 minutes): Place the grape clusters in a couple of spots around the board. Tuck the dried apricots near the cheddar—the orange color complements the cheese nicely. Scatter the black olives in their small bowl or directly on the board if you prefer. The deep black color adds that Halloween touch.
- Add the Candy and Sweet Elements (2 minutes): Pour the candy corn into one of the small bowls or arrange it in a little pile directly on the board. I like to create a small “candy corn mountain” near the center of the board for maximum visual impact. Place the chocolate-covered pretzels in another small bowl or scatter them near the candy corn. Arrange the marshmallows in a small cluster—ghost-shaped ones are especially fun. The contrast between the orange candy corn and the dark chocolate pretzels is visually striking.
- Add the Spooky Decorations (1 minute): Tuck a few plastic spider rings around the board, making sure they’re visible but not overwhelming. Place edible eyes on a few of the marshmallows or cheese cubes if you’re using them. Sprinkle a few orange and black sprinkles over the candy corn for extra festive flair. Add the fresh rosemary sprigs in a couple of spots for a touch of green that breaks up all the orange and black.
- Final Adjustments (1 minute): Step back and look at your board. Fill in any empty spots with extra crackers or fruit. Make sure the colors are balanced—you want a good mix of orange, black, white, and brown throughout the board. Adjust any items that look cluttered or crowded. The goal is a board that looks abundant but not messy.
Here’s a sensory cue to watch for: When everything is arranged, the board should look like a Halloween harvest. The orange cheddar and candy corn should pop against the darker elements. The brie should look soft and inviting. The whole board should feel festive and fun, not fussy or precious. If it makes you smile, you’ve done it right.
One more thing: If you’re making this board for a party, assemble it no more than an hour before serving. The crackers can get soft if they sit too long, and the cheese will start to sweat. Keep the board covered with plastic wrap if you need to make it a few hours ahead, and add the crackers and pretzels just before serving.
Cooking Tips & Techniques
After making this board more times than I can count (and learning from a few mistakes along the way), here are my best tips for getting it right every time:
Balance Your Flavors: The key to a great charcuterie board is variety. You want salty, sweet, tangy, and creamy all represented. If your cheese selection is all mild, the board will feel flat. If it’s all sharp, it might overwhelm the candy corn. I aim for one soft cheese (brie), one firm cheese (cheddar), one smoky cheese (gouda), and one spicy cheese (pepper jack). That covers all the flavor bases.
Think About Texture: A board with all soft items feels monotonous. Include crunchy crackers, chewy dried fruit, creamy cheese, and crispy pretzels. The variety keeps people coming back for more. I learned this the hard way when I made a board with only soft brie and marshmallows—it was a texture disaster.
Don’t Overcrowd the Board: This is the most common mistake I see. People try to fit too much on one board, and everything ends up touching and looking messy. Leave a little space between items so guests can easily grab what they want. If you have too much food, use a second board or a smaller plate for overflow. Trust me, a spacious board looks more inviting than a crowded one.
Keep Candy Corn Separate: Candy corn has a waxy texture that can transfer to other foods if it sits against them for too long. Keep it in its own small bowl or in a designated pile away from the cheese and crackers. This also prevents the candy corn from getting soft or sticky from contact with moist items like grapes.
Temperature Matters: Cheese tastes best at room temperature. Take it out of the refrigerator about 30 minutes before serving. The brie will be perfectly spreadable, and the cheddar will have a creamier texture. Cold cheese loses its flavor and feels hard and unappealing. I’ve made the mistake of serving straight-from-the-fridge cheese at a party, and it was a sad, flavorless experience.
Use the “Rule of Three”: When arranging items, group them in odd numbers. Three types of cheese, three types of crackers, three types of fruit. Odd numbers are more visually appealing than even numbers. This is a basic design principle that applies to food as much as art. I don’t know why it works, but it does.
Prepare for Refills: If you’re serving a crowd, have extra ingredients ready in the kitchen. The candy corn will disappear first, followed by the chocolate-covered pretzels. Keep backup bowls ready so you can refill without disrupting the board’s arrangement. I learned this after watching a board get demolished in 20 minutes at a Halloween party.
Variations & Adaptations
This board is endlessly adaptable, which is one of its best features. Here are some variations I’ve tried and loved:
The Sweet Tooth Board: If you’re serving a crowd that leans heavily toward sweets, swap out the savory meats and add more candy options. Replace the salami and prosciutto with additional candy corn varieties (the pumpkin-shaped ones are fun), chocolate truffles, and gummy worms. The gummy worms add a creepy-crawly Halloween vibe that kids especially love. I made this version for a kids’ Halloween party, and the gummy worms were gone in five minutes.
The Savory Lover’s Board: For guests who prefer savory over sweet, reduce the candy corn and add more cheese and meat options. Include some pickled vegetables like cornichons or pickled okra for a tangy contrast. Add a small bowl of honey or fig jam for drizzling over the brie. The salty-savory combination is incredibly satisfying, and the pickles add a brightness that cuts through the richness of the cheese.
The Healthy-ish Board: If you want to keep things a bit lighter, swap the chocolate-covered pretzels for dark chocolate-covered almonds, add more fresh fruit like apple slices and pear slices, and include some raw vegetables like carrot sticks and celery. The orange carrots fit the Halloween theme perfectly. I’ve made this version for a weeknight dinner when I wanted something festive but didn’t want to overdo the sugar.
The Gluten-Free Board: Replace the wheat crackers and pretzels with gluten-free crackers or rice cakes. Most cheese and meat are naturally gluten-free, so the only swaps are the crunchy elements. Look for gluten-free pretzel sticks if you can find them—they’re available at most grocery stores now. I have a gluten-sensitive friend, and this version makes her feel included without sacrificing any of the fun.
The Vegan Board: Use vegan cheese alternatives (there are some surprisingly good options now), replace the meat with marinated artichoke hearts or roasted red peppers, and use vegan marshmallows. Most candy corn is accidentally vegan, so that’s one less thing to worry about. The key is to include enough savory, satisfying elements so the board doesn’t feel like just a pile of candy.
The Spicy Board: Amp up the heat by adding spicy salami, jalapeño-stuffed olives, and pepper jack cheese. Include a small bowl of hot honey for drizzling over the brie. The sweet-spicy combination is addictive, and the heat cuts through the richness of the cheese. I made this version for a Halloween party with a “spooky spicy” theme, and it was a hit with the adults.
My personal favorite variation is the Savory Lover’s Board with a drizzle of honey over the brie and a few pickled vegetables tucked in. The combination of creamy, salty, tangy, and sweet is just perfect. I’ve made it for multiple gatherings, and it never fails to impress.
Serving & Storage Suggestions
This board is best served at room temperature, so plan to take it out of the refrigerator about 30 minutes before you’re ready to serve. The cheese will be softer and more flavorful, and the crackers will stay crisp. If you’re serving outdoors on a cool Halloween evening, the board will hold its temperature well for about an hour.
For presentation, arrange the board on a large wooden cutting board or a marble slab. The contrast between the dark board and the bright orange candy corn is visually striking. If you’re using a lighter-colored board, consider lining it with a piece of dark parchment paper or a black placemat to make the colors pop. I once used a black slate tile from a home improvement store as a board, and it looked amazing—plus it cost about three dollars.
Complementary dishes to serve alongside this board include a warm bowl of butternut squash soup, a simple green salad with a tangy vinaigrette, or a tray of roasted vegetables. For beverages, apple cider (hot or cold) is a natural pairing, as is a crisp white wine like Sauvignon Blanc or a light red like Pinot Noir. For a non-alcoholic option, sparkling water with a splash of pomegranate juice fits the Halloween color scheme perfectly.
If you have leftovers (which is rare in my experience, but possible), here’s how to store everything properly:
- Cheese: Wrap each cheese variety separately in wax paper or parchment paper, then place in a zip-top bag. Store in the refrigerator for up to 5 days. The brie will soften as it sits, so use it within 2-3 days for the best texture.
- Meats: Wrap tightly in plastic wrap or store in an airtight container. Use within 3 days. The prosciutto will dry out quickly, so eat it first.
- Crackers and Pretzels: Store in an airtight container at room temperature. They’ll stay crisp for up to a week. If they get soft, you can crisp them in a 300°F oven for 5 minutes.
- Candy Corn and Chocolate Pretzels: Store in an airtight container at room temperature. Candy corn will keep for weeks, but the chocolate pretzels are best eaten within a few days.
- Fruit: Store grapes and dried fruit in the refrigerator. Grapes will last about a week, dried fruit for several weeks.
One thing I’ve noticed: The flavors on this board actually improve slightly after a few hours at room temperature. The cheese softens, the fruit releases a bit of juice, and everything melds together in a lovely way. If you’re making this for a party that runs long, don’t worry about the board sitting out for a couple of hours—it’s designed to be enjoyed at a leisurely pace.
Nutritional Information & Benefits
While this is definitely an indulgent Halloween treat, there are some nutritional bright spots worth noting. Here’s an approximate breakdown per serving (based on a board serving 8-10 people):
| Nutrient | Amount Per Serving |
|---|---|
| Calories | 350-400 |
| Total Fat | 22g |
| Saturated Fat | 12g |
| Cholesterol | 55mg |
| Sodium | 680mg |
| Total Carbohydrates | 30g |
| Dietary Fiber | 2g |
| Sugars | 18g |
| Protein | 14g |
| Calcium | 200mg (15% DV) |
| Vitamin A | 300IU (6% DV) |
The cheese provides a good amount of calcium and protein, which helps balance out the sugar from the candy corn. The grapes and dried apricots offer fiber and antioxidants. The nuts (if you include them) provide healthy fats and vitamin E. Even the candy corn, while primarily sugar, offers a small amount of nostalgia and joy—which counts for something in my book.
For those with dietary concerns, this board can be adapted to be gluten-free (use gluten-free crackers), vegetarian (skip the meat and add more cheese and vegetables), or lower in sugar (reduce the candy corn and add more fruit and nuts). The cheese is naturally low in carbohydrates, making this board a decent option for those watching their carb intake—just go easy on the crackers and candy corn.
From a wellness perspective, I love that this board encourages grazing and sharing. There’s something inherently social about a charcuterie board that makes people slow down, talk, and enjoy each other’s company. In a world where we’re all rushing around, that’s a pretty valuable benefit.
Conclusion
This Quick Halloween Charcuterie Board has become my go-to for every Halloween gathering, and I honestly can’t imagine celebrating the holiday without it now. It’s the recipe that Marge from the hardware store line accidentally gave me, and it’s the one I keep coming back to because it just works. No stress, no complicated steps, no hours in the kitchen—just a beautiful, festive board that makes everyone feel special.
I hope you’ll make this board your own. Add your favorite candies, swap in cheeses you love, or go wild with the spooky decorations. The beauty of this recipe is that it’s more of a template than a strict set of rules. Trust your instincts, have fun with it, and don’t be afraid to experiment. The best boards come from cooks who aren’t afraid to try something new.
When you make this board (and I really hope you do), I’d love to hear about it. Leave a comment below and tell me what variations you tried, what your guests thought, or how you decorated your board. Share a photo on social media and tag me so I can see your creation. There’s nothing I love more than seeing this recipe come to life in other people’s kitchens.
Here’s to a Halloween filled with candy corn, good cheese, and the kind of gatherings where everyone leaves happy and full. You’ve got this—now go make that board!
Frequently Asked Questions
Can I make this board ahead of time?
Yes, you can prep most of the ingredients ahead of time, but I recommend assembling the board no more than an hour before serving. You can cut the cheese, wash the grapes, and arrange the candy corn in bowls a day ahead. Store everything separately in the refrigerator and assemble just before guests arrive. Add the crackers and pretzels at the last minute so they stay crisp.
How many people does this board serve?
This board is designed to serve 8-10 people as a snack or appetizer. If you’re serving it as a main course for a casual gathering, it will serve about 4-6 people. I always make a little extra because the candy corn and chocolate pretzels tend to disappear quickly. Better to have too much than not enough!
Can I use different types of candy corn?
Absolutely! The classic tri-color candy corn is my favorite, but there are so many fun variations available now. Pumpkin-shaped candy corn, chocolate-flavored candy corn, and even caramel apple-flavored versions all work beautifully on this board. Just keep in mind that flavored varieties might clash with certain cheeses, so taste-test before you arrange everything.
What if I don’t have a large board or platter?
No problem at all! You can use a large baking sheet, a clean cookie sheet, or even a few smaller plates arranged together on the table. I’ve made this board on a large pizza pan before, and it worked perfectly. The key is having enough surface area to spread everything out without overcrowding. Get creative with what you have.
How do I keep the board looking fresh during a party?
If your party runs for several hours, check the board periodically and refresh items as needed. Replace empty bowls of candy corn, add more crackers if they’re getting low, and remove any cheese that looks like it’s sweating too much. Keep backup ingredients in the kitchen so you can quickly refill without disrupting the party. A quick spritz of water on the grapes can help them look fresh and glossy.
Pin This Recipe!
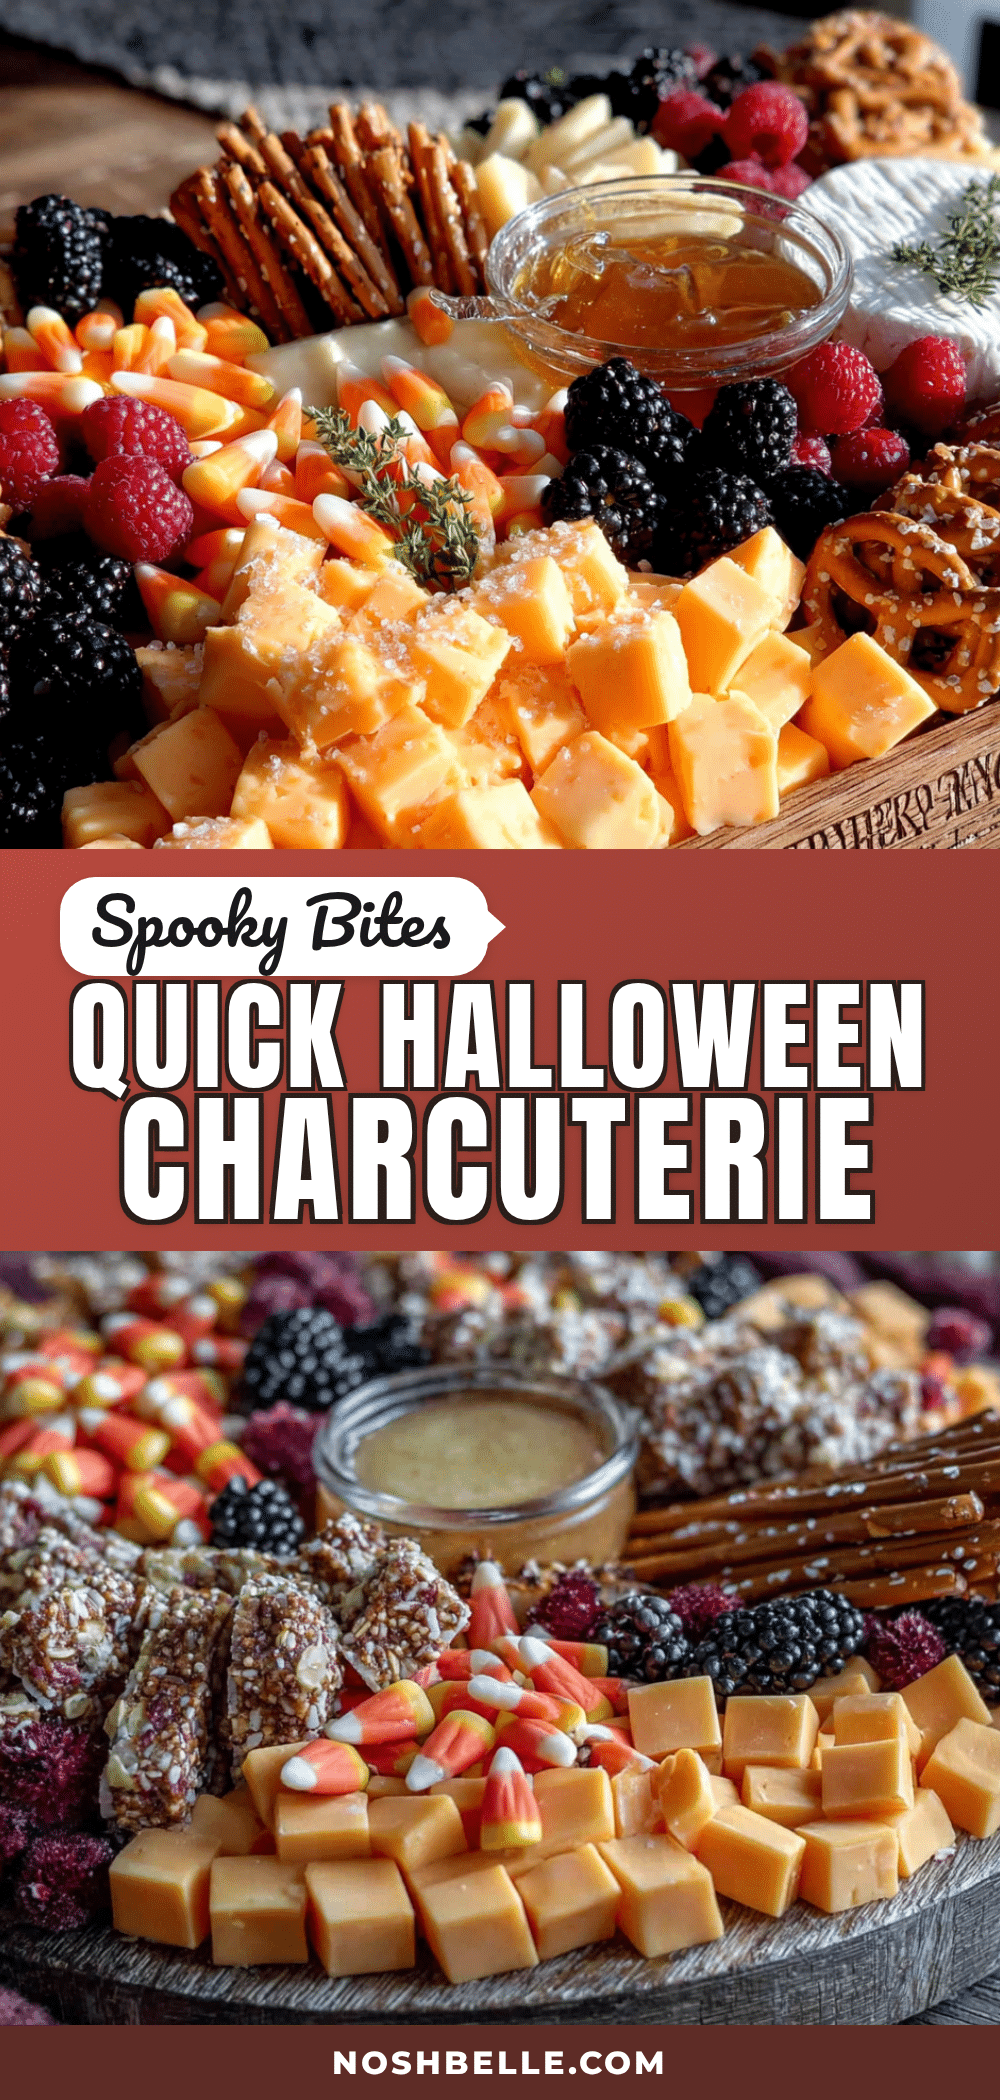
Quick Halloween Charcuterie Board: Easy Candy Corn & Cheese Idea
A quick and easy Halloween charcuterie board that combines nostalgic candy corn with savory cheeses, meats, and crackers. Perfect for parties, movie marathons, or trick-or-treat gatherings, this board comes together in just 15 minutes and looks impressive with minimal effort.
- Prep Time: 15 minutes
- Cook Time: 0 minutes
- Total Time: 15 minutes
- Yield: 8-10 servings 1x
- Category: Appetizer
- Cuisine: American
Ingredients
- 8 ounces sharp cheddar cheese, sliced into cubes or triangles
- 6 ounces smoked gouda, sliced
- 1 small wheel brie (about 8 ounces)
- 6 ounces pepper jack cheese, sliced into thin strips or small cubes
- 4 ounces salami, thinly sliced
- 3 ounces prosciutto, thinly sliced
- 1 cup candy corn
- 1 cup chocolate-covered pretzels
- 1 cup marshmallows (ghost-shaped if available)
- 1 cup wheat crackers
- 1 cup pretzel sticks
- 1 cup baguette slices, toasted lightly
- 1 cup red grapes, washed and separated into small clusters
- ½ cup dried apricots
- ½ cup black olives (kalamata or castelvetrano)
- Fresh rosemary sprigs for garnish
- Plastic spider rings (optional)
- Edible eyes (optional)
- Orange and black sprinkles (optional)
Instructions
- Prepare your board or platter: Start with a clean, dry surface. Place small bowls or ramekins on the board to hold loose items like olives and candy corn. Position them slightly off-center.
- Place the cheese: Arrange the cheese wedges and cubes around the board, leaving space between them. Place the brie wheel in a prominent position. Cut the cheddar into cubes and arrange in a small cluster. Slice the smoked gouda into thin triangles and fan them out. Cut the pepper jack into small strips and place near the cheddar.
- Add the meats: Fold the salami slices into quarters and arrange in a small pile near one of the cheeses. Drape the prosciutto slices loosely, letting them form gentle waves.
- Arrange the crackers and bread: Scatter the wheat crackers around the board, placing some near each cheese variety. Stand the pretzel sticks upright in small clusters. Arrange baguette slices in a neat row or fan pattern near the brie.
- Add the fruits and accents: Place grape clusters in a couple of spots around the board. Tuck dried apricots near the cheddar. Scatter black olives in their small bowl or directly on the board.
- Add the candy and sweet elements: Pour candy corn into a small bowl or arrange in a pile directly on the board. Place chocolate-covered pretzels in another small bowl or scatter near the candy corn. Arrange marshmallows in a small cluster.
- Add the spooky decorations: Tuck plastic spider rings around the board. Place edible eyes on marshmallows or cheese cubes if using. Sprinkle orange and black sprinkles over the candy corn. Add fresh rosemary sprigs in a couple of spots.
- Final adjustments: Step back and look at your board. Fill in any empty spots with extra crackers or fruit. Ensure colors are balanced. Adjust any items that look cluttered or crowded.
Notes
Assemble the board no more than an hour before serving to keep crackers crisp and cheese fresh. Take cheese out of the refrigerator 30 minutes before serving for best flavor and texture. Keep candy corn in a separate bowl to prevent it from transferring waxy texture to other foods. For a crowd, have extra ingredients ready for refills.
Nutrition
- Serving Size: 1 serving (based on
- Calories: 375
- Sugar: 18
- Sodium: 680
- Fat: 22
- Saturated Fat: 12
- Carbohydrates: 30
- Fiber: 2
- Protein: 14
Keywords: Halloween charcuterie board, candy corn, cheese board, easy appetizer, Halloween party food, quick snack, spooky board


