I was walking through the parking lot of my local grocery store last Tuesday when the smell of someone’s wood-burning fireplace drifted across the asphalt — and suddenly I was eight years old in my Aunt Clara’s tiny kitchen, watching her pull a cast iron skillet from the oven. The air in that room was always thick with garlic and butter and the kind of warmth that felt like a hug you didn’t know you needed. She’d let me sprinkle the Parmesan over her chicken thighs, standing on a wobbly stool so I could reach the counter, and I remember how the cheese would fall in uneven clumps because my hands were too small and too eager. She passed away five years ago, and I’ve been chasing that exact feeling ever since — that specific combination of crispy, garlicky, cheesy comfort that only fall evenings seem to demand. This recipe is my closest attempt yet at recreating that memory, and honestly, it might even be a little better. The air fryer gives you that perfect crunch without the fuss of a skillet, and the smell that fills your kitchen? Let me tell you, it’s almost as good as Aunt Clara’s.
Why You’ll Love This Recipe
These crispy air fryer garlic parmesan chicken thighs are the kind of meal that makes you look forward to weeknight cooking again. I’ve tested this recipe about seven times to get it just right, and here’s why I keep coming back to it.
- Quick & Easy: Ready in under 30 minutes from start to finish, which means you can have dinner on the table even on the busiest October Tuesday.
- Simple Ingredients: No fancy grocery trips required — just chicken thighs, garlic, Parmesan, and a few pantry staples you probably already have.
- Perfect for Fall Weeknights: This is the meal you want when the air gets crisp and you need something warm, satisfying, and deeply savory without spending hours in the kitchen.
- Crowd-Pleaser: My kids used to be picky about chicken thighs, but the crispy Parmesan coating won them over instantly. Even my neighbor Steve, who claims he doesn’t like air fryer food, asked for the recipe.
- Unbelievably Delicious: The combination of juicy dark meat, crunchy garlicky crust, and salty Parmesan is next-level comfort food that makes you close your eyes after the first bite.
What makes this version different from every other garlic Parmesan chicken recipe out there is the technique — I blend the Parmesan with panko breadcrumbs and a secret touch of mayonnaise that locks in moisture while creating that golden, shatteringly crisp exterior. It’s comfort food reimagined for the air fryer generation: faster, healthier, but with the same soul-soothing satisfaction you remember from childhood dinners.
What Ingredients You Will Need
This recipe relies on simple, high-impact ingredients that work together to create something truly special. Most of these are pantry staples, especially during fall when we’re all craving hearty, savory flavors.
For the Chicken
- 4 bone-in, skin-on chicken thighs (about 1.5 pounds total) — the skin helps keep the meat incredibly juicy, and the bone adds flavor. I prefer organic thighs from Costco for consistent quality.
- 2 tablespoons olive oil — helps the coating stick and promotes browning. You can use avocado oil if that’s what you have.
- 1 tablespoon mayonnaise — trust me on this one. It sounds weird, but mayonnaise creates an unbeatable crispy crust and keeps the chicken moist. Use full-fat for best results.
- 4 cloves garlic, minced — fresh garlic is non-negotiable here. The jarred stuff just doesn’t have the same punch.
- 1 teaspoon salt — I use fine sea salt for even distribution.
- ½ teaspoon black pepper — freshly ground if you have it.
- ½ teaspoon smoked paprika — adds a subtle smoky depth that complements the Parmesan beautifully.
For the Coating
- ½ cup panko breadcrumbs — these give you that light, airy crunch that regular breadcrumbs just can’t match. I’ve tried both and panko wins every time.
- ⅓ cup freshly grated Parmesan cheese — please, please grate your own. The pre-shredded stuff has anti-caking agents that prevent it from melting properly. It takes two minutes with a microplane.
- 2 tablespoons melted butter — adds richness and helps the coating brown evenly. Use salted butter and adjust the added salt accordingly.
- 1 teaspoon dried Italian seasoning — a blend of oregano, basil, and rosemary works perfectly. You can use dried oregano alone in a pinch.
- ½ teaspoon garlic powder — reinforces the fresh garlic flavor without being overwhelming.
For the Garnish
- 2 tablespoons fresh parsley, chopped — adds a pop of color and freshness that cuts through the richness.
- Extra grated Parmesan for serving — because you can never have too much cheese.
- Lemon wedges — a squeeze of lemon juice right before eating brightens everything up. Don’t skip this.
Equipment Needed
The beauty of this recipe is that you don’t need much. Here’s what you’ll need to pull it off:
- Air fryer — any model works, but I use a 5.8-quart Cosori and it’s been a workhorse. If yours is smaller, cook the thighs in batches to avoid overcrowding.
- Mixing bowls — one large bowl for the chicken and one shallow dish for the coating mixture.
- Tongs — for turning the chicken without burning your fingers. Silicone-tipped ones won’t scratch your air fryer basket.
- Microplane or fine grater — for grating the Parmesan and zesting lemons if you’re adding them.
- Meat thermometer — this is crucial for ensuring perfectly cooked chicken. I’ve ruined too many batches by guessing. An instant-read thermometer takes the guesswork out.
- Pastry brush — for brushing the butter mixture onto the chicken. A silicone brush is easiest to clean.
If you don’t have an air fryer, you can bake these in a 400°F oven on a wire rack set over a baking sheet. Add about 10 minutes to the cooking time and flip halfway through. The texture won’t be quite as crispy, but it’ll still be delicious.
Preparation Method
Let me walk you through this step by step. I’ve made this recipe enough times to know exactly where things can go wrong, so I’ll point those out as we go.
- Pat the chicken thighs dry with paper towels. This is the most important step, honestly. Moisture is the enemy of crispiness, and you want the skin as dry as possible. Let them sit on a paper towel-lined plate for 5 minutes while you prep everything else.
- Preheat your air fryer to 380°F (193°C). Most air fryers need about 3 minutes to preheat. I usually do this while I’m mixing the coating so everything’s ready at the same time.
- Mix the coating in a shallow bowl. Combine the panko breadcrumbs, grated Parmesan, Italian seasoning, garlic powder, and a pinch of salt and pepper. Stir with a fork until everything is evenly distributed. The Parmesan should look like little flecks throughout the breadcrumbs.
- Make the garlic butter mixture in a small bowl. Melt the butter in the microwave (about 20 seconds), then stir in the minced garlic, olive oil, mayonnaise, smoked paprika, salt, and pepper. Whisk until smooth. The mayonnaise will look a little strange at first, but keep stirring — it emulsifies into the butter beautifully.
- Coat the chicken by brushing each thigh generously with the garlic butter mixture. Use a pastry brush to get it into all the nooks and crannies, including underneath the skin if you can. Then press each thigh into the panko-Parmesan mixture, making sure every surface is covered. Don’t be shy — really press it in. I use my fingers to pat the coating firmly onto the chicken.
- Place the thighs in the air fryer basket skin-side up, leaving at least an inch of space between each piece. If they’re touching, they won’t crisp properly. I can usually fit 4 thighs in my 5.8-quart air fryer without overcrowding.
- Cook for 18-20 minutes at 380°F. Do not flip them halfway through — you want the skin to stay on top and get golden and crunchy. At the 15-minute mark, check the internal temperature with your meat thermometer. You’re looking for 165°F (74°C) in the thickest part of the thigh, not touching the bone. If they need more time, add 2-minute increments until they hit temperature.
- Let them rest for 5 minutes after cooking. I know it’s hard to wait, but this allows the juices to redistribute so every bite is perfectly moist. If you cut into them immediately, all those delicious juices will run out onto the plate.
- Garnish and serve by sprinkling fresh parsley and extra Parmesan over the hot chicken. Squeeze a lemon wedge over each thigh just before eating — the acidity cuts through the richness and ties everything together.
Cooking Tips & Techniques
After making this recipe more times than I care to count, here are the things I wish I’d known from the start:
Don’t overcrowd the basket. I learned this the hard way when I tried to cram six thighs into my air fryer and ended up with steamed, soggy chicken instead of crispy. Air needs to circulate around each piece for that golden crust to form. Cook in batches if you need to, and keep the finished batch warm in a 200°F oven while the rest cook.
Use a meat thermometer. Chicken thighs are forgiving because of their higher fat content, but they can still dry out if overcooked. I aim for 165°F, but honestly, dark meat is actually better at 170-175°F — the collagen breaks down more and the meat becomes incredibly tender. Just don’t go past 180°F or you’ll be chewing for a while.
Toast the panko first for extra crunch. If you have an extra 2 minutes, spread the panko on a baking sheet and toast them in a 350°F oven until lightly golden (about 3-4 minutes). This gives the coating a head start on browning and makes the crust even crispier. I do this when I’m feeling fancy or when I have company coming over.
Let the chicken come to room temperature. Take the thighs out of the fridge 20 minutes before cooking. Cold chicken cooks unevenly, and the coating will brown before the inside is done. Room temperature chicken cooks more evenly and stays juicier.
Watch the garlic. Fresh garlic burns easily in the air fryer because of the high heat and concentrated airflow. That’s why I mix it into the butter mixture rather than sprinkling it directly on top — the butter and mayonnaise protect it from burning while still infusing the chicken with that amazing garlic flavor.
Variations & Adaptations
One of the best things about this recipe is how adaptable it is. Here are some variations I’ve tried and loved:
Spicy Garlic Parmesan: Add ½ teaspoon of red pepper flakes to the butter mixture and a pinch of cayenne to the panko coating. The heat pairs beautifully with the cool, creamy garlic flavor. My husband requests this version every time.
Lemon Herb Version: Replace the Italian seasoning with 1 tablespoon of fresh chopped rosemary and thyme, and add the zest of one lemon to the panko mixture. The lemon brightens everything up and makes it feel lighter — perfect for those early fall days when it’s still warm out.
Gluten-Free Adaptation: Swap the panko breadcrumbs for crushed pork rinds or gluten-free panko. I’ve used both, and honestly, the pork rinds create an even crispier crust. Just make sure they’re finely crushed — I put them in a zip-top bag and go at them with a rolling pin.
Dairy-Free Option: Use vegan Parmesan (the brand Follow Your Heart makes a good one) and replace the butter with olive oil. The texture won’t be quite as rich, but the garlic and herb flavors still shine through beautifully.
Boneless, Skinless Thighs: If that’s what you have on hand, reduce the cooking time to 12-14 minutes at 375°F. The coating won’t be quite as crispy without the skin, so I recommend brushing them with a little extra mayonnaise to compensate.
Serving & Storage Suggestions
These chicken thighs are incredibly versatile when it comes to serving. Here’s how I like to enjoy them:
Serving Temperature: Serve hot, straight from the air fryer. The crust is at its crispiest within the first 10 minutes. If you need to hold them, keep them in a 200°F oven on a wire rack (not on a plate, or the steam will soften the crust).
What to Serve With: I love these with a simple arugula salad dressed with lemon vinaigrette — the peppery greens and bright acidity cut through the richness of the chicken. Roasted fall vegetables like butternut squash or Brussels sprouts are also perfect. And honestly, a side of creamy mashed potatoes to soak up any leftover garlic butter? Absolute heaven.
Storage: Leftover chicken thighs will keep in an airtight container in the refrigerator for up to 4 days. The crust will soften as they sit, but don’t worry — you can bring it back to life.
Reheating: The air fryer is your best friend here. Reheat at 350°F for 4-5 minutes, and the crust will crisp right back up. The microwave will make them soggy, so avoid it if you can. If you don’t have access to an air fryer, reheat them in a 375°F oven for 8-10 minutes.
Freezing: These freeze beautifully. Let them cool completely, then wrap each thigh individually in plastic wrap and place them in a freezer bag. They’ll keep for up to 3 months. Thaw overnight in the refrigerator and reheat in the air fryer as directed above.
One thing I’ve noticed is that the flavors actually deepen overnight — the garlic and Parmesan meld together in a way that’s even more satisfying the next day. I sometimes make a double batch just for the leftovers.
Nutritional Information & Benefits
Here’s the approximate nutritional breakdown for one chicken thigh (based on 4 servings):
- Calories: 385
- Protein: 32g
- Fat: 26g
- Carbohydrates: 8g
- Fiber: 1g
- Sugar: 1g
Chicken thighs are an excellent source of protein, iron, and B vitamins, which are especially important during the fall when our energy levels can dip as the days get shorter. The dark meat contains more zinc and selenium than chicken breasts, both of which support immune health — something we all need more of during cold and flu season.
Garlic is packed with allicin, a compound known for its anti-inflammatory and immune-boosting properties. And Parmesan cheese provides calcium and protein, though it’s also higher in sodium, so be mindful if you’re watching your salt intake.
This recipe is naturally low-carb and keto-friendly if you use the pork rind variation mentioned above. It’s also gluten-free with the right breadcrumb substitution, and you can easily make it dairy-free. Just be aware of the sodium content if you’re on a low-sodium diet — you can reduce the added salt by half and rely on the Parmesan for flavor instead.
Conclusion
These crispy air fryer garlic parmesan chicken thighs have become my go-to fall weeknight dinner for good reason. They’re fast enough for a Tuesday night but impressive enough for company, and that combination of juicy meat, crunchy coating, and rich garlic flavor hits every single note of comfort food perfection.
What I love most about this recipe is how it bridges that gap between the meals we remember from childhood and the practical realities of adult life. I can’t spend an hour hovering over a skillet like Aunt Clara did, but I can have these on the table in under 30 minutes, and honestly? The flavor is just as good. Maybe even better.
I’d love to hear how these turn out for you. Did you try any variations? Did your family love them as much as mine does? Drop a comment below and let me know — and don’t forget to share this recipe with someone who needs a little fall comfort in their life. Happy cooking!
Frequently Asked Questions
Can I use chicken breasts instead of thighs?
Yes, but you’ll need to adjust the cooking time. Boneless, skinless chicken breasts will cook faster — about 12-15 minutes at 375°F. Make sure to check the internal temperature reaches 165°F. The breasts won’t be quite as juicy as thighs, so consider brining them for 30 minutes beforehand if you have time.
How do I prevent the Parmesan from burning in the air fryer?
This is a common concern, but the key is mixing the Parmesan with the panko breadcrumbs and butter. The breadcrumbs and butter create a barrier that protects the cheese from direct heat. Also, make sure you’re cooking at 380°F, not higher. I’ve tried 400°F and the cheese definitely burns at that temperature.
Can I make this recipe without an air fryer?
Absolutely. Bake the chicken thighs on a wire rack set over a baking sheet at 400°F for 30-35 minutes, flipping halfway through. The wire rack is important — it allows air to circulate underneath so the bottom stays crispy instead of steaming on the pan. You can also pan-fry them in a cast iron skillet with a little oil, but that’s a bit messier.
How do I get the coating to stick better?
The mayonnaise is your secret weapon here. It acts as a binder that helps the panko-Parmesan mixture adhere to the chicken. Make sure you’re pressing the coating firmly into the chicken with your hands, and let the coated thighs rest for 5 minutes before cooking — this gives the coating time to set.
Can I prep these ahead of time?
Yes! You can coat the chicken thighs up to 24 hours in advance and keep them covered in the refrigerator. Let them sit at room temperature for 20 minutes before air frying. The coating might get a little wet from the chicken’s moisture, so I recommend adding an extra tablespoon of panko just before cooking to freshen up the crust.
Pin This Recipe!

Crispy Air Fryer Garlic Parmesan Chicken Thighs: Easy Fall Dinner

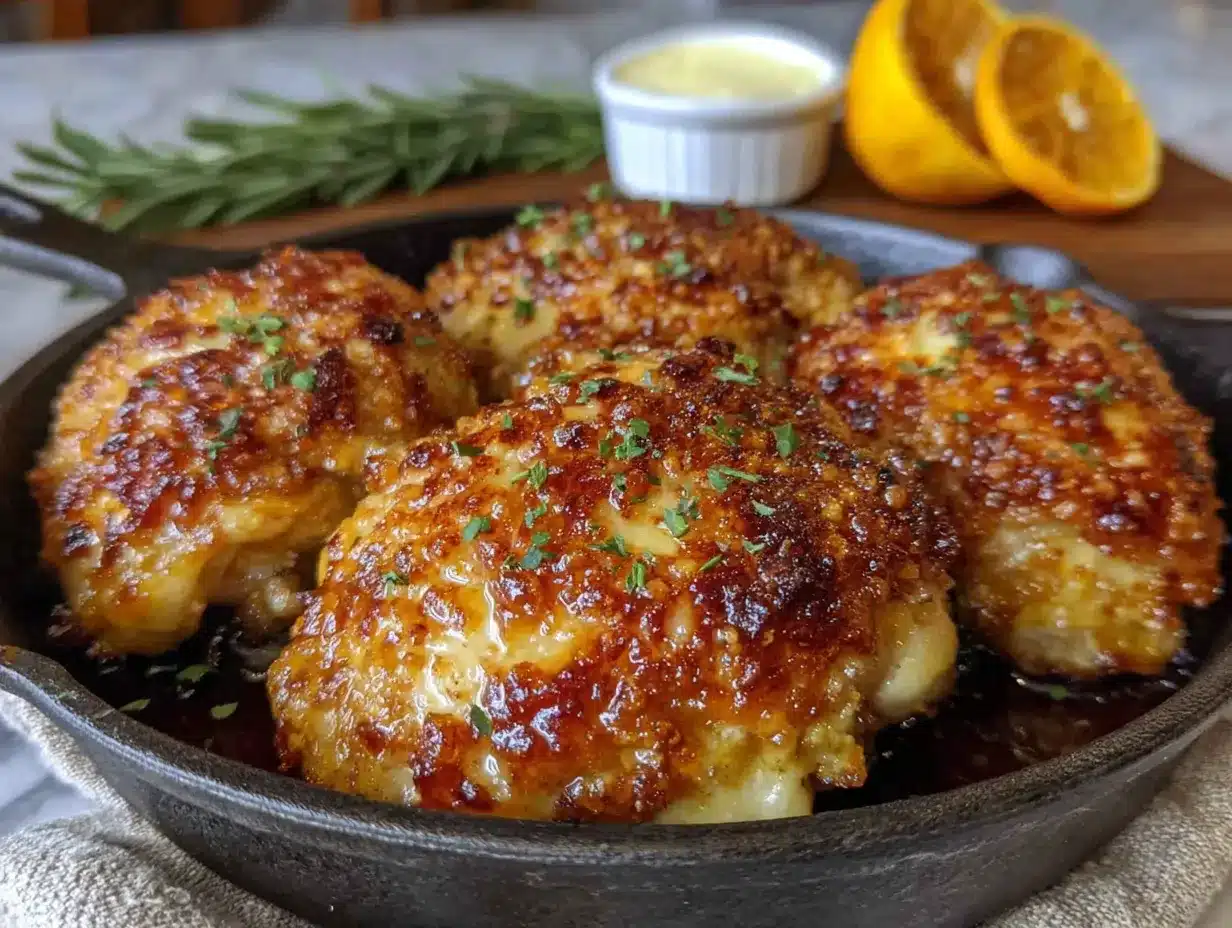
These crispy air fryer garlic parmesan chicken thighs are the kind of meal that makes you look forward to weeknight cooking again. Ready in under 30 minutes, they combine juicy dark meat with a crunchy, garlicky, cheesy crust for ultimate comfort food.
- Prep Time: 10 minutes
- Cook Time: 20 minutes
- Total Time: 30 minutes
- Yield: 4 servings 1x
- Category: Main Course
- Cuisine: American
Ingredients
- 4 bone-in, skin-on chicken thighs (about 1.5 pounds total)
- 2 tablespoons olive oil
- 1 tablespoon mayonnaise
- 4 cloves garlic, minced
- 1 teaspoon fine sea salt
- ½ teaspoon freshly ground black pepper
- ½ teaspoon smoked paprika
- ½ cup panko breadcrumbs
- ⅓ cup freshly grated Parmesan cheese
- 2 tablespoons salted butter, melted
- 1 teaspoon dried Italian seasoning
- ½ teaspoon garlic powder
- 2 tablespoons fresh parsley, chopped
- Extra grated Parmesan for serving
- Lemon wedges for serving
Instructions
- Pat the chicken thighs dry with paper towels. Let them sit on a paper towel-lined plate for 5 minutes.
- Preheat your air fryer to 380°F (193°C).
- Mix the coating in a shallow bowl: combine panko breadcrumbs, grated Parmesan, Italian seasoning, garlic powder, and a pinch of salt and pepper. Stir until evenly distributed.
- Make the garlic butter mixture in a small bowl: melt the butter, then stir in minced garlic, olive oil, mayonnaise, smoked paprika, salt, and pepper. Whisk until smooth.
- Coat the chicken: brush each thigh generously with the garlic butter mixture, then press into the panko-Parmesan mixture, covering every surface.
- Place the thighs in the air fryer basket skin-side up, leaving at least an inch of space between each piece.
- Cook for 18-20 minutes at 380°F. Do not flip. Check internal temperature at 15 minutes; aim for 165°F (74°C) in the thickest part.
- Let the chicken rest for 5 minutes after cooking.
- Garnish with fresh parsley, extra Parmesan, and a squeeze of lemon juice before serving.
Notes
Don’t overcrowd the basket; cook in batches if needed. Use a meat thermometer for perfect doneness. Toast panko first for extra crunch. Let chicken come to room temperature before cooking. Watch the garlic to prevent burning.
Nutrition
- Serving Size: 1 chicken thigh
- Calories: 385
- Sugar: 1
- Sodium: 720
- Fat: 26
- Saturated Fat: 8
- Carbohydrates: 8
- Fiber: 1
- Protein: 32
Keywords: air fryer chicken thighs, garlic parmesan chicken, crispy chicken thighs, fall dinner, easy weeknight dinner