It was 11:15 PM on a random Tuesday in January, and I was wrapped in two blankets on the couch, watching the snow pile up outside the window. The craving hit me out of nowhere — not for the fancy hot cocoa you see on Pinterest with the perfect swirl of whipped cream and a dusting of gold flakes. No, I wanted the real deal. The kind that warms you from the inside out. The problem? I didn’t have any store-bought marshmallows, and honestly, I wasn’t about to put on boots and drive to the gas station for a bag of stale ones. But I had heavy cream, sugar, gelatin, and a crazy idea that had been rattling around in my head for months: what if I just made my own marshmallows? Right then, at nearly midnight, in my pajamas?
So I did. And let me tell you, something about the late hour loosened all the usual rules. I wasn’t worried about perfection. I wasn’t taking notes for a blog post. I was just a tired person with a craving, standing in a warm kitchen while the world outside went quiet and white. The marshmallows came out pillowy and ridiculous — nothing like the rubbery store-bought kind. And the hot cocoa? I threw in a pinch of cinnamon because I couldn’t find the vanilla extract. That accidental addition turned into my signature move. Maybe you’ve been there — that moment when you improvise out of necessity and stumble onto something genuinely better.
That night, the idea for a full-on winter hot cocoa bar was born. Not a fussy, over-styled thing, but a real, cozy setup where people can build their perfect cup. Homemade marshmallows are the star, but honestly, the whole bar is designed for those quiet winter evenings when you need something warm and sweet and a little bit special. I’ve been setting it up every snowy weekend since, and it keeps getting better. This is the kind of recipe that stays with you — not because it’s complicated, but because it feels like a hug in a mug.
Why You’ll Love This Recipe
I’ve tested this hot cocoa bar setup about a dozen times now, tweaking the marshmallow recipe and the cocoa base until everything felt just right. Here’s why I keep coming back to it — and why I think you will too.
- Quick & Easy: The cocoa base comes together in under 10 minutes. The marshmallows take a bit more time, but most of it is hands-off setting time. Perfect for a snowy afternoon project.
- Simple Ingredients: No fancy grocery trips needed. You probably already have cocoa powder, sugar, milk, and cream in your kitchen. The marshmallows use basic pantry staples too.
- Perfect for Winter Gatherings: Great for holiday parties, snow days, or just a quiet evening when you want to make something feel special. It turns a simple drink into an experience.
- Crowd-Pleaser: Kids go crazy for the DIY toppings bar, and adults appreciate the homemade touch. I’ve never seen anyone walk away from this without a smile.
- Unbelievably Delicious: The texture of homemade marshmallows is next-level — soft, creamy, and nothing like the store-bought kind. Paired with rich, not-too-sweet cocoa, it’s pure comfort.
What makes this recipe different from all the other hot cocoa bar ideas out there? It’s the homemade marshmallows, honestly. They’re not hard to make, but they transform the whole experience. I use a technique of blooming the gelatin in cold water first, then whipping it with hot sugar syrup until it’s glossy and thick. This method, which I learned from a pastry chef friend, gives you marshmallows that are impossibly light and fluffy. Plus, I’ve dialed in the cocoa base to be rich without being overly sweet — it balances the sweetness of the marshmallows perfectly.
This isn’t just a drink — it’s the kind that makes you close your eyes after the first sip. It’s winter comfort reimagined: homemade, customizable, and full of small touches that make it feel like a real treat. Perfect for impressing guests without stress, or turning a simple Tuesday night into something memorable.
What Ingredients You Will Need
This recipe uses simple, wholesome ingredients to deliver rich chocolate flavor and pillowy marshmallows. Most items are pantry staples, and I’ve included notes on where you can get creative with substitutions.
For the Hot Cocoa Base
- Unsweetened cocoa powder (3 tablespoons) — I prefer Dutch-processed for a smoother, less acidic flavor. Valrhona or Guittard are my go-to brands for deep chocolate taste.
- Granulated sugar (2 tablespoons) — Adjust to your sweetness preference. You can also use coconut sugar for a deeper flavor.
- Pinch of salt — This is non-negotiable. It balances the bitterness of the cocoa and makes everything taste more chocolatey.
- Whole milk (2 cups) — For the creamiest texture. You can use 2% or oat milk in a pinch, but whole milk really makes a difference here.
- Heavy cream (1/4 cup) — Adds richness and a velvety mouthfeel. For a dairy-free version, use full-fat coconut cream.
- Vanilla extract (1 teaspoon) — Pure vanilla, not imitation. It rounds out the chocolate flavor beautifully.
- Cinnamon stick (optional, for simmering) — This was my accidental addition that became a signature. It adds warmth without being overpowering.
For the Homemade Marshmallows
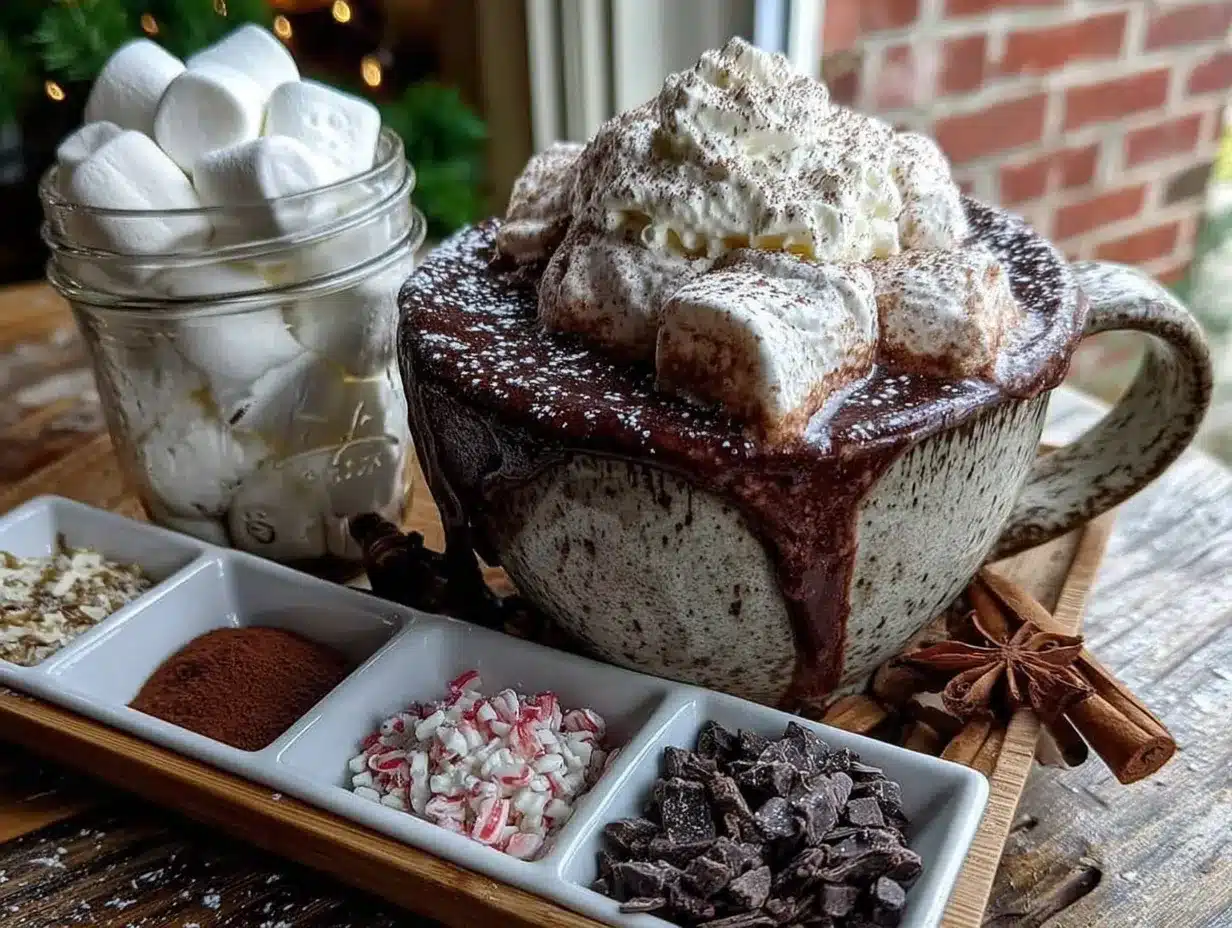
- Unflavored gelatin (3 envelopes, about 3 tablespoons) — Knox is the most reliable brand. Don’t skip blooming it in cold water first — this step is crucial for texture.
- Cold water (1/2 cup, divided) — Used for blooming the gelatin and for the sugar syrup.
- Granulated sugar (1 1/2 cups) — Regular white sugar works best. Don’t substitute with brown sugar here — it changes the texture.
- Light corn syrup (1 cup) — This prevents crystallization and gives marshmallows their signature chewiness. You can use honey or agave, but the texture will be slightly different.
- Salt (1/4 teaspoon) — Enhances sweetness and balances the flavor.
- Vanilla extract (2 teaspoons) — Again, pure vanilla is best. You can experiment with peppermint or almond extract for flavored marshmallows.
- Powdered sugar (for dusting) — Mixed with cornstarch (1:1 ratio) for the classic marshmallow coating that prevents sticking.
For the Toppings Bar
- Whipped cream — Homemade is best, but store-bought works in a pinch. Whip 1 cup heavy cream with 2 tablespoons powdered sugar until soft peaks form.
- Chocolate shavings — Use a vegetable peeler on a bar of dark chocolate for beautiful curls.
- Crushed candy canes — Essential for a peppermint twist. Crush them in a bag with a rolling pin for easy cleanup.
- Mini chocolate chips — Semi-sweet or dark both work well.
- Caramel sauce — Store-bought is fine, but homemade salted caramel takes it over the top.
- Cinnamon sticks — For stirring and adding subtle spice.
- Marshmallow skewers — For toasting marshmallows over the mug (if you’re feeling adventurous).
Equipment Needed
You don’t need a fancy kitchen to pull this off. Here’s what you’ll actually use:
- Saucepan (medium-sized) — For the cocoa base. A heavy-bottomed one prevents scorching.
- Stand mixer or hand mixer — For whipping the marshmallow mixture. A stand mixer is easier, but a hand mixer works fine — your arm might just get a workout.
- Candy thermometer — This is crucial for the marshmallows. You need the sugar syrup to reach exactly 240°F (soft ball stage). I’ve ruined batches by guessing — trust the thermometer.
- 8×8 inch baking pan — For setting the marshmallows. Line it with parchment paper and grease it well.
- Sifter or fine-mesh strainer — For dusting the powdered sugar mixture evenly.
- Sharp knife or pizza cutter — For cutting marshmallows. A pizza cutter works surprisingly well and doesn’t stick as much.
- Mugs — The bigger, the better. I use 12-ounce ceramic mugs for the perfect cocoa-to-topping ratio.
- Small bowls or ramekins — For organizing toppings. Muffin tins also work great for this.
If you don’t have a candy thermometer, you can use the cold water test: drop a small amount of syrup into cold water; it should form a soft, pliable ball. But honestly, the thermometer is worth the $10 investment — it takes the guesswork out completely.
Preparation Method
Make the Homemade Marshmallows (Start the day before)
- Prepare the pan: Line an 8×8 inch baking pan with parchment paper, leaving overhang on two sides. Lightly grease the paper with butter or nonstick spray. In a small bowl, whisk together 1/4 cup powdered sugar and 1/4 cup cornstarch. Dust the pan generously with this mixture, tapping out any excess. Set aside.
- Bloom the gelatin: In the bowl of your stand mixer (or a large heatproof bowl if using a hand mixer), combine 1/4 cup cold water with 3 envelopes of gelatin. Stir gently to combine. Let it sit for about 10 minutes — it will become thick and firm. Don’t rush this step.
- Make the sugar syrup: In a medium saucepan, combine 1 1/2 cups granulated sugar, 1 cup light corn syrup, 1/4 cup cold water, and 1/4 teaspoon salt. Stir gently to combine. Place over medium heat and bring to a boil, without stirring. Attach your candy thermometer to the side of the pan. Cook until the mixture reaches 240°F (soft ball stage). This will take about 8-10 minutes. Watch it carefully — once it starts boiling, the temperature rises quickly.
- Whip the mixture: Once the syrup reaches 240°F, remove it from heat immediately. Turn your mixer to low speed and slowly pour the hot syrup into the bloomed gelatin, aiming for the side of the bowl to avoid splashing. Increase speed to high and whip for 8-10 minutes. The mixture will become thick, glossy, and white. It should hold stiff peaks when you lift the whisk. Add 2 teaspoons vanilla extract during the last minute of whipping.
- Pour and set: Working quickly (the mixture firms up fast), scrape the marshmallow mixture into the prepared pan. Use a greased spatula to spread it evenly. Dust the top with more of the powdered sugar mixture. Let it sit uncovered at room temperature for at least 4 hours, or overnight. I usually make these the night before and let them set while I sleep.
- Cut and store: Once set, turn the marshmallow block out onto a cutting board dusted with the powdered sugar mixture. Use a sharp knife or pizza cutter (dusted with the mixture) to cut into squares. Toss each piece in the powdered sugar mixture to coat all sides. Store in an airtight container at room temperature for up to 2 weeks — if they last that long.
Make the Hot Cocoa Base
- Combine dry ingredients: In a medium saucepan, whisk together 3 tablespoons cocoa powder, 2 tablespoons sugar, and a pinch of salt. Breaking up any lumps now prevents a grainy texture later.
- Add milk and cream: Slowly whisk in 2 cups whole milk and 1/4 cup heavy cream. Add a cinnamon stick if using. Place over medium heat and whisk constantly until hot and steaming, about 4-5 minutes. Do not let it boil — this can make the cocoa taste bitter and cause the milk to scald.
- Finish with vanilla: Remove from heat. Stir in 1 teaspoon vanilla extract. Remove the cinnamon stick. Taste and adjust sweetness if needed. The cocoa should be rich and smooth, not watery.
- Keep warm: Transfer to a slow cooker set to warm, or keep in a thermos for serving. If using a slow cooker, stir occasionally to prevent a skin from forming.
Assemble the Hot Cocoa Bar
- Set up your station: Arrange the slow cooker or thermos of cocoa at the center. Surround it with small bowls of toppings: homemade marshmallows, whipped cream, chocolate shavings, crushed candy canes, mini chocolate chips, caramel sauce, and cinnamon sticks.
- Add serving tools: Provide ladles or small pitchers for the cocoa, tongs or spoons for toppings, and a stack of mugs. Include small plates or napkins for the marshmallows.
- Let guests customize: Encourage everyone to build their perfect cup. Some will go heavy on the marshmallows, others will layer every topping imaginable. That’s the beauty of a bar — no two cups are the same.
Cooking Tips & Techniques
After making this setup more times than I can count, I’ve learned a few things the hard way. Here’s what I wish someone had told me.
Don’t skip the candy thermometer for marshmallows. I tried making these without one once, using the cold water test, and ended up with marshmallows that were either too sticky or too firm. The thermometer takes the guesswork out completely. Aim for exactly 240°F — any lower and they won’t set properly, any higher and they’ll be tough.
Grease everything that touches marshmallow. The spatula, the knife, your hands if you’re shaping them — marshmallow mixture sticks to everything. I keep a small bowl of butter nearby and re-grease tools as needed. It saves so much frustration.
For the cocoa base, low and slow is the way to go. I ruined my first batch by cranking the heat to hurry it up. The milk scorched on the bottom, and the whole pot had a burnt taste. Keep the heat at medium and whisk constantly. You want steam, not bubbles.
Make the marshmallows a day ahead. They need at least 4 hours to set, but overnight is better. Plus, it means the day of your hot cocoa bar, you just have to make the base and set out toppings. Way less stress.
Toast the marshmallows if you’re feeling fancy. I skewer a marshmallow and hold it over a gas burner for a few seconds until it’s golden and gooey. Drop it into the cocoa and stir — it melts into this incredible, caramelized layer on top. If you don’t have a gas stove, you can use a kitchen torch or even broil them on a baking sheet for a minute.
One thing I learned the hard way: Don’t store marshmallows in the refrigerator. They’ll get sticky and weep moisture. Keep them in an airtight container at room temperature, with parchment paper between layers. They’ll stay fresh for up to two weeks.
Variations & Adaptations
This hot cocoa bar is endlessly customizable. Here are some of my favorite variations.
Peppermint Hot Cocoa: Add 1/2 teaspoon peppermint extract to the cocoa base along with the vanilla. Top with crushed candy canes and a peppermint marshmallow (just add 1/2 teaspoon peppermint extract instead of vanilla when making the marshmallows). It’s like drinking a candy cane — in the best way.
Spiced Mexican Hot Chocolate: Add 1/2 teaspoon cinnamon, a pinch of cayenne pepper, and a dash of nutmeg to the cocoa base. Simmer with a cinnamon stick. Top with a dollop of whipped cream and a sprinkle of cinnamon. The heat from the cayenne is subtle but warming — perfect for a really cold night.
Dairy-Free/Vegan Version: Use oat milk or full-fat coconut milk instead of whole milk, and coconut cream instead of heavy cream. For the marshmallows, use a vegan gelatin substitute like agar agar. The texture will be slightly different — more jelly-like than pillowy — but still delicious. I’ve tested this with oat milk and it works surprisingly well.
White Hot Chocolate: Skip the cocoa powder entirely. Melt 8 ounces of good-quality white chocolate into the milk and cream mixture. Add a vanilla bean or extra vanilla extract. Top with white chocolate shavings and raspberries for a pretty pink-and-white color scheme.
Boozy Adult Version: Set out small bottles of peppermint schnapps, Bailey’s, bourbon, or dark rum. Let guests add a splash to their cocoa. My personal favorite is a tablespoon of bourbon with a pinch of cinnamon — it tastes like a winter cocktail.
My personal variation: I once added a spoonful of peanut butter to my cocoa when I was out of cream. It melted in and created this nutty, rich flavor that was surprisingly good. Now I keep a jar of peanut butter on the toppings bar for anyone who wants to try it.
Serving & Storage Suggestions
Serve the hot cocoa piping hot, ideally in pre-warmed mugs. I pour hot water into the mugs and let them sit while I finish the cocoa, then dump the water out before pouring. It keeps the cocoa hot longer.
For the toppings bar, set everything out in small bowls or a muffin tin. Arrange them in a logical order: cocoa base first, then marshmallows, then whipped cream, then dry toppings, then sauces. This prevents a traffic jam of people trying to reach everything at once.
Storage: Leftover cocoa can be refrigerated in an airtight container for up to 3 days. Reheat gently on the stovetop or in the microwave, whisking to recombine. The marshmallows will keep at room temperature in an airtight container for up to 2 weeks. I’ve frozen them too — just place them in a single layer on a baking sheet, freeze until firm, then transfer to a freezer bag. They thaw in about 10 minutes at room temperature.
The flavors of the cocoa actually deepen after a day in the fridge. I sometimes make a double batch on purpose, just so I can have leftovers. The marshmallows, if you can resist eating them all, are amazing in coffee or hot chocolate for weeks to come.
If you’re setting up the bar for a party, keep the cocoa in a slow cooker on the warm setting. Stir every 20 minutes or so to prevent a skin from forming. The marshmallows can sit out for hours without issue — they’re surprisingly stable at room temperature.
Nutritional Information & Benefits
Per serving (1 cup cocoa with 2 marshmallows and 1 tablespoon whipped cream, without additional toppings):
- Calories: 320
- Fat: 14g
- Carbohydrates: 45g
- Protein: 6g
- Fiber: 2g
- Sugar: 35g
This recipe does contain dairy and gelatin, so it’s not suitable for vegans or those with dairy allergies without modifications. The marshmallows are gluten-free, which is great for guests with celiac disease or gluten sensitivity.
On the health front, cocoa powder is actually packed with antioxidants called flavonoids, which can help reduce inflammation and improve heart health. The milk provides calcium and vitamin D, while the homemade marshmallows — though still a treat — don’t contain the preservatives and artificial flavors found in store-bought versions. I like to think of this as a treat that also gives you a little something good. Plus, the act of making marshmallows from scratch is oddly meditative. There’s something satisfying about watching the mixture transform from a liquid into a fluffy, cloud-like mass. It’s kitchen therapy, honestly.
Conclusion
Look, I know making homemade marshmallows sounds like a project. But trust me — that first bite of a soft, pillowy marshmallow you made yourself will change your mind. And when you drop it into a cup of rich, steaming cocoa, with snow falling outside and a cozy blanket wrapped around you? That’s winter perfection.
This hot cocoa bar is meant to be played with. Add your favorite toppings, experiment with flavors, and don’t be afraid to mess up the marshmallows the first time (I did, and they were still delicious). The beauty of this setup is that it’s forgiving. Even a slightly imperfect marshmallow is better than any store-bought one.
I’d love to hear how your cocoa bar turns out. What toppings did you use? Did you try a crazy flavor combination? Drop a comment below and let me know — I’m always looking for new ideas to try. And if you make the marshmallows, tag me in your photos. There’s nothing better than seeing someone else fall in love with homemade marshmallows the way I did that snowy Tuesday night. Happy sipping, friends.
Frequently Asked Questions
Can I make the marshmallows without a candy thermometer?
Yes, you can use the cold water test instead. Drop a small amount of the sugar syrup into a bowl of cold water. If it forms a soft, pliable ball that holds its shape, it’s ready. But honestly, a candy thermometer makes it foolproof and costs less than $10.
How far in advance can I make the marshmallows?
You can make them up to 2 weeks ahead. Store them in an airtight container at room temperature with parchment paper between layers. Don’t refrigerate them — they’ll get sticky.
Can I use store-bought marshmallows instead?
Absolutely. The homemade ones are better, but store-bought works in a pinch. If using store-bought, try toasting them under the broiler or with a kitchen torch for a few seconds — it makes a huge difference in flavor.
What’s the best milk for the creamiest hot cocoa?
Whole milk combined with a splash of heavy cream gives the richest texture. For dairy-free options, oat milk or full-fat coconut milk work best. Avoid skim milk — it makes the cocoa watery.
Can I set up the hot cocoa bar for a large party?
Definitely. Double or triple the cocoa recipe and keep it warm in a large slow cooker. Set out toppings in bulk and let guests help themselves. The marshmallows can sit out for hours without issue. For a crowd, I recommend making the marshmallows a few days ahead to save time on party day.
Pin This Recipe!
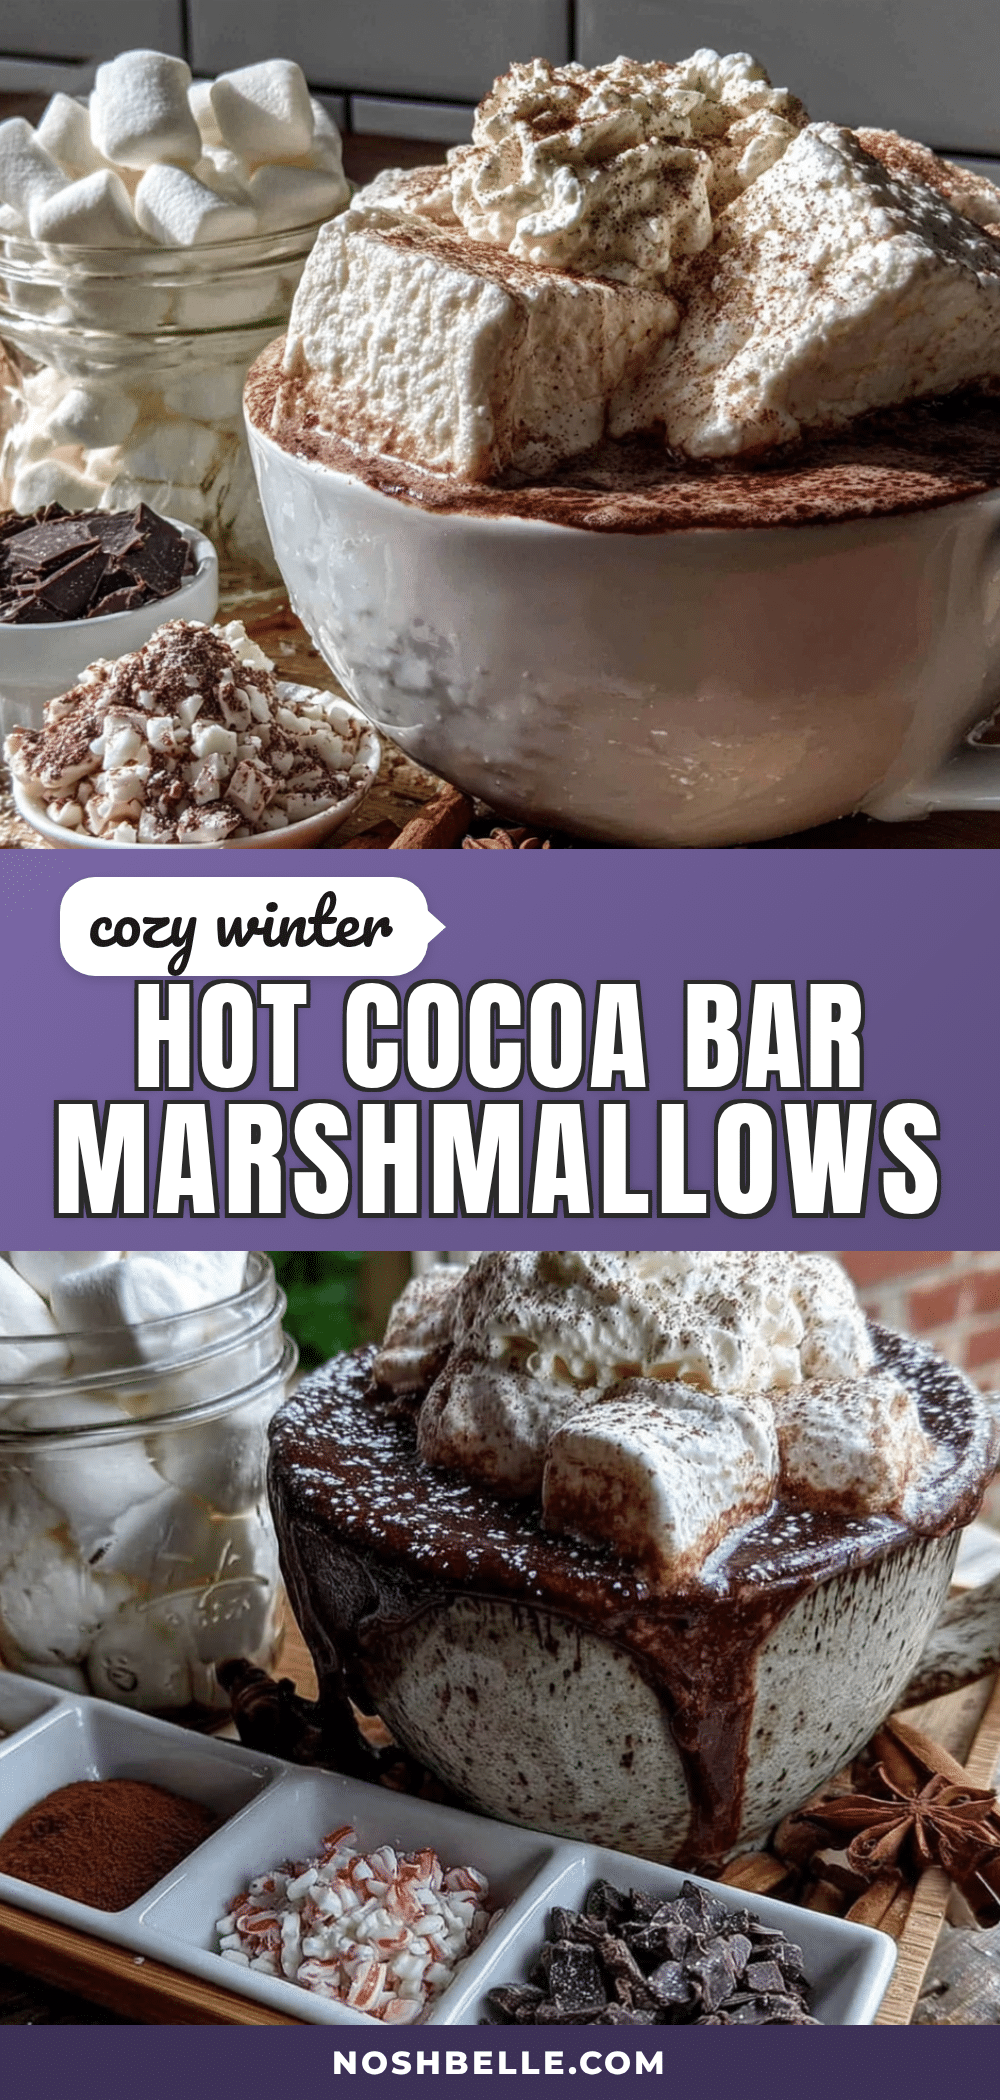
Cozy Winter Hot Cocoa Bar with Homemade Marshmallows
A cozy winter hot cocoa bar featuring rich, not-too-sweet cocoa and pillowy homemade marshmallows. Perfect for snowy days, holiday parties, or quiet evenings when you need something warm and special.
- Prep Time: 30 minutes
- Cook Time: 15 minutes
- Total Time: 4 hours 45 minutes (includes setting time for marshmallows)
- Yield: 4 servings 1x
- Category: Beverage
- Cuisine: American
Ingredients
- 3 tablespoons unsweetened cocoa powder (Dutch-processed preferred)
- 2 tablespoons granulated sugar
- Pinch of salt
- 2 cups whole milk
- 1/4 cup heavy cream
- 1 teaspoon vanilla extract
- 1 cinnamon stick (optional, for simmering)
- 3 envelopes unflavored gelatin (about 3 tablespoons)
- 1/2 cup cold water (divided)
- 1 1/2 cups granulated sugar
- 1 cup light corn syrup
- 1/4 teaspoon salt
- 2 teaspoons vanilla extract
- 1/4 cup powdered sugar (for dusting)
- 1/4 cup cornstarch (for dusting)
- 1 cup heavy cream (for whipped cream)
- 2 tablespoons powdered sugar (for whipped cream)
- Chocolate shavings (for topping)
- Crushed candy canes (for topping)
- Mini chocolate chips (for topping)
- Caramel sauce (for topping)
- Cinnamon sticks (for stirring)
Instructions
- Prepare the pan: Line an 8×8 inch baking pan with parchment paper, leaving overhang on two sides. Lightly grease the paper with butter or nonstick spray. In a small bowl, whisk together 1/4 cup powdered sugar and 1/4 cup cornstarch. Dust the pan generously with this mixture, tapping out any excess. Set aside.
- Bloom the gelatin: In the bowl of your stand mixer (or a large heatproof bowl if using a hand mixer), combine 1/4 cup cold water with 3 envelopes of gelatin. Stir gently to combine. Let it sit for about 10 minutes — it will become thick and firm.
- Make the sugar syrup: In a medium saucepan, combine 1 1/2 cups granulated sugar, 1 cup light corn syrup, 1/4 cup cold water, and 1/4 teaspoon salt. Stir gently to combine. Place over medium heat and bring to a boil, without stirring. Attach your candy thermometer to the side of the pan. Cook until the mixture reaches 240°F (soft ball stage), about 8-10 minutes.
- Whip the mixture: Once the syrup reaches 240°F, remove it from heat immediately. Turn your mixer to low speed and slowly pour the hot syrup into the bloomed gelatin, aiming for the side of the bowl to avoid splashing. Increase speed to high and whip for 8-10 minutes until thick, glossy, and white. Add 2 teaspoons vanilla extract during the last minute of whipping.
- Pour and set: Working quickly, scrape the marshmallow mixture into the prepared pan. Use a greased spatula to spread it evenly. Dust the top with more of the powdered sugar mixture. Let it sit uncovered at room temperature for at least 4 hours, or overnight.
- Cut and store: Once set, turn the marshmallow block out onto a cutting board dusted with the powdered sugar mixture. Use a sharp knife or pizza cutter (dusted with the mixture) to cut into squares. Toss each piece in the powdered sugar mixture to coat all sides. Store in an airtight container at room temperature for up to 2 weeks.
- Make the hot cocoa base: In a medium saucepan, whisk together 3 tablespoons cocoa powder, 2 tablespoons sugar, and a pinch of salt. Slowly whisk in 2 cups whole milk and 1/4 cup heavy cream. Add a cinnamon stick if using. Place over medium heat and whisk constantly until hot and steaming, about 4-5 minutes. Do not let it boil.
- Finish with vanilla: Remove from heat. Stir in 1 teaspoon vanilla extract. Remove the cinnamon stick. Taste and adjust sweetness if needed.
- Keep warm: Transfer to a slow cooker set to warm, or keep in a thermos for serving.
- Assemble the hot cocoa bar: Arrange the slow cooker or thermos of cocoa at the center. Surround it with small bowls of toppings: homemade marshmallows, whipped cream, chocolate shavings, crushed candy canes, mini chocolate chips, caramel sauce, and cinnamon sticks. Provide ladles or small pitchers for the cocoa, tongs or spoons for toppings, and a stack of mugs.
Notes
Don’t skip the candy thermometer for marshmallows. Grease everything that touches marshmallow mixture. For the cocoa base, low and slow is key to avoid scorching. Make marshmallows a day ahead for less stress. Toast marshmallows over a gas burner or with a kitchen torch for extra flavor. Store marshmallows at room temperature, not in the refrigerator.
Nutrition
- Serving Size: 1 cup cocoa with 2 m
- Calories: 320
- Sugar: 35
- Sodium: 180
- Fat: 14
- Saturated Fat: 8
- Carbohydrates: 45
- Fiber: 2
- Protein: 6
Keywords: hot cocoa, hot chocolate, marshmallows, homemade marshmallows, winter, cozy, cocoa bar, toppings bar, holiday, snow day