My neighbor Sarah wasn’t trying to impress anyone. I’d stopped by to borrow a baking dish on a random Tuesday afternoon, and the sight of her bento boxes lined up on the counter hit me before I even got past her front door. She had these little cups filled with cheese cubes, salami roses, berries, and crackers — all organized like tiny edible bouquets. She shrugged when I asked about them, said something about needing a lunch that wouldn’t come back uneaten. That casualness is the whole point here. She was making something extraordinary look like it was nothing.
I mean, I’d seen charcuterie boards for adults before — the fancy ones with expensive prosciutto and aged gouda. But this was different. This was for her kids, and honestly, it was the most brilliant lunch hack I’d ever witnessed. She wasn’t trying to be a Pinterest mom or anything. She just wanted her kids to actually eat what she packed. And let me tell you, when I saw those little hands grabbing cheese cubes and apple slices without any fuss, I knew I had to steal this idea.
These easy bento charcuterie cups for kids have completely changed my lunch-packing game. Maybe you’ve been there — staring at a sad sandwich wondering if it’ll even get touched. These cups are the answer. They’re fun, they’re fast, and they make lunch feel like a treat. I’ve been making them ever since that Tuesday afternoon, and honestly, they never get old. There’s something about the way everything stays separate and fresh that just works. The best part? My kids think they’re getting a special snack, and I know they’re actually eating real food.
Why You’ll Love This Recipe
Let me be real with you — I’ve tested a lot of lunch ideas over the years. Some were disasters (muffin tin lunches that fell apart, anyone?). But these bento charcuterie cups? They’re the ones that actually stuck. Here’s why you’re going to love them as much as I do:
- Quick & Easy: These come together in under 10 minutes. I’m not exaggerating. Once you have your ingredients prepped, you can assemble a week’s worth of lunches in less time than it takes to make a single sandwich.
- Simple Ingredients: No fancy grocery trips needed. You likely already have cheese sticks, crackers, fruit, and lunch meat in your kitchen. It’s all about how you arrange them, not what you buy.
- Perfect for School Lunches: These cups are great for packed lunches, but they also work for picnics, road trips, or even after-school snacks. They’re portable, mess-free, and the kids actually eat them.
- Crowd-Pleaser: I’ve made these for playdates, birthday parties, and even as a quick breakfast option. Kids and adults alike grab them without hesitation. There’s something about the bite-sized variety that just hits different.
- Unbelievably Delicious: The combination of textures and flavors — crunchy crackers, creamy cheese, juicy fruit, savory meat — is next-level comfort food. It’s like a mini lunch buffet in a cup.
What makes these different from other lunch ideas? It’s the presentation, honestly. When you take the time to arrange everything neatly in a cup, it feels special. It’s not just thrown together. It shows a little love. And that makes all the difference when your kid opens their lunchbox at school.
This recipe isn’t just good — it’s the kind that makes you feel like a rockstar parent without actually doing much work. It’s lunchbox perfection reimagined: faster, easier, but with the same heartwarming satisfaction. Perfect for busy mornings when you need something that looks impressive but takes zero effort.
What Ingredients You Will Need
This recipe uses simple, everyday ingredients to create something that feels special. You don’t need anything fancy — just a few pantry staples and fridge basics. Here’s what you’ll need:
For the Base
- Crackers (about 6-8 per cup — I prefer Ritz or Wheat Thins for the salty crunch)
- Cheese cubes or cheese sticks (cut into bite-sized pieces; cheddar, mozzarella, or Colby Jack work great)
- Sliced salami or pepperoni (about 4-5 slices per cup; roll them into little roses for a fun look)
- Turkey or ham slices (rolled up and sliced into pinwheels)
For the Fruit & Veggie Add-Ins
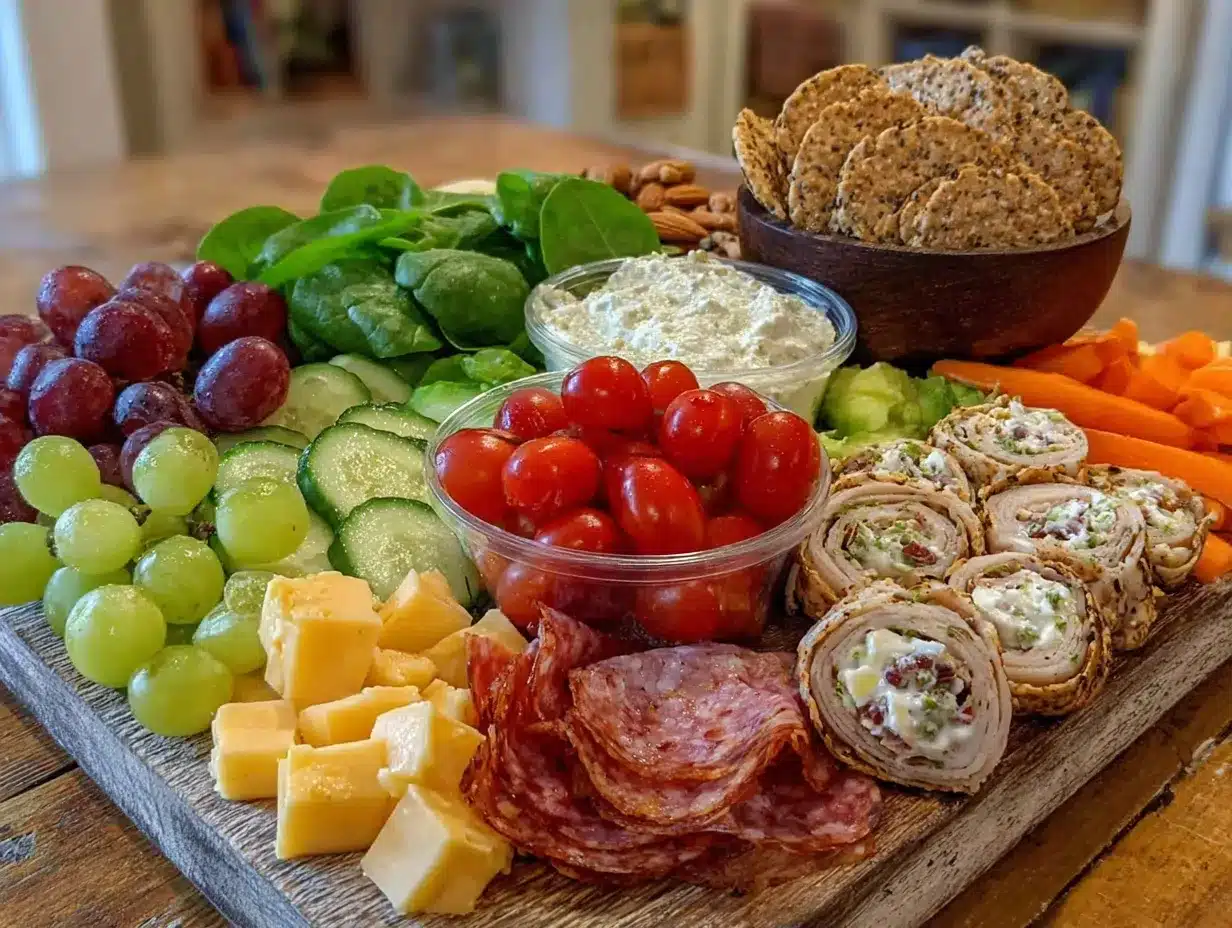
- Grapes (red or green, washed and dried — halved for younger kids)
- Apple slices (tossed with a little lemon juice to prevent browning)
- Baby carrots or cucumber rounds (adds a nice crunch)
- Berries (strawberries, blueberries, or raspberries — whatever is in season)
For the Sweet Touch
- Chocolate chips or mini M&Ms (a small handful for a treat)
- Dried fruit (raisins, dried cranberries, or apricot pieces)
- Yogurt-covered raisins (my kids’ favorite addition)
Optional Extras
- Nut-free spread (like SunButter or WowButter, for dipping apple slices)
- Pretzel sticks (adds a salty crunch)
- Mini pickles or olives (for adventurous eaters)
I recommend using Boar’s Head or Applegate lunch meats for the best flavor and fewer additives. For cheese, Sargento or Tillamook are my go-to brands. When it comes to crackers, I stick with Annie’s bunny crackers for a fun shape that kids love.
If your child has allergies, swap the cheese for dairy-free alternatives like Daiya or Violife. Use gluten-free crackers like Simple Mills or Crunchmaster for a celiac-friendly option. The beauty of these cups is that everything is customizable!
Equipment Needed
You don’t need much for this recipe, which is part of the charm. Here’s what you’ll need:
- Bento boxes or small cups (I use 8-ounce plastic cups with lids, or reusable silicone cups from Bentgo or PlanetBox)
- Small cookie cutters (for cutting cheese or fruit into fun shapes — stars, hearts, or dinosaurs)
- Sharp knife and cutting board (for slicing cheese, fruit, and meat)
- Melon baller or small scoop (for making perfect cheese balls or melon bites)
- Tongs (for arranging ingredients without touching everything)
If you don’t have bento boxes, don’t worry. Muffin tins work great for serving at home, or you can use small mason jars. I’ve even used paper cups in a pinch — just make sure they’re sturdy enough to hold the weight. The key is having individual compartments or cups so everything stays separate and looks appealing.
I learned the hard way that flimsy cups tip over easily. Spend a little extra on reusable containers with tight-fitting lids. Trust me, it’s worth it when you’re packing lunches for the week.
Preparation Method
Let me walk you through how to make these easy bento charcuterie cups for kids. It’s simpler than you think, and once you get the hang of it, you’ll be able to assemble them in minutes.
- Wash and dry all your fruit and vegetables (about 2 minutes). This step is important because wet fruit can make the crackers soggy. Pat everything dry with a paper towel. I usually do this the night before to save time in the morning.
- Cut the cheese into bite-sized cubes (about 1-inch pieces). If you’re using cheese sticks, slice them into rounds. For fun shapes, use small cookie cutters. My kids love star-shaped cheddar — it makes them feel like they’re eating something special.
- Roll the salami or pepperoni into roses (about 30 seconds per rose). Take a slice of salami, fold it in half, then roll it up tightly. Place it seam-side down in the cup. It’ll look like a little flower. This is the trick that makes these cups look so fancy, and honestly, it’s the easiest part.
- Slice the turkey or ham into pinwheels (about 1 minute). Lay a slice of turkey flat, place a cheese stick at one edge, and roll it up tightly. Slice into 1-inch rounds. These little spirals are adorable and easy for little fingers to grab.
- Prepare the fruit (about 2 minutes). Cut grapes in half lengthwise (for safety, especially for younger kids). Slice apples into thin wedges and toss them with a little lemon juice to prevent browning. Leave berries whole if they’re small.
- Assemble the cups (about 1 minute per cup). Start with the heavier items at the bottom — cheese cubes, meat rolls, and apple slices. Then add the lighter items like crackers and berries on top. This keeps everything from getting squished. Fill each cup about two-thirds full — you want it to look abundant but not overflowing.
- Add the finishing touches (about 30 seconds per cup). Tuck in a few chocolate chips or dried fruit for a sweet surprise. If you’re using a dip like SunButter, add a small container on the side or a dollop in the corner of the cup.
- Seal and store (about 10 seconds per cup). Pop a lid on each cup and refrigerate until ready to pack. These keep well for up to 3 days in the fridge, so you can meal prep on Sunday for the whole week.
A quick tip: if you’re packing these for school, add an ice pack to the lunchbox to keep everything fresh. The cheese and meat should stay cold until lunchtime. Also, avoid adding anything too wet (like sliced tomatoes or juicy melon) that could make the crackers soggy.
Cooking Tips & Techniques
I’ve made these cups more times than I can count, and I’ve definitely learned a few things along the way. Here are my best tips for perfect bento charcuterie cups every time:
Keep it dry. Moisture is the enemy of these cups. Wet fruit or sweaty cheese will turn your crackers into mush by lunchtime. Make sure everything is patted dry before assembling. I learned this the hard way when my daughter opened her lunchbox to find a soggy mess.
Use the right containers. Not all cups are created equal. I prefer reusable silicone cups with snap-on lids. They’re leak-proof, easy to clean, and they hold up to repeated use. Avoid paper cups — they get flimsy and can collapse in a lunchbox.
Prep ahead of time. Cut your cheese, wash your fruit, and roll your meat the night before. Store everything in separate containers in the fridge. In the morning, all you have to do is assemble. This cuts your prep time down to about 5 minutes.
Mix it up. Don’t use the same ingredients every day. Rotate the fruit, switch up the cheese, try different crackers. Kids get bored easily, and variety is what keeps them interested. I keep a rotation of 5-6 different fruits and 3-4 types of cheese so it never feels repetitive.
Get the kids involved. My kids love helping me make these cups. They get to choose their own combinations and arrange everything how they like. It’s a great way to teach them about balanced eating, and they’re more likely to eat something they helped create.
Watch the portion sizes. These cups should be a snack or part of a balanced lunch. Don’t overfill them. Aim for about 1/4 cup of fruit, 1/4 cup of cheese, 2-3 ounces of meat, and a handful of crackers. That’s plenty for a school lunch.
One of my biggest failures was using too many wet ingredients. I added cucumber slices and cherry tomatoes without drying them first. By lunchtime, the crackers were completely ruined. Now I always pat everything dry, and I keep wetter veggies in a separate container.
Variations & Adaptations
One of the best things about these easy bento charcuterie cups for kids is how customizable they are. Here are some of my favorite variations:
Dietary Variations
- Gluten-Free: Use gluten-free crackers like Simple Mills or Crunchmaster. Skip the pretzels and add extra fruit or cheese instead.
- Dairy-Free: Swap cheese for dairy-free alternatives like Daiya or Violife. Use nut-free spreads or hummus for dipping.
- Nut-Free: Avoid any nut-based spreads or snacks. Use SunButter or WowButter instead of peanut butter. Check labels on crackers to make sure they’re processed in a nut-free facility.
- Low-Carb: Skip the crackers and add extra cheese, meat, and veggies. Use cucumber rounds or bell pepper strips as a crunchy alternative.
Seasonal Variations
- Summer: Add fresh berries, melon balls, and peach slices. Use mozzarella pearls and prosciutto for a lighter feel.
- Fall: Include apple slices, dried cranberries, and sharp cheddar. Add a few mini pumpkin-shaped crackers for fun.
- Winter: Use clementine segments, pomegranate seeds, and aged gouda. Add a small dark chocolate square for a cozy treat.
- Spring: Add fresh strawberries, kiwi slices, and brie. Use flower-shaped cookie cutters for the cheese.
Flavor Twists
- Sweet Tooth: Add chocolate chips, yogurt-covered raisins, and mini marshmallows. Use graham crackers instead of salty crackers.
- Savory Lover: Include olives, pickles, and cherry tomatoes. Use hard salami and aged cheddar for a bolder flavor.
- Breakfast Version: Use mini pancakes or waffles instead of crackers. Add scrambled egg bites and fresh fruit.
I once tried a Mediterranean version with feta cheese, olives, and cherry tomatoes. It was a hit with the adults but a total flop with the kids. Stick with kid-friendly flavors — mild cheeses, sweet fruit, and simple crackers. You can always get adventurous with your own lunch!
Serving & Storage Suggestions
These bento charcuterie cups are best served cold or at room temperature. If you’re packing them for lunch, keep them refrigerated until you’re ready to leave. Add an ice pack to the lunchbox to keep everything fresh until lunchtime.
Serving Ideas:
- Pair with a small container of yogurt or applesauce for a complete lunch
- Add a juice box or water bottle on the side
- Include a napkin and a fun note for a special touch
- Serve with a side of vegetable sticks (carrots, celery, bell peppers) with ranch dip
Storage Instructions:
- Refrigerator: Store assembled cups in an airtight container for up to 3 days. Keep them in the coldest part of the fridge, not the door.
- Freezer: I don’t recommend freezing these cups. The texture of the cheese, meat, and crackers will suffer. If you want to prep ahead, freeze the fruit and cheese separately, then assemble fresh.
- Reheating: These are meant to be eaten cold or at room temperature. No reheating needed!
One thing I love about these cups is that the flavors actually get better after a day in the fridge. The cheese and meat meld together slightly, and the fruit releases a little juice that adds sweetness. Just make sure the crackers stay separate until serving if you’re worried about sogginess.
Nutritional Information & Benefits
Here’s a rough estimate for one bento charcuterie cup (made with cheddar cheese, turkey, grapes, and whole wheat crackers):
- Calories: 350-400
- Protein: 20-25g
- Carbohydrates: 30-35g
- Fat: 15-20g
- Fiber: 4-6g
- Sugar: 12-15g (from fruit)
Health Benefits:
- Cheese provides calcium and protein for strong bones and muscles
- Turkey is a lean protein source that keeps kids full and focused
- Grapes offer antioxidants and vitamin C for immune support
- Whole wheat crackers provide complex carbohydrates for sustained energy
These cups are naturally nut-free if you skip the spreads, making them safe for school lunch policies. They’re also low in added sugar — the sweetness comes from fruit, not processed snacks. If you’re watching sodium, choose low-sodium lunch meats and cheese.
I love that these cups offer a balanced mix of protein, carbs, and healthy fats. They keep my kids full through the afternoon without the sugar crash that comes from processed snacks. Plus, the variety means they’re getting a wider range of nutrients than they would from a typical sandwich.
Conclusion
These easy bento charcuterie cups for kids have honestly changed the way I think about lunch packing. They’re quick, they’re fun, and they actually get eaten — which is more than I can say for most of my previous lunch experiments. Whether you’re a busy parent looking for a time-saving hack or someone who just wants to make lunch feel special, these cups deliver.
I love that you can customize them based on what your kids like or what you have in the fridge. There’s no right or wrong way to make them, and that’s the beauty of it. Start with the basics, then experiment with different combinations. You might discover a new favorite along the way.
So go ahead — give these a try. Your kids will thank you, your mornings will be easier, and you’ll feel like a lunch-packing pro. And if you come up with a killer combination, I’d love to hear about it. Drop a comment below and share your favorite ingredients. Happy lunch packing!
Frequently Asked Questions
Can I make these the night before?
Absolutely! These cups keep well in the fridge for up to 3 days. Just make sure to pat everything dry before assembling, and keep the crackers separate if you’re worried about sogginess. I often prep a week’s worth on Sunday evening.
What if my child has food allergies?
These cups are super customizable. Use dairy-free cheese, gluten-free crackers, and nut-free spreads. Just check labels to make sure everything is safe for your child’s specific allergies. The beauty of this recipe is that you can swap anything in or out.
How do I keep the fruit from turning brown?
Toss apple slices and pear slices in a little lemon juice or pineapple juice before adding them to the cups. You can also use fruit that doesn’t brown easily, like grapes, berries, or melon. Another trick is to use frozen fruit — it thaws by lunchtime and stays fresh.
Can I use these for adult lunches too?
Definitely! Just swap the kid-friendly ingredients for more grown-up options. Think aged gouda, prosciutto, olives, and fig crackers. Add a small dark chocolate square for a sophisticated touch. They’re perfect for work lunches or picnics.
How many cups should I pack for a full lunch?
For most kids, one cup is enough as part of a balanced lunch. Pair it with a fruit pouch, yogurt, or a small sandwich. For older kids or hungry teens, two cups work well. You can also use larger cups and add more ingredients for a heartier meal.
Pin This Recipe!
Easy Bento Charcuterie Cups for Kids: Best School Lunch Idea

These easy bento charcuterie cups for kids are the ultimate school lunch hack. Quick to assemble in under 10 minutes, they feature cheese cubes, salami roses, fresh fruit, and crackers arranged in individual cups for a fun, mess-free meal that kids actually eat.
- Prep Time: 10 minutes
- Cook Time: 0 minutes
- Total Time: 10 minutes
- Yield: 4 servings 1x
- Category: Lunch
- Cuisine: American
Ingredients
- 6–8 crackers (Ritz or Wheat Thins)
- Cheese cubes or cheese sticks (cheddar, mozzarella, or Colby Jack), cut into bite-sized pieces
- 4–5 slices salami or pepperoni, rolled into roses
- Turkey or ham slices, rolled and sliced into pinwheels
- Grapes (red or green), washed and dried, halved for younger kids
- Apple slices, tossed with lemon juice to prevent browning
- Baby carrots or cucumber rounds
- Berries (strawberries, blueberries, or raspberries)
- Chocolate chips or mini M&Ms
- Dried fruit (raisins, dried cranberries, or apricot pieces)
- Yogurt-covered raisins
- Nut-free spread (like SunButter or WowButter, optional)
- Pretzel sticks (optional)
- Mini pickles or olives (optional)
Instructions
- Wash and dry all fruit and vegetables thoroughly to prevent soggy crackers.
- Cut cheese into bite-sized cubes (about 1-inch pieces) or use cookie cutters for fun shapes.
- Roll salami or pepperoni into roses: fold a slice in half, then roll tightly and place seam-side down.
- Slice turkey or ham into pinwheels: lay a slice flat, place a cheese stick at one edge, roll tightly, and slice into 1-inch rounds.
- Prepare fruit: halve grapes lengthwise, slice apples into thin wedges and toss with lemon juice, leave berries whole.
- Assemble cups: start with heavier items (cheese cubes, meat rolls, apple slices) at the bottom, then add lighter items (crackers, berries) on top. Fill each cup about two-thirds full.
- Add finishing touches: tuck in chocolate chips, dried fruit, or a dollop of nut-free spread if desired.
- Seal cups with lids and refrigerate until ready to pack. These keep well for up to 3 days.
Notes
Keep ingredients dry to prevent soggy crackers. Prep ingredients the night before to save time. Use an ice pack in lunchboxes to keep everything fresh. Avoid adding wet ingredients like sliced tomatoes. These cups are customizable for dietary needs and seasonal variations.
Nutrition
- Serving Size: 1 cup
- Calories: 375
- Sugar: 13.5
- Sodium: 650
- Fat: 17.5
- Saturated Fat: 8
- Carbohydrates: 32.5
- Fiber: 5
- Protein: 22.5
Keywords: bento charcuterie cups, kids lunch, school lunch idea, easy lunch, charcuterie for kids, bento box lunch, no-cook lunch